|
|
| (One intermediate revision by one other user not shown) |
| Line 1: |
Line 1: |
| <!-- DO NOT EDIT OR DELETE LINES WITH COMMENTS (it's look like as this or next line) -->
| | {{#vardefine:ship_name|Duca degli Abruzzi}} |
| <!-- Add |Ship=code for manual override -->
| | __NOTOC____NOEDITSECTION__ |
| {{WoWs_Ship | |
| |Promo=<!-- in case of gift or promo ship write conditions to get it. (optional)--> | |
| <!-- -->
| |
|
| |
|
| |Anno=<!-- you can write below short description for the ship. it will replace default once. -->
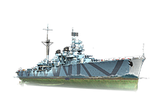
| | <div class="b-description gw-frame-1"><div class="b-description-img b-description-img__indent b-description-img__single"><div style="width:160px; height:102px; opacity:.5; border-radius:2px; position:absolute; left:0; top:0; z-index:1; -webkit-transition:all 0.2s ease-out 0.1s; transition:all 0.2s ease-out 0.1s;">[[File:Wows_anno_flag_italy.png|160px]]</div><div class="l-description-img_class"><span class="b-description-img_type b-description-img_type__Cruiser b-description-img_type__Cruiser-Premium"></span><span class="b-description-img_class">VII</span></div><div class="b-description-img_vehicle">[[File:Ship_PISC507_Duca_degli_Abruzzi.png|160px|link=|left]]</div><div class="l-description-img_price"><span class="b-description-img_price b-description-img_price__gold"><span title="''{{#var:ship_name}}'' was first released for sale on DD Month YYYY.">7,500 doubloons</span></span></div></div><p>[[Ship:{{#var:ship_name}}|{{#var:ship_name}}]] — Italy Premium Tier VII [[Ship:Cruiser|Cruiser]].</p><p>Cruiser projects of the 1932–1933 program had a tendency to increase armor protection, which resulted in reduced speed. It led to the creation of one of the most successful projects out of the pre-war Italian cruisers. Duca degli Abruzzi was laid down in December 1933. During World War II, she participated in battles at Punta Stilo and Cape Matapan, intercepted a convoy in Operation Halberd, and saw much more action. At the end of 1941, she was hit by a torpedo and was sent to be repaired. After the war, the cruiser remained in the Italian Navy, later becoming its flagship.</p><p> </p></div> |
| The top and most powerful ship in a series of Italian ''Condottieri''-class light cruisers. Unlike her predecessors, she boasted more powerful armament and significantly improved protection, but couldn't travel as fast.<br><br>''{{#var:ship_name}}'' was first released for sale worldwide on 4 May 2018.
| |
| <!-- <br><br>{{Model3DViewer|fb951e88aff94681bb084c6a07e22b47}}--> | |
|
| |
|
| |Performance={{AA Sidebar Warning Insert}}
| | ===Pros=== |
| '''Luigi di Savoia Duca Degli Abruzzi''' is a fairly unique light cruiser at Tier VII, owing mainly to her assortment of consumables, including {{Repair Party}}. In terms of firepower and overall play style she shares many similarities with her Tier VI Premium Italian cousin, ''[[Duca d'Aosta]]'', so captains who are experienced in playing ''d'Aosta'' will feel right at home in ''Abruzzi''.
| | * Above average manueverability |
| | * Better than average concealment |
| | * Long range torpedoes with better than average reload |
| | * Good selection of consumables available |
|
| |
|
| For main battery firepower, ''{{#var:ship_name}}'' features ten 152mm guns arranged in two sets of triple turrets and two sets of double turrets super-firing over the triples. On paper, this appears to be a large number of guns; however, in battle captains will quickly discover that her rear turrets have abysmal firing angles towards the front, requiring her to show significant amounts of her profile in order to get all her guns on target. ''Abruzzi'' is best played as a "kiter", angling away from the enemy and moving parallel to them in order to minimize her profile and maximize her armor thickness and guns-on-target. The guns themselves are fairly average in terms of AP and HE damage, but like ''d'Aosta'', they suffer from a low fire chance; captains may wish to take the [[Ship:Commander#Inertia_Fuse_for_HE_Shells|Inertia Fuse for HE Shells]] skill to improve her damage output, as relying on fire damage is not a viable strategy.
| | ===Cons=== |
| | * Below average gun performance |
| | * Poor HE shells characteristics |
|
| |
|
| ''{{#var:ship_name}}'''s maneuverability is excellent; a top speed of 35 knots allows her to get into and away from fights with relative ease, while a quick rudder shift time of 8.9 seconds allows her to wiggle out of the way of incoming fire. A turning radius of 680 meters leads to a decent ability to dodge torpedoes. Along with her maneuverability, ''Abruzzi''’s concealment is very good as well. These two aspects of ''Abruzzi'' are her primary tools for staying alive in such a fragile ship. Captains should use her concealment and speed to get into good positions, and then kite the enemy from an unexpected direction, using her rudder shift to dodge incoming shells. If she is drawing too much attention to herself, she can fall back on her concealment and speed to get away, all while dropping her slow 12.0 km range torpedoes back at the advancing enemy.
| |
|
| |
|
| ''Abruzzi''’s mix of consumables — including {{Repair Party}} — allows her to function as a decent fleet support vessel, while the ability to heal allows her to recover some of her fighting ability after engagements. It should be noted however that her heal will not make up for poor positioning and poor angling in combat, nor will it save her from disappearing in a single, well-placed battleship salvo. Captains must be exceptionally cautious in ''{{#var:ship_name}}'' when under fire from enemy battleships, or they'll have a quick trip back to port.
| | ==Ship Stats== |
| | <div class="b-popup"><div class="b-popup_head js-tech-nav_head"><div><h2>Hull Information</h2></div><span class="b-tech-nav_arrow"></span></div><div class="b-popup_content" style="display: none;"><div> |
| | <div style="border: 2px solid rgba(212,175,55,0.8); border-radius: 3px; margin-bottom: 1em; overflow: hidden;"> |
| | {| class="wikitable" style="margin:0; color:inherit; width:100%" |
| | ! style="background-color:#1a3244; color:#ffffff; font-weight:bold;" | SURVIVABILITY !! style="background-color:#1a3244; color:#ffffff; font-weight:bold;" | |
| | |- |
| | | style="color:inherit;" | • Hit Points || style="color:inherit;" | 32500 |
| | |- |
| | | style="color:inherit;" | • Torpedo protection damage reduction (%) || style="color:inherit;" | — |
| | |} |
| | </div> |
|
| |
|
| |Pros=<!-- write list of positive points below. use * as in ordinary wiki-list. --> | | <div style="border: 2px solid rgba(212,175,55,0.8); border-radius: 3px; margin-bottom: 1em; overflow: hidden;"> |
| * Can mount the {{Repair Party}} consumable, allowing captains to recover some lost hit points during battle.
| | {| class="wikitable" style="margin:0; color:inherit; width:100%" |
| * Can mount {{Hydroacoustic Search}} and {{Defensive AA Fire}} simultaneously. Captains are also provided with the option to mount the {{Spotting Aircraft}} consumable in place of Defensive Fire.
| | ! style="background-color:#1a3244; color:#ffffff; font-weight:bold;" | ARMOR DETAIL !! style="background-color:#1a3244; color:#ffffff; font-weight:bold;" | |
| * Her torpedoes have an impressive 12.0 km range, wide firing angles, and a short reload time.
| | |- |
| * Cannons, while lacking in penetrative ability, turn and reload relatively fast.
| | | style="color:inherit;" | • Belt (mm) || style="color:inherit;" | — |
| * The ship’s high top speed of 35 knots helps her quickly escape unfavorable situations.
| | |- |
| * Her decent turn radius and rudder shift time allow her to dodge shells well enough.
| | | style="color:inherit;" | • Deck (mm) || style="color:inherit;" | — |
| * Smaller surface detection range than many other cruisers at Tier VII.
| | |- |
| | | style="color:inherit;" | • Superstructure (mm) || style="color:inherit;" | — |
| | |- |
| | | style="color:inherit;" | • Extremities (mm) || style="color:inherit;" | — |
| | |} |
| | </div> |
|
| |
|
| |Cons=<!-- write list of negative points below. use * as in ordinary wiki-list. --> | | <div style="border: 2px solid rgba(212,175,55,0.8); border-radius: 3px; margin-bottom: 1em; overflow: hidden;"> |
| * High explosive shell performance without [[Ship:Commander#List_of_Attack_Skills|Inertia Fuse for HE Shells]] is underwhelming.
| | {| class="wikitable" style="margin:0; color:inherit; width:100%" |
| * Armor-piercing shells have the worst penetration values of all Tier VII cruisers, and are largely ineffective at long range.
| | ! style="background-color:#1a3244; color:#ffffff; font-weight:bold;" | MANEUVERABILITY !! style="background-color:#1a3244; color:#ffffff; font-weight:bold;" | |
| * Low fire chance of HE shells means that setting fires will be a rare occurrence.
| | |- |
| * Citadel sits high in the water, making her highly vulnerable to large caliber shells.
| | | style="color:inherit;" | • Maximum speed (kt) || style="color:inherit;" | 35.0 |
| * Even when using {{Defensive AA Fire}}, her anti-aircraft armament is underwhelming, especially when facing higher tier opponents.
| | |- |
| * ''{{#var:ship_name}}'' will struggle to perform well without a commander of at least 10 points.
| | | style="color:inherit;" | • Turning circle radius (m) || style="color:inherit;" | 680 |
| * Her torpedoes are somewhat slow at 51 knots.
| | |- |
| | | style="color:inherit;" | • Rudder-shift time (sec) || style="color:inherit;" | 11.6 |
| | |} |
| | </div> |
|
| |
|
| |Research=<!-- write text about priority sequence of research below --> | | <div style="border: 2px solid rgba(212,175,55,0.8); border-radius: 3px; margin-bottom: 1em; overflow: hidden;"> |
| As a Premium ship, ''{{#var:ship_name}}'' has no upgrades to research.
| | {| class="wikitable" style="margin:0; color:inherit; width:100%" |
| | ! style="background-color:#1a3244; color:#ffffff; font-weight:bold;" | CONCEALMENT !! style="background-color:#1a3244; color:#ffffff; font-weight:bold;" | |
| | |- |
| | | style="color:inherit;" | • Detectability by sea (km) || style="color:inherit;" | 10.83 |
| | |- |
| | | style="color:inherit;" | • Detectability by air (km) || style="color:inherit;" | 6.12 |
| | |- |
| | | style="color:inherit;" | • Detectability after firing main guns in smoke (km) || style="color:inherit;" | 5.16 |
| | |- |
| | | style="color:inherit;" | • Detectability by depths (km) || style="color:inherit;" | 6.12 |
| | |} |
| | </div> |
|
| |
|
| |OptimalConfiguration=<!-- write some general text about selection of optimal configuration below (optional)--> | | </div></div></div> |
| | <div class="b-popup"><div class="b-popup_head js-tech-nav_head"><div><h2>Main Battery</h2></div><span class="b-tech-nav_arrow"></span></div><div class="b-popup_content" style="display: none;"><div><div style="border: 2px solid rgba(212,175,55,0.8); border-radius: 3px; margin-bottom: 1em; overflow: hidden;"> |
| | {| class="wikitable" style="margin:0; color:inherit; width:100%" |
| | ! style="background-color:#1a3244; color:#ffffff; font-weight:bold;" | MAIN BATTERY !! style="background-color:#1a3244; color:#ffffff; font-weight:bold;" | |
| | |- |
| | | style="color:inherit;" | • Arrangement || style="color:inherit;" | 4×3 152mm |
| | |- |
| | | style="color:inherit;" | • Firing range (km) || style="color:inherit;" | 15.06 |
| | |- |
| | | style="color:inherit;" | • Reload time (sec) || style="color:inherit;" | 7.5 |
| | |- |
| | | style="color:inherit;" | • Rate of fire (shots/min) || style="color:inherit;" | 8 |
| | |- |
| | | style="color:inherit;" | • 180° turn time (sec) || style="color:inherit;" | 24.0 |
| | |} |
| | </div> |
|
| |
|
| |Upgrades=<!-- write text about best upgrades below, add * after upgrade link to designate that another upgrade may be viable --> | | <div style="border: 2px solid rgba(212,175,55,0.8); border-radius: 3px; margin-bottom: 1em; overflow: hidden;"> |
| The recommended upgrades for ''{{#var:ship_name}}'' are as follows:
| | {| class="wikitable" style="margin:0; color:inherit; width:100%" |
| * '''Slot 1''': {{Main Armaments Modification 1}} to keep the guns and torpedoes active and firing.
| | ! style="background-color:#1a3244; color:#ffffff; font-weight:bold;" | DISPERSION !! style="background-color:#1a3244; color:#ffffff; font-weight:bold;" | |
| * '''Slot 2''': Either {{Engine Room Protection}} to help keep the rudder or engine up and running longer or {{Damage Control System Modification 1}} to slightly lower the risk of fire and flooding.
| | |- |
| * '''Slot 3''': {{Aiming Systems Modification 1}} increases the accuracy of the guns and the traverse speed of the torpedo tubes.
| | | style="color:inherit;" | • Dispersion type || style="color:inherit;" | Standard CA/CL dispersion |
| * '''Slot 4''': {{Propulsion Modification 1}} provides for faster acceleration from stop to start.
| | |- |
| | | style="color:inherit;" | • Dispersion formula || style="color:inherit;" | Dispersion (m) = 6.9 × range(km) + 33 |
| | |- |
| | | style="color:inherit;" | • Sigma || style="color:inherit;" | 2.0 |
| | |- |
| | | style="color:inherit;" | • Maximum dispersion (m) || style="color:inherit;" | 136 |
| | |- |
| | | style="color:inherit;" | • Dispersion at 5 km || style="color:inherit;" | 68 |
| | |- |
| | | style="color:inherit;" | • Dispersion at 10 km || style="color:inherit;" | 102 |
| | |- |
| | | style="color:inherit;" | • Dispersion at 15 km || style="color:inherit;" | 136 |
| | |- |
| | | style="color:inherit;" | • Dispersion at 15.06 km || style="color:inherit;" | 137 |
| | |} |
| | </div> |
|
| |
|
| Also consider the Special Upgrades.
| | <div style="border: 2px solid rgba(212,175,55,0.8); border-radius: 3px; margin-bottom: 1em; overflow: hidden;"> |
| | {| class="wikitable" style="margin:0; color:inherit; width:100%" |
| | ! style="background-color:#1a3244; color:#ffffff; font-weight:bold;" | HE SHELL !! style="background-color:#1a3244; color:#ffffff; font-weight:bold;" | |
| | |- |
| | | style="color:inherit;" | • Name || style="color:inherit;" | 152 mm proiettili HE |
| | |- |
| | | style="color:inherit;" | • Maximum damage || style="color:inherit;" | 2100 |
| | |- |
| | | style="color:inherit;" | • Fire chance (%) || style="color:inherit;" | 7.0% |
| | |- |
| | | style="color:inherit;" | • Shell velocity (m/s) || style="color:inherit;" | 995 |
| | |- |
| | | style="color:inherit;" | • Shell weight (kg) || style="color:inherit;" | 44.3 |
| | |- |
| | | style="color:inherit;" | • Penetration (mm) || style="color:inherit;" | 25 |
| | |} |
| | </div> |
|
| |
|
| |CommanderSkills=<!-- write text about best set of Commander Skills below -->
| |
| <!-- Key skills for ''{{#var:ship_name}}'' commanders include Priority Target, Superintendent, Concealment Expert and Radio Position Finder. Priority Target is a basic skill for all ships, giving vital information on the enemy's targeting. Superintendent is useful for an extra use of Repair Party. Concealment Expert is a crucial skill for all ships, especially the ''{{#var:ship_name}}'', that enables the ship to better disengage from fights and to sneak around the battlefield undetected. As the ''{{#var:ship_name}}'' chiefly hunts destroyers and other cruisers, Radio Position Finder is very useful in tracking low detection targets. Alternatively, Inertia Fuse for High Explosive and Demolition Expert can be selected to boost damage, although it should be remembered that even with IFHE, the ''{{#var:ship_name}}'' cannot penetrate Tier 8-9 battleships, and that the 7% base fire chance may be too anemic to be worth an investment of captain points.
| |
| -->
| |
| {{Commander Skills 3 CR
| |
| <!-- Ratings 1,2,3 are legit. Others are ignored.-->
| |
| | rating11 = 2 <!-- Grease the Gears -->
| |
| | rating12 = <!-- Swift Fish -->
| |
| | rating13 = <!-- Consumables Specialist -->
| |
| | rating14 = <!-- Gun Feeder -->
| |
| | rating15 = <!-- Incoming Fire Alert -->
| |
| | rating16 = 1 <!-- Last Stand -->
| |
|
| |
|
| | rating21 = <!-- Pyrotechnician --> | | <div style="border: 2px solid rgba(212,175,55,0.8); border-radius: 3px; margin-bottom: 1em; overflow: hidden;"> |
| | rating22 = <!-- Fill the Tubes --> | | {| class="wikitable" style="margin:0; color:inherit; width:100%" |
| | rating23 = 2 <!-- Consumables Enhancements -->
| | ! style="background-color:#1a3244; color:#ffffff; font-weight:bold;" | AP SHELL !! style="background-color:#1a3244; color:#ffffff; font-weight:bold;" | |
| | rating24 = <!-- Eye in the Sky --> | | |- |
| | rating25 = 2 <!-- Priority Target --> | | | style="color:inherit;" | • Name || style="color:inherit;" | 152 mm proiettili AP |
| | rating26 = <!-- Expert AA Marksman --> | | |- |
| | | style="color:inherit;" | • Maximum damage || style="color:inherit;" | 3100 |
| | |- |
| | | style="color:inherit;" | • Shell velocity (m/s) || style="color:inherit;" | 910 |
| | |- |
| | | style="color:inherit;" | • Shell weight (kg) || style="color:inherit;" | 50 |
| | |- |
| | | style="color:inherit;" | • Fuse time (sec) || style="color:inherit;" | 0.025 |
| | |- |
| | | style="color:inherit;" | • Ricochet start (°) || style="color:inherit;" | 45 |
| | |- |
| | | style="color:inherit;" | • Always ricochet (°) || style="color:inherit;" | 60 |
| | |- |
| | | style="color:inherit;" | • Normalisation (°) || style="color:inherit;" | 8.5 |
| | |- |
| | | style="color:inherit;" | • Arming threshold (mm) || style="color:inherit;" | 25 |
| | |} |
| | </div> |
| | </div></div></div> |
| | <div class="b-popup"><div class="b-popup_head js-tech-nav_head"><div><h2>Torpedoes</h2></div><span class="b-tech-nav_arrow"></span></div><div class="b-popup_content" style="display: none;"><div> |
| | <div style="border: 2px solid rgba(212,175,55,0.8); border-radius: 3px; margin-bottom: 1em; overflow: hidden;"> |
| | {| class="wikitable" style="margin:0; color:inherit; width:100%" |
| | ! style="background-color:#1a3244; color:#ffffff; font-weight:bold;" | TORPEDO LAUNCHERS !! style="background-color:#1a3244; color:#ffffff; font-weight:bold;" | |
| | |- |
| | | style="color:inherit;" | • Number of launchers || style="color:inherit;" | 1 |
| | |- |
| | | style="color:inherit;" | • Torpedo name || style="color:inherit;" | PIPT002 |
| | |- |
| | | style="color:inherit;" | • Reload time (sec) || style="color:inherit;" | 71.0 |
| | |- |
| | | style="color:inherit;" | • 180° turn time (sec) || style="color:inherit;" | 7.2 |
| | |- |
| | | style="color:inherit;" | • Damage || style="color:inherit;" | 37100 |
| | |- |
| | | style="color:inherit;" | • Range (km) || style="color:inherit;" | 0.4 |
| | |- |
| | | style="color:inherit;" | • Speed (kt) || style="color:inherit;" | 51 |
| | |- |
| | | style="color:inherit;" | • Detectability (km) || style="color:inherit;" | 1.0 |
| | |- |
| | | style="color:inherit;" | • Flooding chance (%) || style="color:inherit;" | 2.2% |
| | |} |
| | </div> |
|
| |
|
| | rating31 = 2 <!-- Heavy HE and SAP Shells -->
| | </div></div></div> |
| | rating32 = <!-- Enhanced Torpedo Explosive Charge -->
| | <div class="b-popup"><div class="b-popup_head js-tech-nav_head"><div><h2>Secondary Battery</h2></div><span class="b-tech-nav_arrow"></span></div><div class="b-popup_content" style="display: none;"><div> |
| | rating33 = 2 <!-- Adrenaline Rush -->
| | <div style="border: 2px solid rgba(212,175,55,0.8); border-radius: 3px; margin-bottom: 1em; overflow: hidden;"> |
| | rating34 = <!-- Heavy AP Shells --> | | {| class="wikitable" style="margin:0; color:inherit; width:100%" |
| | rating35 = 2 <!-- Superintendent --> | | ! style="background-color:#1a3244; color:#ffffff; font-weight:bold;" | SECONDARY BATTERY !! style="background-color:#1a3244; color:#ffffff; font-weight:bold;" | |
| | rating36 = 2 <!-- Survivability Expert --> | | |- |
| | | style="color:inherit;" | • Secondary battery range (km) || style="color:inherit;" | 5.6 |
| | |} |
| | </div> |
|
| |
|
| | rating41 = <!-- Top Grade Gunner -->
| | <div style="border: 2px solid rgba(212,175,55,0.8); border-radius: 3px; margin-bottom: 1em; overflow: hidden;"> |
| | rating42 = <!-- Outnumbered --> | | {| class="wikitable" style="margin:0; color:inherit; width:100%" |
| | rating43 = 1 <!-- Radio Location --> | | ! style="background-color:#1a3244; color:#ffffff; font-weight:bold;" | SECONDARY ARMAMENT 1 !! style="background-color:#1a3244; color:#ffffff; font-weight:bold;" | |
| | rating44 = <!-- Inertial Fuse for HE Shells --> | | |- |
| | rating45 = 2 <!-- Concealment Expert --> | | | style="color:inherit;" | • Shell type || style="color:inherit;" | HE |
| | rating46 = <!-- AA Gunner --> | | |- |
| }}
| | | style="color:inherit;" | • Name || style="color:inherit;" | 100 mm proiettili HE |
| | |- |
| | | style="color:inherit;" | • Arrangement || style="color:inherit;" | 2x100mm |
| | |- |
| | | style="color:inherit;" | • Rate of fire (shots/min) || style="color:inherit;" | 10.0 |
| | |- |
| | | style="color:inherit;" | • Maximum damage || style="color:inherit;" | 1500 |
| | |- |
| | | style="color:inherit;" | • Shell velocity (m/s) || style="color:inherit;" | 850 |
| | |- |
| | | style="color:inherit;" | • Penetration (mm) || style="color:inherit;" | 17 |
| | |- |
| | | style="color:inherit;" | • Fire chance (%) || style="color:inherit;" | 6.0% |
| | |} |
| | </div> |
|
| |
|
| |Consumables=<!-- write text about selection of Consumables below -->
| |
| ''{{#var:ship_name}}'' can equip the following consumables:
| |
| * '''Slot 1:''' {{Damage Control Party}}
| |
| * '''Slot 2:''' {{Hydroacoustic Search}}
| |
| * '''Slot 3:''' {{Defensive AA Fire}} '''or''' {{Spotting Aircraft}}
| |
| * '''Slot 4:''' {{Repair Party}}
| |
|
| |
|
| |Camouflage=
| |
| {{Prem Ship Camo Insert|shiptier=7}}
| |
|
| |
|
| |Signals=<!-- write text about best set of signals below -->
| | </div></div></div> |
| ''{{#var:ship_name}}'' should prioritize signals that boost the distinguishing features of the cruiser: Repair Party and speed. Further signals to boost fire chance and consumable cooldown are also helpful. Players seeking to min-max may also wish to mount signals for AA, torpedo flooding, ramming, and hydroacoustic search duration.
| | <div class="b-popup"><div class="b-popup_head js-tech-nav_head"><div><h2>AA Defense</h2></div><span class="b-tech-nav_arrow"></span></div><div class="b-popup_content" style="display: none;"><div> |
| | <div style="border: 2px solid rgba(212,175,55,0.8); border-radius: 3px; margin-bottom: 1em; overflow: hidden;"> |
| | {| class="wikitable" style="margin:0 0 0.8em 0; width:100%; color:inherit;" |
| | ! style="background-color:#1a3244; color:#ffffff; font-weight:bold;" | AA ARMAMENT !! style="background-color:#1a3244; color:#ffffff; font-weight:bold;" | MOUNTS × BARRELS |
| | |- |
| | | style="color:inherit;" | 100 mm || style="color:inherit;" | 4 × 2 |
| | |- |
| | | style="color:inherit;" | 37 mm || style="color:inherit;" | 4 × 2 |
| | |- |
| | | style="color:inherit;" | 20 mm || style="color:inherit;" | 4 × 2 + 2 × 1 |
| | |} |
|
| |
|
| {{Signal Flags
| | '''Continuous damage''' — average DPS within each action zone |
| | November Echo Setteseven = 1 | | {| class="wikitable" style="margin:0 0 0.8em 0; width:100%; color:inherit;" |
| | Mike Yankee Soxisix = | | ! style="background-color:#1a3244; color:#ffffff; font-weight:bold;" | RANGE !! style="background-color:#1a3244; color:#ffffff; font-weight:bold;" | DPS !! style="background-color:#1a3244; color:#ffffff; font-weight:bold;" | HIT CHANCE !! style="background-color:#1a3244; color:#ffffff; font-weight:bold;" | ACTION ZONE (km) |
| | India X-Ray = 2 | | |- |
| | Juliet Whiskey Unaone = 1 | | | style="color:inherit;" | Short-range || style="color:inherit;" | 49 || style="color:inherit;" | 85% || style="color:inherit;" | 2.0 |
| | Victor Lima = 3 | | |- |
| | Hotel Yankee = 1 | | | style="color:inherit;" | Mid-range || style="color:inherit;" | 105 || style="color:inherit;" | 90% || style="color:inherit;" | 3.5 |
| | |- |
| | | style="color:inherit;" | Long-range || style="color:inherit;" | 42 || style="color:inherit;" | 90% || style="color:inherit;" | 4.6 |
| | |} |
|
| |
|
| | November Foxtrot = 2 | | '''Damage by shell explosions''' |
| | Sierra Mike = 3 | | {| class="wikitable" style="margin:0 0 0.8em 0; width:100%; color:inherit;" |
| | India Delta = 3 | | ! style="background-color:#1a3244; color:#ffffff; font-weight:bold;" | EXPLOSIONS / SALVO !! style="background-color:#1a3244; color:#ffffff; font-weight:bold;" | DAMAGE !! style="background-color:#1a3244; color:#ffffff; font-weight:bold;" | HIT CHANCE !! style="background-color:#1a3244; color:#ffffff; font-weight:bold;" | ACTION ZONE (km) |
| | Juliet Yankee Bissotwo = | | |- |
| | India Yankee = 1 | | | style="color:inherit;" | 1 || style="color:inherit;" | 160 || style="color:inherit;" | 90% || style="color:inherit;" | 3.5–4.6 |
| | Juliet Charlie = 2 | | |} |
| | X-Ray Papa Unaone = 0 | | </div> |
| | Sierra Bravo = 1 | | </div></div></div> |
| | <div class="b-popup"><div class="b-popup_head js-tech-nav_head"><div><h2>Depth Charges</h2></div><span class="b-tech-nav_arrow"></span></div><div class="b-popup_content" style="display: none;"><div> |
| | <div style="border: 2px solid rgba(212,175,55,0.8); border-radius: 3px; margin-bottom: 1em; overflow: hidden;"> |
| | {| class="wikitable" style="margin:0; color:inherit; width:100%" |
| | ! style="background-color:#1a3244; color:#ffffff; font-weight:bold;" | DEPTH CHARGES !! style="background-color:#1a3244; color:#ffffff; font-weight:bold;" | |
| | |- |
| | | style="color:inherit;" | • Max damage || style="color:inherit;" | 3200 |
| | |- |
| | | style="color:inherit;" | • Number of charges || style="color:inherit;" | 2 |
| | |- |
| | | style="color:inherit;" | • Bombs per charge || style="color:inherit;" | 2 |
| | |- |
| | | style="color:inherit;" | • Reload time (sec) || style="color:inherit;" | 40.0 |
| | |} |
| | </div> |
| | </div></div></div> |
|
| |
|
| | Zulu = 1
| |
| | India Bravo Terrathree = 1
| |
| | Equal Speed Charlie London = 1
| |
| | Zulu Hotel = 1
| |
| | Papa Papa = 1
| |
|
| |
|
| | Wyvern = 1
| | <!-- Add the ship code here to populate the upgrade table --> |
| | Red Dragon = 1
| | {{Ship Upgrades Section|code=PISC507_Duca_degli_Abruzzi}} |
| | Dragon Flag = 1 | |
| | Ouroboros = 1
| |
| | Hydra = 1
| |
| | Basilisk = 1
| |
| | Leviathan = 1
| |
| | Scylla = 1
| |
| }} | |
|
| |
|
| |Gallery=<!-- write below list of files with description (if necessary) separated with | --><gallery>
| |
| File:AbGuns.jpg
| |
| File:AbSail.jpg
| |
| File:AbSpotter.jpg
| |
| File:AbTorps.jpg
| |
| File:AbDBMiss.jpg
| |
| File:AbCorsair.jpg|A friendly fighter appears on the scene to chase away enemy bombers.
| |
| File:AbDodge.jpg
| |
| </gallery>
| |
|
| |
|
| |History=<!-- write text below -->
| | <!-- Consumables have to be tagged individually on a slot by slot basis --> |
| <div class="thumb tright">
| | {{Ship Consumables Section|consumables= |
| {{AnnoWiki|content= | | * '''Slot 1:''' {{Damage Control Party}} (5.0s action, 60.0s cooldown) |
| <h2>''{{#var:ship_name}}'', 1937</h2>
| | * '''Slot 2:''' {{Hydroacoustic Search}} (3 charges, 100.0s action, 120.0s cooldown) |
| ===Construction===
| | * '''Slot 3:''' {{Defensive AA Fire}} (3 charges, 40.0s action, 80.0s cooldown) '''or''' {{Spotting Aircraft}} (4 charges, 100.0s action, 240.0s cooldown) |
| :Builder: Odero-Terni-Orlando (OTO); La Spezia, Italy
| | * '''Slot 4:''' {{Repair Party}} (3 charges, 28.0s action, 80.0s cooldown, 162.5 hp/s) |
| :Laid down: 28 December 1933
| | * '''Slot 5:''' {{Submarine Surveillance}} (3 charges, 20.0s action, 120.0s cooldown) |
| :Launched: 21 April 1936
| | }} |
| :Commissioned: 1 December 1937
| |
| ----
| |
| ===Specifications===
| |
| :11,350 tons displacement, standard | |
| :187m length
| |
| :18.9m beam
| |
| :6.9m draft
| |
| ----
| |
| ====Machinery====
| |
| :6 boilers, 2 turbines
| |
| ----
| |
| ====Performance====
| |
| :34 knots at 100,000 shaft horsepower
| |
| :4,125 nautical miles at 13 knots
| |
| ----
| |
| ====Armor====
| |
| :Main belt: 30mm outer belt + 100mm inner belt.
| |
| :Decks: 40mm
| |
| :Bulkheads: 30mm outer, 100mm inner
| |
| :Barbettes and Turrets: 30-100mm
| |
| :Conning tower: 30-140mm
| |
| ----
| |
| ====Armament====
| |
| =====Main=====
| |
| : Ten (3x2, 2x2) 152mm guns
| |
| =====Secondary=====
| |
| : Eight (4x2) dual-purpose 100mm guns
| |
| =====Anti-aircraft=====
| |
| : Eight (4x2) 37mm guns
| |
| : Eight (4x2) 13.2mm guns
| |
| =====Torpedoes=====
| |
| : Six (2x3) 533mm torpedo tubes
| |
| ----
| |
| ====Aircraft====
| |
| =====Total=====
| |
| : Four (4) Ro.43 floatplanes
| |
| }}</div>
| |
| [[File:Abruzzi at speed.jpg|none|thumb|x350px|link=|''{{#var:ship_name}}'' at high speed, date and location unknown.]]
| |
| ===History===
| |
| ====Design====
| |
| The ''Abruzzi''-class cruisers were considered the fifth and final subgroup of the ''Condottieri''-class “family” of cruiser designs, incorporating the second major redesign and often considered the most balanced of all the cruisers of the class. Overall, the designers chose to reduce the speed and increase the size of the cruisers, while forfeiting agility for increased protection, stability, and armament.
| |
| | |
| ''Abruzzi'' looks superficially similar to her cousins, with the most striking difference being the arrangement of the funnels; the increased beam allowed the two catapults to be placed off-center, so the funnels could be brought closer together. Internally, the armor scheme was similar to the previous designs with some noticeable improvements. For instance, the main belt consisted of two parts: a forward 30mm plate with a thicker 100mm slab placed some distance inside. The first layer was meant to detonate the fuses of incoming shells, while the latter plate was there to absorb fragmentation and further penetration. Additionally, the main deck was increased to 40mm, the control tower was increased to 70mm in some areas, and the exposed barbettes were increased to 100mm. Interestingly, the ''Abruzzi''-class was one of the few ships that had armoring along the base of the funnels, most likely to avoid shell splinters entering the boiler compartments. | |
| | |
| The additional hull space meant that the class was able to carry eight boilers — two more than their predecessors — for further redundancy in machinery for safety. Feeding two geared turbines, the power plant generated close to 104,000 shaft horsepower. Although slower by two knots in comparison to the ''[[Duca d'Aosta|Duca d’Aosta]]''-class, the ships still managed a respectable 34 knots in speed trials.
| |
| | |
| Although the caliber of the armament was standardized to 152mm, the ''Abruzzi''-class carried the longer 55 caliber guns as main armament; the ones first installed on the ''[[Roma|Littorio]]''-class as secondary armament. Furthermore, the class increased the battery count from eight to ten rifles. These were organized as a pair of two-gun and three-gun turrets fore and aft; two-gun turret super-firing over the three-gun turret. Additionally there were 100mm AA guns organized around the superstructure, and a triple-torpedo launcher found on each side of the beam. Wartime modifications included replacing the 13.2mm AA guns for 20mm auto-cannons, and the installation of a radar set on a modified foremast over the forward superstructure.
| |
| | |
| Cruiser ''Luigi di Savoia Duca Degli Abruzzi'' – named after the Prince Luigi Amedeo – was the lead ship of the ''Duca degli Abruzzi''-class cruisers. She was laid down 28 December 1933 at shipyards in modern day Lerici, Italy. Launched on 21 April 1936, she was commissioned into the ''Regia Marina'' on 1 December 1937.
| |
|
| |
|
| ====Service====
| |
| ''Luigi di Savoia Duca Degli Abruzzi'' was commissioned into the ''Regia Marina'' the most advanced light cruiser in the Italian navy. On her trials in 1937, she achieved a speed of 34.78 knots at 103,991 shaft horsepower. ''Abruzzi'' and her sister-ship ''Giuseppe Garibaldi'' formed the 8th Squadron of the 1st Division. Her first missions were some of the last operations of the Spanish Civil War, participating in blockades of Republican Spanish shorelines, until the Nationalists won in April 1939. Following a visit to Portugal in later 1939, ''Abruzzi'' became the flagship of the 8th Division. When Italy declared war on France and Britain in 1940, ''Abruzzi'' and ''Garibaldi'' operated together frequently, eoyj their first major action being the indecisive Battle of Calabria against the British in mid-1940. Operating out of Taranto, ''Abruzzi'' remained on call throughout 1940, her only other major sortie ending up as a failed attempt to intercept troop convoys bound for Malta from Egypt.
| |
|
| |
|
| Come mid-March 1941, however, ''Abruzzi'' and ''Garibaldi'' moved to the Adriatic to cover convoy traffic involved in the Italian invasion of Greece. On 26 March 1941, both ships set out for a raid into Cretan waters, supported by heavy cruisers, destroyers, and battleship ''Vittorio Veneto''. This raid turned into the Battle of Cape Matapan, where three Italian heavy cruisers were sunk at British-Australian hands; ''Abruzzi'' and ''Garibaldi'' had already detached from the raiding force before the battle, so they escaped a similar fate. The pair returned to their duties of intercepting convoys around the island of Malta and protecting Italian-German convoys bound for North Africa. ''Abruzzi'' split off from her sister, deploying in response to the British Operation "Halberd" in late September 1941. After resuming convoy protection operations, she took an air-dropped torpedo to the stern in the early morning of 22 November, blowing off her stern in its entirety. She limped back to port in Messina, where she remained for several months while undergoing repairs. As 1942 opened — and the pendulum in the Mediterranean began to swing against Italy and her Axis allies — ''Abruzzi'', still missing her stern, had to quickly sail from Messina to Taranto, which was a safer port for her while her repairs were completed.
| | ==Gallery== |
| | <div class="b-popup"><div class="b-popup_head js-tech-nav_head"><div><h2>WoWs Gallery</h2></div><span class="b-tech-nav_arrow"></span></div><div class="b-popup_content" style="display: none;"><div> |
|
| |
|
| Re-joining ''Garibaldi'', the two cruisers transferred to Pilos, Greece in July 1942 to attempt to intercept British attacks on convoys, but shortages of fuel, bombing attacks, and the lack of enemy naval activity forced their withdrawal to Taranto by November that year. The severe shortage of fuel in Italy eventually left both ships permanently in port at La Spezia. Following the Italian Armistice, both ships surrendered at Malta in September 1943, then became two of the largest combat-capable ships in the Italian Co-Belligerent Navy. They were transferred to the Central Atlantic, settling at their new base of Freetown, Sierra Leone, where they escorted Allied convoys through the Atlantic.
| | [[File:AbruzziShip.png|thumb]] |
|
| |
|
| ''Abruzzi'' returned to Taranto on 29 April 1944, operating thereafter as a transport and training ship. After World War II, she had a long career in the reformed ''Marina Militare'', going through several rounds of modernization, and equipped with various experimental equipment designed for future Italian vessels. ''{{#var:ship_name}}'' was decommissioned in 1961 but remained a hulk in Venezia until she was scrapped in 1972.
| | <div class="b-popup"><div class="b-popup_head js-tech-nav_head"><div><h2>Historical Gallery</h2></div><span class="b-tech-nav_arrow"></span></div><div class="b-popup_content" style="display: none;"><div> |
|
| |
|
| |HistoricalGallery=<!-- write below list of files with description (if necessary) separated with | --><gallery>
| | <gallery> |
| File:Duca-degli-Abruzzi.jpg|''Duca degli Abruzzi'' during sea trials, circa 1938.
| |
| File:Giuseppe Garibaldi heading to sea.jpg|''Giuseppe Garibaldi'', sister ship of ''Duca degli Abruzzi'', heads to sea.
| |
| File:RN_Garibaldi_1938.jpg|''Garibaldi'' underway, location unknown, circa 1938.
| |
| File:Giuseppe Garibaldi design.jpg|Sketch of her sister ship, ''Giuseppe Garibaldi''.
| |
| File:GaribaldiONI.JPG|US Office of Naval Intelligence recognition drawing of an ''Abruzzi''-class cruiser.
| |
| File:Abruzzi at Malta.jpeg|''Abruzzi'' during a formal visit to Malta, 23 July 1955.
| |
| </gallery> | | </gallery> |
| | </div></div></div> |
|
| |
|
| |Video=<!-- put below video clips with using template VideoYT. You can use html-tags for formatting. -->
| | [[Category:Ships of Italy]] |
| {{VideoYT|S4dzN68n5sw}}
| | [[Category:Cruisers]] |
| |Ref= <!-- write below -->
| | [[Category:Tier VII ships]] |
| <references /><br />
| | [[Category:Premium ships]]<!-- DO NOT DELETE THIS LINE. DO NOT INSERT ANYTHING BELOW THIS LINE --> |
| {{AnnoWiki|content=
| |
| '''[https://forum.worldofwarships.com/topic/157327-premium-ship-review-duca-degli-abruzzi/ LittleWhiteMouse's Premium Ship Review: Duca degli Abruzzi] from the NA forums'''}}
| |
| | |
| * [https://en.wikipedia.org/wiki/Italian_cruiser_Duca_degli_Abruzzi Italian cruiser ''Duca degli Abruzzi'' - Wikipedia]
| |
| * [https://en.wikipedia.org/wiki/Condottieri-class_cruiser ''Condottieri''-class cruiser - Wikipedia]
| |
| * [https://worldofwarships.com/en/news/history/the-other-duke/ Squall Line: Duca degli Abruzzi - News - World of Warships]
| |
| | |
| {{WoWS Ship Changelog Insert|1=
| |
| {{WoWS Ship Testing Changes Insert|1=
| |
| *<span class="plainlinks">[https://www.facebook.com/wowsdevblog/posts/pfbid02YhjSe2oFcSpKzb1aLKtLHEh6GPZUyzYUG3qfN9zNpq1Tx6HeHjWApQP9qGBGKxfpl October 18, 2017]</span>:
| |
| **Preliminary characteristics.
| |
| *<span class="plainlinks">[https://www.facebook.com/wowsdevblog/posts/pfbid0kqUyU1a1cqa72aBV2Y9p7PabNmmF5ivojzCYRJPmQ8eau33Ew7R93L81x2KdJGdtl November 21, 2017]</span>:
| |
| **Main battery rotation speed increased from 7 degrees per second to 7.5 degrees per second.
| |
| **Main battery elevation speed increased from 5 degrees per second to 8 degrees per second.
| |
| *<span class="plainlinks">[https://www.facebook.com/wowsdevblog/posts/pfbid02JGJuHyVQsjA7btwTJWNZ1s4naEEz5BMpsPgMWn5eEqde6RZpfwxSdfUwdSDSeQXfl March 17, 2018]</span>:
| |
| **Repair Party consumable added with the following characteristics:
| |
| ***Restores 162 HP per second over 28 seconds.
| |
| ***120 seconds cooldown, 80 seconds cooldown with premium consumable.
| |
| ***2 charges stock, 3 charges stock with premium consumable.
| |
| *<span class="plainlinks">[https://www.facebook.com/wowsdevblog/posts/pfbid0ovojU2V3qiPfWwaNRBFTVMGne93tXCbRFd5UtfZLjFhWc5QSugMzK6HvtPhgQyRfl April 18, 2018]</span>:
| |
| **Citadel repair percentage was increased to 33%.
| |
| }}
| |
| *Available for testing by supertesters in the game starting from Update 0.6.13.
| |
| *First appeared on sale in May 2018.
| |
| *Update 0.7.7:
| |
| **added for purchase in the game client for doubloons.
| |
| *Update 0.7.9:
| |
| **removed for purchase in the game client for doubloons.
| |
| *Update 0.7.10:
| |
| **the range of the Hydroacoustic Search consumable was unified - 4 km for detecting ships, 3 km for detecting torpedoes.
| |
| *Update 0.7.11:
| |
| **added (again) for purchase in the game client for doubloons.
| |
| *Update 0.9.2:
| |
| **HE shell armor penetration increased from 24 mm to 25 mm.
| |
| **changed armor thickness: deck armor increased from 16 mm to 25 mm.
| |
| *Update 0.9.3:
| |
| **minor fixes to textures and ship model.
| |
| *Update 0.10.0:
| |
| **the firing range of the secondary battery was increased to 5.6 km.
| |
| *Update 0.11.1:
| |
| **Minor corrections to geometry and textures of the ship.
| |
| *Update 12.5:
| |
| **The number of depth charges released per one armament charge has been increased from 2 to 4.
| |
| }}
| |
| | |
| }}<!-- DO NOT DELETE THIS LINE. DO NOT INSERT ANYTHING BELOW THIS LINE -->
| |



 (5.0s action, 60.0s cooldown)
 (3 charges, 100.0s action, 120.0s cooldown)
 (3 charges, 40.0s action, 80.0s cooldown) or Spotting Aircraft
  (4 charges, 100.0s action, 240.0s cooldown)
 (3 charges, 28.0s action, 80.0s cooldown, 162.5 hp/s)
 (3 charges, 20.0s action, 120.0s cooldown)
