Ship:Khabarovsk
imported>iDuckman:na No edit summary |
No edit summary |
||
| (2 intermediate revisions by 2 users not shown) | |||
| Line 1: | Line 1: | ||
{{#vardefine:ship_name|Khabarovsk}} | |||
__NOTOC____NOEDITSECTION__ | |||
| | <div class="b-description gw-frame-1"><div class="b-description-img b-description-img__indent b-description-img__single"><div style="width:160px; height:102px; opacity:.5; border-radius:2px; position:absolute; left:0; top:0; z-index:1; -webkit-transition:all 0.2s ease-out 0.1s; transition:all 0.2s ease-out 0.1s;">[[File:Wows_anno_flag_ussr.png|160px]]</div><div class="l-description-img_class"><span class="b-description-img_type b-description-img_type__Destroyer b-description-img_type__Destroyer-Special"></span><span class="b-description-img_class">X</span></div><div class="b-description-img_vehicle">[[File:Ship_PRSD110_Pr_24_Khabarovsk.png|160px|link=|left]]</div><div class="l-description-img_price"><span class="b-description-img_price b-description-img_price__gold"><span title="''{{#var:ship_name}}'' was first released for sale on DD Month YYYY.">26,000 doubloons</span></span></div></div><p>[[Ship:{{#var:ship_name}}|{{#var:ship_name}}]] — U.S.S.R. Special Tier X [[Ship:Destroyer|Destroyer]].</p><p>In the second half of the 1930s, the Soviet government was contemplating building an armored leader. In 1935, two preliminary designs were drawn up, one of which included five variants. The project was assigned number 24, and the final draft saw the light of day in 1936. However, the Navy's senior officials eventually decided in favor of more conventional destroyers and leaders. In 1939, the idea of an armored leader became the subject of discussion once again, resulting in a technical specification being drawn up. The design, known as Project 47, was never implemented due to the outbreak of war.</p><p> </p></div> | ||
===Pros=== | |||
* Main battery guns are effective at all ranges | |||
* High top speed | |||
* Repair Party consumable available | |||
===Cons=== | |||
* Low maneuverability | |||
* High detectability | |||
==Ship Stats== | |||
<div class="b-popup"><div class="b-popup_head js-tech-nav_head"><div><h2>Hull Information</h2></div><span class="b-tech-nav_arrow"></span></div><div class="b-popup_content" style="display: none;"><div> | |||
<div style="border: 2px solid rgba(212,175,55,0.8); border-radius: 3px; margin-bottom: 1em; overflow: hidden;"> | |||
{| class="wikitable" style="margin:0; color:inherit; width:100%" | |||
! style="background-color:#1a3244; color:#ffffff; font-weight:bold;" | SURVIVABILITY !! style="background-color:#1a3244; color:#ffffff; font-weight:bold;" | | |||
|- | |||
| style="color:inherit;" | • Hit Points || style="color:inherit;" | 22500 | |||
|- | |||
| style="color:inherit;" | • Torpedo protection damage reduction (%) || style="color:inherit;" | 0 | |||
|} | |||
</div> | |||
<div style="border: 2px solid rgba(212,175,55,0.8); border-radius: 3px; margin-bottom: 1em; overflow: hidden;"> | |||
{| class="wikitable" style="margin:0; color:inherit; width:100%" | |||
! style="background-color:#1a3244; color:#ffffff; font-weight:bold;" | ARMOR DETAIL !! style="background-color:#1a3244; color:#ffffff; font-weight:bold;" | | |||
|- | |||
| style="color:inherit;" | • Belt (mm) || style="color:inherit;" | 50 | |||
|- | |||
| style="color:inherit;" | • Deck (mm) || style="color:inherit;" | 25 | |||
|- | |||
| style="color:inherit;" | • Superstructure (mm) || style="color:inherit;" | 13 | |||
|- | |||
| style="color:inherit;" | • Extremities (mm) || style="color:inherit;" | 19 | |||
|} | |||
</div> | |||
<div style="border: 2px solid rgba(212,175,55,0.8); border-radius: 3px; margin-bottom: 1em; overflow: hidden;"> | |||
{| class="wikitable" style="margin:0; color:inherit; width:100%" | |||
! style="background-color:#1a3244; color:#ffffff; font-weight:bold;" | MANEUVERABILITY !! style="background-color:#1a3244; color:#ffffff; font-weight:bold;" | | |||
|- | |||
| style="color:inherit;" | • Maximum speed (kt) || style="color:inherit;" | 43.0 | |||
|- | |||
| style="color:inherit;" | • Turning circle radius (m) || style="color:inherit;" | 760 | |||
|- | |||
| style="color:inherit;" | • Rudder-shift time (sec) || style="color:inherit;" | 11.1 | |||
|} | |||
</div> | |||
| | <div style="border: 2px solid rgba(212,175,55,0.8); border-radius: 3px; margin-bottom: 1em; overflow: hidden;"> | ||
{| class="wikitable" style="margin:0; color:inherit; width:100%" | |||
! style="background-color:#1a3244; color:#ffffff; font-weight:bold;" | CONCEALMENT !! style="background-color:#1a3244; color:#ffffff; font-weight:bold;" | | |||
|- | |||
| style="color:inherit;" | • Detectability by sea (km) || style="color:inherit;" | 9.7 | |||
|- | |||
| style="color:inherit;" | • Detectability by air (km) || style="color:inherit;" | 3.96 | |||
|- | |||
| style="color:inherit;" | • Detectability after firing main guns in smoke (km) || style="color:inherit;" | 4.06 | |||
|- | |||
| style="color:inherit;" | • Detectability by depths (km) || style="color:inherit;" | 3.96 | |||
|} | |||
</div> | |||
</div></div></div> | |||
<div class="b-popup"><div class="b-popup_head js-tech-nav_head"><div><h2>Main Battery</h2></div><span class="b-tech-nav_arrow"></span></div><div class="b-popup_content" style="display: none;"><div><div style="border: 2px solid rgba(212,175,55,0.8); border-radius: 3px; margin-bottom: 1em; overflow: hidden;"> | |||
{| class="wikitable" style="margin:0; color:inherit; width:100%" | |||
! style="background-color:#1a3244; color:#ffffff; font-weight:bold;" | MAIN BATTERY !! style="background-color:#1a3244; color:#ffffff; font-weight:bold;" | | |||
|- | |||
| style="color:inherit;" | • Arrangement || style="color:inherit;" | 4×2 130mm | |||
|- | |||
| style="color:inherit;" | • Firing range (km) || style="color:inherit;" | 11.24 | |||
|- | |||
| style="color:inherit;" | • Reload time (sec) || style="color:inherit;" | 5.0 | |||
|- | |||
| style="color:inherit;" | • Rate of fire (shots/min) || style="color:inherit;" | 12 | |||
|- | |||
| style="color:inherit;" | • 180° turn time (sec) || style="color:inherit;" | 9.0 | |||
|} | |||
</div> | |||
| | <div style="border: 2px solid rgba(212,175,55,0.8); border-radius: 3px; margin-bottom: 1em; overflow: hidden;"> | ||
{| class="wikitable" style="margin:0; color:inherit; width:100%" | |||
! style="background-color:#1a3244; color:#ffffff; font-weight:bold;" | DISPERSION !! style="background-color:#1a3244; color:#ffffff; font-weight:bold;" | | |||
|- | |||
| style="color:inherit;" | • Dispersion type || style="color:inherit;" | Standard DD dispersion | |||
|- | |||
| style="color:inherit;" | • Dispersion formula || style="color:inherit;" | Dispersion (m) = 7.5 × range(km) + 15 | |||
|- | |||
| style="color:inherit;" | • Sigma || style="color:inherit;" | 2.0 | |||
|- | |||
| style="color:inherit;" | • Maximum dispersion (m) || style="color:inherit;" | 99 | |||
|- | |||
| style="color:inherit;" | • Dispersion at 5 km || style="color:inherit;" | 52 | |||
|- | |||
| style="color:inherit;" | • Dispersion at 10 km || style="color:inherit;" | 90 | |||
|- | |||
| style="color:inherit;" | • Dispersion at 11.24 km || style="color:inherit;" | 99 | |||
|} | |||
</div> | |||
| | <div style="border: 2px solid rgba(212,175,55,0.8); border-radius: 3px; margin-bottom: 1em; overflow: hidden;"> | ||
{| class="wikitable" style="margin:0; color:inherit; width:100%" | |||
! style="background-color:#1a3244; color:#ffffff; font-weight:bold;" | HE SHELL !! style="background-color:#1a3244; color:#ffffff; font-weight:bold;" | | |||
|- | |||
| style="color:inherit;" | • Name || style="color:inherit;" | HE-46 | |||
|- | |||
| style="color:inherit;" | • Maximum damage || style="color:inherit;" | 1900 | |||
|- | |||
| style="color:inherit;" | • Fire chance (%) || style="color:inherit;" | 8.0% | |||
|- | |||
| style="color:inherit;" | • Shell velocity (m/s) || style="color:inherit;" | 900 | |||
|- | |||
| style="color:inherit;" | • Shell weight (kg) || style="color:inherit;" | 33.4 | |||
|- | |||
| style="color:inherit;" | • Penetration (mm) || style="color:inherit;" | 22 | |||
|} | |||
</div> | |||
| | <div style="border: 2px solid rgba(212,175,55,0.8); border-radius: 3px; margin-bottom: 1em; overflow: hidden;"> | ||
{| class="wikitable" style="margin:0; color:inherit; width:100%" | |||
! style="background-color:#1a3244; color:#ffffff; font-weight:bold;" | AP SHELL !! style="background-color:#1a3244; color:#ffffff; font-weight:bold;" | | |||
|- | |||
| style="color:inherit;" | • Name || style="color:inherit;" | SAP-46 | |||
|- | |||
| style="color:inherit;" | • Maximum damage || style="color:inherit;" | 2600 | |||
|- | |||
| style="color:inherit;" | • Shell velocity (m/s) || style="color:inherit;" | 900 | |||
|- | |||
| style="color:inherit;" | • Shell weight (kg) || style="color:inherit;" | 33.5 | |||
|- | |||
| style="color:inherit;" | • Fuse time (sec) || style="color:inherit;" | 0.01 | |||
|- | |||
| style="color:inherit;" | • Ricochet start (°) || style="color:inherit;" | 45 | |||
|- | |||
| style="color:inherit;" | • Always ricochet (°) || style="color:inherit;" | 60 | |||
|- | |||
| style="color:inherit;" | • Normalisation (°) || style="color:inherit;" | 10 | |||
|- | |||
| style="color:inherit;" | • Arming threshold (mm) || style="color:inherit;" | 22 | |||
|} | |||
</div> | |||
</div></div></div> | |||
<div class="b-popup"><div class="b-popup_head js-tech-nav_head"><div><h2>Torpedoes</h2></div><span class="b-tech-nav_arrow"></span></div><div class="b-popup_content" style="display: none;"><div> | |||
<div style="border: 2px solid rgba(212,175,55,0.8); border-radius: 3px; margin-bottom: 1em; overflow: hidden;"> | |||
{| class="wikitable" style="margin:0; color:inherit; width:100%" | |||
! style="background-color:#1a3244; color:#ffffff; font-weight:bold;" | TORPEDO LAUNCHERS !! style="background-color:#1a3244; color:#ffffff; font-weight:bold;" | | |||
|- | |||
| style="color:inherit;" | • Torpedo tubes (launchers × tubes) || style="color:inherit;" | 2 × 5 | |||
|- | |||
| style="color:inherit;" | • Torpedo name || style="color:inherit;" | ET-46 | |||
|- | |||
| style="color:inherit;" | • Reload time (sec) || style="color:inherit;" | 127 | |||
|- | |||
| style="color:inherit;" | • 180° turn time (sec) || style="color:inherit;" | 7.2 | |||
|- | |||
| style="color:inherit;" | • Damage || style="color:inherit;" | 19,500 | |||
|- | |||
| style="color:inherit;" | • Range (km) || style="color:inherit;" | 6.0 | |||
|- | |||
| style="color:inherit;" | • Speed (kt) || style="color:inherit;" | 53 | |||
|- | |||
| style="color:inherit;" | • Detectability (km) || style="color:inherit;" | 0.6 | |||
|- | |||
| style="color:inherit;" | • Flooding chance (%) || style="color:inherit;" | 332 | |||
|} | |||
</div> | |||
</div></div></div> | |||
< | <div class="b-popup"><div class="b-popup_head js-tech-nav_head"><div><h2>AA Defense</h2></div><span class="b-tech-nav_arrow"></span></div><div class="b-popup_content" style="display: none;"><div> | ||
<div style="border: 2px solid rgba(212,175,55,0.8); border-radius: 3px; margin-bottom: 1em; overflow: hidden;"> | |||
{| class="wikitable" style="margin:0 0 0.8em 0; width:100%; color:inherit;" | |||
| | ! style="background-color:#1a3244; color:#ffffff; font-weight:bold;" | AA ARMAMENT !! style="background-color:#1a3244; color:#ffffff; font-weight:bold;" | MOUNTS × BARRELS | ||
| | |- | ||
| | | style="color:inherit;" | 37 mm || style="color:inherit;" | 4 × 4 | ||
| | |- | ||
| style="color:inherit;" | 37 mm || style="color:inherit;" | 2 × 2 | |||
|- | |||
| style="color:inherit;" | 13 mm || style="color:inherit;" | 4 × 1 | |||
|} | |||
| | '''Continuous damage''' — average DPS within each action zone | ||
| | {| class="wikitable" style="margin:0 0 0.8em 0; width:100%; color:inherit;" | ||
| | ! style="background-color:#1a3244; color:#ffffff; font-weight:bold;" | RANGE !! style="background-color:#1a3244; color:#ffffff; font-weight:bold;" | DPS !! style="background-color:#1a3244; color:#ffffff; font-weight:bold;" | HIT CHANCE !! style="background-color:#1a3244; color:#ffffff; font-weight:bold;" | ACTION ZONE (km) | ||
|- | |||
| | | style="color:inherit;" | Short-range || style="color:inherit;" | 35 || style="color:inherit;" | 95% || style="color:inherit;" | 1.5 | ||
| | |- | ||
| style="color:inherit;" | Mid-range || style="color:inherit;" | 136.5 || style="color:inherit;" | 100% || style="color:inherit;" | 3.5 | |||
|- | |||
| style="color:inherit;" | Long-range || style="color:inherit;" | 70 || style="color:inherit;" | 100% || style="color:inherit;" | 6.0 | |||
|} | |||
</div> | |||
</div></div></div> | |||
<div class="b-popup"><div class="b-popup_head js-tech-nav_head"><div><h2>Depth Charges</h2></div><span class="b-tech-nav_arrow"></span></div><div class="b-popup_content" style="display: none;"><div> | |||
<div style="border: 2px solid rgba(212,175,55,0.8); border-radius: 3px; margin-bottom: 1em; overflow: hidden;"> | |||
{| class="wikitable" style="margin:0; color:inherit; width:100%" | |||
! style="background-color:#1a3244; color:#ffffff; font-weight:bold;" | DEPTH CHARGES !! style="background-color:#1a3244; color:#ffffff; font-weight:bold;" | | |||
|- | |||
| style="color:inherit;" | • Max damage || style="color:inherit;" | 2400 | |||
|- | |||
| style="color:inherit;" | • Number of charges || style="color:inherit;" | 2 | |||
|- | |||
| style="color:inherit;" | • Bombs per charge || style="color:inherit;" | 12 | |||
|- | |||
| style="color:inherit;" | • Reload time (sec) || style="color:inherit;" | 40.0 | |||
|} | |||
</div> | |||
</div></div></div> | |||
<!-- Add the ship code here to populate the upgrade table --> | |||
{{Ship Upgrades Section|code=PRSD110_Pr_24_Khabarovsk}} | |||
<!-- Consumables have to be tagged individually on a slot by slot basis --> | |||
| | {{Ship Consumables Section|consumables= | ||
* '''Slot 1:''' {{Damage Control Party}} (5.0s action, 40.0s cooldown) | |||
* '''Slot 2:''' {{Smoke Generator}} (3 charges, 20.0s action, 160.0s cooldown) '''or''' {{Repair Party}} (3 charges, 20.0s action, 80.0s cooldown, 225 hp/s) | |||
* '''Slot 3:''' {{Engine Boost}} (3 charges, 120.0s action, 120.0s cooldown) | |||
}} | }} | ||
< | ==Gallery== | ||
<div class="b-popup"><div class="b-popup_head js-tech-nav_head"><div><h2>WoWs Gallery</h2></div><span class="b-tech-nav_arrow"></span></div><div class="b-popup_content" style="display: none;"><div> | |||
: | |||
<gallery> | |||
: | </gallery>[[File:Khabapermacamo.png|thumb|Khabarovsk in her default permanent camouflage.]]</div></div></div> | ||
==== | <div class="b-popup"><div class="b-popup_head js-tech-nav_head"><div><h2>Historical Gallery</h2></div><span class="b-tech-nav_arrow"></span></div><div class="b-popup_content" style="display: none;"><div> | ||
: | |||
<gallery> | <gallery> | ||
</gallery> | |||
</gallery> | </div></div></div> | ||
< | |||
{{WoWS Ship Changelog Insert|1= | {{WoWS Ship Changelog Insert|1= | ||
*Available for testing by supertesters in the game starting from Update 0.5.0.1. | *Update 0.5.0.1: | ||
**Available for testing by supertesters in the game starting from Update 0.5.0.1. | |||
*Update 0.5.0.3: | *Update 0.5.0.3: | ||
**Khabarovsk was added as a Tier X researchable ship. | **Khabarovsk was added as a Tier X researchable ship. | ||
| Line 223: | Line 294: | ||
**The number of bombs per Depth Charge drop increased from 10 to 12. | **The number of bombs per Depth Charge drop increased from 10 to 12. | ||
}} | }} | ||
[[Category:Ships of U.S.S.R.]] | |||
[[Category:Destroyers]] | |||
[[Category:Tier X ships]] | |||
<!-- DO NOT DELETE THIS LINE. DO NOT INSERT ANYTHING BELOW THIS LINE --> | |||
Latest revision as of 17:22, 7 August 2026

X
26,000 doubloons
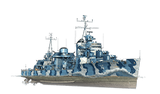
Khabarovsk — U.S.S.R. Special Tier X Destroyer.
In the second half of the 1930s, the Soviet government was contemplating building an armored leader. In 1935, two preliminary designs were drawn up, one of which included five variants. The project was assigned number 24, and the final draft saw the light of day in 1936. However, the Navy's senior officials eventually decided in favor of more conventional destroyers and leaders. In 1939, the idea of an armored leader became the subject of discussion once again, resulting in a technical specification being drawn up. The design, known as Project 47, was never implemented due to the outbreak of war.
Pros
- Main battery guns are effective at all ranges
- High top speed
- Repair Party consumable available
Cons
- Low maneuverability
- High detectability
Ship Stats
Hull Information
Main Battery
Torpedoes
AA Defense
Depth Charges
Compatible Upgrades
| Slot 1 |
 |
 |

| ||
|---|---|---|---|---|---|
| Slot 2 |
 |
 |

| ||
| Slot 3 |
 |
 |
 |
 |

|
| Slot 4 |
 |
 |
 |

| |
| Slot 5 |
 |
 |
 |
 |

|
| Slot 6 |
 |
 |

|
Consumables
- Slot 1: Damage Control Party
 (5.0s action, 40.0s cooldown)
 - Slot 2: Smoke Generator
 (3 charges, 20.0s action, 160.0s cooldown) or Repair Party
  (3 charges, 20.0s action, 80.0s cooldown, 225 hp/s)
 - Slot 3: Engine Boost
 (3 charges, 120.0s action, 120.0s cooldown)
Gallery
WoWs Gallery

Historical Gallery
Ship Change Log
Categories:
