Ship:Ragnarok
imported>SirDixie:eu m Removed dead forum link. |
Pockington (talk | contribs) added missing information on launch day |
||
| (One intermediate revision by one other user not shown) | |||
| Line 1: | Line 1: | ||
{{#vardefine:ship_name|Ragnarok}} | |||
__NOTOC____NOEDITSECTION__ | |||
| | <div class="b-description gw-frame-1"><div class="b-description-img b-description-img__indent b-description-img__single"><div style="width:160px; height:102px; opacity:.5; border-radius:2px; position:absolute; left:0; top:0; z-index:1; -webkit-transition:all 0.2s ease-out 0.1s; transition:all 0.2s ease-out 0.1s;">[[File:Wows_anno_flag_japan.png|160px]]</div><div class="l-description-img_class"><span class="b-description-img_type b-description-img_type__Battleship b-description-img_type__Battleship-Premium"></span><span class="b-description-img_class">VIII</span></div><div class="b-description-img_vehicle">[[File:Ship_PJSB888_Ragnarok.png|160px|link=|left]]</div><div class="l-description-img_price"><span class="b-description-img_price b-description-img_price__gold"><span title="''{{#var:ship_name}}'' was first released for sale on DD Month YYYY.">13,000 doubloons</span></span></div></div><p>[[Ship:{{#var:ship_name}}|{{#var:ship_name}}]] — Japan Premium Tier VIII [[Ship:Battleship|Battleship]].</p><p>The vessel is immeasurably ancient—a relic of days long forgotten. It was built in the shipyards orbiting a world of proud and fearsome warriors. Though the citizens adhered to the Imperial creed and paid their tithes, secret cabals on the planet's surface worshipped Khorne, the Lord of Rage. These cults were strong. They were hated. They were outnumbered. At the appointed hour, they rose up and tried to overthrow their loyalist masters. They failed. They were defeated in a long, bloody war and all, to a man, perished in flames. Their name was erased from history. But the fickle whims of the Warp decreed that their vengeful spirits would forever haunt the vessel Ragnarok, whose hull was being constructed in the docks above the planet's surface. The furious spirits invaded the hull and ensured the vessel served none but the Ruinous Powers. To this day, Ragnarok and all aboard it cry, "Vengeance! Death! Blood for the Blood God!".</p><p> </p></div> | ||
===Pros=== | |||
* Great damage per salvo. | |||
* High level of anti-torpedo protection. | |||
===Cons=== | |||
* High detectability. | |||
* Low AA defense efficiency | |||
* | |||
* | |||
==Ship Stats== | |||
<!-- | <div class="b-popup"><div class="b-popup_head js-tech-nav_head"><div><h2>Hull Information</h2></div><span class="b-tech-nav_arrow"></span></div><div class="b-popup_content" style="display: none;"><div> | ||
<div style="border: 2px solid rgba(212,175,55,0.8); border-radius: 3px; margin-bottom: 1em; overflow: hidden;"> | |||
{| class="wikitable" style="margin:0; color:inherit; width:100%" | |||
! style="background-color:#1a3244; color:#ffffff; font-weight:bold;" | SURVIVABILITY !! style="background-color:#1a3244; color:#ffffff; font-weight:bold;" | | |||
|- | |||
| style="color:inherit;" | • Hit Points || style="color:inherit;" | 66300 | |||
|- | |||
| style="color:inherit;" | • Torpedo protection damage reduction (%) || style="color:inherit;" | 43 | |||
|} | |||
</div> | |||
<!-- | <div style="border: 2px solid rgba(212,175,55,0.8); border-radius: 3px; margin-bottom: 1em; overflow: hidden;"> | ||
{| class="wikitable" style="margin:0; color:inherit; width:100%" | |||
! style="background-color:#1a3244; color:#ffffff; font-weight:bold;" | ARMOR DETAIL !! style="background-color:#1a3244; color:#ffffff; font-weight:bold;" | | |||
|- | |||
| style="color:inherit;" | • Belt (mm) || style="color:inherit;" | 254 | |||
|- | |||
| style="color:inherit;" | • Deck (mm) || style="color:inherit;" | 32 | |||
|- | |||
| style="color:inherit;" | • Superstructure (mm) || style="color:inherit;" | 19 | |||
|- | |||
| style="color:inherit;" | • Extremities (mm) || style="color:inherit;" | 32 | |||
|} | |||
</div> | |||
| | <div style="border: 2px solid rgba(212,175,55,0.8); border-radius: 3px; margin-bottom: 1em; overflow: hidden;"> | ||
{| class="wikitable" style="margin:0; color:inherit; width:100%" | |||
! style="background-color:#1a3244; color:#ffffff; font-weight:bold;" | MANEUVERABILITY !! style="background-color:#1a3244; color:#ffffff; font-weight:bold;" | | |||
|- | |||
| style="color:inherit;" | • Maximum speed (kt) || style="color:inherit;" | 30.0 | |||
|- | |||
| style="color:inherit;" | • Turning circle radius (m) || style="color:inherit;" | 870 | |||
|- | |||
| style="color:inherit;" | • Rudder-shift time (sec) || style="color:inherit;" | 17.3 | |||
|} | |||
</div> | |||
| | <div style="border: 2px solid rgba(212,175,55,0.8); border-radius: 3px; margin-bottom: 1em; overflow: hidden;"> | ||
{| class="wikitable" style="margin:0; color:inherit; width:100%" | |||
! style="background-color:#1a3244; color:#ffffff; font-weight:bold;" | CONCEALMENT !! style="background-color:#1a3244; color:#ffffff; font-weight:bold;" | | |||
|- | |||
| style="color:inherit;" | • Detectability by sea (km) || style="color:inherit;" | 16.76 | |||
|- | |||
| style="color:inherit;" | • Detectability by air (km) || style="color:inherit;" | 10.0 | |||
|- | |||
| style="color:inherit;" | • Detectability after firing main guns in smoke (km) || style="color:inherit;" | 16.9 | |||
|- | |||
| style="color:inherit;" | • Detectability by depths (km) || style="color:inherit;" | 10.0 | |||
|} | |||
</div> | |||
</div></div></div> | |||
<div class="b-popup"><div class="b-popup_head js-tech-nav_head"><div><h2>Main Battery</h2></div><span class="b-tech-nav_arrow"></span></div><div class="b-popup_content" style="display: none;"><div><div style="border: 2px solid rgba(212,175,55,0.8); border-radius: 3px; margin-bottom: 1em; overflow: hidden;"> | |||
{| class="wikitable" style="margin:0; color:inherit; width:100%" | |||
! style="background-color:#1a3244; color:#ffffff; font-weight:bold;" | MAIN BATTERY !! style="background-color:#1a3244; color:#ffffff; font-weight:bold;" | | |||
|- | |||
| style="color:inherit;" | • Arrangement || style="color:inherit;" | 5×2 410mm | |||
|- | |||
| style="color:inherit;" | • Firing range (km) || style="color:inherit;" | 19.89 | |||
|- | |||
| style="color:inherit;" | • Reload time (sec) || style="color:inherit;" | 33.0 | |||
|- | |||
| style="color:inherit;" | • Rate of fire (shots/min) || style="color:inherit;" | 1.8 | |||
|- | |||
| style="color:inherit;" | • 180° turn time (sec) || style="color:inherit;" | 41.9 | |||
|} | |||
</div> | |||
| | <div style="border: 2px solid rgba(212,175,55,0.8); border-radius: 3px; margin-bottom: 1em; overflow: hidden;"> | ||
{| class="wikitable" style="margin:0; color:inherit; width:100%" | |||
! style="background-color:#1a3244; color:#ffffff; font-weight:bold;" | DISPERSION !! style="background-color:#1a3244; color:#ffffff; font-weight:bold;" | | |||
|- | |||
| style="color:inherit;" | • Dispersion type || style="color:inherit;" | IJN BB dispersion | |||
|- | |||
| style="color:inherit;" | • Dispersion formula || style="color:inherit;" | Dispersion (m) = 7.2 × range(km) + 84 | |||
|- | |||
| style="color:inherit;" | • Sigma || style="color:inherit;" | 1.9 | |||
|- | |||
| style="color:inherit;" | • Maximum dispersion (m) || style="color:inherit;" | 227 | |||
|- | |||
| style="color:inherit;" | • Dispersion at 5 km || style="color:inherit;" | 120 | |||
|- | |||
| style="color:inherit;" | • Dispersion at 10 km || style="color:inherit;" | 156 | |||
|- | |||
| style="color:inherit;" | • Dispersion at 15 km || style="color:inherit;" | 192 | |||
|- | |||
| style="color:inherit;" | • Dispersion at 19.89 km || style="color:inherit;" | 227 | |||
|} | |||
</div> | |||
<div style="border: 2px solid rgba(212,175,55,0.8); border-radius: 3px; margin-bottom: 1em; overflow: hidden;"> | |||
{| class="wikitable" style="margin:0; color:inherit; width:100%" | |||
| | ! style="background-color:#1a3244; color:#ffffff; font-weight:bold;" | HE SHELL !! style="background-color:#1a3244; color:#ffffff; font-weight:bold;" | | ||
| | |- | ||
| | | style="color:inherit;" | • Name || style="color:inherit;" | 410 mm HE Type0 | ||
| | |- | ||
| | | style="color:inherit;" | • Maximum damage || style="color:inherit;" | 6500 | ||
|- | |||
| style="color:inherit;" | • Fire chance (%) || style="color:inherit;" | 30.0% | |||
|- | |||
| style="color:inherit;" | • Shell velocity (m/s) || style="color:inherit;" | 805 | |||
|- | |||
| style="color:inherit;" | • Shell weight (kg) || style="color:inherit;" | 938.5 | |||
|- | |||
| style="color:inherit;" | • Penetration (mm) || style="color:inherit;" | 68 | |||
|} | |||
</div> | |||
| | <div style="border: 2px solid rgba(212,175,55,0.8); border-radius: 3px; margin-bottom: 1em; overflow: hidden;"> | ||
| | {| class="wikitable" style="margin:0; color:inherit; width:100%" | ||
| | ! style="background-color:#1a3244; color:#ffffff; font-weight:bold;" | AP SHELL !! style="background-color:#1a3244; color:#ffffff; font-weight:bold;" | | ||
| | |- | ||
| style="color:inherit;" | • Name || style="color:inherit;" | 410 mm AP/APC Type91 | |||
| | |- | ||
| style="color:inherit;" | • Maximum damage || style="color:inherit;" | 12600 | |||
|- | |||
| style="color:inherit;" | • Shell velocity (m/s) || style="color:inherit;" | 806 | |||
|- | |||
| style="color:inherit;" | • Shell weight (kg) || style="color:inherit;" | 1020 | |||
|- | |||
| style="color:inherit;" | • Fuse time (sec) || style="color:inherit;" | 0.033 | |||
|- | |||
| style="color:inherit;" | • Ricochet start (°) || style="color:inherit;" | 45 | |||
|- | |||
| style="color:inherit;" | • Always ricochet (°) || style="color:inherit;" | 60 | |||
|- | |||
| style="color:inherit;" | • Normalisation (°) || style="color:inherit;" | 6 | |||
|- | |||
| style="color:inherit;" | • Arming threshold (mm) || style="color:inherit;" | 68 | |||
|} | |||
</div> | |||
</div></div></div> | |||
<div class="b-popup"><div class="b-popup_head js-tech-nav_head"><div><h2>Secondary Battery</h2></div><span class="b-tech-nav_arrow"></span></div><div class="b-popup_content" style="display: none;"><div> | |||
<div style="border: 2px solid rgba(212,175,55,0.8); border-radius: 3px; margin-bottom: 1em; overflow: hidden;"> | |||
{| class="wikitable" style="margin:0; color:inherit; width:100%" | |||
! style="background-color:#1a3244; color:#ffffff; font-weight:bold;" | SECONDARY BATTERY !! style="background-color:#1a3244; color:#ffffff; font-weight:bold;" | | |||
|- | |||
| style="color:inherit;" | • Secondary battery range (km) || style="color:inherit;" | 6.6 | |||
|} | |||
</div> | |||
| | <div style="border: 2px solid rgba(212,175,55,0.8); border-radius: 3px; margin-bottom: 1em; overflow: hidden;"> | ||
| | {| class="wikitable" style="margin:0; color:inherit; width:100%" | ||
| | ! style="background-color:#1a3244; color:#ffffff; font-weight:bold;" | SECONDARY ARMAMENT 1 !! style="background-color:#1a3244; color:#ffffff; font-weight:bold;" | | ||
| | |- | ||
| | | style="color:inherit;" | • Shell type || style="color:inherit;" | HE | ||
| | |- | ||
} | | style="color:inherit;" | • Name || style="color:inherit;" | 140 mm HE Type0 | ||
|- | |||
| style="color:inherit;" | • Arrangement || style="color:inherit;" | 16x1 140mm | |||
|- | |||
| style="color:inherit;" | • Rate of fire (shots/min) || style="color:inherit;" | 7.5 | |||
|- | |||
| style="color:inherit;" | • Maximum damage || style="color:inherit;" | 2400 | |||
|- | |||
| style="color:inherit;" | • Shell velocity (m/s) || style="color:inherit;" | 850 | |||
|- | |||
| style="color:inherit;" | • Penetration (mm) || style="color:inherit;" | 23 | |||
|- | |||
| style="color:inherit;" | • Fire chance (%) || style="color:inherit;" | 10.0% | |||
|} | |||
</div> | |||
<div style="border: 2px solid rgba(212,175,55,0.8); border-radius: 3px; margin-bottom: 1em; overflow: hidden;"> | |||
{| class="wikitable" style="margin:0; color:inherit; width:100%" | |||
! style="background-color:#1a3244; color:#ffffff; font-weight:bold;" | SECONDARY ARMAMENT 2 !! style="background-color:#1a3244; color:#ffffff; font-weight:bold;" | | |||
|- | |||
| style="color:inherit;" | • Shell type || style="color:inherit;" | HE | |||
|- | |||
| style="color:inherit;" | • Name || style="color:inherit;" | 127 mm HE Type0 | |||
|- | |||
| style="color:inherit;" | • Arrangement || style="color:inherit;" | 8x2 127mm | |||
|- | |||
| style="color:inherit;" | • Rate of fire (shots/min) || style="color:inherit;" | 10.0 | |||
|- | |||
| style="color:inherit;" | • Maximum damage || style="color:inherit;" | 2100 | |||
|- | |||
| style="color:inherit;" | • Shell velocity (m/s) || style="color:inherit;" | 725 | |||
|- | |||
| style="color:inherit;" | • Penetration (mm) || style="color:inherit;" | 21 | |||
|- | |||
| style="color:inherit;" | • Fire chance (%) || style="color:inherit;" | 8.0% | |||
|} | |||
</div> | |||
</div></div></div> | |||
<div class="b-popup"><div class="b-popup_head js-tech-nav_head"><div><h2>Airstrike</h2></div><span class="b-tech-nav_arrow"></span></div><div class="b-popup_content" style="display: none;"><div> | |||
| | <div style="border: 2px solid rgba(212,175,55,0.8); border-radius: 3px; margin-bottom: 1em; overflow: hidden;"> | ||
{| class="wikitable" style="margin:0; color:inherit; width:100%" | |||
! style="background-color:#1a3244; color:#ffffff; font-weight:bold;" | ASW AIRSTRIKE (DEPTH CHARGES) !! style="background-color:#1a3244; color:#ffffff; font-weight:bold;" | | |||
|- | |||
| style="color:inherit;" | • Range (km) || style="color:inherit;" | 10 | |||
|- | |||
| style="color:inherit;" | • Minimum range (km) || style="color:inherit;" | 0.5 | |||
|- | |||
| style="color:inherit;" | • Reload time (sec) || style="color:inherit;" | 30.0 | |||
|- | |||
| style="color:inherit;" | • Number of aircraft || style="color:inherit;" | 1 | |||
|- | |||
| style="color:inherit;" | • Depth charges in payload || style="color:inherit;" | 2 | |||
|- | |||
| style="color:inherit;" | • Damage || style="color:inherit;" | 4200 | |||
|- | |||
| style="color:inherit;" | • Deployment || style="color:inherit;" | Manual | |||
|} | |||
</div> | |||
</div></div></div> | |||
<div class="b-popup"><div class="b-popup_head js-tech-nav_head"><div><h2>AA Defense</h2></div><span class="b-tech-nav_arrow"></span></div><div class="b-popup_content" style="display: none;"><div> | |||
<div style="border: 2px solid rgba(212,175,55,0.8); border-radius: 3px; margin-bottom: 1em; overflow: hidden;"> | |||
{| class="wikitable" style="margin:0 0 0.8em 0; width:100%; color:inherit;" | |||
! style="background-color:#1a3244; color:#ffffff; font-weight:bold;" | AA ARMAMENT !! style="background-color:#1a3244; color:#ffffff; font-weight:bold;" | MOUNTS × BARRELS | |||
|- | |||
| style="color:inherit;" | 127 mm || style="color:inherit;" | 8 × 2 | |||
|- | |||
| style="color:inherit;" | 25 mm || style="color:inherit;" | 12 × 3 + 24 × 2 + 18 × 1 | |||
|} | |||
{ | '''Continuous damage''' — average DPS within each action zone | ||
{| class="wikitable" style="margin:0 0 0.8em 0; width:100%; color:inherit;" | |||
! style="background-color:#1a3244; color:#ffffff; font-weight:bold;" | RANGE !! style="background-color:#1a3244; color:#ffffff; font-weight:bold;" | DPS !! style="background-color:#1a3244; color:#ffffff; font-weight:bold;" | HIT CHANCE !! style="background-color:#1a3244; color:#ffffff; font-weight:bold;" | ACTION ZONE (km) | |||
|- | |||
| style="color:inherit;" | Mid-range || style="color:inherit;" | 304.5 || style="color:inherit;" | 85% || style="color:inherit;" | 2.5 | |||
|- | |||
| style="color:inherit;" | Long-range || style="color:inherit;" | 105 || style="color:inherit;" | 75% || style="color:inherit;" | 5.8 | |||
|} | |||
| | '''Damage by shell explosions''' | ||
| | {| class="wikitable" style="margin:0 0 0.8em 0; width:100%; color:inherit;" | ||
| | ! style="background-color:#1a3244; color:#ffffff; font-weight:bold;" | EXPLOSIONS / SALVO !! style="background-color:#1a3244; color:#ffffff; font-weight:bold;" | DAMAGE !! style="background-color:#1a3244; color:#ffffff; font-weight:bold;" | HIT CHANCE !! style="background-color:#1a3244; color:#ffffff; font-weight:bold;" | ACTION ZONE (km) | ||
|- | |||
| style="color:inherit;" | 5 || style="color:inherit;" | 1470 || style="color:inherit;" | 75% || style="color:inherit;" | 3.5–5.8 | |||
|} | |||
</div> | |||
</div></div></div> | |||
<!-- Add the ship code here to populate the upgrade table --> | |||
| | {{Ship Upgrades Section|code=PJSB888_Ragnarok}} | ||
}} | |||
</ | <!-- Consumables have to be tagged individually on a slot by slot basis --> | ||
{{Ship Consumables Section|consumables= | |||
* '''Slot 1:''' {{Damage Control Party}} (10.0s action, 80.0s cooldown) | |||
* '''Slot 2:''' {{Repair Party}} (4 charges, 28.0s action, 80.0s cooldown, 331.5 hp/s) | |||
* '''Slot 3:''' {{Spotting Aircraft}} (4 charges, 100.0s action, 240.0s cooldown) '''or''' {{Patrol Fighter}} (3 charges, 60.0s action, 90.0s cooldown) | |||
}} | |||
==Gallery== | |||
<div class="b-popup"><div class="b-popup_head js-tech-nav_head"><div><h2>WoWs Gallery</h2></div><span class="b-tech-nav_arrow"></span></div><div class="b-popup_content" style="display: none;"><div> | |||
<gallery> | |||
</gallery>[[File:Ragnarokpermacamo.png|thumb|Ragnarok in her default permanent camouflage.]]</div></div></div> | |||
<div class="b-popup"><div class="b-popup_head js-tech-nav_head"><div><h2>Historical Gallery</h2></div><span class="b-tech-nav_arrow"></span></div><div class="b-popup_content" style="display: none;"><div> | |||
<gallery> | |||
</gallery> | </gallery> | ||
</div></div></div> | |||
[[Category:Ships of Japan]] | |||
[[Category:Battleships]] | |||
[[Category:Tier VIII ships]] | |||
[[Category:Premium ships]]<!-- DO NOT DELETE THIS LINE. DO NOT INSERT ANYTHING BELOW THIS LINE --> | |||
Latest revision as of 22:37, 8 July 2026

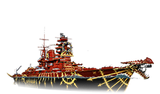
Ragnarok — Japan Premium Tier VIII Battleship.
The vessel is immeasurably ancient—a relic of days long forgotten. It was built in the shipyards orbiting a world of proud and fearsome warriors. Though the citizens adhered to the Imperial creed and paid their tithes, secret cabals on the planet's surface worshipped Khorne, the Lord of Rage. These cults were strong. They were hated. They were outnumbered. At the appointed hour, they rose up and tried to overthrow their loyalist masters. They failed. They were defeated in a long, bloody war and all, to a man, perished in flames. Their name was erased from history. But the fickle whims of the Warp decreed that their vengeful spirits would forever haunt the vessel Ragnarok, whose hull was being constructed in the docks above the planet's surface. The furious spirits invaded the hull and ensured the vessel served none but the Ruinous Powers. To this day, Ragnarok and all aboard it cry, "Vengeance! Death! Blood for the Blood God!".
Pros
- Great damage per salvo.
- High level of anti-torpedo protection.
Cons
- High detectability.
- Low AA defense efficiency
Ship Stats
Hull Information
Main Battery
Secondary Battery
Airstrike
AA Defense
Compatible Upgrades
| Slot 1 |
 |
 |
 |

|
|---|---|---|---|---|
| Slot 2 |
 |

| ||
| Slot 3 |
 |
 |
 |

|
| Slot 4 |
 |
 |
 |

|
| Slot 5 |
 |
 |

|
Consumables
- Slot 1: Damage Control Party
 (10.0s action, 80.0s cooldown)
 - Slot 2: Repair Party
 (4 charges, 28.0s action, 80.0s cooldown, 331.5 hp/s)
 - Slot 3: Spotting Aircraft
 (4 charges, 100.0s action, 240.0s cooldown) or Patrol Fighter
  (3 charges, 60.0s action, 90.0s cooldown)

