Ship:Nino Bixio
imported>SirDixie:eu m Changed protection level for "Ship:Nino Bixio" ([Edit=Allow only administrators] (indefinite) [Move=Allow only administrators] (indefinite)) |
No edit summary |
||
| (3 intermediate revisions by 3 users not shown) | |||
| Line 1: | Line 1: | ||
{{#vardefine:ship_name|Nino Bixio}} | |||
__NOTOC____NOEDITSECTION__ | |||
{{ | |||
| | <div class="b-description gw-frame-1"><div class="b-description-img b-description-img__indent b-description-img__single"><div style="width:160px; height:102px; opacity:.5; border-radius:2px; position:absolute; left:0; top:0; z-index:1; -webkit-transition:all 0.2s ease-out 0.1s; transition:all 0.2s ease-out 0.1s;">[[File:Wows_anno_flag_italy.png|160px]]</div><div class="l-description-img_class"><span class="b-description-img_type b-description-img_type__Cruiser b-description-img_type__Cruiser-Tech Tree"></span><span class="b-description-img_class">II</span></div><div class="b-description-img_vehicle">[[File:Ship_PISC102_Nino_Bixio.png|160px|link=|left]]</div><div class="l-description-img_price"><span class="b-description-img_price b-description-img_price__gold"><span title="''{{#var:ship_name}}'' was first released for sale on DD Month YYYY.">85,000</span></span></div></div><p>[[Ship:{{#var:ship_name}}|{{#var:ship_name}}]] — Italy Tech Tree Tier II [[Ship:Cruiser|Cruiser]].</p><p>At the beginning of the 20th century, the idea of a fast scout cruiser was popular in many countries. The first ship of that kind in the Italian Navy was armored cruiser Quarto. This was followed by the Nino Bixio class—they were larger than their predecessor and had more convenient artillery arrangement. During World War I, the lead ship of the series participated in the interception of Austro-Hungarian raiders and in the defense of the Entente transports. Nino Bixio served in the Navy until the end of the 1920s.</p><p> </p></div> | ||
===Pros=== | |||
* High rate of fire | |||
* Low detectability | |||
* High top speed | |||
===Cons=== | |||
* Shooting accurately over long ranges is challenging | |||
==Ship Stats== | |||
<div class="b-popup"><div class="b-popup_head js-tech-nav_head"><div><h2>Hull Information</h2></div><span class="b-tech-nav_arrow"></span></div><div class="b-popup_content" style="display: none;"><div> | |||
<div style="border: 2px solid rgba(212,175,55,0.8); border-radius: 3px; margin-bottom: 1em; overflow: hidden;"> | |||
{| class="wikitable" style="margin:0; color:inherit; width:100%" | |||
! style="background-color:#1a3244; color:#ffffff; font-weight:bold;" | SURVIVABILITY !! style="background-color:#1a3244; color:#ffffff; font-weight:bold;" | Nino Bixio (A) !! style="background-color:#1a3244; color:#ffffff; font-weight:bold;" | Nino Bixio (B) | |||
|- | |||
| style="color:inherit;" | • Hit Points || style="color:inherit;" | 15500 || style="color:inherit;" | 16600 | |||
|- | |||
| style="color:inherit;" | • Torpedo protection damage reduction (%) || colspan="2" style="color:inherit;" | 0 | |||
|} | |||
</div> | |||
<div style="border: 2px solid rgba(212,175,55,0.8); border-radius: 3px; margin-bottom: 1em; overflow: hidden;"> | |||
{| class="wikitable" style="margin:0; color:inherit; width:100%" | |||
! style="background-color:#1a3244; color:#ffffff; font-weight:bold;" | ARMOR DETAIL !! style="background-color:#1a3244; color:#ffffff; font-weight:bold;" | | |||
|- | |||
| style="color:inherit;" | • Belt (mm) || style="color:inherit;" | 6 | |||
|- | |||
| style="color:inherit;" | • Deck (mm) || style="color:inherit;" | 6 | |||
|- | |||
| style="color:inherit;" | • Superstructure (mm) || style="color:inherit;" | 6 | |||
|- | |||
| style="color:inherit;" | • Extremities (mm) || style="color:inherit;" | 6 | |||
|} | |||
</div> | |||
<div style="border: 2px solid rgba(212,175,55,0.8); border-radius: 3px; margin-bottom: 1em; overflow: hidden;"> | |||
{| class="wikitable" style="margin:0; color:inherit; width:100%" | |||
! style="background-color:#1a3244; color:#ffffff; font-weight:bold;" | MANEUVERABILITY !! style="background-color:#1a3244; color:#ffffff; font-weight:bold;" | Nino Bixio (A) !! style="background-color:#1a3244; color:#ffffff; font-weight:bold;" | Nino Bixio (B) | |||
|- | |||
| style="color:inherit;" | • Maximum speed (kt) || style="color:inherit;" | 26.8 || style="color:inherit;" | 26.8 | |||
|- | |||
| style="color:inherit;" | • Turning circle radius (m) || style="color:inherit;" | 480 || style="color:inherit;" | 480 | |||
|- | |||
| style="color:inherit;" | • Rudder-shift time (sec) || style="color:inherit;" | 6.7 || style="color:inherit;" | 4.8 | |||
|} | |||
</div> | |||
<div style="border: 2px solid rgba(212,175,55,0.8); border-radius: 3px; margin-bottom: 1em; overflow: hidden;"> | |||
{| class="wikitable" style="margin:0; color:inherit; width:100%" | |||
! style="background-color:#1a3244; color:#ffffff; font-weight:bold;" | CONCEALMENT !! style="background-color:#1a3244; color:#ffffff; font-weight:bold;" | Nino Bixio (A) !! style="background-color:#1a3244; color:#ffffff; font-weight:bold;" | Nino Bixio (B) | |||
|- | |||
| style="color:inherit;" | • Detectability by sea (km) || style="color:inherit;" | 7.9 || style="color:inherit;" | 7.9 | |||
|- | |||
| style="color:inherit;" | • Detectability by air (km) || style="color:inherit;" | 4.0 || style="color:inherit;" | 4.0 | |||
|- | |||
| style="color:inherit;" | • Detectability after firing main guns in smoke (km) || colspan="2" style="color:inherit;" | 2.9 | |||
|- | |||
| style="color:inherit;" | • Detectability by depths (km) || style="color:inherit;" | 4.0 || style="color:inherit;" | 4.0 | |||
|} | |||
</div> | |||
| | </div></div></div> | ||
<div class="b-popup"><div class="b-popup_head js-tech-nav_head"><div><h2>Main Battery</h2></div><span class="b-tech-nav_arrow"></span></div><div class="b-popup_content" style="display: none;"><div><div style="border: 2px solid rgba(212,175,55,0.8); border-radius: 3px; margin-bottom: 1em; overflow: hidden;"> | |||
{| class="wikitable" style="margin:0; color:inherit; width:100%" | |||
! style="background-color:#1a3244; color:#ffffff; font-weight:bold;" | MAIN BATTERY !! style="background-color:#1a3244; color:#ffffff; font-weight:bold;" | SDT 2 mod.1 !! style="background-color:#1a3244; color:#ffffff; font-weight:bold;" | SDT 2 mod.2 | |||
|- | |||
| style="color:inherit;" | • Arrangement || colspan="2" style="color:inherit;" | 8×1 120mm | |||
|- | |||
| style="color:inherit;" | • Firing range (km) || style="color:inherit;" | 10.34 || style="color:inherit;" | 11.37 | |||
|- | |||
| style="color:inherit;" | • Reload time (sec) || colspan="2" style="color:inherit;" | 5.5 | |||
|- | |||
| style="color:inherit;" | • Rate of fire (shots/min) || colspan="2" style="color:inherit;" | 10.9 | |||
|- | |||
| style="color:inherit;" | • 180° turn time (sec) || colspan="2" style="color:inherit;" | 15.0 | |||
|} | |||
</div> | |||
| | <div style="border: 2px solid rgba(212,175,55,0.8); border-radius: 3px; margin-bottom: 1em; overflow: hidden;"> | ||
{| class="wikitable" style="margin:0; color:inherit; width:100%" | |||
! style="background-color:#1a3244; color:#ffffff; font-weight:bold;" | DISPERSION !! style="background-color:#1a3244; color:#ffffff; font-weight:bold;" | | |||
|- | |||
| style="color:inherit;" | • Dispersion type || style="color:inherit;" | Standard CA/CL dispersion | |||
|- | |||
| style="color:inherit;" | • Dispersion formula || style="color:inherit;" | Dispersion (m) = 6.9 × range(km) + 33 | |||
|- | |||
| style="color:inherit;" | • Sigma || style="color:inherit;" | 2.0 | |||
|- | |||
| style="color:inherit;" | • Maximum dispersion (m) || style="color:inherit;" | 104 | |||
|- | |||
| style="color:inherit;" | • Dispersion at 5 km || style="color:inherit;" | 68 | |||
|- | |||
| style="color:inherit;" | • Dispersion at 10 km || style="color:inherit;" | 102 | |||
|- | |||
| style="color:inherit;" | • Dispersion at 10.34 km || style="color:inherit;" | 104 | |||
|} | |||
</div> | |||
| | <div style="border: 2px solid rgba(212,175,55,0.8); border-radius: 3px; margin-bottom: 1em; overflow: hidden;"> | ||
{| class="wikitable" style="margin:0; color:inherit; width:100%" | |||
! style="background-color:#1a3244; color:#ffffff; font-weight:bold;" | SAP SHELL !! style="background-color:#1a3244; color:#ffffff; font-weight:bold;" | | |||
|- | |||
| style="color:inherit;" | • Name || style="color:inherit;" | 120 mm proiettili CS 1908 | |||
|- | |||
| style="color:inherit;" | • Maximum damage || style="color:inherit;" | 1300 | |||
|- | |||
| style="color:inherit;" | • Shell velocity (m/s) || style="color:inherit;" | 840 | |||
|- | |||
| style="color:inherit;" | • Shell weight (kg) || style="color:inherit;" | 22.75 | |||
|- | |||
| style="color:inherit;" | • Penetration (mm) || style="color:inherit;" | 34.2 | |||
|- | |||
| style="color:inherit;" | • Fuse time (sec) || style="color:inherit;" | 0.03 | |||
|- | |||
| style="color:inherit;" | • Ricochet start (°) || style="color:inherit;" | 60 | |||
|- | |||
| style="color:inherit;" | • Always ricochet (°) || style="color:inherit;" | 75 | |||
|- | |||
| style="color:inherit;" | • Normalisation (°) || style="color:inherit;" | 45 | |||
|- | |||
| style="color:inherit;" | • Arming threshold (mm) || style="color:inherit;" | 25 | |||
|} | |||
</div> | |||
</div></div></div> | |||
<div class="b-popup"><div class="b-popup_head js-tech-nav_head"><div><h2>Secondary Battery</h2></div><span class="b-tech-nav_arrow"></span></div><div class="b-popup_content" style="display: none;"><div> | |||
<div style="border: 2px solid rgba(212,175,55,0.8); border-radius: 3px; margin-bottom: 1em; overflow: hidden;"> | |||
{| class="wikitable" style="margin:0; color:inherit; width:100%" | |||
! style="background-color:#1a3244; color:#ffffff; font-weight:bold;" | SECONDARY BATTERY !! style="background-color:#1a3244; color:#ffffff; font-weight:bold;" | | |||
|- | |||
| style="color:inherit;" | • Secondary battery range (km) || style="color:inherit;" | 3.2 | |||
|} | |||
</div> | |||
| | <div style="border: 2px solid rgba(212,175,55,0.8); border-radius: 3px; margin-bottom: 1em; overflow: hidden;"> | ||
{| class="wikitable" style="margin:0; color:inherit; width:100%" | |||
! style="background-color:#1a3244; color:#ffffff; font-weight:bold;" | SECONDARY ARMAMENT 1 !! style="background-color:#1a3244; color:#ffffff; font-weight:bold;" | | |||
|- | |||
| style="color:inherit;" | • Shell type || style="color:inherit;" | HE | |||
|- | |||
| style="color:inherit;" | • Name || style="color:inherit;" | 76 mm proiettili HE 1909 | |||
|- | |||
| style="color:inherit;" | • Arrangement || style="color:inherit;" | 1x76mm | |||
|- | |||
| style="color:inherit;" | • Rate of fire (shots/min) || style="color:inherit;" | 10.0 | |||
|- | |||
| style="color:inherit;" | • Maximum damage || style="color:inherit;" | 1100 | |||
|- | |||
| style="color:inherit;" | • Shell velocity (m/s) || style="color:inherit;" | 815 | |||
|- | |||
| style="color:inherit;" | • Penetration (mm) || style="color:inherit;" | 13 | |||
|- | |||
| style="color:inherit;" | • Fire chance (%) || style="color:inherit;" | 4.0% | |||
|} | |||
</div> | |||
</div></div></div> | |||
<div class="b-popup"><div class="b-popup_head js-tech-nav_head"><div><h2>AA Defense</h2></div><span class="b-tech-nav_arrow"></span></div><div class="b-popup_content" style="display: none;"><div> | |||
<div style="border: 2px solid rgba(212,175,55,0.8); border-radius: 3px; margin-bottom: 1em; overflow: hidden;"> | |||
'''Nino Bixio (A)''' | |||
| | {| class="wikitable" style="margin:0 0 0.8em 0; width:100%; color:inherit;" | ||
| | ! style="background-color:#1a3244; color:#ffffff; font-weight:bold;" | AA ARMAMENT !! style="background-color:#1a3244; color:#ffffff; font-weight:bold;" | MOUNTS × BARRELS | ||
| | |- | ||
| | | style="color:inherit;" | 8 mm || style="color:inherit;" | 2 × 1 | ||
| | |} | ||
| | |||
| | '''Continuous damage''' — average DPS within each action zone | ||
{| class="wikitable" style="margin:0 0 0.8em 0; width:100%; color:inherit;" | |||
! style="background-color:#1a3244; color:#ffffff; font-weight:bold;" | RANGE !! style="background-color:#1a3244; color:#ffffff; font-weight:bold;" | DPS !! style="background-color:#1a3244; color:#ffffff; font-weight:bold;" | HIT CHANCE !! style="background-color:#1a3244; color:#ffffff; font-weight:bold;" | ACTION ZONE (km) | |||
|- | |||
| style="color:inherit;" | Short-range || style="color:inherit;" | 11 || style="color:inherit;" | 85% || style="color:inherit;" | 1.5 | |||
|} | |||
'''Nino Bixio (B)''' | |||
{| class="wikitable" style="margin:0 0 0.8em 0; width:100%; color:inherit;" | |||
! style="background-color:#1a3244; color:#ffffff; font-weight:bold;" | AA ARMAMENT !! style="background-color:#1a3244; color:#ffffff; font-weight:bold;" | MOUNTS × BARRELS | |||
|- | |||
| style="color:inherit;" | 40 mm || style="color:inherit;" | 2 × 1 | |||
|} | |||
'''Continuous damage''' — average DPS within each action zone | |||
{| class="wikitable" style="margin:0 0 0.8em 0; width:100%; color:inherit;" | |||
! style="background-color:#1a3244; color:#ffffff; font-weight:bold;" | RANGE !! style="background-color:#1a3244; color:#ffffff; font-weight:bold;" | DPS !! style="background-color:#1a3244; color:#ffffff; font-weight:bold;" | HIT CHANCE !! style="background-color:#1a3244; color:#ffffff; font-weight:bold;" | ACTION ZONE (km) | |||
|- | |||
| style="color:inherit;" | Mid-range || style="color:inherit;" | 25 || style="color:inherit;" | 90% || style="color:inherit;" | 2.5 | |||
|} | |||
</div> | |||
</div></div></div> | |||
<!-- Add the ship code here to populate the upgrade table --> | |||
{{Ship Upgrades Section|code=PISC102_Nino_Bixio}} | |||
| | |||
<!-- Consumables have to be tagged individually on a slot by slot basis --> | |||
{{Ship Consumables Section|consumables= | |||
* '''Slot 1:''' {{Damage Control Party}} (5.0s action, 60.0s cooldown) | |||
| | |||
}} | }} | ||
==Gallery== | |||
<div class="b-popup"><div class="b-popup_head js-tech-nav_head"><div><h2>WoWs Gallery</h2></div><span class="b-tech-nav_arrow"></span></div><div class="b-popup_content" style="display: none;"><div> | |||
<gallery> | |||
</gallery>[[File:NinoBixioOcean.png|400px|thumb|Nino Bixio on Ocean port.]]</div></div></div> | |||
<div class="b-popup"><div class="b-popup_head js-tech-nav_head"><div><h2>Historical Gallery</h2></div><span class="b-tech-nav_arrow"></span></div><div class="b-popup_content" style="display: none;"><div> | |||
<gallery> | |||
</gallery> | </gallery> | ||
</div></div></div> | |||
< | |||
{{WoWS Ship Changelog Insert|1= | {{WoWS Ship Changelog Insert|1= | ||
*Available for testing by supertesters in the game starting from Update 0.8.7. | *Update 0.8.7: | ||
**Available for testing by supertesters in the game starting from Update 0.8.7. | |||
* | *Update 0.8.10: | ||
**Introduced in Update 0.8.10. | |||
* | |||
*Introduced in Update 0.8.10. | |||
*Update 0.10.0: | *Update 0.10.0: | ||
**Acceleration and braking dynamics were decreased to standard values. | **Acceleration and braking dynamics were decreased to standard values. | ||
| Line 228: | Line 232: | ||
**Secondary battery maximum firing range increased to 3.2 km. | **Secondary battery maximum firing range increased to 3.2 km. | ||
*Update 0.11.1: | *Update 0.11.1: | ||
**Ricochet angles for SAP shells changed from 80-85 degrees to 60-75 degrees in an unlisted change, likely due to sharing shells with low tier Italian destroyers which had their shells changed during testing in | **Ricochet angles for SAP shells changed from 80-85 degrees to 60-75 degrees in an unlisted change, likely due to sharing shells with low tier Italian destroyers which had their shells changed during testing in . | ||
*Update 12.2: | *Update 12.2: | ||
**Maximum SAP shell damage reduced from 2,800 to 2,600. | **Maximum SAP shell damage reduced from 2,800 to 2,600. | ||
| Line 234: | Line 238: | ||
*Update 13.0: | *Update 13.0: | ||
**Fixed Commander skill recommendations for the ship. | **Fixed Commander skill recommendations for the ship. | ||
*Update 14.2: | |||
**Main Battery parameters changed: | |||
***Reload time reduced: 11 to 5.5s | |||
***Maximum SAP shell damage reduced: 2600 to 1300 | |||
***Main battery turret traverse time reduced: 22.5 to 15s | |||
***Shell ballistic parameters changed. The firing arcs will now be flatter | |||
*Update Oct 14, 2019: | |||
**Main battery reload time decreased from 13 to 12 s. | |||
*Update July 23, 2019: | |||
**Preliminary characteristics. | |||
*Update Aug 20, 2019: | |||
**Removed the 10% damage limit for semi-armor-piercing shell penetrations against destroyers. | |||
**Improved ricochet angles of semi-armor-piercing shells from 60-85 degrees to 80-85 degrees. | |||
}} | }} | ||
[[Category:Ships of Italy]] | |||
[[Category:Cruisers]] | |||
[[Category:Tier II ships]] | |||
<!-- DO NOT DELETE THIS LINE. DO NOT INSERT ANYTHING BELOW THIS LINE --> | |||
Latest revision as of 17:16, 7 August 2026

II
85,000
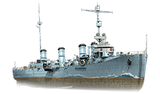
Nino Bixio — Italy Tech Tree Tier II Cruiser.
At the beginning of the 20th century, the idea of a fast scout cruiser was popular in many countries. The first ship of that kind in the Italian Navy was armored cruiser Quarto. This was followed by the Nino Bixio class—they were larger than their predecessor and had more convenient artillery arrangement. During World War I, the lead ship of the series participated in the interception of Austro-Hungarian raiders and in the defense of the Entente transports. Nino Bixio served in the Navy until the end of the 1920s.
Pros
- High rate of fire
- Low detectability
- High top speed
Cons
- Shooting accurately over long ranges is challenging
Ship Stats
Hull Information
Main Battery
Secondary Battery
AA Defense
Compatible Upgrades
| Slot 1 |
 |
 |

|
|---|
Consumables
- Slot 1: Damage Control Party
 (5.0s action, 60.0s cooldown)
Gallery
WoWs Gallery

Historical Gallery
Ship Change Log
Categories:
