Ship:Adatara
imported>HasteMakesWaste:na 13.3 |
WarshipFoxy (talk | contribs) No edit summary |
||
| (3 intermediate revisions by 3 users not shown) | |||
| Line 1: | Line 1: | ||
{{#vardefine:ship_name|Adatara}} | |||
__NOTOC____NOEDITSECTION__ | |||
| | <div class="b-description gw-frame-1"><div class="b-description-img b-description-img__indent b-description-img__single"><div style="width:160px; height:102px; opacity:.5; border-radius:2px; position:absolute; left:0; top:0; z-index:1; -webkit-transition:all 0.2s ease-out 0.1s; transition:all 0.2s ease-out 0.1s;">[[File:Wows_anno_flag_japan.png|160px]]</div><div class="l-description-img_class"><span class="b-description-img_type b-description-img_type__Battleship b-description-img_type__Battleship-Tech Tree"></span><span class="b-description-img_class">IX</span></div><div class="b-description-img_vehicle">[[File:Ship_PJSB209_Adatara.png|160px|link=|left]]</div><div class="l-description-img_price"><span class="b-description-img_price b-description-img_price__gold"><span title="''{{#var:ship_name}}'' was first released for sale on DD Month YYYY.">15,500,000</span></span></div></div><p>[[Ship:{{#var:ship_name}}|{{#var:ship_name}}]] — Japan Tech Tree Tier IX [[Ship:Battleship|Battleship]].</p><p>Following the announcement of an ambitious shipbuilding program by the U.S. in 1919, Japan reconsidered the plans for the development of its Navy and gave the order to build four more battleships and four more battlecruisers. Thirteen variants of battleships and battlecruisers were presented. Project A was selected to become the Kii-class battleship, and Project K was used for the battlecruiser. Construction was meant to start in 1922, but the battlecruisers were never laid down in the aftermath of the Washington Naval Conference.</p><p> </p></div> | ||
===Pros=== | |||
* Low Concealment | |||
* Access to High-Precision Spotter plane consumable | |||
* High firing accuracy | |||
* Long firing range | |||
===Cons=== | |||
* Small HP pool | |||
* Weak armor | |||
* | |||
* | |||
| | ==Ship Stats== | ||
<!-- | <div class="b-popup"><div class="b-popup_head js-tech-nav_head"><div><h2>Hull Information</h2></div><span class="b-tech-nav_arrow"></span></div><div class="b-popup_content" style="display: none;"><div> | ||
<div style="border: 2px solid rgba(212,175,55,0.8); border-radius: 3px; margin-bottom: 1em; overflow: hidden;"> | |||
# | {| class="wikitable" style="margin:0; color:inherit; width:100%" | ||
! style="background-color:#1a3244; color:#ffffff; font-weight:bold;" | SURVIVABILITY !! style="background-color:#1a3244; color:#ffffff; font-weight:bold;" | Adatara (A) !! style="background-color:#1a3244; color:#ffffff; font-weight:bold;" | Adatara (B) | |||
|- | |||
| style="color:inherit;" | • Hit Points || style="color:inherit;" | 65400 || style="color:inherit;" | 71100 | |||
|- | |||
| style="color:inherit;" | • Torpedo protection damage reduction (%) || colspan="2" style="color:inherit;" | 29 | |||
|} | |||
</div> | |||
<div style="border: 2px solid rgba(212,175,55,0.8); border-radius: 3px; margin-bottom: 1em; overflow: hidden;"> | |||
{| class="wikitable" style="margin:0; color:inherit; width:100%" | |||
! style="background-color:#1a3244; color:#ffffff; font-weight:bold;" | ARMOR DETAIL !! style="background-color:#1a3244; color:#ffffff; font-weight:bold;" | | |||
|- | |||
| style="color:inherit;" | • Belt (mm) || style="color:inherit;" | 305 | |||
|- | |||
| style="color:inherit;" | • Deck (mm) || style="color:inherit;" | 57 | |||
|- | |||
| style="color:inherit;" | • Superstructure (mm) || style="color:inherit;" | 19 | |||
|- | |||
| style="color:inherit;" | • Extremities (mm) || style="color:inherit;" | 25 | |||
|} | |||
</div> | |||
<div style="border: 2px solid rgba(212,175,55,0.8); border-radius: 3px; margin-bottom: 1em; overflow: hidden;"> | |||
{| class="wikitable" style="margin:0; color:inherit; width:100%" | |||
! style="background-color:#1a3244; color:#ffffff; font-weight:bold;" | MANEUVERABILITY !! style="background-color:#1a3244; color:#ffffff; font-weight:bold;" | Adatara (A) !! style="background-color:#1a3244; color:#ffffff; font-weight:bold;" | Adatara (B) | |||
|- | |||
| style="color:inherit;" | • Maximum speed (kt) || style="color:inherit;" | 30.0 || style="color:inherit;" | 30.0 | |||
|- | |||
| style="color:inherit;" | • Turning circle radius (m) || style="color:inherit;" | 880 || style="color:inherit;" | 880 | |||
|- | |||
| style="color:inherit;" | • Rudder-shift time (sec) || style="color:inherit;" | 22.7 || style="color:inherit;" | 16.2 | |||
|} | |||
</div> | |||
<div style="border: 2px solid rgba(212,175,55,0.8); border-radius: 3px; margin-bottom: 1em; overflow: hidden;"> | |||
{| class="wikitable" style="margin:0; color:inherit; width:100%" | |||
! style="background-color:#1a3244; color:#ffffff; font-weight:bold;" | CONCEALMENT !! style="background-color:#1a3244; color:#ffffff; font-weight:bold;" | Adatara (A) !! style="background-color:#1a3244; color:#ffffff; font-weight:bold;" | Adatara (B) | |||
|- | |||
| style="color:inherit;" | • Detectability by sea (km) || style="color:inherit;" | 15.01 || style="color:inherit;" | 15.01 | |||
|- | |||
| style="color:inherit;" | • Detectability by air (km) || style="color:inherit;" | 10.0 || style="color:inherit;" | 10.0 | |||
|- | |||
| style="color:inherit;" | • Detectability after firing main guns in smoke (km) || colspan="2" style="color:inherit;" | 16.51 | |||
|- | |||
| style="color:inherit;" | • Detectability by depths (km) || style="color:inherit;" | 10.0 || style="color:inherit;" | 10.0 | |||
|} | |||
</div> | |||
| | </div></div></div> | ||
<div class="b-popup"><div class="b-popup_head js-tech-nav_head"><div><h2>Main Battery</h2></div><span class="b-tech-nav_arrow"></span></div><div class="b-popup_content" style="display: none;"><div><div style="border: 2px solid rgba(212,175,55,0.8); border-radius: 3px; margin-bottom: 1em; overflow: hidden;"> | |||
{| class="wikitable" style="margin:0; color:inherit; width:100%" | |||
! style="background-color:#1a3244; color:#ffffff; font-weight:bold;" | MAIN BATTERY !! style="background-color:#1a3244; color:#ffffff; font-weight:bold;" | Type9 mod. 1 !! style="background-color:#1a3244; color:#ffffff; font-weight:bold;" | Type9 mod. 2 | |||
|- | |||
| style="color:inherit;" | • Arrangement || colspan="2" style="color:inherit;" | 4×2 457mm | |||
|- | |||
| style="color:inherit;" | • Firing range (km) || style="color:inherit;" | 21.75 || style="color:inherit;" | 23.93 | |||
|- | |||
| style="color:inherit;" | • Reload time (sec) || colspan="2" style="color:inherit;" | 30.0 | |||
|- | |||
| style="color:inherit;" | • Rate of fire (shots/min) || colspan="2" style="color:inherit;" | 2 | |||
|- | |||
| style="color:inherit;" | • 180° turn time (sec) || colspan="2" style="color:inherit;" | 45.0 | |||
|} | |||
</div> | |||
| | <div style="border: 2px solid rgba(212,175,55,0.8); border-radius: 3px; margin-bottom: 1em; overflow: hidden;"> | ||
{| class="wikitable" style="margin:0; color:inherit; width:100%" | |||
! style="background-color:#1a3244; color:#ffffff; font-weight:bold;" | DISPERSION !! style="background-color:#1a3244; color:#ffffff; font-weight:bold;" | | |||
|- | |||
| style="color:inherit;" | • Dispersion type || style="color:inherit;" | IJN BB dispersion | |||
|- | |||
| style="color:inherit;" | • Dispersion formula || style="color:inherit;" | Dispersion (m) = 7.2 × range(km) + 84 | |||
|- | |||
| style="color:inherit;" | • Sigma || style="color:inherit;" | 2.1 | |||
|- | |||
| style="color:inherit;" | • Maximum dispersion (m) || style="color:inherit;" | 240 | |||
|- | |||
| style="color:inherit;" | • Dispersion at 5 km || style="color:inherit;" | 120 | |||
|- | |||
| style="color:inherit;" | • Dispersion at 10 km || style="color:inherit;" | 156 | |||
|- | |||
| style="color:inherit;" | • Dispersion at 15 km || style="color:inherit;" | 192 | |||
|- | |||
| style="color:inherit;" | • Dispersion at 20 km || style="color:inherit;" | 228 | |||
|- | |||
| style="color:inherit;" | • Dispersion at 21.75 km || style="color:inherit;" | 241 | |||
|} | |||
</div> | |||
<div style="border: 2px solid rgba(212,175,55,0.8); border-radius: 3px; margin-bottom: 1em; overflow: hidden;"> | |||
{| class="wikitable" style="margin:0; color:inherit; width:100%" | |||
! style="background-color:#1a3244; color:#ffffff; font-weight:bold;" | HE SHELL !! style="background-color:#1a3244; color:#ffffff; font-weight:bold;" | | |||
|- | |||
| style="color:inherit;" | • Name || style="color:inherit;" | 457 mm HE Type0 | |||
|- | |||
| style="color:inherit;" | • Maximum damage || style="color:inherit;" | 7300 | |||
|- | |||
| style="color:inherit;" | • Fire chance (%) || style="color:inherit;" | 35.0% | |||
|- | |||
| style="color:inherit;" | • Shell velocity (m/s) || style="color:inherit;" | 860 | |||
|- | |||
| style="color:inherit;" | • Shell weight (kg) || style="color:inherit;" | 1130 | |||
|- | |||
| style="color:inherit;" | • Penetration (mm) || style="color:inherit;" | 77 | |||
|} | |||
</div> | |||
| | <div style="border: 2px solid rgba(212,175,55,0.8); border-radius: 3px; margin-bottom: 1em; overflow: hidden;"> | ||
| | {| class="wikitable" style="margin:0; color:inherit; width:100%" | ||
| | ! style="background-color:#1a3244; color:#ffffff; font-weight:bold;" | AP SHELL !! style="background-color:#1a3244; color:#ffffff; font-weight:bold;" | | ||
|- | |||
| style="color:inherit;" | • Name || style="color:inherit;" | 457 mm AP/APC Type91 | |||
| | |- | ||
| style="color:inherit;" | • Maximum damage || style="color:inherit;" | 13500 | |||
|- | |||
| style="color:inherit;" | • Shell velocity (m/s) || style="color:inherit;" | 860 | |||
|- | |||
| style="color:inherit;" | • Shell weight (kg) || style="color:inherit;" | 1130 | |||
|- | |||
| style="color:inherit;" | • Fuse time (sec) || style="color:inherit;" | 0.033 | |||
|- | |||
| style="color:inherit;" | • Ricochet start (°) || style="color:inherit;" | 45 | |||
|- | |||
| style="color:inherit;" | • Always ricochet (°) || style="color:inherit;" | 60 | |||
|- | |||
| style="color:inherit;" | • Normalisation (°) || style="color:inherit;" | 6 | |||
|- | |||
| style="color:inherit;" | • Arming threshold (mm) || style="color:inherit;" | 76 | |||
|} | |||
</div> | |||
</div></div></div> | |||
<div class="b-popup"><div class="b-popup_head js-tech-nav_head"><div><h2>Secondary Battery</h2></div><span class="b-tech-nav_arrow"></span></div><div class="b-popup_content" style="display: none;"><div> | |||
<div style="border: 2px solid rgba(212,175,55,0.8); border-radius: 3px; margin-bottom: 1em; overflow: hidden;"> | |||
{| class="wikitable" style="margin:0; color:inherit; width:100%" | |||
! style="background-color:#1a3244; color:#ffffff; font-weight:bold;" | SECONDARY BATTERY !! style="background-color:#1a3244; color:#ffffff; font-weight:bold;" | | |||
|- | |||
| style="color:inherit;" | • Secondary battery range (km) || style="color:inherit;" | 7.0 | |||
|} | |||
</div> | |||
<div style="border: 2px solid rgba(212,175,55,0.8); border-radius: 3px; margin-bottom: 1em; overflow: hidden;"> | |||
| | {| class="wikitable" style="margin:0; color:inherit; width:100%" | ||
| | ! style="background-color:#1a3244; color:#ffffff; font-weight:bold;" | SECONDARY ARMAMENT 1 !! style="background-color:#1a3244; color:#ffffff; font-weight:bold;" | | ||
| | |- | ||
| | | style="color:inherit;" | • Shell type || style="color:inherit;" | HE | ||
| | |- | ||
| style="color:inherit;" | • Name || style="color:inherit;" | 140 mm HE Type0 | |||
|- | |||
| style="color:inherit;" | • Arrangement || style="color:inherit;" | 12x1 140mm | |||
|- | |||
| style="color:inherit;" | • Rate of fire (shots/min) || style="color:inherit;" | 7.5 | |||
|- | |||
| style="color:inherit;" | • Maximum damage || style="color:inherit;" | 2400 | |||
|- | |||
| style="color:inherit;" | • Shell velocity (m/s) || style="color:inherit;" | 850 | |||
|- | |||
| style="color:inherit;" | • Penetration (mm) || style="color:inherit;" | 23 | |||
|- | |||
| style="color:inherit;" | • Fire chance (%) || style="color:inherit;" | 10.0% | |||
|} | |||
</div> | |||
| | <div style="border: 2px solid rgba(212,175,55,0.8); border-radius: 3px; margin-bottom: 1em; overflow: hidden;"> | ||
| | {| class="wikitable" style="margin:0; color:inherit; width:100%" | ||
! style="background-color:#1a3244; color:#ffffff; font-weight:bold;" | SECONDARY ARMAMENT 2 !! style="background-color:#1a3244; color:#ffffff; font-weight:bold;" | | |||
| | |- | ||
| | | style="color:inherit;" | • Shell type || style="color:inherit;" | HE | ||
|- | |||
| style="color:inherit;" | • Name || style="color:inherit;" | 100 mm HE Type 98 | |||
|- | |||
| style="color:inherit;" | • Arrangement || style="color:inherit;" | 6x2 100mm | |||
|- | |||
| style="color:inherit;" | • Rate of fire (shots/min) || style="color:inherit;" | 21.0 | |||
|- | |||
| style="color:inherit;" | • Maximum damage || style="color:inherit;" | 1700 | |||
|- | |||
| style="color:inherit;" | • Shell velocity (m/s) || style="color:inherit;" | 1000 | |||
|- | |||
| style="color:inherit;" | • Penetration (mm) || style="color:inherit;" | 30 | |||
|- | |||
| style="color:inherit;" | • Fire chance (%) || style="color:inherit;" | 6.0% | |||
|} | |||
</div> | |||
</div></div></div> | |||
<div class="b-popup"><div class="b-popup_head js-tech-nav_head"><div><h2>Airstrike</h2></div><span class="b-tech-nav_arrow"></span></div><div class="b-popup_content" style="display: none;"><div> | |||
<div style="border: 2px solid rgba(212,175,55,0.8); border-radius: 3px; margin-bottom: 1em; overflow: hidden;"> | |||
{| class="wikitable" style="margin:0; color:inherit; width:100%" | |||
! style="background-color:#1a3244; color:#ffffff; font-weight:bold;" | ASW AIRSTRIKE (DEPTH CHARGES) !! style="background-color:#1a3244; color:#ffffff; font-weight:bold;" | | |||
|- | |||
| style="color:inherit;" | • Range (km) || style="color:inherit;" | 10 | |||
|- | |||
| style="color:inherit;" | • Minimum range (km) || style="color:inherit;" | 0.5 | |||
|- | |||
| style="color:inherit;" | • Reload time (sec) || style="color:inherit;" | 30.0 | |||
|- | |||
| style="color:inherit;" | • Number of aircraft || style="color:inherit;" | 1 | |||
|- | |||
| style="color:inherit;" | • Depth charges in payload || style="color:inherit;" | 2 | |||
|- | |||
| style="color:inherit;" | • Damage || style="color:inherit;" | 4200 | |||
|- | |||
| style="color:inherit;" | • Deployment || style="color:inherit;" | Manual | |||
|} | |||
</div> | |||
</div></div></div> | |||
<div class="b-popup"><div class="b-popup_head js-tech-nav_head"><div><h2>AA Defense</h2></div><span class="b-tech-nav_arrow"></span></div><div class="b-popup_content" style="display: none;"><div> | |||
<div style="border: 2px solid rgba(212,175,55,0.8); border-radius: 3px; margin-bottom: 1em; overflow: hidden;"> | |||
'''Adatara (A)''' | |||
{| class="wikitable" style="margin:0 0 0.8em 0; width:100%; color:inherit;" | |||
! style="background-color:#1a3244; color:#ffffff; font-weight:bold;" | AA ARMAMENT !! style="background-color:#1a3244; color:#ffffff; font-weight:bold;" | MOUNTS × BARRELS | |||
|- | |||
| style="color:inherit;" | 100 mm || style="color:inherit;" | 6 × 2 | |||
|- | |||
| style="color:inherit;" | 40 mm || style="color:inherit;" | 6 × 2 | |||
|- | |||
| style="color:inherit;" | 25 mm || style="color:inherit;" | 6 × 3 + 25 × 1 | |||
|} | |||
| | '''Continuous damage''' — average DPS within each action zone | ||
{| class="wikitable" style="margin:0 0 0.8em 0; width:100%; color:inherit;" | |||
! style="background-color:#1a3244; color:#ffffff; font-weight:bold;" | RANGE !! style="background-color:#1a3244; color:#ffffff; font-weight:bold;" | DPS !! style="background-color:#1a3244; color:#ffffff; font-weight:bold;" | HIT CHANCE !! style="background-color:#1a3244; color:#ffffff; font-weight:bold;" | ACTION ZONE (km) | |||
|- | |||
| style="color:inherit;" | Short-range || style="color:inherit;" | 136.5 || style="color:inherit;" | 85% || style="color:inherit;" | 2.5 | |||
|- | |||
| style="color:inherit;" | Mid-range || style="color:inherit;" | 119 || style="color:inherit;" | 75% || style="color:inherit;" | 3.5 | |||
|- | |||
| style="color:inherit;" | Long-range || style="color:inherit;" | 150.5 || style="color:inherit;" | 75% || style="color:inherit;" | 5.8 | |||
|} | |||
'''Damage by shell explosions''' | |||
{| class="wikitable" style="margin:0 0 0.8em 0; width:100%; color:inherit;" | |||
! style="background-color:#1a3244; color:#ffffff; font-weight:bold;" | EXPLOSIONS / SALVO !! style="background-color:#1a3244; color:#ffffff; font-weight:bold;" | DAMAGE !! style="background-color:#1a3244; color:#ffffff; font-weight:bold;" | HIT CHANCE !! style="background-color:#1a3244; color:#ffffff; font-weight:bold;" | ACTION ZONE (km) | |||
|- | |||
| style="color:inherit;" | 6 || style="color:inherit;" | 1470 || style="color:inherit;" | 75% || style="color:inherit;" | 3.5–5.8 | |||
|} | |||
'''Adatara (B)''' | |||
| | {| class="wikitable" style="margin:0 0 0.8em 0; width:100%; color:inherit;" | ||
! style="background-color:#1a3244; color:#ffffff; font-weight:bold;" | AA ARMAMENT !! style="background-color:#1a3244; color:#ffffff; font-weight:bold;" | MOUNTS × BARRELS | |||
|- | |||
| style="color:inherit;" | 100 mm || style="color:inherit;" | 6 × 2 | |||
|- | |||
| style="color:inherit;" | 40 mm || style="color:inherit;" | 12 × 2 | |||
|- | |||
| style="color:inherit;" | 25 mm || style="color:inherit;" | 10 × 3 + 15 × 1 | |||
|} | |||
{ | '''Continuous damage''' — average DPS within each action zone | ||
{| class="wikitable" style="margin:0 0 0.8em 0; width:100%; color:inherit;" | |||
| | ! style="background-color:#1a3244; color:#ffffff; font-weight:bold;" | RANGE !! style="background-color:#1a3244; color:#ffffff; font-weight:bold;" | DPS !! style="background-color:#1a3244; color:#ffffff; font-weight:bold;" | HIT CHANCE !! style="background-color:#1a3244; color:#ffffff; font-weight:bold;" | ACTION ZONE (km) | ||
| | |- | ||
| | | style="color:inherit;" | Short-range || style="color:inherit;" | 122.5 || style="color:inherit;" | 85% || style="color:inherit;" | 2.5 | ||
| | |- | ||
| | | style="color:inherit;" | Mid-range || style="color:inherit;" | 231 || style="color:inherit;" | 75% || style="color:inherit;" | 3.5 | ||
| | |- | ||
| style="color:inherit;" | Long-range || style="color:inherit;" | 150.5 || style="color:inherit;" | 75% || style="color:inherit;" | 5.8 | |||
|} | |||
| | '''Damage by shell explosions''' | ||
| | {| class="wikitable" style="margin:0 0 0.8em 0; width:100%; color:inherit;" | ||
| | ! style="background-color:#1a3244; color:#ffffff; font-weight:bold;" | EXPLOSIONS / SALVO !! style="background-color:#1a3244; color:#ffffff; font-weight:bold;" | DAMAGE !! style="background-color:#1a3244; color:#ffffff; font-weight:bold;" | HIT CHANCE !! style="background-color:#1a3244; color:#ffffff; font-weight:bold;" | ACTION ZONE (km) | ||
| | |- | ||
| style="color:inherit;" | 6 || style="color:inherit;" | 1470 || style="color:inherit;" | 75% || style="color:inherit;" | 3.5–5.8 | |||
|} | |||
</div> | |||
</div></div></div> | |||
<!-- Add the ship code here to populate the upgrade table --> | |||
{{Ship Upgrades Section|code=PJSB209_Adatara}} | |||
<!-- Consumables have to be tagged individually on a slot by slot basis --> | |||
{{Ship Consumables Section|consumables= | |||
{{ | * '''Slot 1:''' {{Damage Control Party}} (10.0s action, 80.0s cooldown) | ||
* '''Slot 2:''' {{Repair Party}} (4 charges, 28.0s action, 80.0s cooldown, 327 hp/s) | |||
* '''Slot 3:''' {{Spotting Aircraft}} (5 charges, 55.0s action, 120.0s cooldown) '''or''' {{Patrol Fighter}} (3 charges, 60.0s action, 90.0s cooldown) | |||
: | |||
: | |||
}} | }} | ||
==Gallery== | |||
<div class="b-popup"><div class="b-popup_head js-tech-nav_head"><div><h2>WoWs Gallery</h2></div><span class="b-tech-nav_arrow"></span></div>[[File:adatara_EA.png|400px]]<div class="b-popup_content" style="display: none;"><div> | |||
<gallery> | |||
</gallery> | </gallery> | ||
</div></div></div> | |||
<div class="b-popup"><div class="b-popup_head js-tech-nav_head"><div><h2>Historical Gallery</h2></div><span class="b-tech-nav_arrow"></span></div><div class="b-popup_content" style="display: none;"><div> | |||
<gallery> | |||
< | </gallery> | ||
</div></div></div> | |||
{{WoWS Ship Changelog Insert|1= | {{WoWS Ship Changelog Insert|1= | ||
*Preliminary characteristics. | |||
*Sigma value reduced from 2.2 to 2.1. | |||
*Changed the accuracy of 100 mm secondary guns and now it will be more similar to Japanese battleships. | |||
*Changed characteristics of the Spotting Aircraft with high-precision optics — Bonus to maximum main battery shell dispersion decreased from -20% to -10%. — Consumable action time decreased from 65 to 55 s. | |||
*Update 12.7: | |||
**Available for testing by supertesters in the game starting from Update 12.7. | |||
*Update 12.9: | *Update 12.9: | ||
**Available from sequential bundle #5 of the Japanese Battleships event (for Japanese Tokens). | **Available from sequential bundle #5 of the Japanese Battleships event (for Japanese Tokens). | ||
**The Kuraokami permanent camouflage was added. | **The Kuraokami permanent camouflage was added. | ||
*Added to the game as a researchable ship in Update 12.11. | *Update 12.11: | ||
**Added to the game as a researchable ship in Update 12.11. | |||
*Update 13.3: | *Update 13.3: | ||
**Fixed textures and geometry for the New Year permanent camouflage for the ship. | **Fixed textures and geometry for the New Year permanent camouflage for the ship. | ||
*Update 14.0: | |||
**HE shell ballistic parameters changed. This will result in the flight trajectory becoming flatter, identical to that of the AP shells of the ships. | |||
}} | }} | ||
[[Category:Ships of Japan]] | |||
[[Category:Battleships]] | |||
[[Category:Tier IX ships]] | |||
<!-- DO NOT DELETE THIS LINE. DO NOT INSERT ANYTHING BELOW THIS LINE --> | |||
Latest revision as of 15:13, 1 August 2026

IX
15,500,000
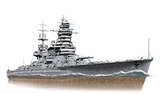
Adatara — Japan Tech Tree Tier IX Battleship.
Following the announcement of an ambitious shipbuilding program by the U.S. in 1919, Japan reconsidered the plans for the development of its Navy and gave the order to build four more battleships and four more battlecruisers. Thirteen variants of battleships and battlecruisers were presented. Project A was selected to become the Kii-class battleship, and Project K was used for the battlecruiser. Construction was meant to start in 1922, but the battlecruisers were never laid down in the aftermath of the Washington Naval Conference.
Pros
- Low Concealment
- Access to High-Precision Spotter plane consumable
- High firing accuracy
- Long firing range
Cons
- Small HP pool
- Weak armor
Ship Stats
Hull Information
Main Battery
Secondary Battery
Airstrike
AA Defense
Compatible Upgrades
| Slot 1 |
 |
 |
 |

|
|---|---|---|---|---|
| Slot 2 |
 |

| ||
| Slot 3 |
 |
 |
 |

|
| Slot 4 |
 |
 |
 |

|
| Slot 5 |
 |
 |

| |
| Slot 6 |
 |
 |

|
Consumables
- Slot 1: Damage Control Party
 (10.0s action, 80.0s cooldown)
 - Slot 2: Repair Party
 (4 charges, 28.0s action, 80.0s cooldown, 327 hp/s)
 - Slot 3: Spotting Aircraft
 (5 charges, 55.0s action, 120.0s cooldown) or Patrol Fighter
  (3 charges, 60.0s action, 90.0s cooldown)
Gallery
WoWs Gallery

Historical Gallery
Ship Change Log
Categories:
