Ship:Chungking
imported>SirDixie:eu m Protected "Ship:Chungking" ([Edit=Allow only administrators] (indefinite) [Move=Allow only administrators] (indefinite)) |
Pockington (talk | contribs) fixed rudder shift, torpedo stats, incorrect flak info on both hulls, and ASW charge count |
||
| (3 intermediate revisions by 2 users not shown) | |||
| Line 1: | Line 1: | ||
{{#vardefine:ship_name|Chungking}} | |||
__NOTOC____NOEDITSECTION__ | |||
{{ | |||
| | |||
<div class="b-description gw-frame-1"><div class="b-description-img b-description-img__indent b-description-img__single"><div style="width:160px; height:102px; opacity:.5; border-radius:2px; position:absolute; left:0; top:0; z-index:1; -webkit-transition:all 0.2s ease-out 0.1s; transition:all 0.2s ease-out 0.1s;">[[File:Wows_anno_flag_pan_asia.png|160px]]</div><div class="l-description-img_class"><span class="b-description-img_type b-description-img_type__Cruiser b-description-img_type__Cruiser-Tech Tree"></span><span class="b-description-img_class">V</span></div><div class="b-description-img_vehicle">[[File:Ship_PZSC105_Chung_King.png|160px|link=|left]]</div><div class="l-description-img_price"><span class="b-description-img_price b-description-img_price__gold"><span title="''{{#var:ship_name}}'' was first released for sale on DD Month YYYY.">1,350,000</span></span></div></div><p>[[Ship:{{#var:ship_name}}|{{#var:ship_name}}]] — Pan-Asia Tech Tree Tier V [[Ship:Cruiser|Cruiser]].</p><p>HMS Aurora, a British Arethusa-class light cruiser, was built in Portsmouth between 1935 and 1937. The ship participated in the Norwegian campaign and the hunt for Bismarck, intercepted Italian convoys in the Mediterranean, and covered the landings of Allied forces in Africa, Sicily, and France. In 1948, the cruiser was transferred to the Republic of China Navy, where she received the name Chungking and was made their flagship. On February 25, 1949, the cruiser and her entire crew sided with the Communist Party of China, but a month later, the ship was sunk by Kuomintang aviation. After the civil war, the cruiser was raised, but plans to repair and upgrade her were never implemented.</p><p> </p></div> | |||
< | |||
===Pros=== | |||
* Great damage and long range Deepwater torpedoes. | |||
* Smoke screen generator available | |||
* Good rate of fire for the tier. | |||
===Cons=== | |||
* Weak armor plating. | |||
* Shooting accurately over long ranges is challenging due to shell arcs. | |||
* HE shells do low damage and have low armor penetration. | |||
==Ship Stats== | |||
<div class="b-popup"><div class="b-popup_head js-tech-nav_head"><div><h2>Hull Information</h2></div><span class="b-tech-nav_arrow"></span></div><div class="b-popup_content" style="display: none;"><div> | |||
<div style="border: 2px solid rgba(212,175,55,0.8); border-radius: 3px; margin-bottom: 1em; overflow: hidden;"> | |||
{| class="wikitable" style="margin:0; color:inherit; width:100%" | |||
! style="background-color:#1a3244; color:#ffffff; font-weight:bold;" | SURVIVABILITY !! style="background-color:#1a3244; color:#ffffff; font-weight:bold;" | Chungking (A) !! style="background-color:#1a3244; color:#ffffff; font-weight:bold;" | Chungking (B) | |||
|- | |||
| style="color:inherit;" | • Hit Points || style="color:inherit;" | 20100 || style="color:inherit;" | 22600 | |||
|- | |||
| style="color:inherit;" | • Torpedo protection damage reduction (%) || colspan="2" style="color:inherit;" | 4 | |||
|} | |||
</div> | |||
<div style="border: 2px solid rgba(212,175,55,0.8); border-radius: 3px; margin-bottom: 1em; overflow: hidden;"> | |||
{| class="wikitable" style="margin:0; color:inherit; width:100%" | |||
! style="background-color:#1a3244; color:#ffffff; font-weight:bold;" | ARMOR DETAIL !! style="background-color:#1a3244; color:#ffffff; font-weight:bold;" | | |||
|- | |||
| style="color:inherit;" | • Belt (mm) || style="color:inherit;" | 70 | |||
|- | |||
| style="color:inherit;" | • Deck (mm) || style="color:inherit;" | 25 | |||
|- | |||
| style="color:inherit;" | • Superstructure (mm) || style="color:inherit;" | 10 | |||
|- | |||
| style="color:inherit;" | • Extremities (mm) || style="color:inherit;" | 13 | |||
|} | |||
</div> | |||
< | <div style="border: 2px solid rgba(212,175,55,0.8); border-radius: 3px; margin-bottom: 1em; overflow: hidden;"> | ||
{| class="wikitable" style="margin:0; color:inherit; width:100%" | |||
! style="background-color:#1a3244; color:#ffffff; font-weight:bold;" | MANEUVERABILITY !! style="background-color:#1a3244; color:#ffffff; font-weight:bold;" | Chungking (A) !! style="background-color:#1a3244; color:#ffffff; font-weight:bold;" | Chungking (B) | |||
|- | |||
| style="color:inherit;" | • Maximum speed (kt) || style="color:inherit;" | 32.2 || style="color:inherit;" | 32.2 | |||
|- | |||
| style="color:inherit;" | • Turning circle radius (m) || style="color:inherit;" | 570 || style="color:inherit;" | 570 | |||
|- | |||
| style="color:inherit;" | • Rudder-shift time (sec) || style="color:inherit;" | 9.0 || style="color:inherit;" | 6.4 | |||
|} | |||
</div> | |||
Chungking | <div style="border: 2px solid rgba(212,175,55,0.8); border-radius: 3px; margin-bottom: 1em; overflow: hidden;"> | ||
{| class="wikitable" style="margin:0; color:inherit; width:100%" | |||
! style="background-color:#1a3244; color:#ffffff; font-weight:bold;" | CONCEALMENT !! style="background-color:#1a3244; color:#ffffff; font-weight:bold;" | Chungking (A) !! style="background-color:#1a3244; color:#ffffff; font-weight:bold;" | Chungking (B) | |||
|- | |||
| style="color:inherit;" | • Detectability by sea (km) || style="color:inherit;" | 9.96 || style="color:inherit;" | 9.96 | |||
|- | |||
| style="color:inherit;" | • Detectability by air (km) || style="color:inherit;" | 6.44 || style="color:inherit;" | 6.44 | |||
|- | |||
| style="color:inherit;" | • Detectability after firing main guns in smoke (km) || colspan="2" style="color:inherit;" | 4.6 | |||
|- | |||
| style="color:inherit;" | • Detectability by depths (km) || style="color:inherit;" | 6.44 || style="color:inherit;" | 6.44 | |||
|} | |||
</div> | |||
< | </div></div></div> | ||
<div class="b-popup"><div class="b-popup_head js-tech-nav_head"><div><h2>Main Battery</h2></div><span class="b-tech-nav_arrow"></span></div><div class="b-popup_content" style="display: none;"><div><div style="border: 2px solid rgba(212,175,55,0.8); border-radius: 3px; margin-bottom: 1em; overflow: hidden;"> | |||
{| class="wikitable" style="margin:0; color:inherit; width:100%" | |||
! style="background-color:#1a3244; color:#ffffff; font-weight:bold;" | MAIN BATTERY !! style="background-color:#1a3244; color:#ffffff; font-weight:bold;" | Mk V mod. 1 !! style="background-color:#1a3244; color:#ffffff; font-weight:bold;" | Mk V mod. 2 | |||
|- | |||
| style="color:inherit;" | • Arrangement || colspan="2" style="color:inherit;" | 3×2 152mm | |||
|- | |||
| style="color:inherit;" | • Firing range (km) || style="color:inherit;" | 11.82 || style="color:inherit;" | 13.0 | |||
|- | |||
| style="color:inherit;" | • Reload time (sec) || colspan="2" style="color:inherit;" | 6.5 | |||
|- | |||
| style="color:inherit;" | • Rate of fire (shots/min) || colspan="2" style="color:inherit;" | 9.2 | |||
|- | |||
| style="color:inherit;" | • 180° turn time (sec) || colspan="2" style="color:inherit;" | 18.0 | |||
|} | |||
</div> | |||
<div style="border: 2px solid rgba(212,175,55,0.8); border-radius: 3px; margin-bottom: 1em; overflow: hidden;"> | |||
{| class="wikitable" style="margin:0; color:inherit; width:100%" | |||
! style="background-color:#1a3244; color:#ffffff; font-weight:bold;" | DISPERSION !! style="background-color:#1a3244; color:#ffffff; font-weight:bold;" | | |||
|- | |||
| style="color:inherit;" | • Dispersion type || style="color:inherit;" | Standard CA/CL dispersion | |||
|- | |||
| style="color:inherit;" | • Dispersion formula || style="color:inherit;" | Dispersion (m) = 6.9 × range(km) + 33 | |||
|- | |||
| style="color:inherit;" | • Sigma || style="color:inherit;" | 2.0 | |||
|- | |||
| style="color:inherit;" | • Maximum dispersion (m) || style="color:inherit;" | 114 | |||
|- | |||
| style="color:inherit;" | • Dispersion at 5 km || style="color:inherit;" | 68 | |||
|- | |||
| style="color:inherit;" | • Dispersion at 10 km || style="color:inherit;" | 102 | |||
|- | |||
| style="color:inherit;" | • Dispersion at 11.82 km || style="color:inherit;" | 115 | |||
|} | |||
</div> | |||
<div style="border: 2px solid rgba(212,175,55,0.8); border-radius: 3px; margin-bottom: 1em; overflow: hidden;"> | |||
{| class="wikitable" style="margin:0; color:inherit; width:100%" | |||
! style="background-color:#1a3244; color:#ffffff; font-weight:bold;" | HE SHELL !! style="background-color:#1a3244; color:#ffffff; font-weight:bold;" | | |||
|- | |||
| style="color:inherit;" | • Name || style="color:inherit;" | 152 mm HE 6crh Mk IV | |||
|- | |||
| style="color:inherit;" | • Maximum damage || style="color:inherit;" | 1450 | |||
|- | |||
| style="color:inherit;" | • Fire chance (%) || style="color:inherit;" | 9.0% | |||
|- | |||
| style="color:inherit;" | • Shell velocity (m/s) || style="color:inherit;" | 841 | |||
|- | |||
| style="color:inherit;" | • Shell weight (kg) || style="color:inherit;" | 50.8 | |||
|- | |||
| style="color:inherit;" | • Penetration (mm) || style="color:inherit;" | 25 | |||
|} | |||
</div> | |||
< | <div style="border: 2px solid rgba(212,175,55,0.8); border-radius: 3px; margin-bottom: 1em; overflow: hidden;"> | ||
{| class="wikitable" style="margin:0; color:inherit; width:100%" | |||
! style="background-color:#1a3244; color:#ffffff; font-weight:bold;" | AP SHELL !! style="background-color:#1a3244; color:#ffffff; font-weight:bold;" | | |||
|- | |||
| style="color:inherit;" | • Name || style="color:inherit;" | 152 mm AP 6crh Mk IV | |||
|- | |||
| style="color:inherit;" | • Maximum damage || style="color:inherit;" | 2150 | |||
|- | |||
| style="color:inherit;" | • Shell velocity (m/s) || style="color:inherit;" | 841 | |||
|- | |||
| style="color:inherit;" | • Shell weight (kg) || style="color:inherit;" | 50.8 | |||
|- | |||
| style="color:inherit;" | • Fuse time (sec) || style="color:inherit;" | 0.025 | |||
|- | |||
| style="color:inherit;" | • Ricochet start (°) || style="color:inherit;" | 45 | |||
|- | |||
| style="color:inherit;" | • Always ricochet (°) || style="color:inherit;" | 60 | |||
|- | |||
| style="color:inherit;" | • Normalisation (°) || style="color:inherit;" | 8.5 | |||
|- | |||
| style="color:inherit;" | • Arming threshold (mm) || style="color:inherit;" | 25 | |||
|} | |||
</div> | |||
</div></div></div> | |||
<div class="b-popup"><div class="b-popup_head js-tech-nav_head"><div><h2>Torpedoes</h2></div><span class="b-tech-nav_arrow"></span></div><div class="b-popup_content" style="display: none;"><div> | |||
<div style="border: 2px solid rgba(212,175,55,0.8); border-radius: 3px; margin-bottom: 1em; overflow: hidden;"> | |||
{| class="wikitable" style="margin:0; color:inherit; width:100%" | |||
! style="background-color:#1a3244; color:#ffffff; font-weight:bold;" | TORPEDO LAUNCHERS !! style="background-color:#1a3244; color:#ffffff; font-weight:bold;" | | |||
|- | |||
| style="color:inherit;" | • Number of launchers || style="color:inherit;" | 2x3 | |||
|- | |||
| style="color:inherit;" | • Torpedo name || style="color:inherit;" | 533mm Mark IX | |||
|- | |||
| style="color:inherit;" | • Reload time (sec) || style="color:inherit;" | 98.0 | |||
|- | |||
| style="color:inherit;" | • 180° turn time (sec) || style="color:inherit;" | 7.2 | |||
|- | |||
| style="color:inherit;" | • Damage || style="color:inherit;" | 15867 | |||
|- | |||
| style="color:inherit;" | • Range (km) || style="color:inherit;" | 9.5 | |||
|- | |||
| style="color:inherit;" | • Speed (kt) || style="color:inherit;" | 61 | |||
|- | |||
| style="color:inherit;" | • Detectability (km) || style="color:inherit;" | 0.8 | |||
|- | |||
| style="color:inherit;" | • Flooding chance (%) || style="color:inherit;" | 265% | |||
|} | |||
</div> | |||
</div></div></div> | |||
<div class="b-popup"><div class="b-popup_head js-tech-nav_head"><div><h2>Secondary Battery</h2></div><span class="b-tech-nav_arrow"></span></div><div class="b-popup_content" style="display: none;"><div> | |||
<div style="border: 2px solid rgba(212,175,55,0.8); border-radius: 3px; margin-bottom: 1em; overflow: hidden;"> | |||
{| class="wikitable" style="margin:0; color:inherit; width:100%" | |||
! style="background-color:#1a3244; color:#ffffff; font-weight:bold;" | SECONDARY BATTERY !! style="background-color:#1a3244; color:#ffffff; font-weight:bold;" | | |||
|- | |||
| style="color:inherit;" | • Secondary battery range (km) || style="color:inherit;" | 4.3 | |||
|} | |||
</div> | |||
< | <div style="border: 2px solid rgba(212,175,55,0.8); border-radius: 3px; margin-bottom: 1em; overflow: hidden;"> | ||
{| class="wikitable" style="margin:0; color:inherit; width:100%" | |||
! style="background-color:#1a3244; color:#ffffff; font-weight:bold;" | SECONDARY ARMAMENT 1 !! style="background-color:#1a3244; color:#ffffff; font-weight:bold;" | | |||
|- | |||
| style="color:inherit;" | • Shell type || style="color:inherit;" | HE | |||
|- | |||
| style="color:inherit;" | • Name || style="color:inherit;" | 102 mm HE 35 lb | |||
|- | |||
| style="color:inherit;" | • Arrangement || style="color:inherit;" | 4x2 102mm | |||
|- | |||
| style="color:inherit;" | • Rate of fire (shots/min) || style="color:inherit;" | 20.0 | |||
|- | |||
| style="color:inherit;" | • Maximum damage || style="color:inherit;" | 1500 | |||
|- | |||
| style="color:inherit;" | • Shell velocity (m/s) || style="color:inherit;" | 811 | |||
|- | |||
| style="color:inherit;" | • Penetration (mm) || style="color:inherit;" | 17 | |||
|- | |||
| style="color:inherit;" | • Fire chance (%) || style="color:inherit;" | 6.0% | |||
|} | |||
</div> | |||
</div></div></div> | |||
<div class="b-popup"><div class="b-popup_head js-tech-nav_head"><div><h2>AA Defense</h2></div><span class="b-tech-nav_arrow"></span></div><div class="b-popup_content" style="display: none;"><div> | |||
<div style="border: 2px solid rgba(212,175,55,0.8); border-radius: 3px; margin-bottom: 1em; overflow: hidden;"> | |||
'''Chungking (A)''' | |||
| | {| class="wikitable" style="margin:0 0 0.8em 0; width:100%; color:inherit;" | ||
! style="background-color:#1a3244; color:#ffffff; font-weight:bold;" | AA ARMAMENT !! style="background-color:#1a3244; color:#ffffff; font-weight:bold;" | MOUNTS × BARRELS | |||
|- | |||
| style="color:inherit;" | 102 mm || style="color:inherit;" | 4 × 2 | |||
|- | |||
| style="color:inherit;" | 40 mm || style="color:inherit;" | 2 × 4 | |||
|- | |||
| style="color:inherit;" | 20 mm || style="color:inherit;" | 5 × 1 | |||
|} | |||
| | '''Continuous damage''' — average DPS within each action zone | ||
{| class="wikitable" style="margin:0 0 0.8em 0; width:100%; color:inherit;" | |||
! style="background-color:#1a3244; color:#ffffff; font-weight:bold;" | RANGE !! style="background-color:#1a3244; color:#ffffff; font-weight:bold;" | DPS !! style="background-color:#1a3244; color:#ffffff; font-weight:bold;" | HIT CHANCE !! style="background-color:#1a3244; color:#ffffff; font-weight:bold;" | ACTION ZONE (km) | |||
|- | |||
| style="color:inherit;" | Short-range || style="color:inherit;" | 49 || style="color:inherit;" | 85% || style="color:inherit;" | 2.0 | |||
|- | |||
| style="color:inherit;" | Mid-range || style="color:inherit;" | 63 || style="color:inherit;" | 90% || style="color:inherit;" | 2.5 | |||
|- | |||
| style="color:inherit;" | Long-range || style="color:inherit;" | 59.5 || style="color:inherit;" | 90% || style="color:inherit;" | 5.8 | |||
|} | |||
'''Damage by shell explosions''' | |||
{| class="wikitable" style="margin:0 0 0.8em 0; width:100%; color:inherit;" | |||
! style="background-color:#1a3244; color:#ffffff; font-weight:bold;" | EXPLOSIONS / SALVO !! style="background-color:#1a3244; color:#ffffff; font-weight:bold;" | DAMAGE !! style="background-color:#1a3244; color:#ffffff; font-weight:bold;" | HIT CHANCE !! style="background-color:#1a3244; color:#ffffff; font-weight:bold;" | ACTION ZONE (km) | |||
|- | |||
| style="color:inherit;" | 2 || style="color:inherit;" | 1050 || style="color:inherit;" | 90% || style="color:inherit;" | 3.5–5.8 | |||
|} | |||
'''Chungking (B)''' | |||
| | {| class="wikitable" style="margin:0 0 0.8em 0; width:100%; color:inherit;" | ||
! style="background-color:#1a3244; color:#ffffff; font-weight:bold;" | AA ARMAMENT !! style="background-color:#1a3244; color:#ffffff; font-weight:bold;" | MOUNTS × BARRELS | |||
|- | |||
| style="color:inherit;" | 102 mm || style="color:inherit;" | 4 × 2 | |||
|- | |||
| style="color:inherit;" | 40 mm || style="color:inherit;" | 2 × 4 | |||
|- | |||
| style="color:inherit;" | 20 mm || style="color:inherit;" | 3 × 2 + 2 × 1 | |||
|} | |||
| | '''Continuous damage''' — average DPS within each action zone | ||
{| class="wikitable" style="margin:0 0 0.8em 0; width:100%; color:inherit;" | |||
! style="background-color:#1a3244; color:#ffffff; font-weight:bold;" | RANGE !! style="background-color:#1a3244; color:#ffffff; font-weight:bold;" | DPS !! style="background-color:#1a3244; color:#ffffff; font-weight:bold;" | HIT CHANCE !! style="background-color:#1a3244; color:#ffffff; font-weight:bold;" | ACTION ZONE (km) | |||
|- | |||
| style="color:inherit;" | Short-range || style="color:inherit;" | 70 || style="color:inherit;" | 85% || style="color:inherit;" | 2.0 | |||
|- | |||
| style="color:inherit;" | Mid-range || style="color:inherit;" | 63 || style="color:inherit;" | 90% || style="color:inherit;" | 2.5 | |||
|- | |||
| style="color:inherit;" | Long-range || style="color:inherit;" | 59.5 || style="color:inherit;" | 90% || style="color:inherit;" | 5.8 | |||
|} | |||
'''Damage by shell explosions''' | |||
{| class="wikitable" style="margin:0 0 0.8em 0; width:100%; color:inherit;" | |||
! style="background-color:#1a3244; color:#ffffff; font-weight:bold;" | EXPLOSIONS / SALVO !! style="background-color:#1a3244; color:#ffffff; font-weight:bold;" | DAMAGE !! style="background-color:#1a3244; color:#ffffff; font-weight:bold;" | HIT CHANCE !! style="background-color:#1a3244; color:#ffffff; font-weight:bold;" | ACTION ZONE (km) | |||
|- | |||
| style="color:inherit;" | 2 || style="color:inherit;" | 1050 || style="color:inherit;" | 90% || style="color:inherit;" | 3.5–5.8 | |||
|} | |||
</div> | |||
</div></div></div> | |||
<div class="b-popup"><div class="b-popup_head js-tech-nav_head"><div><h2>Depth Charges</h2></div><span class="b-tech-nav_arrow"></span></div><div class="b-popup_content" style="display: none;"><div> | |||
<div style="border: 2px solid rgba(212,175,55,0.8); border-radius: 3px; margin-bottom: 1em; overflow: hidden;"> | |||
{| class="wikitable" style="margin:0; color:inherit; width:100%" | |||
! style="background-color:#1a3244; color:#ffffff; font-weight:bold;" | DEPTH CHARGES !! style="background-color:#1a3244; color:#ffffff; font-weight:bold;" | | |||
|- | |||
| style="color:inherit;" | • Max damage || style="color:inherit;" | 2100 | |||
|- | |||
| style="color:inherit;" | • Number of charges || style="color:inherit;" | 2 | |||
|- | |||
| style="color:inherit;" | • Bombs per charge || style="color:inherit;" | 7 | |||
|- | |||
| style="color:inherit;" | • Reload time (sec) || style="color:inherit;" | 40.0 | |||
|} | |||
</div> | |||
</div></div></div> | |||
<!-- Add the ship code here to populate the upgrade table --> | |||
<!-- | {{Ship Upgrades Section|code=PZSC105_Chung_King}} | ||
<!-- Consumables have to be tagged individually on a slot by slot basis --> | |||
{{Ship Consumables Section|consumables= | |||
* '''Slot 1:''' {{Damage Control Party}} (5.0s action, 60.0s cooldown) | |||
| | * '''Slot 2:''' {{Smoke Generator}} (3 charges, 30.0s action, 110.0s cooldown) | ||
}} | }} | ||
==Gallery== | |||
<div class="b-popup"><div class="b-popup_head js-tech-nav_head"><div><h2>WoWs Gallery</h2></div><span class="b-tech-nav_arrow"></span></div><div class="b-popup_content" style="display: none;"><div> | |||
< | |||
<gallery> | |||
</gallery> | </gallery> | ||
</div>[[File:Chungkinginport.png|thumb|Chungking in port.]]</div></div> | |||
<div class="b-popup"><div class="b-popup_head js-tech-nav_head"><div><h2>Historical Gallery</h2></div><span class="b-tech-nav_arrow"></span></div><div class="b-popup_content" style="display: none;"><div> | |||
<div class=" | |||
<h2> | |||
= | |||
-- | |||
</div> | |||
<gallery> | |||
</gallery> | </gallery> | ||
</div></div></div> | |||
[[Category:Ships of Pan-Asia]] | |||
[[Category:Cruisers]] | |||
[[Category:Tier V ships]] | |||
<!-- DO NOT DELETE THIS LINE. DO NOT INSERT ANYTHING BELOW THIS LINE --> | |||
Latest revision as of 20:26, 3 July 2026

V
1,350,000
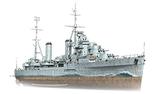
Chungking — Pan-Asia Tech Tree Tier V Cruiser.
HMS Aurora, a British Arethusa-class light cruiser, was built in Portsmouth between 1935 and 1937. The ship participated in the Norwegian campaign and the hunt for Bismarck, intercepted Italian convoys in the Mediterranean, and covered the landings of Allied forces in Africa, Sicily, and France. In 1948, the cruiser was transferred to the Republic of China Navy, where she received the name Chungking and was made their flagship. On February 25, 1949, the cruiser and her entire crew sided with the Communist Party of China, but a month later, the ship was sunk by Kuomintang aviation. After the civil war, the cruiser was raised, but plans to repair and upgrade her were never implemented.
Pros
- Great damage and long range Deepwater torpedoes.
- Smoke screen generator available
- Good rate of fire for the tier.
Cons
- Weak armor plating.
- Shooting accurately over long ranges is challenging due to shell arcs.
- HE shells do low damage and have low armor penetration.
Ship Stats
Hull Information
Main Battery
Torpedoes
Secondary Battery
AA Defense
Depth Charges
Compatible Upgrades
| Slot 1 |
 |
 |

| |||
|---|---|---|---|---|---|---|
| Slot 2 |
 |

| ||||
| Slot 3 |
 |
 |
 |
 |
 |

|
Consumables
- Slot 1: Damage Control Party
 (5.0s action, 60.0s cooldown)
 - Slot 2: Smoke Generator
 (3 charges, 30.0s action, 110.0s cooldown)
Gallery
WoWs Gallery

Historical Gallery
Categories:
