Ship:Gryf
imported>SirDixie:eu m Protected "Ship:Gryf" ([Edit=Allow only administrators] (indefinite) [Move=Allow only administrators] (indefinite)) |
Tier I ships are free: show 0 credits (silver coin) instead of doubloon placeholder |
||
| (2 intermediate revisions by 2 users not shown) | |||
| Line 1: | Line 1: | ||
{{#vardefine:ship_name|Gryf}} | |||
__NOTOC____NOEDITSECTION__ | |||
{{ | |||
| | <div class="b-description gw-frame-1"><div class="b-description-img b-description-img__indent b-description-img__single"><div style="width:160px; height:102px; opacity:.5; border-radius:2px; position:absolute; left:0; top:0; z-index:1; -webkit-transition:all 0.2s ease-out 0.1s; transition:all 0.2s ease-out 0.1s;">[[File:Wows_anno_flag_europe.png|160px]]</div><div class="l-description-img_class"><span class="b-description-img_type b-description-img_type__Cruiser b-description-img_type__Cruiser-Premium"></span><span class="b-description-img_class">I</span></div><div class="b-description-img_vehicle">[[File:Ship_PWSC101_Gryf.png|160px|link=|left]]</div><div class="l-description-img_price"><span class="b-description-img_price"><span>0</span></span></div></div><p>[[Ship:{{#var:ship_name}}|{{#var:ship_name}}]] — Europe Premium Tier I [[Ship:Cruiser|Cruiser]].</p><p>In the early 1930s, the Polish Navy succumbed to the trend of building large minelayers capable of operating independently. The ship was supposed to have weapons that would not be inferior to those of a destroyer and to serve as a training ship in peacetime. Their new minelayer was laid down in 1934, launched two years later, and entered service in 1938. In the event of hostilities, Gryf was tasked with setting up a mining bank to protect the only Polish seaport of Gdynia from amphibious assault. On September 1, 1939, the first day of World War II, the ship was damaged by an air attack. Two days later, she came under artillery fire from German destroyers and suffered another air attack. She received several hits from aerial bombs and sank.</p><p> </p></div> | ||
===Pros=== | |||
* Relatively high HP pool | |||
* Good firing range | |||
===Cons=== | |||
* Low damage per shell | |||
* Relatively poor maneuverability | |||
< | ==Ship Stats== | ||
<div class="b-popup"><div class="b-popup_head js-tech-nav_head"><div><h2>Hull Information</h2></div><span class="b-tech-nav_arrow"></span></div><div class="b-popup_content" style="display: none;"><div> | |||
<div style="border: 2px solid rgba(212,175,55,0.8); border-radius: 3px; margin-bottom: 1em; overflow: hidden;"> | |||
{| class="wikitable" style="margin:0; color:inherit; width:100%" | |||
! style="background-color:#1a3244; color:#ffffff; font-weight:bold;" | SURVIVABILITY !! style="background-color:#1a3244; color:#ffffff; font-weight:bold;" | | |||
|- | |||
| style="color:inherit;" | • Hit Points || style="color:inherit;" | 7550 | |||
|- | |||
| style="color:inherit;" | • Torpedo protection damage reduction (%) || style="color:inherit;" | 0 | |||
|} | |||
</div> | |||
<div style="border: 2px solid rgba(212,175,55,0.8); border-radius: 3px; margin-bottom: 1em; overflow: hidden;"> | |||
{| class="wikitable" style="margin:0; color:inherit; width:100%" | |||
! style="background-color:#1a3244; color:#ffffff; font-weight:bold;" | ARMOR DETAIL !! style="background-color:#1a3244; color:#ffffff; font-weight:bold;" | | |||
|- | |||
| style="color:inherit;" | • Belt (mm) || style="color:inherit;" | 6 | |||
|- | |||
| style="color:inherit;" | • Deck (mm) || style="color:inherit;" | 6 | |||
|- | |||
| style="color:inherit;" | • Superstructure (mm) || style="color:inherit;" | 6 | |||
|- | |||
| style="color:inherit;" | • Extremities (mm) || style="color:inherit;" | 6 | |||
|} | |||
</div> | |||
< | <div style="border: 2px solid rgba(212,175,55,0.8); border-radius: 3px; margin-bottom: 1em; overflow: hidden;"> | ||
{| class="wikitable" style="margin:0; color:inherit; width:100%" | |||
! style="background-color:#1a3244; color:#ffffff; font-weight:bold;" | MANEUVERABILITY !! style="background-color:#1a3244; color:#ffffff; font-weight:bold;" | | |||
|- | |||
| style="color:inherit;" | • Maximum speed (kt) || style="color:inherit;" | 20.0 | |||
|- | |||
| style="color:inherit;" | • Turning circle radius (m) || style="color:inherit;" | 360 | |||
|- | |||
| style="color:inherit;" | • Rudder-shift time (sec) || style="color:inherit;" | 3.8 | |||
|} | |||
</div> | |||
<div style="border: 2px solid rgba(212,175,55,0.8); border-radius: 3px; margin-bottom: 1em; overflow: hidden;"> | |||
{| class="wikitable" style="margin:0; color:inherit; width:100%" | |||
! style="background-color:#1a3244; color:#ffffff; font-weight:bold;" | CONCEALMENT !! style="background-color:#1a3244; color:#ffffff; font-weight:bold;" | | |||
|- | |||
| style="color:inherit;" | • Detectability by sea (km) || style="color:inherit;" | 7.16 | |||
|- | |||
| style="color:inherit;" | • Detectability by air (km) || style="color:inherit;" | 5.36 | |||
|- | |||
| style="color:inherit;" | • Detectability after firing main guns in smoke (km) || style="color:inherit;" | 2.64 | |||
|- | |||
| style="color:inherit;" | • Detectability by depths (km) || style="color:inherit;" | 5.36 | |||
|} | |||
</div> | |||
< | </div></div></div> | ||
<div class="b-popup"><div class="b-popup_head js-tech-nav_head"><div><h2>Main Battery</h2></div><span class="b-tech-nav_arrow"></span></div><div class="b-popup_content" style="display: none;"><div><div style="border: 2px solid rgba(212,175,55,0.8); border-radius: 3px; margin-bottom: 1em; overflow: hidden;"> | |||
{| class="wikitable" style="margin:0; color:inherit; width:100%" | |||
! style="background-color:#1a3244; color:#ffffff; font-weight:bold;" | MAIN BATTERY !! style="background-color:#1a3244; color:#ffffff; font-weight:bold;" | | |||
|- | |||
| style="color:inherit;" | • Arrangement || style="color:inherit;" | 4×2 120mm | |||
|- | |||
| style="color:inherit;" | • Firing range (km) || style="color:inherit;" | 10.74 | |||
|- | |||
| style="color:inherit;" | • Reload time (sec) || style="color:inherit;" | 3.4 | |||
|- | |||
| style="color:inherit;" | • Rate of fire (shots/min) || style="color:inherit;" | 17.6 | |||
|- | |||
| style="color:inherit;" | • 180° turn time (sec) || style="color:inherit;" | 18.0 | |||
|} | |||
</div> | |||
<div style="border: 2px solid rgba(212,175,55,0.8); border-radius: 3px; margin-bottom: 1em; overflow: hidden;"> | |||
{| class="wikitable" style="margin:0; color:inherit; width:100%" | |||
! style="background-color:#1a3244; color:#ffffff; font-weight:bold;" | DISPERSION !! style="background-color:#1a3244; color:#ffffff; font-weight:bold;" | | |||
|- | |||
| style="color:inherit;" | • Dispersion type || style="color:inherit;" | Standard DD dispersion | |||
|- | |||
| style="color:inherit;" | • Dispersion formula || style="color:inherit;" | Dispersion (m) = 7.5 × range(km) + 15 | |||
|- | |||
| style="color:inherit;" | • Sigma || style="color:inherit;" | 2.0 | |||
|- | |||
| style="color:inherit;" | • Maximum dispersion (m) || style="color:inherit;" | 95 | |||
|- | |||
| style="color:inherit;" | • Dispersion at 5 km || style="color:inherit;" | 52 | |||
|- | |||
| style="color:inherit;" | • Dispersion at 10 km || style="color:inherit;" | 90 | |||
|- | |||
| style="color:inherit;" | • Dispersion at 10.74 km || style="color:inherit;" | 96 | |||
|} | |||
</div> | |||
< | <div style="border: 2px solid rgba(212,175,55,0.8); border-radius: 3px; margin-bottom: 1em; overflow: hidden;"> | ||
{| class="wikitable" style="margin:0; color:inherit; width:100%" | |||
! style="background-color:#1a3244; color:#ffffff; font-weight:bold;" | HE SHELL !! style="background-color:#1a3244; color:#ffffff; font-weight:bold;" | | |||
|- | |||
| style="color:inherit;" | • Name || style="color:inherit;" | 120 mm HE | |||
|- | |||
| style="color:inherit;" | • Maximum damage || style="color:inherit;" | 425 | |||
|- | |||
| style="color:inherit;" | • Fire chance (%) || style="color:inherit;" | 8.0% | |||
|- | |||
| style="color:inherit;" | • Shell velocity (m/s) || style="color:inherit;" | 900 | |||
|- | |||
| style="color:inherit;" | • Shell weight (kg) || style="color:inherit;" | 24 | |||
|- | |||
| style="color:inherit;" | • Penetration (mm) || style="color:inherit;" | 20 | |||
|} | |||
</div> | |||
</div></div></div> | |||
<div class="b-popup"><div class="b-popup_head js-tech-nav_head"><div><h2>AA Defense</h2></div><span class="b-tech-nav_arrow"></span></div><div class="b-popup_content" style="display: none;"><div> | |||
<div style="border: 2px solid rgba(212,175,55,0.8); border-radius: 3px; margin-bottom: 1em; overflow: hidden;"> | |||
{| class="wikitable" style="margin:0 0 0.8em 0; width:100%; color:inherit;" | |||
! style="background-color:#1a3244; color:#ffffff; font-weight:bold;" | AA ARMAMENT !! style="background-color:#1a3244; color:#ffffff; font-weight:bold;" | MOUNTS × BARRELS | |||
|- | |||
| style="color:inherit;" | 40 mm || style="color:inherit;" | 2 × 2 | |||
|- | |||
| style="color:inherit;" | 13 mm || style="color:inherit;" | 2 × 2 | |||
|} | |||
| | '''Continuous damage''' — average DPS within each action zone | ||
{| class="wikitable" style="margin:0 0 0.8em 0; width:100%; color:inherit;" | |||
! style="background-color:#1a3244; color:#ffffff; font-weight:bold;" | RANGE !! style="background-color:#1a3244; color:#ffffff; font-weight:bold;" | DPS !! style="background-color:#1a3244; color:#ffffff; font-weight:bold;" | HIT CHANCE !! style="background-color:#1a3244; color:#ffffff; font-weight:bold;" | ACTION ZONE (km) | |||
|- | |||
| style="color:inherit;" | Short-range || style="color:inherit;" | 24 || style="color:inherit;" | 85% || style="color:inherit;" | 1.5 | |||
|- | |||
| style="color:inherit;" | Mid-range || style="color:inherit;" | 63 || style="color:inherit;" | 90% || style="color:inherit;" | 3.5 | |||
|} | |||
</div> | |||
</div></div></div> | |||
<!-- Add the ship code here to populate the upgrade table --> | |||
{{Ship Upgrades Section|code=PWSC101_Gryf}} | |||
<!-- Consumables have to be tagged individually on a slot by slot basis --> | |||
{{Ship Consumables Section|consumables= | |||
* '''Slot 1:''' {{Damage Control Party}} (5.0s action, 25.0s cooldown) | |||
*'''Slot 1''' | |||
}} | }} | ||
==Gallery== | |||
<div class="b-popup"><div class="b-popup_head js-tech-nav_head"><div><h2>WoWs Gallery</h2></div><span class="b-tech-nav_arrow"></span></div><div class="b-popup_content" style="display: none;"><div> | |||
<gallery> | |||
File:Gryf_Alpha.png | |||
File:Gryf_Bravo.png | |||
</gallery> | </gallery> | ||
</div></div></div> | |||
<div class="b-popup"><div class="b-popup_head js-tech-nav_head"><div><h2>Historical Gallery</h2></div><span class="b-tech-nav_arrow"></span></div><div class="b-popup_content" style="display: none;"><div> | |||
<gallery> | |||
</gallery> | </gallery> | ||
</div></div></div> | |||
[[Category:Ships of Europe]] | |||
[[Category:Cruisers]] | |||
[[Category:Tier I ships]] | |||
[[Category:Premium ships]]<!-- DO NOT DELETE THIS LINE. DO NOT INSERT ANYTHING BELOW THIS LINE --> | |||
Latest revision as of 20:19, 7 July 2026

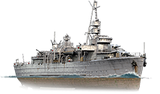
Gryf — Europe Premium Tier I Cruiser.
In the early 1930s, the Polish Navy succumbed to the trend of building large minelayers capable of operating independently. The ship was supposed to have weapons that would not be inferior to those of a destroyer and to serve as a training ship in peacetime. Their new minelayer was laid down in 1934, launched two years later, and entered service in 1938. In the event of hostilities, Gryf was tasked with setting up a mining bank to protect the only Polish seaport of Gdynia from amphibious assault. On September 1, 1939, the first day of World War II, the ship was damaged by an air attack. Two days later, she came under artillery fire from German destroyers and suffered another air attack. She received several hits from aerial bombs and sank.
Pros
- Relatively high HP pool
- Good firing range
Cons
- Low damage per shell
- Relatively poor maneuverability
Ship Stats
Hull Information
Main Battery
AA Defense
Compatible Upgrades
| Slot 1 |
 |
 |

|
|---|
Consumables
- Slot 1: Damage Control Party
 (5.0s action, 25.0s cooldown)


