Ship:Hawkins
imported>Ahskance:na m Protected "Ship:Hawkins" ([Edit=Allow only administrators] (indefinite) [Move=Allow only administrators] (indefinite)) [cascading] |
Bubbyboy007 (talk | contribs) Change Log added |
||
| (3 intermediate revisions by 2 users not shown) | |||
| Line 1: | Line 1: | ||
{{#vardefine:ship_name|Hawkins}} | |||
__NOTOC____NOEDITSECTION__ | |||
{{ | |||
| | <div class="b-description gw-frame-1"><div class="b-description-img b-description-img__indent b-description-img__single"><div style="width:160px; height:102px; opacity:.5; border-radius:2px; position:absolute; left:0; top:0; z-index:1; -webkit-transition:all 0.2s ease-out 0.1s; transition:all 0.2s ease-out 0.1s;">[[File:Wows_anno_flag_uk.png|160px]]</div><div class="l-description-img_class"><span class="b-description-img_type b-description-img_type__Cruiser b-description-img_type__Cruiser-Tech Tree"></span><span class="b-description-img_class">V</span></div><div class="b-description-img_vehicle">[[File:Ship_PBSC205_Hawkins.png|160px|link=|left]]</div><div class="l-description-img_price"><span class="b-description-img_price b-description-img_price__gold"><span title="''{{#var:ship_name}}'' was first released for sale on DD Month YYYY.">1,400,000</span></span></div></div><p>[[Ship:{{#var:ship_name}}|{{#var:ship_name}}]] — U.K. Tech Tree Tier V [[Ship:Cruiser|Cruiser]].</p><p>To take on the German light cruiser ocean raiders, a counter-raider project based on the Town-class ships was created. Given the need for long-range but fast-firing artillery, the ship was equipped with uniform 190 mm guns. HMS Hawkins was laid down in June 1916 and entered service in 1919. Between 1920 and 1928, she operated as the flagship of the 5th Light Cruiser Squadron at the China Station. Between 1928 and 1929, the ship was stationed in the Atlantic and Indian Oceans. During World War II, the cruiser was deployed in the secondary theaters of war—the Caribbean, Africa, and India.</p><p> </p></div> | ||
===Pros=== | |||
* Enhanced repair party | |||
* High shell arcs | |||
===Cons=== | |||
* Slow speed | |||
* Poor damage per minute | |||
==Ship Stats== | |||
<div class="b-popup"><div class="b-popup_head js-tech-nav_head"><div><h2>Hull Information</h2></div><span class="b-tech-nav_arrow"></span></div><div class="b-popup_content" style="display: none;"><div> | |||
<div style="border: 2px solid rgba(212,175,55,0.8); border-radius: 3px; margin-bottom: 1em; overflow: hidden;"> | |||
{| class="wikitable" style="margin:0; color:inherit; width:100%" | |||
! style="background-color:#1a3244; color:#ffffff; font-weight:bold;" | SURVIVABILITY !! style="background-color:#1a3244; color:#ffffff; font-weight:bold;" | Hawkins (A) !! style="background-color:#1a3244; color:#ffffff; font-weight:bold;" | Hawkins (B) | |||
|- | |||
| style="color:inherit;" | • Hit Points || style="color:inherit;" | 27800 || style="color:inherit;" | 32200 | |||
|- | |||
| style="color:inherit;" | • Torpedo protection damage reduction (%) || colspan="2" style="color:inherit;" | 10 | |||
|} | |||
</div> | |||
| | <div style="border: 2px solid rgba(212,175,55,0.8); border-radius: 3px; margin-bottom: 1em; overflow: hidden;"> | ||
{| class="wikitable" style="margin:0; color:inherit; width:100%" | |||
! style="background-color:#1a3244; color:#ffffff; font-weight:bold;" | ARMOR DETAIL !! style="background-color:#1a3244; color:#ffffff; font-weight:bold;" | | |||
|- | |||
| style="color:inherit;" | • Belt (mm) || style="color:inherit;" | 76 | |||
|- | |||
| style="color:inherit;" | • Deck (mm) || style="color:inherit;" | 16 | |||
|- | |||
| style="color:inherit;" | • Superstructure (mm) || style="color:inherit;" | 10 | |||
|- | |||
| style="color:inherit;" | • Extremities (mm) || style="color:inherit;" | 13 | |||
|} | |||
</div> | |||
| | <div style="border: 2px solid rgba(212,175,55,0.8); border-radius: 3px; margin-bottom: 1em; overflow: hidden;"> | ||
{| class="wikitable" style="margin:0; color:inherit; width:100%" | |||
! style="background-color:#1a3244; color:#ffffff; font-weight:bold;" | MANEUVERABILITY !! style="background-color:#1a3244; color:#ffffff; font-weight:bold;" | Hawkins (A) !! style="background-color:#1a3244; color:#ffffff; font-weight:bold;" | Hawkins (B) | |||
|- | |||
| style="color:inherit;" | • Maximum speed (kt) || style="color:inherit;" | 30.0 || style="color:inherit;" | 30.0 | |||
|- | |||
| style="color:inherit;" | • Turning circle radius (m) || style="color:inherit;" | 640 || style="color:inherit;" | 640 | |||
|- | |||
| style="color:inherit;" | • Rudder-shift time (sec) || style="color:inherit;" | 16.7 || style="color:inherit;" | 11.9 | |||
|} | |||
</div> | |||
| | <div style="border: 2px solid rgba(212,175,55,0.8); border-radius: 3px; margin-bottom: 1em; overflow: hidden;"> | ||
{| class="wikitable" style="margin:0; color:inherit; width:100%" | |||
! style="background-color:#1a3244; color:#ffffff; font-weight:bold;" | CONCEALMENT !! style="background-color:#1a3244; color:#ffffff; font-weight:bold;" | Hawkins (A) !! style="background-color:#1a3244; color:#ffffff; font-weight:bold;" | Hawkins (B) | |||
|- | |||
| style="color:inherit;" | • Detectability by sea (km) || style="color:inherit;" | 11.5 || style="color:inherit;" | 11.5 | |||
|- | |||
| style="color:inherit;" | • Detectability by air (km) || style="color:inherit;" | 6.44 || style="color:inherit;" | 6.44 | |||
|- | |||
| style="color:inherit;" | • Detectability after firing main guns in smoke (km) || colspan="2" style="color:inherit;" | 6.37 | |||
|- | |||
| style="color:inherit;" | • Detectability by depths (km) || style="color:inherit;" | 6.44 || style="color:inherit;" | 6.44 | |||
|} | |||
</div> | |||
</div></div></div> | |||
<div class="b-popup"><div class="b-popup_head js-tech-nav_head"><div><h2>Main Battery</h2></div><span class="b-tech-nav_arrow"></span></div><div class="b-popup_content" style="display: none;"><div><div style="border: 2px solid rgba(212,175,55,0.8); border-radius: 3px; margin-bottom: 1em; overflow: hidden;"> | |||
{| class="wikitable" style="margin:0; color:inherit; width:100%" | |||
! style="background-color:#1a3244; color:#ffffff; font-weight:bold;" | MAIN BATTERY !! style="background-color:#1a3244; color:#ffffff; font-weight:bold;" | Mk V mod. 1 !! style="background-color:#1a3244; color:#ffffff; font-weight:bold;" | Mk V mod. 2 | |||
|- | |||
| style="color:inherit;" | • Arrangement || colspan="2" style="color:inherit;" | 7×1 190mm | |||
|- | |||
| style="color:inherit;" | • Firing range (km) || style="color:inherit;" | 12.65 || style="color:inherit;" | 13.92 | |||
|- | |||
| style="color:inherit;" | • Reload time (sec) || colspan="2" style="color:inherit;" | 9.9 | |||
|- | |||
| style="color:inherit;" | • Rate of fire (shots/min) || colspan="2" style="color:inherit;" | 6.1 | |||
|- | |||
| style="color:inherit;" | • 180° turn time (sec) || colspan="2" style="color:inherit;" | 18.0 | |||
|} | |||
</div> | |||
| | <div style="border: 2px solid rgba(212,175,55,0.8); border-radius: 3px; margin-bottom: 1em; overflow: hidden;"> | ||
{| class="wikitable" style="margin:0; color:inherit; width:100%" | |||
! style="background-color:#1a3244; color:#ffffff; font-weight:bold;" | DISPERSION !! style="background-color:#1a3244; color:#ffffff; font-weight:bold;" | | |||
|- | |||
| style="color:inherit;" | • Dispersion type || style="color:inherit;" | Standard CA/CL dispersion | |||
|- | |||
| style="color:inherit;" | • Dispersion formula || style="color:inherit;" | Dispersion (m) = 6.9 × range(km) + 33 | |||
|- | |||
| style="color:inherit;" | • Sigma || style="color:inherit;" | 2.0 | |||
|- | |||
| style="color:inherit;" | • Maximum dispersion (m) || style="color:inherit;" | 120 | |||
|- | |||
| style="color:inherit;" | • Dispersion at 5 km || style="color:inherit;" | 68 | |||
|- | |||
| style="color:inherit;" | • Dispersion at 10 km || style="color:inherit;" | 102 | |||
|- | |||
| style="color:inherit;" | • Dispersion at 12.65 km || style="color:inherit;" | 120 | |||
|} | |||
</div> | |||
<div style="border: 2px solid rgba(212,175,55,0.8); border-radius: 3px; margin-bottom: 1em; overflow: hidden;"> | |||
{| class="wikitable" style="margin:0; color:inherit; width:100%" | |||
! style="background-color:#1a3244; color:#ffffff; font-weight:bold;" | HE SHELL !! style="background-color:#1a3244; color:#ffffff; font-weight:bold;" | | |||
|- | |||
| style="color:inherit;" | • Name || style="color:inherit;" | 190 mm HE 200 fn. | |||
|- | |||
| style="color:inherit;" | • Maximum damage || style="color:inherit;" | 3050 | |||
|- | |||
| style="color:inherit;" | • Fire chance (%) || style="color:inherit;" | 15.0% | |||
|- | |||
| style="color:inherit;" | • Shell velocity (m/s) || style="color:inherit;" | 844 | |||
|- | |||
| style="color:inherit;" | • Shell weight (kg) || style="color:inherit;" | 90.7 | |||
|- | |||
| style="color:inherit;" | • Penetration (mm) || style="color:inherit;" | 32 | |||
|} | |||
</div> | |||
| | <div style="border: 2px solid rgba(212,175,55,0.8); border-radius: 3px; margin-bottom: 1em; overflow: hidden;"> | ||
{| class="wikitable" style="margin:0; color:inherit; width:100%" | |||
! style="background-color:#1a3244; color:#ffffff; font-weight:bold;" | AP SHELL !! style="background-color:#1a3244; color:#ffffff; font-weight:bold;" | | |||
|- | |||
| style="color:inherit;" | • Name || style="color:inherit;" | 190 mm AP 200 fn. | |||
|- | |||
| style="color:inherit;" | • Maximum damage || style="color:inherit;" | 4050 | |||
|- | |||
| style="color:inherit;" | • Shell velocity (m/s) || style="color:inherit;" | 844 | |||
|- | |||
| style="color:inherit;" | • Shell weight (kg) || style="color:inherit;" | 90.7 | |||
|- | |||
| style="color:inherit;" | • Fuse time (sec) || style="color:inherit;" | 0.033 | |||
|- | |||
| style="color:inherit;" | • Ricochet start (°) || style="color:inherit;" | 45 | |||
|- | |||
| style="color:inherit;" | • Always ricochet (°) || style="color:inherit;" | 60 | |||
|- | |||
| style="color:inherit;" | • Normalisation (°) || style="color:inherit;" | 7 | |||
|- | |||
| style="color:inherit;" | • Arming threshold (mm) || style="color:inherit;" | 32 | |||
|} | |||
</div> | |||
</div></div></div> | |||
<div class="b-popup"><div class="b-popup_head js-tech-nav_head"><div><h2>Torpedoes</h2></div><span class="b-tech-nav_arrow"></span></div><div class="b-popup_content" style="display: none;"><div> | |||
<div style="border: 2px solid rgba(212,175,55,0.8); border-radius: 3px; margin-bottom: 1em; overflow: hidden;"> | |||
{| class="wikitable" style="margin:0; color:inherit; width:100%" | |||
! style="background-color:#1a3244; color:#ffffff; font-weight:bold;" | TORPEDO LAUNCHERS !! style="background-color:#1a3244; color:#ffffff; font-weight:bold;" | | |||
|- | |||
| style="color:inherit;" | • Number of launchers || style="color:inherit;" | 2 | |||
|- | |||
| style="color:inherit;" | • Torpedo name || style="color:inherit;" | PBPT006 | |||
|- | |||
| style="color:inherit;" | • Reload time (sec) || style="color:inherit;" | 53.0 | |||
|- | |||
| style="color:inherit;" | • 180° turn time (sec) || style="color:inherit;" | 7.2 | |||
|- | |||
| style="color:inherit;" | • Damage || style="color:inherit;" | 43900 | |||
|- | |||
| style="color:inherit;" | • Range (km) || style="color:inherit;" | 0.2 | |||
|- | |||
| style="color:inherit;" | • Speed (kt) || style="color:inherit;" | 59 | |||
|- | |||
| style="color:inherit;" | • Detectability (km) || style="color:inherit;" | 1.2 | |||
|- | |||
| style="color:inherit;" | • Flooding chance (%) || style="color:inherit;" | 2.62% | |||
|} | |||
</div> | |||
</div></div></div> | |||
< | <div class="b-popup"><div class="b-popup_head js-tech-nav_head"><div><h2>Secondary Battery</h2></div><span class="b-tech-nav_arrow"></span></div><div class="b-popup_content" style="display: none;"><div> | ||
<div style="border: 2px solid rgba(212,175,55,0.8); border-radius: 3px; margin-bottom: 1em; overflow: hidden;"> | |||
{| class="wikitable" style="margin:0; color:inherit; width:100%" | |||
| | ! style="background-color:#1a3244; color:#ffffff; font-weight:bold;" | SECONDARY BATTERY !! style="background-color:#1a3244; color:#ffffff; font-weight:bold;" | | ||
| | |- | ||
| | | style="color:inherit;" | • Secondary battery range (km) || style="color:inherit;" | 4.3 | ||
| | |} | ||
</div> | |||
<div style="border: 2px solid rgba(212,175,55,0.8); border-radius: 3px; margin-bottom: 1em; overflow: hidden;"> | |||
| | {| class="wikitable" style="margin:0; color:inherit; width:100%" | ||
| | ! style="background-color:#1a3244; color:#ffffff; font-weight:bold;" | SECONDARY ARMAMENT 1 !! style="background-color:#1a3244; color:#ffffff; font-weight:bold;" | | ||
| | |- | ||
| | | style="color:inherit;" | • Shell type || style="color:inherit;" | HE | ||
| | |- | ||
| style="color:inherit;" | • Name || style="color:inherit;" | 102 mm HE 35 lb | |||
|- | |||
| style="color:inherit;" | • Arrangement || style="color:inherit;" | 1x102mm | |||
|- | |||
| style="color:inherit;" | • Rate of fire (shots/min) || style="color:inherit;" | 15.0 | |||
|- | |||
| style="color:inherit;" | • Maximum damage || style="color:inherit;" | 1500 | |||
|- | |||
| style="color:inherit;" | • Shell velocity (m/s) || style="color:inherit;" | 811 | |||
|- | |||
| style="color:inherit;" | • Penetration (mm) || style="color:inherit;" | 17 | |||
|- | |||
| style="color:inherit;" | • Fire chance (%) || style="color:inherit;" | 6.0% | |||
|} | |||
</div> | |||
</div></div></div> | |||
<div class="b-popup"><div class="b-popup_head js-tech-nav_head"><div><h2>Airstrike</h2></div><span class="b-tech-nav_arrow"></span></div><div class="b-popup_content" style="display: none;"><div> | |||
| | <div style="border: 2px solid rgba(212,175,55,0.8); border-radius: 3px; margin-bottom: 1em; overflow: hidden;"> | ||
{| class="wikitable" style="margin:0; color:inherit; width:100%" | |||
! style="background-color:#1a3244; color:#ffffff; font-weight:bold;" | ASW AIRSTRIKE (DEPTH CHARGES) !! style="background-color:#1a3244; color:#ffffff; font-weight:bold;" | | |||
|- | |||
| style="color:inherit;" | • Range (km) || style="color:inherit;" | 5 | |||
|- | |||
| style="color:inherit;" | • Minimum range (km) || style="color:inherit;" | 0.5 | |||
|- | |||
| style="color:inherit;" | • Reload time (sec) || style="color:inherit;" | 20.0 | |||
|- | |||
| style="color:inherit;" | • Number of aircraft || style="color:inherit;" | 1 | |||
|- | |||
| style="color:inherit;" | • Depth charges in payload || style="color:inherit;" | 1 | |||
|- | |||
| style="color:inherit;" | • Damage || style="color:inherit;" | 2900 | |||
|- | |||
| style="color:inherit;" | • Deployment || style="color:inherit;" | Manual | |||
|} | |||
</div> | |||
</div></div></div> | |||
<div class="b-popup"><div class="b-popup_head js-tech-nav_head"><div><h2>AA Defense</h2></div><span class="b-tech-nav_arrow"></span></div><div class="b-popup_content" style="display: none;"><div> | |||
<div style="border: 2px solid rgba(212,175,55,0.8); border-radius: 3px; margin-bottom: 1em; overflow: hidden;"> | |||
'''Hawkins (A)''' | |||
{ | {| class="wikitable" style="margin:0 0 0.8em 0; width:100%; color:inherit;" | ||
! style="background-color:#1a3244; color:#ffffff; font-weight:bold;" | AA ARMAMENT !! style="background-color:#1a3244; color:#ffffff; font-weight:bold;" | MOUNTS × BARRELS | |||
|- | |||
| style="color:inherit;" | 102 mm || style="color:inherit;" | 4 × 1 | |||
|- | |||
| style="color:inherit;" | 40 mm || style="color:inherit;" | 4 × 1 | |||
|- | |||
| style="color:inherit;" | 8 mm || style="color:inherit;" | 4 × 1 | |||
|} | |||
| | '''Continuous damage''' — average DPS within each action zone | ||
{| class="wikitable" style="margin:0 0 0.8em 0; width:100%; color:inherit;" | |||
! style="background-color:#1a3244; color:#ffffff; font-weight:bold;" | RANGE !! style="background-color:#1a3244; color:#ffffff; font-weight:bold;" | DPS !! style="background-color:#1a3244; color:#ffffff; font-weight:bold;" | HIT CHANCE !! style="background-color:#1a3244; color:#ffffff; font-weight:bold;" | ACTION ZONE (km) | |||
|- | |||
| style="color:inherit;" | Short-range || style="color:inherit;" | 24.5 || style="color:inherit;" | 85% || style="color:inherit;" | 1.5 | |||
|- | |||
| style="color:inherit;" | Mid-range || style="color:inherit;" | 70 || style="color:inherit;" | 90% || style="color:inherit;" | 2.5 | |||
|- | |||
| style="color:inherit;" | Long-range || style="color:inherit;" | 24.5 || style="color:inherit;" | 90% || style="color:inherit;" | 4.0 | |||
|} | |||
{ | '''Damage by shell explosions''' | ||
| | {| class="wikitable" style="margin:0 0 0.8em 0; width:100%; color:inherit;" | ||
| | ! style="background-color:#1a3244; color:#ffffff; font-weight:bold;" | EXPLOSIONS / SALVO !! style="background-color:#1a3244; color:#ffffff; font-weight:bold;" | DAMAGE !! style="background-color:#1a3244; color:#ffffff; font-weight:bold;" | HIT CHANCE !! style="background-color:#1a3244; color:#ffffff; font-weight:bold;" | ACTION ZONE (km) | ||
| | |- | ||
| | | style="color:inherit;" | 1 || style="color:inherit;" | 130 || style="color:inherit;" | 90% || style="color:inherit;" | 3.5–4.0 | ||
| | |} | ||
| | |||
'''Hawkins (B)''' | |||
| | {| class="wikitable" style="margin:0 0 0.8em 0; width:100%; color:inherit;" | ||
| | ! style="background-color:#1a3244; color:#ffffff; font-weight:bold;" | AA ARMAMENT !! style="background-color:#1a3244; color:#ffffff; font-weight:bold;" | MOUNTS × BARRELS | ||
|- | |||
| style="color:inherit;" | 102 mm || style="color:inherit;" | 4 × 2 | |||
|- | |||
| style="color:inherit;" | 40 mm || style="color:inherit;" | 4 × 4 | |||
|- | |||
| style="color:inherit;" | 13 mm || style="color:inherit;" | 4 × 4 | |||
|} | |||
| | '''Continuous damage''' — average DPS within each action zone | ||
| | {| class="wikitable" style="margin:0 0 0.8em 0; width:100%; color:inherit;" | ||
| | ! style="background-color:#1a3244; color:#ffffff; font-weight:bold;" | RANGE !! style="background-color:#1a3244; color:#ffffff; font-weight:bold;" | DPS !! style="background-color:#1a3244; color:#ffffff; font-weight:bold;" | HIT CHANCE !! style="background-color:#1a3244; color:#ffffff; font-weight:bold;" | ACTION ZONE (km) | ||
| | |- | ||
| | | style="color:inherit;" | Short-range || style="color:inherit;" | 21 || style="color:inherit;" | 85% || style="color:inherit;" | 1.5 | ||
|- | |||
| style="color:inherit;" | Mid-range || style="color:inherit;" | 126 || style="color:inherit;" | 90% || style="color:inherit;" | 2.5 | |||
|- | |||
| style="color:inherit;" | Long-range || style="color:inherit;" | 59.5 || style="color:inherit;" | 90% || style="color:inherit;" | 5.8 | |||
|} | |||
| | '''Damage by shell explosions''' | ||
| | {| class="wikitable" style="margin:0 0 0.8em 0; width:100%; color:inherit;" | ||
| | ! style="background-color:#1a3244; color:#ffffff; font-weight:bold;" | EXPLOSIONS / SALVO !! style="background-color:#1a3244; color:#ffffff; font-weight:bold;" | DAMAGE !! style="background-color:#1a3244; color:#ffffff; font-weight:bold;" | HIT CHANCE !! style="background-color:#1a3244; color:#ffffff; font-weight:bold;" | ACTION ZONE (km) | ||
| | |- | ||
| | | style="color:inherit;" | 2 || style="color:inherit;" | 300 || style="color:inherit;" | 90% || style="color:inherit;" | 3.5–5.8 | ||
| | |} | ||
</div> | |||
</div></div></div> | |||
<!-- Add the ship code here to populate the upgrade table --> | |||
{{Ship Upgrades Section|code=PBSC205_Hawkins}} | |||
<!-- Consumables have to be tagged individually on a slot by slot basis --> | |||
{{Ship Consumables Section|consumables= | |||
* '''Slot 1:''' {{Damage Control Party}} (5.0s action, 60.0s cooldown) | |||
* '''Slot 2:''' {{Repair Party}} (3 charges, 28.0s action, 80.0s cooldown, 139 hp/s) | |||
* '''Slot 3:''' {{Defensive AA Fire}} (3 charges, 40.0s action, 80.0s cooldown) '''or''' {{Hydroacoustic Search}} (3 charges, 100.0s action, 120.0s cooldown) | |||
}} | |||
==Gallery== | |||
<div class="b-popup"><div class="b-popup_head js-tech-nav_head"><div><h2>WoWs Gallery</h2></div><span class="b-tech-nav_arrow"></span></div>[[File:Image of Hawkins.png|thumb]]<div class="b-popup_content" style="display: none;"><div> | |||
<gallery> | |||
</gallery> | </gallery> | ||
</div></div></div> | |||
<div class="b-popup"><div class="b-popup_head js-tech-nav_head"><div><h2>Historical Gallery</h2></div><span class="b-tech-nav_arrow"></span></div><div class="b-popup_content" style="display: none;"><div> | |||
<gallery> | |||
< | </gallery> | ||
</div></div></div> | |||
{{WoWS Ship Changelog Insert|1= | {{WoWS Ship Changelog Insert|1= | ||
*Available for testing by supertesters in the game starting from Update 0.8.10. | *Update 0.8.10: | ||
**Available for testing by supertesters in the game starting from Update 0.8.10. | |||
*Update 0.9.0: | *Update 0.9.0: | ||
**Available from the Royal Pack or Imperial Pack in the Armory. | **Available from the Royal Pack or Imperial Pack in the Armory. | ||
*Introduced into the game as a researchable ship in Update 0.9.1. | *Update 0.9.1: | ||
**Introduced into the game as a researchable ship in Update 0.9.1. | |||
*Update 0.9.2: | *Update 0.9.2: | ||
**The thickness of the armor was changed: the central part was reinforced from 13 to 16 mm. | **The thickness of the armor was changed: the central part was reinforced from 13 to 16 mm. | ||
*Update 0.9.3: | *Update 0.9.3: | ||
**Main battery reload time decreased from 14 to 13.5 s. | **Main battery reload time decreased from 14 to 13.5 s. | ||
**Increased horizontal guidance angles of main battery guns | **Increased horizontal guidance angles of main battery guns | ||
**Horizontal aiming angles of the main battery guns were increased: | **Horizontal aiming angles of the main battery guns were increased: | ||
*** By 32 degrees (for short distances) for the first turret. | ***By 32 degrees (for short distances) for the first turret. | ||
*** By 2 degrees for the second turret. | ***By 2 degrees for the second turret. | ||
*** By 5 degrees for the third and fourth turrets. | ***By 5 degrees for the third and fourth turrets. | ||
*** By 36 degrees (for long ranges) for the sixth turret. | ***By 36 degrees (for long ranges) for the sixth turret. | ||
*Update 0.9.4: | *Update 0.9.4: | ||
**Main battery reload time decreased from 13.5 to 13 s. | **Main battery reload time decreased from 13.5 to 13 s. | ||
| Line 206: | Line 346: | ||
**Secondary battery maximum firing range decreased from 4.5 to 4.3 km. | **Secondary battery maximum firing range decreased from 4.5 to 4.3 km. | ||
*Update 12.5: | *Update 12.5: | ||
**Detectability range by sea reduced from 12.2 to 11.5 km | **Detectability range by sea reduced from 12.2 to 11.5 km: | ||
***Other detectability values have been reduced accordingly. | ***Other detectability values have been reduced accordingly. | ||
**Main battery reload time reduced from 11.7 to 10.5 seconds. | **Main battery reload time reduced from 11.7 to 10.5 seconds. | ||
*Update 12.6: | *Update 12.6: | ||
**The shell ballistics have been changed and are now characterized by a flatter trajectory | **The shell ballistics have been changed and are now characterized by a flatter trajectory: | ||
***AP shell air drag reduced from 0.37 to 0.29. | ***AP shell air drag reduced from 0.37 to 0.29. | ||
**The armor penetration capabilities of AP shells have been improved. | **The armor penetration capabilities of AP shells have been improved. | ||
*Update 14.7: | |||
**Main Battery Reload time decreased: 10.5 to 9.9s | |||
*Update Oct 10, 2019: | |||
**Preliminary characteristics. | |||
*Update Nov 29, 2019: | |||
**Main battery reload time increased from 13 to 14 s. | |||
**HE shell parameters changed: | |||
***Maximum damage increased from 2,650 to 3,050. | |||
***Fire chance increased from 13% to 15%. | |||
**Repair Party consumable changed: | |||
***Restoration of citadel damage increased from 10% to 50%. | |||
*Update Dec 27, 2019: | |||
**Ballistics were changed. Now the shell needs less time to travel the same distance. For example, instead of 3.94 s at 7 km range, it will take 3.80 s. At a range of 13.86 km instead of 10.08 s, it will take 9.19 s. Armor penetration will remain almost the same as before these changes. | |||
*Update Dec 10, 2019: | |||
**Ballistics were changed. Now the shell needs less time to travel the same distance. For example, instead of 4.17 s at 7 km range, it will take 3.94 s. At a range of 13.86 km instead of 11.26 s it will take 10.08 s. | |||
**Armor penetration of AP shells was increased by 23% at 7 km and by 40% at 13.86 km. | |||
**Hydroacoustic Search consumable changed: | |||
***Action time decreased from 180 to 100 s. | |||
***Ship detection range increased from 3 to 4 km. | |||
**Defensive AA consumable added in the same slot as Hydroacoustic Search. | |||
}} | }} | ||
[[Category:Ships of U.K.]] | |||
[[Category:Cruisers]] | |||
[[Category:Tier V ships]] | |||
<!-- DO NOT DELETE THIS LINE. DO NOT INSERT ANYTHING BELOW THIS LINE --> | |||
Latest revision as of 00:09, 2 August 2026

V
1,400,000
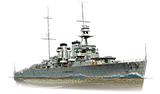
Hawkins — U.K. Tech Tree Tier V Cruiser.
To take on the German light cruiser ocean raiders, a counter-raider project based on the Town-class ships was created. Given the need for long-range but fast-firing artillery, the ship was equipped with uniform 190 mm guns. HMS Hawkins was laid down in June 1916 and entered service in 1919. Between 1920 and 1928, she operated as the flagship of the 5th Light Cruiser Squadron at the China Station. Between 1928 and 1929, the ship was stationed in the Atlantic and Indian Oceans. During World War II, the cruiser was deployed in the secondary theaters of war—the Caribbean, Africa, and India.
Pros
- Enhanced repair party
- High shell arcs
Cons
- Slow speed
- Poor damage per minute
Ship Stats
Hull Information
Main Battery
Torpedoes
Secondary Battery
Airstrike
AA Defense
Compatible Upgrades
| Slot 1 |
 |
 |

| ||
|---|---|---|---|---|---|
| Slot 2 |
 |
 |
 |

| |
| Slot 3 |
 |
 |
 |
 |

|
Consumables
- Slot 1: Damage Control Party
 (5.0s action, 60.0s cooldown)
 - Slot 2: Repair Party
 (3 charges, 28.0s action, 80.0s cooldown, 139 hp/s)
 - Slot 3: Defensive AA Fire
 (3 charges, 40.0s action, 80.0s cooldown) or Hydroacoustic Search
  (3 charges, 100.0s action, 120.0s cooldown)
Gallery
WoWs Gallery

Historical Gallery
Ship Change Log
Categories:
