Ship:Kagerō
imported>Franz_von_Suppe:eu Redirected page to Ship:Kagero |
Pockington (talk | contribs) added missing information on launch day |
||
| (5 intermediate revisions by 2 users not shown) | |||
| Line 1: | Line 1: | ||
# | {{#vardefine:ship_name|Kagerō}} | ||
__NOTOC____NOEDITSECTION__ | |||
<div class="b-description gw-frame-1"><div class="b-description-img b-description-img__indent b-description-img__single"><div style="width:160px; height:102px; opacity:.5; border-radius:2px; position:absolute; left:0; top:0; z-index:1; -webkit-transition:all 0.2s ease-out 0.1s; transition:all 0.2s ease-out 0.1s;">[[File:Wows_anno_flag_japan.png|160px]]</div><div class="l-description-img_class"><span class="b-description-img_type b-description-img_type__Destroyer b-description-img_type__Destroyer-Tech Tree"></span><span class="b-description-img_class">VIII</span></div><div class="b-description-img_vehicle">[[File:Ship_PJSD208_Kagero.png|160px|link=|left]]</div><div class="l-description-img_price"><span class="b-description-img_price b-description-img_price__gold"><span title="''{{#var:ship_name}}'' was first released for sale on DD Month YYYY.">9,100,000</span></span></div></div><p>[[Ship:{{#var:ship_name}}|{{#var:ship_name}}]] — Japan Tech Tree Tier VIII [[Ship:Destroyer|Destroyer]].</p><p>Japan avoided the limitations on ship tonnage by declining to sign the Second London Naval Treaty. As a result, new criteria were formulated for "cruiser-type" destroyers, emphasizing enhanced stability and sea endurance while maintaining the armament of "special type" destroyers. Laid down in September 1937, Kagerō played a role in World War II, engaging in combat near the eastern Solomon Islands and Santa Cruz Islands and participating in the Battles of Guadalcanal and Tassafaronga.</p><p> </p></div> | |||
===Pros=== | |||
* Low detectability | |||
* Powerful torpedo armament | |||
===Cons=== | |||
* Long torpedo reload | |||
* Low gun traverse speed | |||
==Ship Stats== | |||
<div class="b-popup"><div class="b-popup_head js-tech-nav_head"><div><h2>Hull Information</h2></div><span class="b-tech-nav_arrow"></span></div><div class="b-popup_content" style="display: none;"><div> | |||
<div style="border: 2px solid rgba(212,175,55,0.8); border-radius: 3px; margin-bottom: 1em; overflow: hidden;"> | |||
{| class="wikitable" style="margin:0; color:inherit; width:100%" | |||
! style="background-color:#1a3244; color:#ffffff; font-weight:bold;" | SURVIVABILITY !! style="background-color:#1a3244; color:#ffffff; font-weight:bold;" | Kagerō (A) !! style="background-color:#1a3244; color:#ffffff; font-weight:bold;" | Kagerō (B) | |||
|- | |||
| style="color:inherit;" | • Hit Points || style="color:inherit;" | 13300 || style="color:inherit;" | 15100 | |||
|- | |||
| style="color:inherit;" | • Torpedo protection damage reduction (%) || colspan="2" style="color:inherit;" | 0 | |||
|} | |||
</div> | |||
<div style="border: 2px solid rgba(212,175,55,0.8); border-radius: 3px; margin-bottom: 1em; overflow: hidden;"> | |||
{| class="wikitable" style="margin:0; color:inherit; width:100%" | |||
! style="background-color:#1a3244; color:#ffffff; font-weight:bold;" | ARMOR DETAIL !! style="background-color:#1a3244; color:#ffffff; font-weight:bold;" | | |||
|- | |||
| style="color:inherit;" | • Belt (mm) || style="color:inherit;" | 19 | |||
|- | |||
| style="color:inherit;" | • Deck (mm) || style="color:inherit;" | 19 | |||
|- | |||
| style="color:inherit;" | • Superstructure (mm) || style="color:inherit;" | 13 | |||
|- | |||
| style="color:inherit;" | • Extremities (mm) || style="color:inherit;" | 19 | |||
|} | |||
</div> | |||
<div style="border: 2px solid rgba(212,175,55,0.8); border-radius: 3px; margin-bottom: 1em; overflow: hidden;"> | |||
{| class="wikitable" style="margin:0; color:inherit; width:100%" | |||
! style="background-color:#1a3244; color:#ffffff; font-weight:bold;" | MANEUVERABILITY !! style="background-color:#1a3244; color:#ffffff; font-weight:bold;" | Kagerō (A) !! style="background-color:#1a3244; color:#ffffff; font-weight:bold;" | Kagerō (B) | |||
|- | |||
| style="color:inherit;" | • Maximum speed (kt) || style="color:inherit;" | 35.0 || style="color:inherit;" | 35.0 | |||
|- | |||
| style="color:inherit;" | • Turning circle radius (m) || style="color:inherit;" | 640 || style="color:inherit;" | 640 | |||
|- | |||
| style="color:inherit;" | • Rudder-shift time (sec) || style="color:inherit;" | 4.0 || style="color:inherit;" | 2.7 | |||
|} | |||
</div> | |||
<div style="border: 2px solid rgba(212,175,55,0.8); border-radius: 3px; margin-bottom: 1em; overflow: hidden;"> | |||
{| class="wikitable" style="margin:0; color:inherit; width:100%" | |||
! style="background-color:#1a3244; color:#ffffff; font-weight:bold;" | CONCEALMENT !! style="background-color:#1a3244; color:#ffffff; font-weight:bold;" | Kagerō (A) !! style="background-color:#1a3244; color:#ffffff; font-weight:bold;" | Kagerō (B) | |||
|- | |||
| style="color:inherit;" | • Detectability by sea (km) || style="color:inherit;" | 6.63 || style="color:inherit;" | 6.63 | |||
|- | |||
| style="color:inherit;" | • Detectability by air (km) || style="color:inherit;" | 3.07 || style="color:inherit;" | 3.07 | |||
|- | |||
| style="color:inherit;" | • Detectability after firing main guns in smoke (km) || colspan="2" style="color:inherit;" | 2.55 | |||
|- | |||
| style="color:inherit;" | • Detectability by depths (km) || style="color:inherit;" | 3.07 || style="color:inherit;" | 3.07 | |||
|} | |||
</div> | |||
</div></div></div> | |||
<div class="b-popup"><div class="b-popup_head js-tech-nav_head"><div><h2>Main Battery</h2></div><span class="b-tech-nav_arrow"></span></div><div class="b-popup_content" style="display: none;"><div><div style="border: 2px solid rgba(212,175,55,0.8); border-radius: 3px; margin-bottom: 1em; overflow: hidden;"> | |||
{| class="wikitable" style="margin:0; color:inherit; width:100%" | |||
! style="background-color:#1a3244; color:#ffffff; font-weight:bold;" | MAIN BATTERY !! style="background-color:#1a3244; color:#ffffff; font-weight:bold;" | Type8 mod. 1 !! style="background-color:#1a3244; color:#ffffff; font-weight:bold;" | Type8 mod. 2 | |||
|- | |||
| style="color:inherit;" | • Arrangement || colspan="2" style="color:inherit;" | 3×2 127mm | |||
|- | |||
| style="color:inherit;" | • Firing range (km) || style="color:inherit;" | 8.55 || style="color:inherit;" | 9.41 | |||
|- | |||
| style="color:inherit;" | • Reload time (sec) || colspan="2" style="color:inherit;" | 7.0 | |||
|- | |||
| style="color:inherit;" | • Rate of fire (shots/min) || colspan="2" style="color:inherit;" | 8.5 | |||
|- | |||
| style="color:inherit;" | • 180° turn time (sec) || colspan="2" style="color:inherit;" | 26.1 | |||
|} | |||
</div> | |||
<div style="border: 2px solid rgba(212,175,55,0.8); border-radius: 3px; margin-bottom: 1em; overflow: hidden;"> | |||
{| class="wikitable" style="margin:0; color:inherit; width:100%" | |||
! style="background-color:#1a3244; color:#ffffff; font-weight:bold;" | DISPERSION !! style="background-color:#1a3244; color:#ffffff; font-weight:bold;" | | |||
|- | |||
| style="color:inherit;" | • Dispersion type || style="color:inherit;" | Standard DD dispersion | |||
|- | |||
| style="color:inherit;" | • Dispersion formula || style="color:inherit;" | Dispersion (m) = 7.5 × range(km) + 15 | |||
|- | |||
| style="color:inherit;" | • Sigma || style="color:inherit;" | 2.0 | |||
|- | |||
| style="color:inherit;" | • Maximum dispersion (m) || style="color:inherit;" | 79 | |||
|- | |||
| style="color:inherit;" | • Dispersion at 5 km || style="color:inherit;" | 52 | |||
|- | |||
| style="color:inherit;" | • Dispersion at 8.55 km || style="color:inherit;" | 79 | |||
|} | |||
</div> | |||
<div style="border: 2px solid rgba(212,175,55,0.8); border-radius: 3px; margin-bottom: 1em; overflow: hidden;"> | |||
{| class="wikitable" style="margin:0; color:inherit; width:100%" | |||
! style="background-color:#1a3244; color:#ffffff; font-weight:bold;" | HE SHELL !! style="background-color:#1a3244; color:#ffffff; font-weight:bold;" | | |||
|- | |||
| style="color:inherit;" | • Name || style="color:inherit;" | 127 mm HE Type1 | |||
|- | |||
| style="color:inherit;" | • Maximum damage || style="color:inherit;" | 2150 | |||
|- | |||
| style="color:inherit;" | • Fire chance (%) || style="color:inherit;" | 9.0% | |||
|- | |||
| style="color:inherit;" | • Shell velocity (m/s) || style="color:inherit;" | 915 | |||
|- | |||
| style="color:inherit;" | • Shell weight (kg) || style="color:inherit;" | 23 | |||
|- | |||
| style="color:inherit;" | • Penetration (mm) || style="color:inherit;" | 21 | |||
|} | |||
</div> | |||
<div style="border: 2px solid rgba(212,175,55,0.8); border-radius: 3px; margin-bottom: 1em; overflow: hidden;"> | |||
{| class="wikitable" style="margin:0; color:inherit; width:100%" | |||
! style="background-color:#1a3244; color:#ffffff; font-weight:bold;" | AP SHELL !! style="background-color:#1a3244; color:#ffffff; font-weight:bold;" | | |||
|- | |||
| style="color:inherit;" | • Name || style="color:inherit;" | 127 mm AP Type0 | |||
|- | |||
| style="color:inherit;" | • Maximum damage || style="color:inherit;" | 2200 | |||
|- | |||
| style="color:inherit;" | • Shell velocity (m/s) || style="color:inherit;" | 915 | |||
|- | |||
| style="color:inherit;" | • Shell weight (kg) || style="color:inherit;" | 23 | |||
|- | |||
| style="color:inherit;" | • Fuse time (sec) || style="color:inherit;" | 0.01 | |||
|- | |||
| style="color:inherit;" | • Ricochet start (°) || style="color:inherit;" | 45 | |||
|- | |||
| style="color:inherit;" | • Always ricochet (°) || style="color:inherit;" | 60 | |||
|- | |||
| style="color:inherit;" | • Normalisation (°) || style="color:inherit;" | 10 | |||
|- | |||
| style="color:inherit;" | • Arming threshold (mm) || style="color:inherit;" | 21 | |||
|} | |||
</div> | |||
</div></div></div> | |||
<div class="b-popup"><div class="b-popup_head js-tech-nav_head"><div><h2>Torpedoes</h2></div><span class="b-tech-nav_arrow"></span></div><div class="b-popup_content" style="display: none;"><div> | |||
<div style="border: 2px solid rgba(212,175,55,0.8); border-radius: 3px; margin-bottom: 1em; overflow: hidden;"> | |||
{| class="wikitable" style="margin:0; color:inherit; width:100%" | |||
! style="background-color:#1a3244; color:#ffffff; font-weight:bold;" | TORPEDO LAUNCHERS !! style="background-color:#1a3244; color:#ffffff; font-weight:bold;" | Type90 mod. 1 !! style="background-color:#1a3244; color:#ffffff; font-weight:bold;" | Type 93 mod. 2 | |||
|- | |||
| style="color:inherit;" | • Torpedo tubes (launchers × tubes) || style="color:inherit;" | 2 × 4 || style="color:inherit;" | 2 × 4 | |||
|- | |||
| style="color:inherit;" | • Torpedo name || style="color:inherit;" | Type90 mod. 1 || style="color:inherit;" | Type 93 mod. 2 | |||
|- | |||
| style="color:inherit;" | • Reload time (sec) || style="color:inherit;" | 101 || style="color:inherit;" | 112 | |||
|- | |||
| style="color:inherit;" | • 180° turn time (sec) || style="color:inherit;" | 7.2 || style="color:inherit;" | 7.2 | |||
|- | |||
| style="color:inherit;" | • Damage || style="color:inherit;" | 17,233 || style="color:inherit;" | 20,967 | |||
|- | |||
| style="color:inherit;" | • Range (km) || style="color:inherit;" | 10.0 || style="color:inherit;" | 10.0 | |||
|- | |||
| style="color:inherit;" | • Speed (kt) || style="color:inherit;" | 62 || style="color:inherit;" | 67 | |||
|- | |||
| style="color:inherit;" | • Detectability (km) || style="color:inherit;" | 1.6 || style="color:inherit;" | 1.7 | |||
|- | |||
| style="color:inherit;" | • Flooding chance (%) || style="color:inherit;" | 287 || style="color:inherit;" | 355 | |||
|} | |||
</div> | |||
</div></div></div> | |||
<div class="b-popup"><div class="b-popup_head js-tech-nav_head"><div><h2>AA Defense</h2></div><span class="b-tech-nav_arrow"></span></div><div class="b-popup_content" style="display: none;"><div> | |||
<div style="border: 2px solid rgba(212,175,55,0.8); border-radius: 3px; margin-bottom: 1em; overflow: hidden;"> | |||
'''Kagerō (A)''' | |||
{| class="wikitable" style="margin:0 0 0.8em 0; width:100%; color:inherit;" | |||
! style="background-color:#1a3244; color:#ffffff; font-weight:bold;" | AA ARMAMENT !! style="background-color:#1a3244; color:#ffffff; font-weight:bold;" | MOUNTS × BARRELS | |||
|- | |||
| style="color:inherit;" | 25 mm || style="color:inherit;" | 3 × 3 + 4 × 1 | |||
|} | |||
'''Continuous damage''' — average DPS within each action zone | |||
{| class="wikitable" style="margin:0 0 0.8em 0; width:100%; color:inherit;" | |||
! style="background-color:#1a3244; color:#ffffff; font-weight:bold;" | RANGE !! style="background-color:#1a3244; color:#ffffff; font-weight:bold;" | DPS !! style="background-color:#1a3244; color:#ffffff; font-weight:bold;" | HIT CHANCE !! style="background-color:#1a3244; color:#ffffff; font-weight:bold;" | ACTION ZONE (km) | |||
|- | |||
| style="color:inherit;" | Mid-range || style="color:inherit;" | 56 || style="color:inherit;" | 95% || style="color:inherit;" | 2.5 | |||
|} | |||
'''Kagerō (B)''' | |||
{| class="wikitable" style="margin:0 0 0.8em 0; width:100%; color:inherit;" | |||
! style="background-color:#1a3244; color:#ffffff; font-weight:bold;" | AA ARMAMENT !! style="background-color:#1a3244; color:#ffffff; font-weight:bold;" | MOUNTS × BARRELS | |||
|- | |||
| style="color:inherit;" | 25 mm || style="color:inherit;" | 3 × 3 + 10 × 1 | |||
|} | |||
'''Continuous damage''' — average DPS within each action zone | |||
{| class="wikitable" style="margin:0 0 0.8em 0; width:100%; color:inherit;" | |||
! style="background-color:#1a3244; color:#ffffff; font-weight:bold;" | RANGE !! style="background-color:#1a3244; color:#ffffff; font-weight:bold;" | DPS !! style="background-color:#1a3244; color:#ffffff; font-weight:bold;" | HIT CHANCE !! style="background-color:#1a3244; color:#ffffff; font-weight:bold;" | ACTION ZONE (km) | |||
|- | |||
| style="color:inherit;" | Mid-range || style="color:inherit;" | 98 || style="color:inherit;" | 95% || style="color:inherit;" | 2.5 | |||
|} | |||
</div> | |||
</div></div></div> | |||
<div class="b-popup"><div class="b-popup_head js-tech-nav_head"><div><h2>Depth Charges</h2></div><span class="b-tech-nav_arrow"></span></div><div class="b-popup_content" style="display: none;"><div> | |||
<div style="border: 2px solid rgba(212,175,55,0.8); border-radius: 3px; margin-bottom: 1em; overflow: hidden;"> | |||
{| class="wikitable" style="margin:0; color:inherit; width:100%" | |||
! style="background-color:#1a3244; color:#ffffff; font-weight:bold;" | DEPTH CHARGES !! style="background-color:#1a3244; color:#ffffff; font-weight:bold;" | | |||
|- | |||
| style="color:inherit;" | • Max damage || style="color:inherit;" | 4600 | |||
|- | |||
| style="color:inherit;" | • Number of charges || style="color:inherit;" | 2 | |||
|- | |||
| style="color:inherit;" | • Bombs per charge || style="color:inherit;" | 8 | |||
|- | |||
| style="color:inherit;" | • Reload time (sec) || style="color:inherit;" | 40.0 | |||
|} | |||
</div> | |||
</div></div></div> | |||
<!-- Add the ship code here to populate the upgrade table --> | |||
{{Ship Upgrades Section|code=PJSD208_Kagero}} | |||
<!-- Consumables have to be tagged individually on a slot by slot basis --> | |||
{{Ship Consumables Section|consumables= | |||
* '''Slot 1:''' {{Damage Control Party}} (5.0s action, 40.0s cooldown) | |||
* '''Slot 2:''' {{Smoke Generator}} (3 charges, 20.0s action, 160.0s cooldown) '''or''' {{Torpedo Reload Booster}} (3 charges, 1.0s action, 240.0s cooldown) | |||
* '''Slot 3:''' {{Engine Boost}} (3 charges, 120.0s action, 120.0s cooldown) | |||
}} | |||
==Gallery== | |||
<div class="b-popup"><div class="b-popup_head js-tech-nav_head"><div><h2>WoWs Gallery</h2></div><span class="b-tech-nav_arrow"></span></div><div class="b-popup_content" style="display: none;"><div> | |||
<gallery> | |||
</gallery>[[File:Kagero.jpg|left|thumb]]</div></div></div> | |||
<div class="b-popup"><div class="b-popup_head js-tech-nav_head"><div><h2>Historical Gallery</h2></div><span class="b-tech-nav_arrow"></span></div><div class="b-popup_content" style="display: none;"><div> | |||
<gallery> | |||
</gallery> | |||
</div></div></div> | |||
[[Category:Ships of Japan]] | |||
[[Category:Destroyers]] | |||
[[Category:Tier VIII ships]] | |||
<!-- DO NOT DELETE THIS LINE. DO NOT INSERT ANYTHING BELOW THIS LINE --> | |||
Latest revision as of 15:34, 9 July 2026

VIII
9,100,000
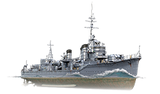
Kagerō — Japan Tech Tree Tier VIII Destroyer.
Japan avoided the limitations on ship tonnage by declining to sign the Second London Naval Treaty. As a result, new criteria were formulated for "cruiser-type" destroyers, emphasizing enhanced stability and sea endurance while maintaining the armament of "special type" destroyers. Laid down in September 1937, Kagerō played a role in World War II, engaging in combat near the eastern Solomon Islands and Santa Cruz Islands and participating in the Battles of Guadalcanal and Tassafaronga.
Pros
- Low detectability
- Powerful torpedo armament
Cons
- Long torpedo reload
- Low gun traverse speed
Ship Stats
Hull Information
Main Battery
Torpedoes
AA Defense
Depth Charges
Compatible Upgrades
| Slot 1 |
 |
 |

| ||
|---|---|---|---|---|---|
| Slot 2 |
 |
 |

| ||
| Slot 3 |
 |
 |
 |
 |

|
| Slot 4 |
 |
 |
 |

| |
| Slot 5 |
 |
 |
 |

|
Consumables
- Slot 1: Damage Control Party
 (5.0s action, 40.0s cooldown)
 - Slot 2: Smoke Generator
 (3 charges, 20.0s action, 160.0s cooldown) or Torpedo Reload Booster
  (3 charges, 1.0s action, 240.0s cooldown)
 - Slot 3: Engine Boost
 (3 charges, 120.0s action, 120.0s cooldown)
Gallery
WoWs Gallery

Historical Gallery
Categories:
