Ship:Navarra
imported>SirDixie:eu m Protected "Ship:Navarra" ([Edit=Allow only administrators] (indefinite) [Move=Allow only administrators] (indefinite)) |
Pockington (talk | contribs) corrected info |
||
| (2 intermediate revisions by 2 users not shown) | |||
| Line 1: | Line 1: | ||
{{#vardefine:ship_name|Navarra}} | |||
__NOTOC____NOEDITSECTION__ | |||
| | <div class="b-description gw-frame-1"><div class="b-description-img b-description-img__indent b-description-img__single"><div style="width:160px; height:102px; opacity:.5; border-radius:2px; position:absolute; left:0; top:0; z-index:1; -webkit-transition:all 0.2s ease-out 0.1s; transition:all 0.2s ease-out 0.1s;">[[File:Wows_anno_flag_spain.png|160px]]</div><div class="l-description-img_class"><span class="b-description-img_type b-description-img_type__Cruiser b-description-img_type__Cruiser-Tech Tree"></span><span class="b-description-img_class">III</span></div><div class="b-description-img_vehicle">[[File:Ship_PSSC103_Navarra.png|160px|link=|left]]</div><div class="l-description-img_price"><span class="b-description-img_price b-description-img_price__gold"><span title="''{{#var:ship_name}}'' was first released for sale on DD Month YYYY.">250,000</span></span></div></div><p>[[Ship:{{#var:ship_name}}|{{#var:ship_name}}]] — Spain Tech Tree Tier III [[Ship:Cruiser|Cruiser]].</p><p>Named after Victoria Eugenie of Battenberg, the wife of the reigning king of Spain at the time, this ship was laid down in March 1915. The project was influenced by the design of British cruiser Birmingham. Between 1923 and 1926, the ship took part in the Rif War; between 1928 and 1929, she underwent a major overhaul; and in 1930, she was transferred to the naval school in Cadiz. After the proclamation of the Second Spanish Republic, she was renamed República. With the start of the Spanish Civil War, the ship was seized by the rebel nationalists, and in 1937, her name was changed again to Navarra.</p><p> </p></div> | ||
===Pros=== | |||
* High survivability | |||
* Enables firing over obstacles | |||
* Low detectability | |||
===Cons=== | |||
* Low damage per minute | |||
* Shooting over ranges is challenging | |||
* | |||
* | |||
==Ship Stats== | |||
< | <div class="b-popup"><div class="b-popup_head js-tech-nav_head"><div><h2>Hull Information</h2></div><span class="b-tech-nav_arrow"></span></div><div class="b-popup_content" style="display: none;"><div> | ||
<div style="border: 2px solid rgba(212,175,55,0.8); border-radius: 3px; margin-bottom: 1em; overflow: hidden;"> | |||
# | {| class="wikitable" style="margin:0; color:inherit; width:100%" | ||
# | ! style="background-color:#1a3244; color:#ffffff; font-weight:bold;" | SURVIVABILITY !! style="background-color:#1a3244; color:#ffffff; font-weight:bold;" | Navarra (A) !! style="background-color:#1a3244; color:#ffffff; font-weight:bold;" | Navarra (B) | ||
|- | |||
| style="color:inherit;" | • Hit Points || style="color:inherit;" | 19600 || style="color:inherit;" | 21200 | |||
|- | |||
| style="color:inherit;" | • Torpedo protection damage reduction (%) || colspan="2" style="color:inherit;" | 0% | |||
|} | |||
</div> | |||
<div style="border: 2px solid rgba(212,175,55,0.8); border-radius: 3px; margin-bottom: 1em; overflow: hidden;"> | |||
{| class="wikitable" style="margin:0; color:inherit; width:100%" | |||
! style="background-color:#1a3244; color:#ffffff; font-weight:bold;" | ARMOR DETAIL !! style="background-color:#1a3244; color:#ffffff; font-weight:bold;" | | |||
|- | |||
| style="color:inherit;" | • Belt (mm) || style="color:inherit;" | 76 | |||
|- | |||
| style="color:inherit;" | • Deck (mm) || style="color:inherit;" | 6 | |||
|- | |||
| style="color:inherit;" | • Superstructure (mm) || style="color:inherit;" | 6 | |||
|- | |||
| style="color:inherit;" | • Extremities (mm) || style="color:inherit;" | 6 | |||
|} | |||
</div> | |||
| | <div style="border: 2px solid rgba(212,175,55,0.8); border-radius: 3px; margin-bottom: 1em; overflow: hidden;"> | ||
{| class="wikitable" style="margin:0; color:inherit; width:100%" | |||
! style="background-color:#1a3244; color:#ffffff; font-weight:bold;" | MANEUVERABILITY !! style="background-color:#1a3244; color:#ffffff; font-weight:bold;" | Navarra (A) !! style="background-color:#1a3244; color:#ffffff; font-weight:bold;" | Navarra (B) | |||
|- | |||
| style="color:inherit;" | • Maximum speed (kt) || style="color:inherit;" | 25.0 || style="color:inherit;" | 25.0 | |||
|- | |||
| style="color:inherit;" | • Turning circle radius (m) || style="color:inherit;" | 510 || style="color:inherit;" | 510 | |||
|- | |||
| style="color:inherit;" | • Rudder-shift time (sec) || style="color:inherit;" | 8.8 || style="color:inherit;" | 6.3 | |||
|} | |||
</div> | |||
| | <div style="border: 2px solid rgba(212,175,55,0.8); border-radius: 3px; margin-bottom: 1em; overflow: hidden;"> | ||
{| class="wikitable" style="margin:0; color:inherit; width:100%" | |||
! style="background-color:#1a3244; color:#ffffff; font-weight:bold;" | CONCEALMENT !! style="background-color:#1a3244; color:#ffffff; font-weight:bold;" | Navarra (A) !! style="background-color:#1a3244; color:#ffffff; font-weight:bold;" | Navarra (B) | |||
|- | |||
| style="color:inherit;" | • Detectability by sea (km) || style="color:inherit;" | 9.56 || style="color:inherit;" | 9.56 | |||
|- | |||
| style="color:inherit;" | • Detectability by air (km) || style="color:inherit;" | 5.11 || style="color:inherit;" | 5.11 | |||
|- | |||
| style="color:inherit;" | • Detectability after firing main guns in smoke (km) || colspan="2" style="color:inherit;" | 4.37 | |||
|- | |||
| style="color:inherit;" | • Detectability by depths (km) || style="color:inherit;" | 5.11 || style="color:inherit;" | 5.11 | |||
|} | |||
</div> | |||
</div></div></div> | |||
<div class="b-popup"><div class="b-popup_head js-tech-nav_head"><div><h2>Main Battery</h2></div><span class="b-tech-nav_arrow"></span></div><div class="b-popup_content" style="display: none;"><div><div style="border: 2px solid rgba(212,175,55,0.8); border-radius: 3px; margin-bottom: 1em; overflow: hidden;"> | |||
{| class="wikitable" style="margin:0; color:inherit; width:100%" | |||
! style="background-color:#1a3244; color:#ffffff; font-weight:bold;" | MAIN BATTERY !! style="background-color:#1a3244; color:#ffffff; font-weight:bold;" | SCI Mk III Mod. 1 !! style="background-color:#1a3244; color:#ffffff; font-weight:bold;" | SCI Mk III Mod. 2 | |||
|- | |||
| style="color:inherit;" | • Arrangement || colspan="2" style="color:inherit;" | 6×1 152mm | |||
|- | |||
| style="color:inherit;" | • Firing range (km) || style="color:inherit;" | 11.04 || style="color:inherit;" | 12.14 | |||
|- | |||
| style="color:inherit;" | • Reload time (sec) || colspan="2" style="color:inherit;" | 8.0 | |||
|- | |||
| style="color:inherit;" | • Rate of fire (shots/min) || colspan="2" style="color:inherit;" | 7.5 | |||
|- | |||
| style="color:inherit;" | • 180° turn time (sec) || colspan="2" style="color:inherit;" | 15.0 | |||
|} | |||
</div> | |||
<div style="border: 2px solid rgba(212,175,55,0.8); border-radius: 3px; margin-bottom: 1em; overflow: hidden;"> | |||
{| class="wikitable" style="margin:0; color:inherit; width:100%" | |||
! style="background-color:#1a3244; color:#ffffff; font-weight:bold;" | DISPERSION !! style="background-color:#1a3244; color:#ffffff; font-weight:bold;" | | |||
|- | |||
| style="color:inherit;" | • Dispersion type || style="color:inherit;" | Standard CA/CL dispersion | |||
|- | |||
| style="color:inherit;" | • Dispersion formula || style="color:inherit;" | Dispersion (m) = 6.9 × range(km) + 33 | |||
|- | |||
| style="color:inherit;" | • Sigma || style="color:inherit;" | 2.0 | |||
|- | |||
| style="color:inherit;" | • Maximum dispersion (m) || style="color:inherit;" | 109 | |||
|- | |||
| style="color:inherit;" | • Dispersion at 5 km || style="color:inherit;" | 68 | |||
|- | |||
| style="color:inherit;" | • Dispersion at 10 km || style="color:inherit;" | 102 | |||
|- | |||
| style="color:inherit;" | • Dispersion at 11.04 km || style="color:inherit;" | 109 | |||
|} | |||
</div> | |||
<div style="border: 2px solid rgba(212,175,55,0.8); border-radius: 3px; margin-bottom: 1em; overflow: hidden;"> | |||
{| class="wikitable" style="margin:0; color:inherit; width:100%" | |||
! style="background-color:#1a3244; color:#ffffff; font-weight:bold;" | HE SHELL !! style="background-color:#1a3244; color:#ffffff; font-weight:bold;" | | |||
|- | |||
| style="color:inherit;" | • Name || style="color:inherit;" | 152 mm HE 99 lb | |||
|- | |||
| style="color:inherit;" | • Maximum damage || style="color:inherit;" | 1750 | |||
|- | |||
| style="color:inherit;" | • Fire chance (%) || style="color:inherit;" | 8.0% | |||
|- | |||
| style="color:inherit;" | • Shell velocity (m/s) || style="color:inherit;" | 900 | |||
|- | |||
| style="color:inherit;" | • Shell weight (kg) || style="color:inherit;" | 45.4 | |||
|- | |||
| style="color:inherit;" | • Penetration (mm) || style="color:inherit;" | 25 | |||
|} | |||
</div> | |||
| | <div style="border: 2px solid rgba(212,175,55,0.8); border-radius: 3px; margin-bottom: 1em; overflow: hidden;"> | ||
{| class="wikitable" style="margin:0; color:inherit; width:100%" | |||
< | ! style="background-color:#1a3244; color:#ffffff; font-weight:bold;" | AP SHELL !! style="background-color:#1a3244; color:#ffffff; font-weight:bold;" | | ||
|- | |||
| style="color:inherit;" | • Name || style="color:inherit;" | 152 mm AP 100 lb | |||
|- | |||
| style="color:inherit;" | • Maximum damage || style="color:inherit;" | 2300 | |||
|- | |||
| style="color:inherit;" | • Shell velocity (m/s) || style="color:inherit;" | 900 | |||
|- | |||
| style="color:inherit;" | • Shell weight (kg) || style="color:inherit;" | 45.4 | |||
|- | |||
| style="color:inherit;" | • Fuse time (sec) || style="color:inherit;" | 0.025 | |||
|- | |||
| style="color:inherit;" | • Ricochet start (°) || style="color:inherit;" | 45 | |||
|- | |||
| style="color:inherit;" | • Always ricochet (°) || style="color:inherit;" | 60 | |||
|- | |||
| style="color:inherit;" | • Normalisation (°) || style="color:inherit;" | 8.5 | |||
|- | |||
| style="color:inherit;" | • Arming threshold (mm) || style="color:inherit;" | 25 | |||
|} | |||
</div> | |||
</div></div></div> | |||
<div class="b-popup"><div class="b-popup_head js-tech-nav_head"><div><h2>Secondary Battery</h2></div><span class="b-tech-nav_arrow"></span></div><div class="b-popup_content" style="display: none;"><div> | |||
<div style="border: 2px solid rgba(212,175,55,0.8); border-radius: 3px; margin-bottom: 1em; overflow: hidden;"> | |||
{| class="wikitable" style="margin:0; color:inherit; width:100%" | |||
! style="background-color:#1a3244; color:#ffffff; font-weight:bold;" | SECONDARY BATTERY !! style="background-color:#1a3244; color:#ffffff; font-weight:bold;" | | |||
|- | |||
| style="color:inherit;" | • Secondary battery range (km) || style="color:inherit;" | 3.2 | |||
|} | |||
</div> | |||
<div style="border: 2px solid rgba(212,175,55,0.8); border-radius: 3px; margin-bottom: 1em; overflow: hidden;"> | |||
| | {| class="wikitable" style="margin:0; color:inherit; width:100%" | ||
| | ! style="background-color:#1a3244; color:#ffffff; font-weight:bold;" | SECONDARY ARMAMENT 1 !! style="background-color:#1a3244; color:#ffffff; font-weight:bold;" | | ||
| | |- | ||
| | | style="color:inherit;" | • Shell type || style="color:inherit;" | HE | ||
| | |- | ||
| style="color:inherit;" | • Name || style="color:inherit;" | 88 mm Spr.Gr. | |||
|- | |||
| style="color:inherit;" | • Arrangement || style="color:inherit;" | 4x1 88mm | |||
|- | |||
| style="color:inherit;" | • Rate of fire (shots/min) || style="color:inherit;" | 15.0 | |||
|- | |||
| style="color:inherit;" | • Maximum damage || style="color:inherit;" | 1000 | |||
|- | |||
| style="color:inherit;" | • Shell velocity (m/s) || style="color:inherit;" | 890 | |||
|- | |||
| style="color:inherit;" | • Penetration (mm) || style="color:inherit;" | 15 | |||
|- | |||
| style="color:inherit;" | • Fire chance (%) || style="color:inherit;" | 4.0% | |||
|} | |||
</div> | |||
</div></div></div> | |||
<div class="b-popup"><div class="b-popup_head js-tech-nav_head"><div><h2>AA Defense</h2></div><span class="b-tech-nav_arrow"></span></div><div class="b-popup_content" style="display: none;"><div> | |||
<div style="border: 2px solid rgba(212,175,55,0.8); border-radius: 3px; margin-bottom: 1em; overflow: hidden;"> | |||
'''Navarra (A)''' | |||
{| class="wikitable" style="margin:0 0 0.8em 0; width:100%; color:inherit;" | |||
! style="background-color:#1a3244; color:#ffffff; font-weight:bold;" | AA ARMAMENT !! style="background-color:#1a3244; color:#ffffff; font-weight:bold;" | MOUNTS × BARRELS | |||
|- | |||
| style="color:inherit;" | 88 mm || style="color:inherit;" | 4 × 1 | |||
|- | |||
| style="color:inherit;" | 20 mm || style="color:inherit;" | 4 × 1 | |||
|} | |||
| | '''Continuous damage''' — average DPS within each action zone | ||
{| class="wikitable" style="margin:0 0 0.8em 0; width:100%; color:inherit;" | |||
! style="background-color:#1a3244; color:#ffffff; font-weight:bold;" | RANGE !! style="background-color:#1a3244; color:#ffffff; font-weight:bold;" | DPS !! style="background-color:#1a3244; color:#ffffff; font-weight:bold;" | HIT CHANCE !! style="background-color:#1a3244; color:#ffffff; font-weight:bold;" | ACTION ZONE (km) | |||
|- | |||
| style="color:inherit;" | Short-range || style="color:inherit;" | 56 || style="color:inherit;" | 85% || style="color:inherit;" | 2.0 | |||
|- | |||
| style="color:inherit;" | Long-range || style="color:inherit;" | 17.5 || style="color:inherit;" | 90% || style="color:inherit;" | 4.6 | |||
|} | |||
'''Damage by shell explosions''' | |||
{| class="wikitable" style="margin:0 0 0.8em 0; width:100%; color:inherit;" | |||
! style="background-color:#1a3244; color:#ffffff; font-weight:bold;" | EXPLOSIONS / SALVO !! style="background-color:#1a3244; color:#ffffff; font-weight:bold;" | DAMAGE !! style="background-color:#1a3244; color:#ffffff; font-weight:bold;" | HIT CHANCE !! style="background-color:#1a3244; color:#ffffff; font-weight:bold;" | ACTION ZONE (km) | |||
|- | |||
| style="color:inherit;" | 1 || style="color:inherit;" | 100 || style="color:inherit;" | 90% || style="color:inherit;" | 3.5–4.6 | |||
|} | |||
'''Navarra (B)''' | |||
{ | {| class="wikitable" style="margin:0 0 0.8em 0; width:100%; color:inherit;" | ||
! style="background-color:#1a3244; color:#ffffff; font-weight:bold;" | AA ARMAMENT !! style="background-color:#1a3244; color:#ffffff; font-weight:bold;" | MOUNTS × BARRELS | |||
|- | |||
| style="color:inherit;" | 88 mm || style="color:inherit;" | 4 × 1 | |||
|- | |||
| style="color:inherit;" | 20 mm || style="color:inherit;" | 4 × 4 | |||
|} | |||
| | '''Continuous damage''' — average DPS within each action zone | ||
| | {| class="wikitable" style="margin:0 0 0.8em 0; width:100%; color:inherit;" | ||
| | ! style="background-color:#1a3244; color:#ffffff; font-weight:bold;" | RANGE !! style="background-color:#1a3244; color:#ffffff; font-weight:bold;" | DPS !! style="background-color:#1a3244; color:#ffffff; font-weight:bold;" | HIT CHANCE !! style="background-color:#1a3244; color:#ffffff; font-weight:bold;" | ACTION ZONE (km) | ||
| | |- | ||
| | | style="color:inherit;" | Short-range || style="color:inherit;" | 101.5 || style="color:inherit;" | 85% || style="color:inherit;" | 2.0 | ||
| | |- | ||
| style="color:inherit;" | Long-range || style="color:inherit;" | 17.5 || style="color:inherit;" | 90% || style="color:inherit;" | 4.6 | |||
|} | |||
| | '''Damage by shell explosions''' | ||
| | {| class="wikitable" style="margin:0 0 0.8em 0; width:100%; color:inherit;" | ||
| | ! style="background-color:#1a3244; color:#ffffff; font-weight:bold;" | EXPLOSIONS / SALVO !! style="background-color:#1a3244; color:#ffffff; font-weight:bold;" | DAMAGE !! style="background-color:#1a3244; color:#ffffff; font-weight:bold;" | HIT CHANCE !! style="background-color:#1a3244; color:#ffffff; font-weight:bold;" | ACTION ZONE (km) | ||
| | |- | ||
| style="color:inherit;" | 1 || style="color:inherit;" | 700 || style="color:inherit;" | 90% || style="color:inherit;" | 3.5–4.6 | |||
|} | |||
</div> | |||
</div></div></div> | |||
<!-- Add the ship code here to populate the upgrade table --> | |||
{{Ship Upgrades Section|code=PSSC103_Navarra}} | |||
<!-- Consumables have to be tagged individually on a slot by slot basis --> | |||
{{Ship Consumables Section|consumables= | |||
{{ | * '''Slot 1:''' {{Damage Control Party}} (5.0s action, 60.0s cooldown) | ||
}} | }} | ||
==Gallery== | |||
<div class="b-popup"><div class="b-popup_head js-tech-nav_head"><div><h2>WoWs Gallery</h2></div><span class="b-tech-nav_arrow"></span></div><div class="b-popup_content" style="display: none;"><div>[[File:Navarrainport.png|thumb]]<gallery> | |||
</gallery> | </gallery> | ||
</div></div></div> | |||
<div class="b-popup"><div class="b-popup_head js-tech-nav_head"><div><h2>Historical Gallery</h2></div><span class="b-tech-nav_arrow"></span></div><div class="b-popup_content" style="display: none;"><div> | |||
<gallery> | |||
< | </gallery> | ||
</div></div></div> | |||
[[Category:Ships of Spain]] | |||
[[Category:Cruisers]] | |||
[[Category:Tier III ships]] | |||
<!-- DO NOT DELETE THIS LINE. DO NOT INSERT ANYTHING BELOW THIS LINE --> | |||
Latest revision as of 14:54, 10 July 2026

III
250,000
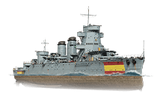
Navarra — Spain Tech Tree Tier III Cruiser.
Named after Victoria Eugenie of Battenberg, the wife of the reigning king of Spain at the time, this ship was laid down in March 1915. The project was influenced by the design of British cruiser Birmingham. Between 1923 and 1926, the ship took part in the Rif War; between 1928 and 1929, she underwent a major overhaul; and in 1930, she was transferred to the naval school in Cadiz. After the proclamation of the Second Spanish Republic, she was renamed República. With the start of the Spanish Civil War, the ship was seized by the rebel nationalists, and in 1937, her name was changed again to Navarra.
Pros
- High survivability
- Enables firing over obstacles
- Low detectability
Cons
- Low damage per minute
- Shooting over ranges is challenging
Ship Stats
Hull Information
Main Battery
Secondary Battery
AA Defense
Compatible Upgrades
| Slot 1 |
 |
 |

|
|---|---|---|---|
| Slot 2 |
 |

|
Consumables
- Slot 1: Damage Control Party
 (5.0s action, 60.0s cooldown)
Gallery
WoWs Gallery

Historical Gallery
Categories:
