Ship:Vallejo
Automated stats update via wiki pipeline |
Pockington (talk | contribs) corrected info |
||
| (One intermediate revision by one other user not shown) | |||
| Line 5: | Line 5: | ||
===Pros=== | ===Pros=== | ||
* | * High damage per minute | ||
* | * Access to the Rapid Takeoff Spotter consumable | ||
* Low detectability | |||
===Cons=== | ===Cons=== | ||
* | * Poor main battery ballistics | ||
* | * Poor survivability | ||
| Line 21: | Line 23: | ||
| style="color:inherit;" | • Hit Points || style="color:inherit;" | 44000 | | style="color:inherit;" | • Hit Points || style="color:inherit;" | 44000 | ||
|- | |- | ||
| style="color:inherit;" | • Torpedo protection damage reduction (%) || style="color:inherit;" | | | style="color:inherit;" | • Torpedo protection damage reduction (%) || style="color:inherit;" | 4 | ||
|} | |} | ||
</div> | </div> | ||
| Line 29: | Line 31: | ||
! style="background-color:#1a3244; color:#ffffff; font-weight:bold;" | ARMOR DETAIL !! style="background-color:#1a3244; color:#ffffff; font-weight:bold;" | | ! style="background-color:#1a3244; color:#ffffff; font-weight:bold;" | ARMOR DETAIL !! style="background-color:#1a3244; color:#ffffff; font-weight:bold;" | | ||
|- | |- | ||
| style="color:inherit;" | • Belt (mm) || style="color:inherit;" | | | style="color:inherit;" | • Belt (mm) || style="color:inherit;" | 102 | ||
|- | |- | ||
| style="color:inherit;" | • Deck (mm) || style="color:inherit;" | | | style="color:inherit;" | • Deck (mm) || style="color:inherit;" | 38 | ||
|- | |- | ||
| style="color:inherit;" | • Superstructure (mm) || style="color:inherit;" | | | style="color:inherit;" | • Superstructure (mm) || style="color:inherit;" | 13 | ||
|- | |- | ||
| style="color:inherit;" | • Extremities (mm) || style="color:inherit;" | | | style="color:inherit;" | • Extremities (mm) || style="color:inherit;" | 25 | ||
|} | |} | ||
</div> | </div> | ||
| Line 47: | Line 49: | ||
| style="color:inherit;" | • Turning circle radius (m) || style="color:inherit;" | 740 | | style="color:inherit;" | • Turning circle radius (m) || style="color:inherit;" | 740 | ||
|- | |- | ||
| style="color:inherit;" | • Rudder-shift time (sec) || style="color:inherit;" | | | style="color:inherit;" | • Rudder-shift time (sec) || style="color:inherit;" | 10.7 | ||
|} | |} | ||
</div> | </div> | ||
| Line 173: | Line 175: | ||
{| class="wikitable" style="margin:0 0 0.8em 0; width:100%; color:inherit;" | {| class="wikitable" style="margin:0 0 0.8em 0; width:100%; color:inherit;" | ||
! style="background-color:#1a3244; color:#ffffff; font-weight:bold;" | AA ARMAMENT !! style="background-color:#1a3244; color:#ffffff; font-weight:bold;" | MOUNTS × BARRELS | ! style="background-color:#1a3244; color:#ffffff; font-weight:bold;" | AA ARMAMENT !! style="background-color:#1a3244; color:#ffffff; font-weight:bold;" | MOUNTS × BARRELS | ||
|- | |||
| style="color:inherit;" | 152 mm || style="color:inherit;" | 5 × 2 | |||
|- | |- | ||
| style="color:inherit;" | 76 mm || style="color:inherit;" | 11 × 2 | | style="color:inherit;" | 76 mm || style="color:inherit;" | 11 × 2 | ||
| Line 186: | Line 190: | ||
|- | |- | ||
| style="color:inherit;" | Mid-range || style="color:inherit;" | 378 || style="color:inherit;" | 90% || style="color:inherit;" | 4.0 | | style="color:inherit;" | Mid-range || style="color:inherit;" | 378 || style="color:inherit;" | 90% || style="color:inherit;" | 4.0 | ||
|- | |||
| style="color:inherit;" | Long-range || style="color:inherit;" | 115.5 || style="color:inherit;" | 90% || style="color:inherit;" | 6.9 | |||
|} | |||
'''Damage by shell explosions''' | |||
{| class="wikitable" style="margin:0 0 0.8em 0; width:100%; color:inherit;" | |||
! style="background-color:#1a3244; color:#ffffff; font-weight:bold;" | EXPLOSIONS / SALVO !! style="background-color:#1a3244; color:#ffffff; font-weight:bold;" | DAMAGE !! style="background-color:#1a3244; color:#ffffff; font-weight:bold;" | HIT CHANCE !! style="background-color:#1a3244; color:#ffffff; font-weight:bold;" | ACTION ZONE (km) | |||
|- | |||
| style="color:inherit;" | 6 || style="color:inherit;" | 1820 || style="color:inherit;" | 90% || style="color:inherit;" | 3.5–6.9 | |||
|} | |} | ||
</div> | </div> | ||
| Line 207: | Line 220: | ||
<div class="b-popup"><div class="b-popup_head js-tech-nav_head"><div><h2>WoWs Gallery</h2></div><span class="b-tech-nav_arrow"></span></div><div class="b-popup_content" style="display: none;"><div> | <div class="b-popup"><div class="b-popup_head js-tech-nav_head"><div><h2>WoWs Gallery</h2></div><span class="b-tech-nav_arrow"></span></div><div class="b-popup_content" style="display: none;"><div> | ||
[[File:Vallejo.png|thumb]] | |||
[[Category:Ships of U.S.A.]] | [[Category:Ships of U.S.A.]] | ||
Latest revision as of 01:05, 10 July 2026

IX
21,500 doubloons
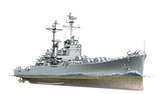
Vallejo — U.S.A. Premium Tier IX Cruiser.
In the summer of 1941, the Bureau of Ships began to develop a cruiser with dual-purpose main battery guns and an armored deck capable of withstanding attacks from standard bombers. One of the presented designs featured an armor belt and five twin-gun main battery turrets. This project never came to life, and subsequent endeavors to design a cruiser focused on anti-aircraft capabilities led to the development of the Worcester-class ships.
Pros
- High damage per minute
- Access to the Rapid Takeoff Spotter consumable
- Low detectability
Cons
- Poor main battery ballistics
- Poor survivability
Ship Stats
Hull Information
Main Battery
Airstrike
AA Defense
Compatible Upgrades
| Slot 1 |
 |
 |
 |

|
|---|---|---|---|---|
| Slot 2 |
 |
 |

| |
| Slot 3 |
 |
 |

| |
| Slot 4 |
 |
 |
 |

|
| Slot 5 |
 |
 |
 |

|
| Slot 6 |
 |
 |

|
Consumables
- Slot 1: Damage Control Party
 (5.0s action, 60.0s cooldown)
 - Slot 2: Defensive AA Fire
 (4 charges, 40.0s action, 80.0s cooldown)
 - Slot 3: Repair Party
 (3 charges, 28.0s action, 80.0s cooldown, 220 hp/s)
 - Slot 4: Spotting Aircraft
 (5 charges, 60.0s action, 10.0s cooldown) or Patrol Fighter
  (3 charges, 60.0s action, 90.0s cooldown)

