Ship:Salem
Automated stats update via wiki pipeline |
Pockington (talk | contribs) corrected info |
||
| (3 intermediate revisions by one other user not shown) | |||
| Line 5: | Line 5: | ||
===Pros=== | ===Pros=== | ||
* | * High survivability | ||
* | * Rapid-firing main guns | ||
* Good selection of consumables | |||
* High AA defense efficiency | |||
===Cons=== | ===Cons=== | ||
* | * No torpedo armament | ||
* | * Large turning circle | ||
| Line 21: | Line 23: | ||
| style="color:inherit;" | • Hit Points || style="color:inherit;" | 49700 | | style="color:inherit;" | • Hit Points || style="color:inherit;" | 49700 | ||
|- | |- | ||
| style="color:inherit;" | • Torpedo protection damage reduction (%) || style="color:inherit;" | | | style="color:inherit;" | • Torpedo protection damage reduction (%) || style="color:inherit;" | 7 | ||
|} | |} | ||
</div> | </div> | ||
| Line 29: | Line 31: | ||
! style="background-color:#1a3244; color:#ffffff; font-weight:bold;" | ARMOR DETAIL !! style="background-color:#1a3244; color:#ffffff; font-weight:bold;" | | ! style="background-color:#1a3244; color:#ffffff; font-weight:bold;" | ARMOR DETAIL !! style="background-color:#1a3244; color:#ffffff; font-weight:bold;" | | ||
|- | |- | ||
| style="color:inherit;" | • Belt (mm) || style="color:inherit;" | | | style="color:inherit;" | • Belt (mm) || style="color:inherit;" | 152 | ||
|- | |- | ||
| style="color:inherit;" | • Deck (mm) || style="color:inherit;" | | | style="color:inherit;" | • Deck (mm) || style="color:inherit;" | 30 | ||
|- | |- | ||
| style="color:inherit;" | • Superstructure (mm) || style="color:inherit;" | | | style="color:inherit;" | • Superstructure (mm) || style="color:inherit;" | 16 | ||
|- | |- | ||
| style="color:inherit;" | • Extremities (mm) || style="color:inherit;" | | | style="color:inherit;" | • Extremities (mm) || style="color:inherit;" | 27 | ||
|} | |} | ||
</div> | </div> | ||
| Line 47: | Line 49: | ||
| style="color:inherit;" | • Turning circle radius (m) || style="color:inherit;" | 770 | | style="color:inherit;" | • Turning circle radius (m) || style="color:inherit;" | 770 | ||
|- | |- | ||
| style="color:inherit;" | • Rudder-shift time (sec) || style="color:inherit;" | | | style="color:inherit;" | • Rudder-shift time (sec) || style="color:inherit;" | 8.6 | ||
|} | |} | ||
</div> | </div> | ||
| Line 164: | Line 166: | ||
| style="color:inherit;" | • Name || style="color:inherit;" | 127 mm HE Mk32 | | style="color:inherit;" | • Name || style="color:inherit;" | 127 mm HE Mk32 | ||
|- | |- | ||
| style="color:inherit;" | • Arrangement || style="color:inherit;" | | | style="color:inherit;" | • Arrangement || style="color:inherit;" | 6x2 127mm | ||
|- | |- | ||
| style="color:inherit;" | • Rate of fire (shots/min) || style="color:inherit;" | 10.0 | | style="color:inherit;" | • Rate of fire (shots/min) || style="color:inherit;" | 10.0 | ||
| Line 217: | Line 219: | ||
! style="background-color:#1a3244; color:#ffffff; font-weight:bold;" | RANGE !! style="background-color:#1a3244; color:#ffffff; font-weight:bold;" | DPS !! style="background-color:#1a3244; color:#ffffff; font-weight:bold;" | HIT CHANCE !! style="background-color:#1a3244; color:#ffffff; font-weight:bold;" | ACTION ZONE (km) | ! style="background-color:#1a3244; color:#ffffff; font-weight:bold;" | RANGE !! style="background-color:#1a3244; color:#ffffff; font-weight:bold;" | DPS !! style="background-color:#1a3244; color:#ffffff; font-weight:bold;" | HIT CHANCE !! style="background-color:#1a3244; color:#ffffff; font-weight:bold;" | ACTION ZONE (km) | ||
|- | |- | ||
| style="color:inherit;" | Mid-range || style="color:inherit;" | | | style="color:inherit;" | Mid-range || style="color:inherit;" | 375 || style="color:inherit;" | 90% || style="color:inherit;" | 4.0 | ||
|- | |- | ||
| style="color:inherit;" | Long-range || style="color:inherit;" | | | style="color:inherit;" | Long-range || style="color:inherit;" | 95 || style="color:inherit;" | 90% || style="color:inherit;" | 5.8 | ||
|} | |} | ||
| Line 226: | Line 228: | ||
! style="background-color:#1a3244; color:#ffffff; font-weight:bold;" | EXPLOSIONS / SALVO !! style="background-color:#1a3244; color:#ffffff; font-weight:bold;" | DAMAGE !! style="background-color:#1a3244; color:#ffffff; font-weight:bold;" | HIT CHANCE !! style="background-color:#1a3244; color:#ffffff; font-weight:bold;" | ACTION ZONE (km) | ! style="background-color:#1a3244; color:#ffffff; font-weight:bold;" | EXPLOSIONS / SALVO !! style="background-color:#1a3244; color:#ffffff; font-weight:bold;" | DAMAGE !! style="background-color:#1a3244; color:#ffffff; font-weight:bold;" | HIT CHANCE !! style="background-color:#1a3244; color:#ffffff; font-weight:bold;" | ACTION ZONE (km) | ||
|- | |- | ||
| style="color:inherit;" | 5 || style="color:inherit;" | | | style="color:inherit;" | 5 || style="color:inherit;" | 1680 || style="color:inherit;" | 90% || style="color:inherit;" | 3.5–5.8 | ||
|} | |} | ||
</div> | </div> | ||
| Line 240: | Line 242: | ||
* '''Slot 1:''' {{Damage Control Party}} (5.0s action, 40.0s cooldown) | * '''Slot 1:''' {{Damage Control Party}} (5.0s action, 40.0s cooldown) | ||
* '''Slot 2:''' {{Defensive AA Fire}} (4 charges, 40.0s action, 80.0s cooldown) | * '''Slot 2:''' {{Defensive AA Fire}} (4 charges, 40.0s action, 80.0s cooldown) | ||
* '''Slot 3:''' {{Hydroacoustic Search}} (3 charges, 100.0s action, 120.0s cooldown) | * '''Slot 3:''' {{Surveillance Radar}} (8.5km, 3 charges, 40.0s action, 120.0s cooldown) '''or''' {{Hydroacoustic Search}} (3 charges, 100.0s action, 120.0s cooldown) | ||
* '''Slot 4:''' {{Repair Party}} (3 charges, 20.0s action, 80.0s cooldown, 994 hp/s) | * '''Slot 4:''' {{Repair Party}} (3 charges, 20.0s action, 80.0s cooldown, 994 hp/s) | ||
}} | }} | ||
| Line 249: | Line 251: | ||
<gallery> | <gallery> | ||
File:Salem.png | |||
</gallery> | </gallery> | ||
</div></div></div> | </div></div></div> | ||
Latest revision as of 01:28, 10 July 2026

X
26,000 doubloons
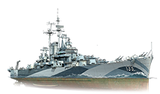
Salem — U.S.A. Special Tier X Cruiser.
USS Salem, a Des Moines-class cruiser, served mainly in the Mediterranean from 1950 to 1956, serving as the flagship of the U.S. 6th and 2nd Fleets on a regular basis. In 1956, she "starred" as German cruiser Admiral Graf Spee in the "Pursuit of the Graf Spee" film. In 1994, the cruiser was decommissioned and converted into a museum ship, which is now located in Quincy, Massachusetts.
Pros
- High survivability
- Rapid-firing main guns
- Good selection of consumables
- High AA defense efficiency
Cons
- No torpedo armament
- Large turning circle
Ship Stats
Hull Information
Main Battery
Secondary Battery
Airstrike
AA Defense
Compatible Upgrades
| Slot 1 |
 |
 |

| ||
|---|---|---|---|---|---|
| Slot 2 |
 |
 |
 |
 |

|
| Slot 3 |
 |
 |
 |

| |
| Slot 4 |
 |
 |
 |

| |
| Slot 5 |
 |
 |
 |

| |
| Slot 6 |
 |
 |

|
Consumables
- Slot 1: Damage Control Party
 (5.0s action, 40.0s cooldown)
 - Slot 2: Defensive AA Fire
 (4 charges, 40.0s action, 80.0s cooldown)
 - Slot 3: Surveillance Radar
 (8.5km, 3 charges, 40.0s action, 120.0s cooldown) or Hydroacoustic Search
  (3 charges, 100.0s action, 120.0s cooldown)
 - Slot 4: Repair Party
 (3 charges, 20.0s action, 80.0s cooldown, 994 hp/s)
Gallery
WoWs Gallery

Historical Gallery
Categories:
