Ship:Elbing
Automated stats update via wiki pipeline |
Added pros and cons, torpedo protection, armor values, AA values for long-range (150mm) guns, one image to WoWS gallery; corrections for ruddershift, torpedoes dropdown, and secondary battery arrangement |
||
| Line 5: | Line 5: | ||
===Pros=== | ===Pros=== | ||
* | * High firing accuracy | ||
* | * Large HP pool | ||
* High level of armor protection | |||
* AP shells have high armour penetration and deal heavy damage. | |||
===Cons=== | ===Cons=== | ||
* | * Poor manoeuvrability | ||
* | * Low damage per minute | ||
| Line 29: | Line 33: | ||
! style="background-color:#1a3244; color:#ffffff; font-weight:bold;" | ARMOR DETAIL !! style="background-color:#1a3244; color:#ffffff; font-weight:bold;" | | ! style="background-color:#1a3244; color:#ffffff; font-weight:bold;" | ARMOR DETAIL !! style="background-color:#1a3244; color:#ffffff; font-weight:bold;" | | ||
|- | |- | ||
| style="color:inherit;" | • Belt (mm) || style="color:inherit;" | | | style="color:inherit;" | • Belt (mm) || style="color:inherit;" | 25 | ||
|- | |- | ||
| style="color:inherit;" | • Deck (mm) || style="color:inherit;" | | | style="color:inherit;" | • Deck (mm) || style="color:inherit;" | 25 | ||
|- | |- | ||
| style="color:inherit;" | • Superstructure (mm) || style="color:inherit;" | | | style="color:inherit;" | • Superstructure (mm) || style="color:inherit;" | 13 | ||
|- | |- | ||
| style="color:inherit;" | • Extremities (mm) || style="color:inherit;" | | | style="color:inherit;" | • Extremities (mm) || style="color:inherit;" | 19 | ||
|} | |} | ||
</div> | </div> | ||
| Line 47: | Line 51: | ||
| style="color:inherit;" | • Turning circle radius (m) || style="color:inherit;" | 890 | | style="color:inherit;" | • Turning circle radius (m) || style="color:inherit;" | 890 | ||
|- | |- | ||
| style="color:inherit;" | • Rudder-shift time (sec) || style="color:inherit;" | | | style="color:inherit;" | • Rudder-shift time (sec) || style="color:inherit;" | 6.3 | ||
|} | |} | ||
</div> | </div> | ||
| Line 150: | Line 154: | ||
! style="background-color:#1a3244; color:#ffffff; font-weight:bold;" | TORPEDO LAUNCHERS !! style="background-color:#1a3244; color:#ffffff; font-weight:bold;" | | ! style="background-color:#1a3244; color:#ffffff; font-weight:bold;" | TORPEDO LAUNCHERS !! style="background-color:#1a3244; color:#ffffff; font-weight:bold;" | | ||
|- | |- | ||
| style="color:inherit;" | • Number of launchers || style="color:inherit;" | | | style="color:inherit;" | • Number of launchers || style="color:inherit;" | 2x5 533mm | ||
|- | |- | ||
| style="color:inherit;" | • Torpedo name || style="color:inherit;" | | | style="color:inherit;" | • Torpedo name || style="color:inherit;" | G7 T1 Ausf.C | ||
|- | |- | ||
| style="color:inherit;" | • Reload time (sec) || style="color:inherit;" | 90.0 | | style="color:inherit;" | • Reload time (sec) || style="color:inherit;" | 90.0 | ||
| Line 158: | Line 162: | ||
| style="color:inherit;" | • 180° turn time (sec) || style="color:inherit;" | 7.2 | | style="color:inherit;" | • 180° turn time (sec) || style="color:inherit;" | 7.2 | ||
|- | |- | ||
| style="color:inherit;" | • Damage || style="color:inherit;" | | | style="color:inherit;" | • Damage || style="color:inherit;" | 16533 | ||
|- | |- | ||
| style="color:inherit;" | • Range (km) || style="color:inherit;" | | | style="color:inherit;" | • Range (km) || style="color:inherit;" | 13.5 | ||
|- | |- | ||
| style="color:inherit;" | • Speed (kt) || style="color:inherit;" | 50 | | style="color:inherit;" | • Speed (kt) || style="color:inherit;" | 50 | ||
| Line 166: | Line 170: | ||
| style="color:inherit;" | • Detectability (km) || style="color:inherit;" | 1.2 | | style="color:inherit;" | • Detectability (km) || style="color:inherit;" | 1.2 | ||
|- | |- | ||
| style="color:inherit;" | • Flooding chance (%) || style="color:inherit;" | | | style="color:inherit;" | • Flooding chance (%) || style="color:inherit;" | 279% | ||
|} | |} | ||
</div> | </div> | ||
| Line 175: | Line 179: | ||
{| class="wikitable" style="margin:0 0 0.8em 0; width:100%; color:inherit;" | {| class="wikitable" style="margin:0 0 0.8em 0; width:100%; color:inherit;" | ||
! style="background-color:#1a3244; color:#ffffff; font-weight:bold;" | AA ARMAMENT !! style="background-color:#1a3244; color:#ffffff; font-weight:bold;" | MOUNTS × BARRELS | ! style="background-color:#1a3244; color:#ffffff; font-weight:bold;" | AA ARMAMENT !! style="background-color:#1a3244; color:#ffffff; font-weight:bold;" | MOUNTS × BARRELS | ||
|- | |||
| style="color:inherit;" | 150 mm || style="color:inherit;" | 3 × 2 | |||
|- | |- | ||
| style="color:inherit;" | 55 mm || style="color:inherit;" | 2 × 2 | | style="color:inherit;" | 55 mm || style="color:inherit;" | 2 × 2 | ||
| Line 188: | Line 194: | ||
|- | |- | ||
| style="color:inherit;" | Mid-range || style="color:inherit;" | 87.5 || style="color:inherit;" | 100% || style="color:inherit;" | 4.0 | | style="color:inherit;" | Mid-range || style="color:inherit;" | 87.5 || style="color:inherit;" | 100% || style="color:inherit;" | 4.0 | ||
|- | |||
| style="color:inherit;" | Long-range || style="color:inherit;" | 46 || style="color:inherit;" | 100% || style="color:inherit;" | 6.9 | |||
|} | |||
'''Damage by shell explosions''' | |||
{| class="wikitable" style="margin:0 0 0.8em 0; width:100%; color:inherit;" | |||
! style="background-color:#1a3244; color:#ffffff; font-weight:bold;" | EXPLOSIONS / SALVO !! style="background-color:#1a3244; color:#ffffff; font-weight:bold;" | DAMAGE !! style="background-color:#1a3244; color:#ffffff; font-weight:bold;" | HIT CHANCE !! style="background-color:#1a3244; color:#ffffff; font-weight:bold;" | ACTION ZONE (km) | |||
|- | |||
| style="color:inherit;" | 2 || style="color:inherit;" | 1750 || style="color:inherit;" | 100% || style="color:inherit;" | 3.5–6.9 | |||
|} | |} | ||
</div> | </div> | ||
| Line 200: | Line 215: | ||
| style="color:inherit;" | • Number of charges || style="color:inherit;" | 2 | | style="color:inherit;" | • Number of charges || style="color:inherit;" | 2 | ||
|- | |- | ||
| style="color:inherit;" | • Bombs per charge || style="color:inherit;" | | | style="color:inherit;" | • Bombs per charge || style="color:inherit;" | 16 | ||
|- | |- | ||
| style="color:inherit;" | • Reload time (sec) || style="color:inherit;" | 40.0 | | style="color:inherit;" | • Reload time (sec) || style="color:inherit;" | 40.0 | ||
| Line 225: | Line 240: | ||
<gallery> | <gallery> | ||
File:Elbing_in_Hamburg.png | |||
</gallery> | </gallery> | ||
</div></div></div> | </div></div></div> | ||
[[Category:Ships of Germany]] | [[Category:Ships of Germany]] | ||
Latest revision as of 16:07, 5 July 2026

X
20,000,000
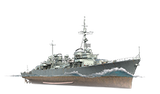
Elbing — Germany Tech Tree Tier X Destroyer.
Type 1938 served as the basis for the scout cruiser project ("Spähkreuzer" in German). The ship grew bigger in size and received more powerful armament, allowing it to stand in line with the German cruisers of the interwar period. It was assumed that the scout cruiser would be able to escape from a superior ship and prevail over a weak enemy. In 1941, three cruisers of this class were ordered, but the following year, their construction was suspended.
Pros
- High firing accuracy
- Large HP pool
- High level of armor protection
- AP shells have high armour penetration and deal heavy damage.
Cons
- Poor manoeuvrability
- Low damage per minute
Ship Stats
Hull Information
Main Battery
Torpedoes
AA Defense
Depth Charges
Compatible Upgrades
| Slot 1 |
 |
 |

| ||
|---|---|---|---|---|---|
| Slot 2 |
 |
 |
 |

| |
| Slot 3 |
 |
 |
 |
 |

|
| Slot 4 |
 |
 |
 |

| |
| Slot 5 |
 |
 |
 |

| |
| Slot 6 |
 |
 |
 |
 |

|
Consumables
- Slot 1: Damage Control Party
 (5.0s action, 40.0s cooldown)
 - Slot 2: Smoke Generator
 (3 charges, 20.0s action, 160.0s cooldown)
 - Slot 3: Engine Boost
 (3 charges, 120.0s action, 120.0s cooldown)
 - Slot 4: Defensive AA Fire
 (3 charges, 40.0s action, 80.0s cooldown)
Gallery
WoWs Gallery

Categories:
