Ship:Andrea Doria
Automated stats update via wiki pipeline |
No edit summary |
||
| (One intermediate revision by the same user not shown) | |||
| Line 5: | Line 5: | ||
===Pros=== | ===Pros=== | ||
* | * High level of protection against HE shells | ||
* | * Great damage per salvo | ||
* Quick shell type switching time | |||
===Cons=== | ===Cons=== | ||
* | * Small HP pool | ||
* | * Short firing range | ||
* Low firing accuracy | |||
| Line 21: | Line 24: | ||
| style="color:inherit;" | • Hit Points || style="color:inherit;" | 41300 || style="color:inherit;" | 45000 | | style="color:inherit;" | • Hit Points || style="color:inherit;" | 41300 || style="color:inherit;" | 45000 | ||
|- | |- | ||
| style="color:inherit;" | • Torpedo protection damage reduction (%) || colspan="2" style="color:inherit;" | | | style="color:inherit;" | • Torpedo protection damage reduction (%) || colspan="2" style="color:inherit;" | 32 | ||
|} | |} | ||
</div> | </div> | ||
| Line 29: | Line 32: | ||
! style="background-color:#1a3244; color:#ffffff; font-weight:bold;" | ARMOR DETAIL !! style="background-color:#1a3244; color:#ffffff; font-weight:bold;" | | ! style="background-color:#1a3244; color:#ffffff; font-weight:bold;" | ARMOR DETAIL !! style="background-color:#1a3244; color:#ffffff; font-weight:bold;" | | ||
|- | |- | ||
| style="color:inherit;" | • Belt (mm) || style="color:inherit;" | | | style="color:inherit;" | • Belt (mm) || style="color:inherit;" | 220 | ||
|- | |- | ||
| style="color:inherit;" | • Deck (mm) || style="color:inherit;" | | | style="color:inherit;" | • Deck (mm) || style="color:inherit;" | 44 | ||
|- | |- | ||
| style="color:inherit;" | • Superstructure (mm) || style="color:inherit;" | | | style="color:inherit;" | • Superstructure (mm) || style="color:inherit;" | 16 | ||
|- | |- | ||
| style="color:inherit;" | • Extremities (mm) || style="color:inherit;" | | | style="color:inherit;" | • Extremities (mm) || style="color:inherit;" | 26 | ||
|} | |} | ||
</div> | </div> | ||
| Line 47: | Line 50: | ||
| style="color:inherit;" | • Turning circle radius (m) || style="color:inherit;" | 640 || style="color:inherit;" | 640 | | style="color:inherit;" | • Turning circle radius (m) || style="color:inherit;" | 640 || style="color:inherit;" | 640 | ||
|- | |- | ||
| style="color:inherit;" | • Rudder-shift time (sec) || style="color:inherit;" | | | style="color:inherit;" | • Rudder-shift time (sec) || style="color:inherit;" | 18.2 || style="color:inherit;" | 13.0 | ||
|} | |} | ||
</div> | </div> | ||
| Line 59: | Line 62: | ||
| style="color:inherit;" | • Detectability by air (km) || style="color:inherit;" | 8.4 || style="color:inherit;" | 8.4 | | style="color:inherit;" | • Detectability by air (km) || style="color:inherit;" | 8.4 || style="color:inherit;" | 8.4 | ||
|- | |- | ||
| style="color:inherit;" | • Detectability after firing main guns in smoke (km) || colspan="2" style="color:inherit;" | | | style="color:inherit;" | • Detectability after firing main guns in smoke (km) || colspan="2" style="color:inherit;" | 11.0 | ||
|- | |- | ||
| style="color:inherit;" | • Detectability by depths (km) || style="color:inherit;" | 8.4 || style="color:inherit;" | 8.4 | | style="color:inherit;" | • Detectability by depths (km) || style="color:inherit;" | 8.4 || style="color:inherit;" | 8.4 | ||
| Line 109: | Line 112: | ||
! style="background-color:#1a3244; color:#ffffff; font-weight:bold;" | SAP SHELL !! style="background-color:#1a3244; color:#ffffff; font-weight:bold;" | | ! style="background-color:#1a3244; color:#ffffff; font-weight:bold;" | SAP SHELL !! style="background-color:#1a3244; color:#ffffff; font-weight:bold;" | | ||
|- | |- | ||
| style="color:inherit;" | • Name || style="color:inherit;" | | | style="color:inherit;" | • Name || style="color:inherit;" | 320 mm proiettili CS | ||
|- | |- | ||
| style="color:inherit;" | • Maximum damage || style="color:inherit;" | 10250 | | style="color:inherit;" | • Maximum damage || style="color:inherit;" | 10250 | ||
| Line 271: | Line 274: | ||
! style="background-color:#1a3244; color:#ffffff; font-weight:bold;" | RANGE !! style="background-color:#1a3244; color:#ffffff; font-weight:bold;" | DPS !! style="background-color:#1a3244; color:#ffffff; font-weight:bold;" | HIT CHANCE !! style="background-color:#1a3244; color:#ffffff; font-weight:bold;" | ACTION ZONE (km) | ! style="background-color:#1a3244; color:#ffffff; font-weight:bold;" | RANGE !! style="background-color:#1a3244; color:#ffffff; font-weight:bold;" | DPS !! style="background-color:#1a3244; color:#ffffff; font-weight:bold;" | HIT CHANCE !! style="background-color:#1a3244; color:#ffffff; font-weight:bold;" | ACTION ZONE (km) | ||
|- | |- | ||
| style="color:inherit;" | Short-range || style="color:inherit;" | | | style="color:inherit;" | Short-range || style="color:inherit;" | 74 || style="color:inherit;" | 70% || style="color:inherit;" | 1.5 | ||
|- | |- | ||
| style="color:inherit;" | Mid-range || style="color:inherit;" | 154 || style="color:inherit;" | 75% || style="color:inherit;" | 3.5 | | style="color:inherit;" | Mid-range || style="color:inherit;" | 154 || style="color:inherit;" | 75% || style="color:inherit;" | 3.5 | ||
|- | |- | ||
| style="color:inherit;" | Long-range || style="color:inherit;" | | | style="color:inherit;" | Long-range || style="color:inherit;" | 123 || style="color:inherit;" | 75% || style="color:inherit;" | 4.6 | ||
|} | |} | ||
| Line 301: | Line 304: | ||
! style="background-color:#1a3244; color:#ffffff; font-weight:bold;" | RANGE !! style="background-color:#1a3244; color:#ffffff; font-weight:bold;" | DPS !! style="background-color:#1a3244; color:#ffffff; font-weight:bold;" | HIT CHANCE !! style="background-color:#1a3244; color:#ffffff; font-weight:bold;" | ACTION ZONE (km) | ! style="background-color:#1a3244; color:#ffffff; font-weight:bold;" | RANGE !! style="background-color:#1a3244; color:#ffffff; font-weight:bold;" | DPS !! style="background-color:#1a3244; color:#ffffff; font-weight:bold;" | HIT CHANCE !! style="background-color:#1a3244; color:#ffffff; font-weight:bold;" | ACTION ZONE (km) | ||
|- | |- | ||
| style="color:inherit;" | | | style="color:inherit;" | Short-range || style="color:inherit;" | 60 || style="color:inherit;" | 70% || style="color:inherit;" | 2.0 | ||
|- | |- | ||
| style="color:inherit;" | | | style="color:inherit;" | Mid-range || style="color:inherit;" | 193 || style="color:inherit;" | 75% || style="color:inherit;" | 3.5 | ||
|- | |||
| style="color:inherit;" | Long-range || style="color:inherit;" | 123 || style="color:inherit;" | 75% || style="color:inherit;" | 4.6 | |||
|} | |} | ||
| Line 330: | Line 335: | ||
<div class="b-popup"><div class="b-popup_head js-tech-nav_head"><div><h2>WoWs Gallery</h2></div><span class="b-tech-nav_arrow"></span></div><div class="b-popup_content" style="display: none;"><div> | <div class="b-popup"><div class="b-popup_head js-tech-nav_head"><div><h2>WoWs Gallery</h2></div><span class="b-tech-nav_arrow"></span></div><div class="b-popup_content" style="display: none;"><div> | ||
[[File:AndereaDoria.png|thumb]] | |||
<div class="b-popup"><div class="b-popup_head js-tech-nav_head"><div><h2>Historical Gallery</h2></div><span class="b-tech-nav_arrow"></span></div><div class="b-popup_content" style="display: none;"><div> | <div class="b-popup"><div class="b-popup_head js-tech-nav_head"><div><h2>Historical Gallery</h2></div><span class="b-tech-nav_arrow"></span></div><div class="b-popup_content" style="display: none;"><div> | ||
Latest revision as of 02:02, 11 July 2026

VI
3,500,000
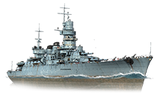
Andrea Doria — Italy Tech Tree Tier VI Battleship.
The second series of Italian battleships was based on the improved Conte di Cavour design. Andrea Doria, which was laid down in 1913, participated in the Fiume Question and the Corfu incident in the 1920s. In the 1930s and 1940s, the ship's propulsion unit and armament were upgraded. During World War II, she escorted convoys to Libya and participated in the Battle of Sirte.
Pros
- High level of protection against HE shells
- Great damage per salvo
- Quick shell type switching time
Cons
- Small HP pool
- Short firing range
- Low firing accuracy
Ship Stats
Hull Information
Main Battery
Secondary Battery
Airstrike
AA Defense
Compatible Upgrades
| Slot 1 |
 |
 |

| |
|---|---|---|---|---|
| Slot 2 |
 |

| ||
| Slot 3 |
 |
 |
 |

|
| Slot 4 |
 |
 |
 |

|
Consumables
- Slot 1: Damage Control Party
 (15.0s action, 80.0s cooldown)
 - Slot 2: Repair Party
 (4 charges, 28.0s action, 80.0s cooldown, 206.5 hp/s)
Gallery
WoWs Gallery

Categories:
