Ship:Pietro Micca
Automated stats update via wiki pipeline |
m Stat adjustment |
||
| (3 intermediate revisions by 2 users not shown) | |||
| Line 4: | Line 4: | ||
<div class="b-description gw-frame-1"><div class="b-description-img b-description-img__indent b-description-img__single"><div style="width:160px; height:102px; opacity:.5; border-radius:2px; position:absolute; left:0; top:0; z-index:1; -webkit-transition:all 0.2s ease-out 0.1s; transition:all 0.2s ease-out 0.1s;">[[File:Wows_anno_flag_italy.png|160px]]</div><div class="l-description-img_class"><span class="b-description-img_type b-description-img_type__Submarine b-description-img_type__Submarine-Tech Tree"></span><span class="b-description-img_class">VIII</span></div><div class="b-description-img_vehicle">[[File:Ship_PISS108_Pietro_Micca.png|160px|link=|left]]</div><div class="l-description-img_price"><span class="b-description-img_price b-description-img_price__gold"><span title="''{{#var:ship_name}}'' was first released for sale on DD Month YYYY.">11,500,000</span></span></div></div><p>[[Ship:{{#var:ship_name}}|{{#var:ship_name}}]] — Italy Tech Tree Tier VIII [[Ship:Submarine|Submarine]].</p><p>Pietro Micca was the first successful Italian ocean-going minelaying submarine, and she served as the prototype for subsequent series, including the Foca class. During World War II, she was deployed in the Mediterranean. Shortly after Italy entered the war, in late 1940, she was partially converted for transport missions. In July 1943, Pietro Micca was sunk near the Strait of Otranto by a British submarine.</p><p> </p></div> | <div class="b-description gw-frame-1"><div class="b-description-img b-description-img__indent b-description-img__single"><div style="width:160px; height:102px; opacity:.5; border-radius:2px; position:absolute; left:0; top:0; z-index:1; -webkit-transition:all 0.2s ease-out 0.1s; transition:all 0.2s ease-out 0.1s;">[[File:Wows_anno_flag_italy.png|160px]]</div><div class="l-description-img_class"><span class="b-description-img_type b-description-img_type__Submarine b-description-img_type__Submarine-Tech Tree"></span><span class="b-description-img_class">VIII</span></div><div class="b-description-img_vehicle">[[File:Ship_PISS108_Pietro_Micca.png|160px|link=|left]]</div><div class="l-description-img_price"><span class="b-description-img_price b-description-img_price__gold"><span title="''{{#var:ship_name}}'' was first released for sale on DD Month YYYY.">11,500,000</span></span></div></div><p>[[Ship:{{#var:ship_name}}|{{#var:ship_name}}]] — Italy Tech Tree Tier VIII [[Ship:Submarine|Submarine]].</p><p>Pietro Micca was the first successful Italian ocean-going minelaying submarine, and she served as the prototype for subsequent series, including the Foca class. During World War II, she was deployed in the Mediterranean. Shortly after Italy entered the war, in late 1940, she was partially converted for transport missions. In July 1943, Pietro Micca was sunk near the Strait of Otranto by a British submarine.</p><p> </p></div> | ||
This ship gets access to a set of combat instructions that enhances torpedo reload and ship speed. | |||
===Pros=== | ===Pros=== | ||
* | * Exhaust Smoke Generator consumable available | ||
* | * Low torpedo detectability | ||
* Long ping effect duration on a sector | |||
* Main Battery Reload Booster consumable available | |||
===Cons=== | ===Cons=== | ||
* | * Low torpedo speed | ||
* | * Low dive capacity | ||
==Ship Stats== | ==Ship Stats== | ||
| Line 21: | Line 23: | ||
| style="color:inherit;" | • Hit Points || style="color:inherit;" | 14600 || style="color:inherit;" | 16800 | | style="color:inherit;" | • Hit Points || style="color:inherit;" | 14600 || style="color:inherit;" | 16800 | ||
|- | |- | ||
| style="color:inherit;" | • Torpedo protection damage reduction (%) || colspan="2" style="color:inherit;" | | | style="color:inherit;" | • Torpedo protection damage reduction (%) || colspan="2" style="color:inherit;" | 0% | ||
|} | |} | ||
</div> | </div> | ||
| Line 29: | Line 31: | ||
! style="background-color:#1a3244; color:#ffffff; font-weight:bold;" | ARMOR DETAIL !! style="background-color:#1a3244; color:#ffffff; font-weight:bold;" | | ! style="background-color:#1a3244; color:#ffffff; font-weight:bold;" | ARMOR DETAIL !! style="background-color:#1a3244; color:#ffffff; font-weight:bold;" | | ||
|- | |- | ||
| style="color:inherit;" | • Belt (mm) || style="color:inherit;" | | | style="color:inherit;" | • Belt (mm) || style="color:inherit;" | 25 | ||
|- | |- | ||
| style="color:inherit;" | • Deck (mm) || style="color:inherit;" | | | style="color:inherit;" | • Deck (mm) || style="color:inherit;" | 16 | ||
|- | |- | ||
| style="color:inherit;" | • Superstructure (mm) || style="color:inherit;" | | | style="color:inherit;" | • Superstructure (mm) || style="color:inherit;" | 16 | ||
|- | |- | ||
| style="color:inherit;" | • Extremities (mm) || style="color:inherit;" | | | style="color:inherit;" | • Extremities (mm) || style="color:inherit;" | 19 | ||
|} | |} | ||
</div> | </div> | ||
| Line 124: | Line 126: | ||
! style="background-color:#1a3244; color:#ffffff; font-weight:bold;" | SAP SHELL !! style="background-color:#1a3244; color:#ffffff; font-weight:bold;" | | ! style="background-color:#1a3244; color:#ffffff; font-weight:bold;" | SAP SHELL !! style="background-color:#1a3244; color:#ffffff; font-weight:bold;" | | ||
|- | |- | ||
| style="color:inherit;" | • Name || style="color:inherit;" | | | style="color:inherit;" | • Name || style="color:inherit;" | 120 mm proiettili CS 1926 | ||
|- | |- | ||
| style="color:inherit;" | • Maximum damage || style="color:inherit;" | 2600 | | style="color:inherit;" | • Maximum damage || style="color:inherit;" | 2600 | ||
| Line 150: | Line 152: | ||
<div style="border: 2px solid rgba(212,175,55,0.8); border-radius: 3px; margin-bottom: 1em; overflow: hidden;"> | <div style="border: 2px solid rgba(212,175,55,0.8); border-radius: 3px; margin-bottom: 1em; overflow: hidden;"> | ||
{| class="wikitable" style="margin:0; color:inherit; width:100%" | {| class="wikitable" style="margin:0; color:inherit; width:100%" | ||
! style="background-color:#1a3244; color:#ffffff; font-weight:bold;" | SONAR !! style="background-color:#1a3244; color:#ffffff; font-weight:bold;" | | ! style="background-color:#1a3244; color:#ffffff; font-weight:bold;" | SONAR !! style="background-color:#1a3244; color:#ffffff; font-weight:bold;" | Typ 8 Mod. A (STOCK) !! style="background-color:#1a3244; color:#ffffff; font-weight:bold;" | Typ 8 Mod. B (UPGRADED) | ||
|- | |- | ||
| style="color:inherit;" | • Sonar reload time (sec) || style="color:inherit;" | 20 | | style="color:inherit;" | • Sonar reload time (sec) || style="color:inherit;" | 20 || style="color:inherit;" | 15 | ||
|- | |- | ||
| style="color:inherit;" | • Ping velocity (m/s) || style="color:inherit;" | 550 | | style="color:inherit;" | • Ping velocity (m/s) || style="color:inherit;" colspan="2" | 550 | ||
|- | |- | ||
| style="color:inherit;" | • Ping width (m) || style="color:inherit;" | | | style="color:inherit;" | • Ping width (m) || style="color:inherit;" colspan="2" | 15 | ||
|- | |- | ||
| style="color:inherit;" | • Single ping duration (sec) || style="color:inherit;" | 35.0 | | style="color:inherit;" | • Single ping duration (sec) || style="color:inherit;" colspan="2" | 35.0 | ||
|- | |- | ||
| style="color:inherit;" | • Double ping duration (sec) || style="color:inherit;" | 75.0 | | style="color:inherit;" | • Double ping duration (sec) || style="color:inherit;" colspan="2" | 75.0 | ||
|- | |- | ||
| style="color:inherit;" | • Maximum ping range (km) || style="color:inherit;" | 9.5 | | style="color:inherit;" | • Maximum ping range (km) || style="color:inherit;" colspan="2" | 9.5 | ||
|} | |} | ||
</div> | </div> | ||
| Line 169: | Line 171: | ||
<div style="border: 2px solid rgba(212,175,55,0.8); border-radius: 3px; margin-bottom: 1em; overflow: hidden;"> | <div style="border: 2px solid rgba(212,175,55,0.8); border-radius: 3px; margin-bottom: 1em; overflow: hidden;"> | ||
{| class="wikitable" style="margin:0; color:inherit; width:100%" | {| class="wikitable" style="margin:0; color:inherit; width:100%" | ||
! style="background-color:#1a3244; color:#ffffff; font-weight:bold;" | | ! style="background-color:#1a3244; color:#ffffff; font-weight:bold;" | SUBMARINE TORPEDOES !! style="background-color:#1a3244; color:#ffffff; font-weight:bold;" | HOMING (STOCK) !! style="background-color:#1a3244; color:#ffffff; font-weight:bold;" | HOMING (UPGRADED) !! style="background-color:#1a3244; color:#ffffff; font-weight:bold;" | STANDARD (STOCK) !! style="background-color:#1a3244; color:#ffffff; font-weight:bold;" | STANDARD (UPGRADED) | ||
|- | |- | ||
| style="color:inherit;" | • | | style="color:inherit;" | • Torpedo name || style="color:inherit;" | 533 mm Si 260 || style="color:inherit;" | 533 mm Si 270 || style="color:inherit;" | 533 mm Si 260 || style="color:inherit;" | 533 mm Si 270 | ||
|- | |- | ||
| style="color:inherit;" | • | | style="color:inherit;" | • Damage || style="color:inherit;" | 10533 || style="color:inherit;" | 10533 || style="color:inherit;" | 16200 || style="color:inherit;" | 16200 | ||
|- | |- | ||
| style="color:inherit;" | • | | style="color:inherit;" | • Range (km) || style="color:inherit;" | 8.5 || style="color:inherit;" | 9.5 || style="color:inherit;" | 11.0 || style="color:inherit;" | 12.0 | ||
|- | |- | ||
| style="color:inherit;" | • | | style="color:inherit;" | • Speed (kt) || style="color:inherit;" | 58 || style="color:inherit;" | 63 || style="color:inherit;" | 47 || style="color:inherit;" | 51 | ||
|- | |- | ||
| style="color:inherit;" | • | | style="color:inherit;" | • Detectability (km) || style="color:inherit;" | 1.4 || style="color:inherit;" | 1.4 || style="color:inherit;" | 1.0 || style="color:inherit;" | 1.0 | ||
|- | |- | ||
| style="color:inherit;" | • | | style="color:inherit;" | • Reload (s) || style="color:inherit;" | 72 || style="color:inherit;" | 65 || style="color:inherit;" | 72 || style="color:inherit;" | 65 | ||
|- | |- | ||
| style="color:inherit;" | • | | style="color:inherit;" | • Bow torpedo tubes || style="color:inherit;" colspan="4" | 4 | ||
|- | |- | ||
| style="color:inherit;" | • | | style="color:inherit;" | • Stern torpedo tubes || style="color:inherit;" colspan="4" | 2 | ||
|- | |- | ||
| style="color:inherit;" | • Torpedo loaders (bow/stern) || style="color:inherit;" colspan="4" | 4/2 | |||
| style="color:inherit;" | • Torpedo loaders (bow/stern) || style="color:inherit;" | |||
| | |||
|} | |} | ||
</div> | </div> | ||
| Line 227: | Line 207: | ||
* '''Slot 5:''' {{Repair Party}} (2 charges, 40.0s action, 80.0s cooldown, 73 hp/s) | * '''Slot 5:''' {{Repair Party}} (2 charges, 40.0s action, 80.0s cooldown, 73 hp/s) | ||
}} | }} | ||
==Gallery== | ==Gallery== | ||
| Line 233: | Line 212: | ||
<gallery> | <gallery> | ||
File:MiccaOcean.png|''Pietro Micca'' | |||
File:MiccaOceanCamo.png|''Pietro Micca'' in her default camo | |||
</gallery> | </gallery> | ||
</div></div></div> | </div></div></div> | ||
Latest revision as of 20:52, 12 July 2026

VIII
11,500,000
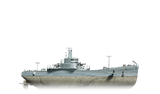
Pietro Micca — Italy Tech Tree Tier VIII Submarine.
Pietro Micca was the first successful Italian ocean-going minelaying submarine, and she served as the prototype for subsequent series, including the Foca class. During World War II, she was deployed in the Mediterranean. Shortly after Italy entered the war, in late 1940, she was partially converted for transport missions. In July 1943, Pietro Micca was sunk near the Strait of Otranto by a British submarine.
This ship gets access to a set of combat instructions that enhances torpedo reload and ship speed.
Pros
- Exhaust Smoke Generator consumable available
- Low torpedo detectability
- Long ping effect duration on a sector
- Main Battery Reload Booster consumable available
Cons
- Low torpedo speed
- Low dive capacity
Ship Stats
Hull Information
Main Battery
Sonar
Torpedoes
Compatible Upgrades
| Slot 1 |
 |
 |

| |||
|---|---|---|---|---|---|---|
| Slot 2 |
 |
 |

| |||
| Slot 3 |
 |
 |
 |
 |
 |

|
| Slot 4 |
 |
 |

| |||
| Slot 5 |
 |
 |

|
Consumables
- Slot 1: Damage Control Party
 (3 charges, 5.0s action, 60.0s cooldown)
 - Slot 2: Submarine Surveillance
 (60.0s action, 120.0s cooldown)
 - Slot 3: Main Battery Reload Booster
 (4 charges, 30.0s action, 100.0s cooldown)
 - Slot 4: Smoke Generator
 (4 charges, 30.0s action, 80.0s cooldown)
 - Slot 5: Repair Party
 (2 charges, 40.0s action, 80.0s cooldown, 73 hp/s)
Gallery
WoWs Gallery


Historical Gallery
Categories:
