Ship:Ashitaka
Automated stats update via wiki pipeline |
Pockington (talk | contribs) added missing information on launch day |
||
| Line 5: | Line 5: | ||
===Pros=== | ===Pros=== | ||
* | * High top speed. | ||
* | * Great damage per salvo. | ||
===Cons=== | ===Cons=== | ||
* | * Low AA defense efficiency. | ||
* | * Weak armor. | ||
| Line 21: | Line 21: | ||
| style="color:inherit;" | • Hit Points || style="color:inherit;" | 59400 | | style="color:inherit;" | • Hit Points || style="color:inherit;" | 59400 | ||
|- | |- | ||
| style="color:inherit;" | • Torpedo protection damage reduction (%) || style="color:inherit;" | | | style="color:inherit;" | • Torpedo protection damage reduction (%) || style="color:inherit;" | 25 | ||
|} | |} | ||
</div> | </div> | ||
| Line 29: | Line 29: | ||
! style="background-color:#1a3244; color:#ffffff; font-weight:bold;" | ARMOR DETAIL !! style="background-color:#1a3244; color:#ffffff; font-weight:bold;" | | ! style="background-color:#1a3244; color:#ffffff; font-weight:bold;" | ARMOR DETAIL !! style="background-color:#1a3244; color:#ffffff; font-weight:bold;" | | ||
|- | |- | ||
| style="color:inherit;" | • Belt (mm) || style="color:inherit;" | | | style="color:inherit;" | • Belt (mm) || style="color:inherit;" | 254 | ||
|- | |- | ||
| style="color:inherit;" | • Deck (mm) || style="color:inherit;" | | | style="color:inherit;" | • Deck (mm) || style="color:inherit;" | 26 | ||
|- | |- | ||
| style="color:inherit;" | • Superstructure (mm) || style="color:inherit;" | | | style="color:inherit;" | • Superstructure (mm) || style="color:inherit;" | 16 | ||
|- | |- | ||
| style="color:inherit;" | • Extremities (mm) || style="color:inherit;" | | | style="color:inherit;" | • Extremities (mm) || style="color:inherit;" | 26 | ||
|} | |} | ||
</div> | </div> | ||
| Line 47: | Line 47: | ||
| style="color:inherit;" | • Turning circle radius (m) || style="color:inherit;" | 870 | | style="color:inherit;" | • Turning circle radius (m) || style="color:inherit;" | 870 | ||
|- | |- | ||
| style="color:inherit;" | • Rudder-shift time (sec) || style="color:inherit;" | | | style="color:inherit;" | • Rudder-shift time (sec) || style="color:inherit;" | 14.9 | ||
|} | |} | ||
</div> | </div> | ||
| Line 164: | Line 164: | ||
| style="color:inherit;" | • Name || style="color:inherit;" | 140 mm HE Type0 | | style="color:inherit;" | • Name || style="color:inherit;" | 140 mm HE Type0 | ||
|- | |- | ||
| style="color:inherit;" | • Arrangement || style="color:inherit;" | | | style="color:inherit;" | • Arrangement || style="color:inherit;" | 16x1 140mm | ||
|- | |- | ||
| style="color:inherit;" | • Rate of fire (shots/min) || style="color:inherit;" | 7.5 | | style="color:inherit;" | • Rate of fire (shots/min) || style="color:inherit;" | 7.5 | ||
| Line 186: | Line 186: | ||
| style="color:inherit;" | • Name || style="color:inherit;" | 120 mm HE Type0 | | style="color:inherit;" | • Name || style="color:inherit;" | 120 mm HE Type0 | ||
|- | |- | ||
| style="color:inherit;" | • Arrangement || style="color:inherit;" | | | style="color:inherit;" | • Arrangement || style="color:inherit;" | 4x1 120mm | ||
|- | |- | ||
| style="color:inherit;" | • Rate of fire (shots/min) || style="color:inherit;" | 12.0 | | style="color:inherit;" | • Rate of fire (shots/min) || style="color:inherit;" | 12.0 | ||
| Line 247: | Line 247: | ||
! style="background-color:#1a3244; color:#ffffff; font-weight:bold;" | EXPLOSIONS / SALVO !! style="background-color:#1a3244; color:#ffffff; font-weight:bold;" | DAMAGE !! style="background-color:#1a3244; color:#ffffff; font-weight:bold;" | HIT CHANCE !! style="background-color:#1a3244; color:#ffffff; font-weight:bold;" | ACTION ZONE (km) | ! style="background-color:#1a3244; color:#ffffff; font-weight:bold;" | EXPLOSIONS / SALVO !! style="background-color:#1a3244; color:#ffffff; font-weight:bold;" | DAMAGE !! style="background-color:#1a3244; color:#ffffff; font-weight:bold;" | HIT CHANCE !! style="background-color:#1a3244; color:#ffffff; font-weight:bold;" | ACTION ZONE (km) | ||
|- | |- | ||
| style="color:inherit;" | 1 || style="color:inherit;" | | | style="color:inherit;" | 1 || style="color:inherit;" | 1120 || style="color:inherit;" | 75% || style="color:inherit;" | 3.5–5.2 | ||
|} | |} | ||
</div> | </div> | ||
| Line 269: | Line 269: | ||
<gallery> | <gallery> | ||
</gallery> | </gallery> | ||
</div></div></div> | </div>[[File:Ashitakapermacamo.png|thumb|Ashitaka in her default permanent camouflage.]]</div></div> | ||
<div class="b-popup"><div class="b-popup_head js-tech-nav_head"><div><h2>Historical Gallery</h2></div><span class="b-tech-nav_arrow"></span></div><div class="b-popup_content" style="display: none;"><div> | <div class="b-popup"><div class="b-popup_head js-tech-nav_head"><div><h2>Historical Gallery</h2></div><span class="b-tech-nav_arrow"></span></div><div class="b-popup_content" style="display: none;"><div> | ||
Latest revision as of 22:18, 8 July 2026

VII
7,500 doubloons
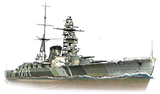
Ashitaka — Japan Premium Tier VII Battleship.
The fourth Amagi-class ship was laid down in Nagasaki at the Mitsubishi dockyard in December 1921 under the name Ashitaka. However, the construction was canceled following the outcome of the Washington Naval Conference, and the ship's hull was demolished on her stocks in 1924.
Pros
- High top speed.
- Great damage per salvo.
Cons
- Low AA defense efficiency.
- Weak armor.
Ship Stats
Hull Information
Main Battery
Secondary Battery
Airstrike
AA Defense
Compatible Upgrades
| Slot 1 |
 |
 |

| |
|---|---|---|---|---|
| Slot 2 |
 |

| ||
| Slot 3 |
 |
 |
 |

|
| Slot 4 |
 |
 |
 |

|
Consumables
- Slot 1: Damage Control Party
 (10.0s action, 80.0s cooldown)
 - Slot 2: Repair Party
 (4 charges, 28.0s action, 80.0s cooldown, 297 hp/s)

