Ship:Kitakami
Automated stats update via wiki pipeline |
Pockington (talk | contribs) added missing information on launch day |
||
| (4 intermediate revisions by one other user not shown) | |||
| Line 5: | Line 5: | ||
===Pros=== | ===Pros=== | ||
* | * Low Concealment | ||
* | * Access to Fuel smoke and Engine boost | ||
===Cons=== | ===Cons=== | ||
* | * Weak armor | ||
* | * Weak AA | ||
| Line 21: | Line 21: | ||
| style="color:inherit;" | • Hit Points || style="color:inherit;" | 28500 | | style="color:inherit;" | • Hit Points || style="color:inherit;" | 28500 | ||
|- | |- | ||
| style="color:inherit;" | • Torpedo protection damage reduction (%) || style="color:inherit;" | | | style="color:inherit;" | • Torpedo protection damage reduction (%) || style="color:inherit;" | 0 | ||
|} | |} | ||
</div> | </div> | ||
| Line 29: | Line 29: | ||
! style="background-color:#1a3244; color:#ffffff; font-weight:bold;" | ARMOR DETAIL !! style="background-color:#1a3244; color:#ffffff; font-weight:bold;" | | ! style="background-color:#1a3244; color:#ffffff; font-weight:bold;" | ARMOR DETAIL !! style="background-color:#1a3244; color:#ffffff; font-weight:bold;" | | ||
|- | |- | ||
| style="color:inherit;" | • Belt (mm) || style="color:inherit;" | | | style="color:inherit;" | • Belt (mm) || style="color:inherit;" | 65 | ||
|- | |- | ||
| style="color:inherit;" | • Deck (mm) || style="color:inherit;" | | | style="color:inherit;" | • Deck (mm) || style="color:inherit;" | 30 | ||
|- | |- | ||
| style="color:inherit;" | • Superstructure (mm) || style="color:inherit;" | | | style="color:inherit;" | • Superstructure (mm) || style="color:inherit;" | 13 | ||
|- | |- | ||
| style="color:inherit;" | • Extremities (mm) || style="color:inherit;" | | | style="color:inherit;" | • Extremities (mm) || style="color:inherit;" | 16 | ||
|} | |} | ||
</div> | </div> | ||
| Line 125: | Line 125: | ||
<div style="border: 2px solid rgba(212,175,55,0.8); border-radius: 3px; margin-bottom: 1em; overflow: hidden;"> | <div style="border: 2px solid rgba(212,175,55,0.8); border-radius: 3px; margin-bottom: 1em; overflow: hidden;"> | ||
{| class="wikitable" style="margin:0; color:inherit; width:100%" | {| class="wikitable" style="margin:0; color:inherit; width:100%" | ||
! style="background-color:#1a3244; color:#ffffff; font-weight:bold;" | TORPEDO LAUNCHERS !! style="background-color:#1a3244; color:#ffffff; font-weight:bold;" | | ! style="background-color:#1a3244; color:#ffffff; font-weight:bold;" | TORPEDO LAUNCHERS !! style="background-color:#1a3244; color:#ffffff; font-weight:bold;" | Type90 mod. 5 !! style="background-color:#1a3244; color:#ffffff; font-weight:bold;" | Type90 | ||
|- | |- | ||
| style="color:inherit;" | • | | style="color:inherit;" | • Torpedo tubes (launchers × tubes) || style="color:inherit;" | 10 × 4 || style="color:inherit;" | 10 × 4 | ||
|- | |- | ||
| style="color:inherit;" | • Torpedo name || style="color:inherit;" | | | style="color:inherit;" | • Torpedo name || style="color:inherit;" | Type90 mod. 5 || style="color:inherit;" | Type90 | ||
|- | |- | ||
| style="color:inherit;" | • Reload time (sec) || style="color:inherit;" | 81 | | style="color:inherit;" | • Reload time (sec) || style="color:inherit;" | 81 || style="color:inherit;" | 81 | ||
|- | |- | ||
| style="color:inherit;" | • 180° turn time (sec) || style="color:inherit;" | 7.2 || style="color:inherit;" | 7.2 | | style="color:inherit;" | • 180° turn time (sec) || style="color:inherit;" | 7.2 || style="color:inherit;" | 7.2 | ||
|- | |- | ||
| style="color:inherit;" | • Damage || style="color:inherit;" | | | style="color:inherit;" | • Damage || style="color:inherit;" | 11,833 || style="color:inherit;" | 20,967 | ||
|- | |- | ||
| style="color:inherit;" | • Range (km) || style="color:inherit;" | 0 | | style="color:inherit;" | • Range (km) || style="color:inherit;" | 12.0 || style="color:inherit;" | 20.0 | ||
|- | |- | ||
| style="color:inherit;" | • Speed (kt) || style="color:inherit;" | 86 || style="color:inherit;" | 67 | | style="color:inherit;" | • Speed (kt) || style="color:inherit;" | 86 || style="color:inherit;" | 67 | ||
| Line 143: | Line 143: | ||
| style="color:inherit;" | • Detectability (km) || style="color:inherit;" | 1.7 || style="color:inherit;" | 0.9 | | style="color:inherit;" | • Detectability (km) || style="color:inherit;" | 1.7 || style="color:inherit;" | 0.9 | ||
|- | |- | ||
| style="color:inherit;" | • Flooding chance (%) || style="color:inherit;" | | | style="color:inherit;" | • Flooding chance (%) || style="color:inherit;" | 194 || style="color:inherit;" | 436 | ||
|} | |} | ||
</div> | </div> | ||
| Line 173: | Line 173: | ||
| style="color:inherit;" | • Number of charges || style="color:inherit;" | 2 | | style="color:inherit;" | • Number of charges || style="color:inherit;" | 2 | ||
|- | |- | ||
| style="color:inherit;" | • Bombs per charge || style="color:inherit;" | | | style="color:inherit;" | • Bombs per charge || style="color:inherit;" | 10 | ||
|- | |- | ||
| style="color:inherit;" | • Reload time (sec) || style="color:inherit;" | 40.0 | | style="color:inherit;" | • Reload time (sec) || style="color:inherit;" | 40.0 | ||
| Line 198: | Line 198: | ||
<gallery> | <gallery> | ||
</gallery> | </gallery>[[File:Kitakami.png|400px]][[File:Kitakami_bitter_wind.png|400px]]</div></div></div> | ||
</div></div></div> | |||
<div class="b-popup"><div class="b-popup_head js-tech-nav_head"><div><h2>Historical Gallery</h2></div><span class="b-tech-nav_arrow"></span></div><div class="b-popup_content" style="display: none;"><div> | <div class="b-popup"><div class="b-popup_head js-tech-nav_head"><div><h2>Historical Gallery</h2></div><span class="b-tech-nav_arrow"></span></div><div class="b-popup_content" style="display: none;"><div> | ||
Latest revision as of 19:18, 9 July 2026

X
34,650 doubloons
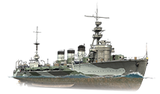
Kitakami — Japan Special Tier X Cruiser.
At the outbreak of the Sino-Japanese War, Kitakami provided cover for landing operations of Japanese troops. In the second half of 1941, she was armed with ten quadruple-tube 610 mm torpedo launchers for night torpedo attacks. In 1942, the ship was converted into a high-speed transport for escorting troop convoys. In 1944, Kitakami took two torpedo hits from submarine HMS Templar. During repairs, the ship was converted into a Kaiten carrier. In 1945, the cruiser was damaged by Task Force 38 bombers and then used as a tender.
Pros
- Low Concealment
- Access to Fuel smoke and Engine boost
Cons
- Weak armor
- Weak AA
Ship Stats
Hull Information
Main Battery
Torpedoes
AA Defense
Depth Charges
Compatible Upgrades
| Slot 1 |
 |
 |

| ||
|---|---|---|---|---|---|
| Slot 2 |
 |
 |

| ||
| Slot 3 |
 |
 |
 |
 |

|
| Slot 4 |
 |
 |

| ||
| Slot 5 |
 |
 |
 |

| |
| Slot 6 |
 |
 |
 |

|
Consumables
- Slot 1: Damage Control Party
 (5.0s action, 60.0s cooldown)
 - Slot 2: Smoke Generator
 (4 charges, 30.0s action, 80.0s cooldown)
 - Slot 3: Engine Boost
 (3 charges, 180.0s action, 90.0s cooldown)
 - Slot 4: Repair Party
 (3 charges, 28.0s action, 80.0s cooldown, 142.5 hp/s)
Gallery
WoWs Gallery


Historical Gallery
Categories:
