Ship:Akizuki
Automated stats update via wiki pipeline |
Pockington (talk | contribs) fixed rudder shift, mislabled torpedos, AA issues, and depth charge miscount |
||
| (One intermediate revision by one other user not shown) | |||
| Line 5: | Line 5: | ||
===Pros=== | ===Pros=== | ||
* | * Large HP pool | ||
* | * High damage per minute with AP and HE shells | ||
* Torpedo Reload Booster consumable available | |||
===Cons=== | ===Cons=== | ||
* | * Low maneuverability | ||
* | * AP shells with low armor penetration | ||
* Low torpedo count per salvo | |||
| Line 21: | Line 23: | ||
| style="color:inherit;" | • Hit Points || style="color:inherit;" | 15900 || style="color:inherit;" | 20400 | | style="color:inherit;" | • Hit Points || style="color:inherit;" | 15900 || style="color:inherit;" | 20400 | ||
|- | |- | ||
| style="color:inherit;" | • Torpedo protection damage reduction (%) || colspan="2" style="color:inherit;" | | | style="color:inherit;" | • Torpedo protection damage reduction (%) || colspan="2" style="color:inherit;" | 0 | ||
|} | |} | ||
</div> | </div> | ||
| Line 29: | Line 31: | ||
! style="background-color:#1a3244; color:#ffffff; font-weight:bold;" | ARMOR DETAIL !! style="background-color:#1a3244; color:#ffffff; font-weight:bold;" | | ! style="background-color:#1a3244; color:#ffffff; font-weight:bold;" | ARMOR DETAIL !! style="background-color:#1a3244; color:#ffffff; font-weight:bold;" | | ||
|- | |- | ||
| style="color:inherit;" | • Belt (mm) || style="color:inherit;" | | | style="color:inherit;" | • Belt (mm) || style="color:inherit;" | 19 | ||
|- | |- | ||
| style="color:inherit;" | • Deck (mm) || style="color:inherit;" | | | style="color:inherit;" | • Deck (mm) || style="color:inherit;" | 19 | ||
|- | |- | ||
| style="color:inherit;" | • Superstructure (mm) || style="color:inherit;" | | | style="color:inherit;" | • Superstructure (mm) || style="color:inherit;" | 13 | ||
|- | |- | ||
| style="color:inherit;" | • Extremities (mm) || style="color:inherit;" | | | style="color:inherit;" | • Extremities (mm) || style="color:inherit;" | 19 | ||
|} | |} | ||
</div> | </div> | ||
| Line 47: | Line 49: | ||
| style="color:inherit;" | • Turning circle radius (m) || style="color:inherit;" | 730 || style="color:inherit;" | 730 | | style="color:inherit;" | • Turning circle radius (m) || style="color:inherit;" | 730 || style="color:inherit;" | 730 | ||
|- | |- | ||
| style="color:inherit;" | • Rudder-shift time (sec) || style="color:inherit;" | | | style="color:inherit;" | • Rudder-shift time (sec) || style="color:inherit;" | 7.8 || style="color:inherit;" | 5.6 | ||
|} | |} | ||
</div> | </div> | ||
| Line 148: | Line 150: | ||
<div style="border: 2px solid rgba(212,175,55,0.8); border-radius: 3px; margin-bottom: 1em; overflow: hidden;"> | <div style="border: 2px solid rgba(212,175,55,0.8); border-radius: 3px; margin-bottom: 1em; overflow: hidden;"> | ||
{| class="wikitable" style="margin:0; color:inherit; width:100%" | {| class="wikitable" style="margin:0; color:inherit; width:100%" | ||
! style="background-color:#1a3244; color:#ffffff; font-weight:bold;" | TORPEDO LAUNCHERS !! style="background-color:#1a3244; color:#ffffff; font-weight:bold;" | | ! style="background-color:#1a3244; color:#ffffff; font-weight:bold;" | TORPEDO LAUNCHERS !! style="background-color:#1a3244; color:#ffffff; font-weight:bold;" | Type90 mod. 1 !! style="background-color:#1a3244; color:#ffffff; font-weight:bold;" | Type 93 mod. 2 | ||
|- | |- | ||
| style="color:inherit;" | • | | style="color:inherit;" | • Torpedo tubes (launchers × tubes) || style="color:inherit;" | 1 × 4 || style="color:inherit;" | 1 × 4 | ||
|- | |- | ||
| style="color:inherit;" | • Torpedo name || style="color:inherit;" | | | style="color:inherit;" | • Torpedo name || style="color:inherit;" | Type90 mod. 1 || style="color:inherit;" | Type 93 mod. 2 | ||
|- | |- | ||
| style="color:inherit;" | • Reload time (sec) || style="color:inherit;" | 101 | | style="color:inherit;" | • Reload time (sec) || style="color:inherit;" | 101 || style="color:inherit;" | 112 | ||
|- | |- | ||
| style="color:inherit;" | • 180° turn time (sec) || style="color:inherit;" | 7.2 || style="color:inherit;" | 7.2 | | style="color:inherit;" | • 180° turn time (sec) || style="color:inherit;" | 7.2 || style="color:inherit;" | 7.2 | ||
|- | |- | ||
| style="color:inherit;" | • Damage || style="color:inherit;" | | | style="color:inherit;" | • Damage || style="color:inherit;" | 17,233 || style="color:inherit;" | 20,967 | ||
|- | |- | ||
| style="color:inherit;" | • Range (km) || style="color:inherit;" | 0 | | style="color:inherit;" | • Range (km) || style="color:inherit;" | 10.0 || style="color:inherit;" | 10.0 | ||
|- | |- | ||
| style="color:inherit;" | • Speed (kt) || style="color:inherit;" | 62 || style="color:inherit;" | 67 | | style="color:inherit;" | • Speed (kt) || style="color:inherit;" | 62 || style="color:inherit;" | 67 | ||
| Line 166: | Line 168: | ||
| style="color:inherit;" | • Detectability (km) || style="color:inherit;" | 1.6 || style="color:inherit;" | 1.7 | | style="color:inherit;" | • Detectability (km) || style="color:inherit;" | 1.6 || style="color:inherit;" | 1.7 | ||
|- | |- | ||
| style="color:inherit;" | • Flooding chance (%) || style="color:inherit;" | | | style="color:inherit;" | • Flooding chance (%) || style="color:inherit;" | 287 || style="color:inherit;" | 355 | ||
|} | |} | ||
</div> | </div> | ||
| Line 177: | Line 179: | ||
{| class="wikitable" style="margin:0 0 0.8em 0; width:100%; color:inherit;" | {| class="wikitable" style="margin:0 0 0.8em 0; width:100%; color:inherit;" | ||
! style="background-color:#1a3244; color:#ffffff; font-weight:bold;" | AA ARMAMENT !! style="background-color:#1a3244; color:#ffffff; font-weight:bold;" | MOUNTS × BARRELS | ! style="background-color:#1a3244; color:#ffffff; font-weight:bold;" | AA ARMAMENT !! style="background-color:#1a3244; color:#ffffff; font-weight:bold;" | MOUNTS × BARRELS | ||
|- | |||
| style="color:inherit;" | 100 mm || style="color:inherit;" | 4 × 2 | |||
|- | |- | ||
| style="color:inherit;" | 25 mm || style="color:inherit;" | 1 × 3 + 6 × 2 | | style="color:inherit;" | 25 mm || style="color:inherit;" | 1 × 3 + 6 × 2 | ||
| Line 186: | Line 190: | ||
|- | |- | ||
| style="color:inherit;" | Mid-range || style="color:inherit;" | 49 || style="color:inherit;" | 95% || style="color:inherit;" | 2.5 | | style="color:inherit;" | Mid-range || style="color:inherit;" | 49 || style="color:inherit;" | 95% || style="color:inherit;" | 2.5 | ||
|- | |||
| style="color:inherit;" | Long-range || style="color:inherit;" | 119 || style="color:inherit;" | 100% || style="color:inherit;" | 5.8 | |||
|} | |||
'''Damage by shell explosions''' | |||
{| class="wikitable" style="margin:0 0 0.8em 0; width:100%; color:inherit;" | |||
! style="background-color:#1a3244; color:#ffffff; font-weight:bold;" | EXPLOSIONS / SALVO !! style="background-color:#1a3244; color:#ffffff; font-weight:bold;" | DAMAGE !! style="background-color:#1a3244; color:#ffffff; font-weight:bold;" | HIT CHANCE !! style="background-color:#1a3244; color:#ffffff; font-weight:bold;" | ACTION ZONE (km) | |||
|- | |||
| style="color:inherit;" | 5 || style="color:inherit;" | 1200 || style="color:inherit;" | 100% || style="color:inherit;" | 3.5–5.8 | |||
|} | |} | ||
| Line 192: | Line 205: | ||
{| class="wikitable" style="margin:0 0 0.8em 0; width:100%; color:inherit;" | {| class="wikitable" style="margin:0 0 0.8em 0; width:100%; color:inherit;" | ||
! style="background-color:#1a3244; color:#ffffff; font-weight:bold;" | AA ARMAMENT !! style="background-color:#1a3244; color:#ffffff; font-weight:bold;" | MOUNTS × BARRELS | ! style="background-color:#1a3244; color:#ffffff; font-weight:bold;" | AA ARMAMENT !! style="background-color:#1a3244; color:#ffffff; font-weight:bold;" | MOUNTS × BARRELS | ||
|- | |||
| style="color:inherit;" | 100 mm || style="color:inherit;" | 4 × 2 | |||
|- | |- | ||
| style="color:inherit;" | 25 mm || style="color:inherit;" | 7 × 3 + 18 × 1 | | style="color:inherit;" | 25 mm || style="color:inherit;" | 7 × 3 + 18 × 1 | ||
| Line 201: | Line 216: | ||
|- | |- | ||
| style="color:inherit;" | Mid-range || style="color:inherit;" | 129.5 || style="color:inherit;" | 95% || style="color:inherit;" | 2.5 | | style="color:inherit;" | Mid-range || style="color:inherit;" | 129.5 || style="color:inherit;" | 95% || style="color:inherit;" | 2.5 | ||
|- | |||
| style="color:inherit;" | Long-range || style="color:inherit;" | 119 || style="color:inherit;" | 100% || style="color:inherit;" | 5.8 | |||
|} | |||
'''Damage by shell explosions''' | |||
{| class="wikitable" style="margin:0 0 0.8em 0; width:100%; color:inherit;" | |||
! style="background-color:#1a3244; color:#ffffff; font-weight:bold;" | EXPLOSIONS / SALVO !! style="background-color:#1a3244; color:#ffffff; font-weight:bold;" | DAMAGE !! style="background-color:#1a3244; color:#ffffff; font-weight:bold;" | HIT CHANCE !! style="background-color:#1a3244; color:#ffffff; font-weight:bold;" | ACTION ZONE (km) | |||
|- | |||
| style="color:inherit;" | 5 || style="color:inherit;" | 1200 || style="color:inherit;" | 100% || style="color:inherit;" | 3.5–5.8 | |||
|} | |} | ||
</div> | </div> | ||
| Line 213: | Line 237: | ||
| style="color:inherit;" | • Number of charges || style="color:inherit;" | 2 | | style="color:inherit;" | • Number of charges || style="color:inherit;" | 2 | ||
|- | |- | ||
| style="color:inherit;" | • Bombs per charge || style="color:inherit;" | | | style="color:inherit;" | • Bombs per charge || style="color:inherit;" | 12 | ||
|- | |- | ||
| style="color:inherit;" | • Reload time (sec) || style="color:inherit;" | 40.0 | | style="color:inherit;" | • Reload time (sec) || style="color:inherit;" | 40.0 | ||
| Line 235: | Line 259: | ||
==Gallery== | ==Gallery== | ||
<div class="b-popup"><div class="b-popup_head js-tech-nav_head"><div><h2>WoWs Gallery</h2></div><span class="b-tech-nav_arrow"></span></div><div class="b-popup_content" style="display: none;"><div> | <div class="b-popup"><div class="b-popup_head js-tech-nav_head"><div><h2>WoWs Gallery</h2></div><span class="b-tech-nav_arrow"></span></div><div class="b-popup_content" style="display: none;"><div>[[File:Akizuki.jpg|thumb]]<gallery> | ||
<gallery> | |||
</gallery> | </gallery> | ||
</div></div></div> | </div></div></div> | ||
Latest revision as of 14:36, 9 July 2026

VIII
9,000,000
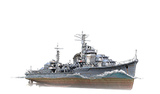
Akizuki — Japan Tech Tree Tier VIII Destroyer.
Akizuki-class destroyers were designed as air defense ships to escort swift carrier formations. Their main battery was represented by eight 100 mm/65 guns. A total of 13 destroyers of this class were ordered, and 12 were built. After entering service in June 1942, Akizuki participated in the Battle of the Eastern Solomons and the Guadalcanal Campaign, the Battle of the Philippine Sea, and the Battle of Leyte Gulf. The destroyer was sunk during the Battle of Cape Engaño.
Pros
- Large HP pool
- High damage per minute with AP and HE shells
- Torpedo Reload Booster consumable available
Cons
- Low maneuverability
- AP shells with low armor penetration
- Low torpedo count per salvo
Ship Stats
Hull Information
Main Battery
Torpedoes
AA Defense
Depth Charges
Compatible Upgrades
| Slot 1 |
 |
 |

| ||
|---|---|---|---|---|---|
| Slot 2 |
 |
 |

| ||
| Slot 3 |
 |
 |
 |
 |

|
| Slot 4 |
 |
 |
 |

| |
| Slot 5 |
 |
 |
 |

|
Consumables
- Slot 1: Damage Control Party
 (5.0s action, 40.0s cooldown)
 - Slot 2: Smoke Generator
 (3 charges, 20.0s action, 160.0s cooldown)
 - Slot 3: Engine Boost
 (3 charges, 120.0s action, 120.0s cooldown)
 - Slot 4: Torpedo Reload Booster
 (3 charges, 1.0s action, 160.0s cooldown)
Gallery
WoWs Gallery

Historical Gallery
Categories:
