Ship:Asturias
Automated stats update via wiki pipeline |
No edit summary |
||
| (2 intermediate revisions by 2 users not shown) | |||
| Line 5: | Line 5: | ||
===Pros=== | ===Pros=== | ||
* | * Easy to shoot accurately at long ranges | ||
* | * Burst Fire alternative fire mode available | ||
* High top speed | |||
===Cons=== | ===Cons=== | ||
* | * Low level of protection against HE shells | ||
| Line 21: | Line 21: | ||
| style="color:inherit;" | • Hit Points || style="color:inherit;" | 37200 || style="color:inherit;" | 39600 | | style="color:inherit;" | • Hit Points || style="color:inherit;" | 37200 || style="color:inherit;" | 39600 | ||
|- | |- | ||
| style="color:inherit;" | • Torpedo protection damage reduction (%) || colspan="2" style="color:inherit;" | | | style="color:inherit;" | • Torpedo protection damage reduction (%) || colspan="2" style="color:inherit;" | 4% | ||
|} | |} | ||
</div> | </div> | ||
| Line 29: | Line 29: | ||
! style="background-color:#1a3244; color:#ffffff; font-weight:bold;" | ARMOR DETAIL !! style="background-color:#1a3244; color:#ffffff; font-weight:bold;" | | ! style="background-color:#1a3244; color:#ffffff; font-weight:bold;" | ARMOR DETAIL !! style="background-color:#1a3244; color:#ffffff; font-weight:bold;" | | ||
|- | |- | ||
| style="color:inherit;" | • Belt (mm) || style="color:inherit;" | | | style="color:inherit;" | • Belt (mm) || style="color:inherit;" | 150 | ||
|- | |- | ||
| style="color:inherit;" | • Deck (mm) || style="color:inherit;" | | | style="color:inherit;" | • Deck (mm) || style="color:inherit;" | 25 | ||
|- | |- | ||
| style="color:inherit;" | • Superstructure (mm) || style="color:inherit;" | | | style="color:inherit;" | • Superstructure (mm) || style="color:inherit;" | 13 | ||
|- | |- | ||
| style="color:inherit;" | • Extremities (mm) || style="color:inherit;" | | | style="color:inherit;" | • Extremities (mm) || style="color:inherit;" | 16 | ||
|} | |} | ||
</div> | </div> | ||
| Line 47: | Line 47: | ||
| style="color:inherit;" | • Turning circle radius (m) || style="color:inherit;" | 860 || style="color:inherit;" | 860 | | style="color:inherit;" | • Turning circle radius (m) || style="color:inherit;" | 860 || style="color:inherit;" | 860 | ||
|- | |- | ||
| style="color:inherit;" | • Rudder-shift time (sec) || style="color:inherit;" | | | style="color:inherit;" | • Rudder-shift time (sec) || style="color:inherit;" | 14.3 || style="color:inherit;" | 10.2 | ||
|} | |} | ||
</div> | </div> | ||
| Line 79: | Line 79: | ||
|- | |- | ||
| style="color:inherit;" | • 180° turn time (sec) || colspan="2" style="color:inherit;" | 25.7 | | style="color:inherit;" | • 180° turn time (sec) || colspan="2" style="color:inherit;" | 25.7 | ||
|- | |||
| style="color:inherit;" | • Alternate fire mode || colspan="2" style="color:inherit;" | — | |||
|- | |||
| style="color:inherit;" | • Salvos per burst || colspan="2" style="color:inherit;" | 2 | |||
|- | |||
| style="color:inherit;" | • Interval between salvos (sec) || colspan="2" style="color:inherit;" | 2 | |||
|- | |||
| style="color:inherit;" | • Reload after burst (sec) || colspan="2" style="color:inherit;" | 32 | |||
|} | |} | ||
</div> | </div> | ||
| Line 148: | Line 156: | ||
<div style="border: 2px solid rgba(212,175,55,0.8); border-radius: 3px; margin-bottom: 1em; overflow: hidden;"> | <div style="border: 2px solid rgba(212,175,55,0.8); border-radius: 3px; margin-bottom: 1em; overflow: hidden;"> | ||
{| class="wikitable" style="margin:0; color:inherit; width:100%" | {| class="wikitable" style="margin:0; color:inherit; width:100%" | ||
! style="background-color:#1a3244; color:#ffffff; font-weight:bold;" | TORPEDO LAUNCHERS !! style="background-color:#1a3244; color:#ffffff; font-weight:bold;" | | ! style="background-color:#1a3244; color:#ffffff; font-weight:bold;" | TORPEDO LAUNCHERS !! style="background-color:#1a3244; color:#ffffff; font-weight:bold;" | 533 mm Si 270 ES | ||
|- | |- | ||
| style="color:inherit;" | • | | style="color:inherit;" | • Torpedo tubes (launchers × tubes) || style="color:inherit;" | 2 × 4 | ||
|- | |- | ||
| style="color:inherit;" | • Torpedo name || style="color:inherit;" | | | style="color:inherit;" | • Torpedo name || style="color:inherit;" | 533 mm Si 270 ES | ||
|- | |- | ||
| style="color:inherit;" | • Reload time (sec) || style="color:inherit;" | 106 | | style="color:inherit;" | • Reload time (sec) || style="color:inherit;" | 106 | ||
|- | |- | ||
| style="color:inherit;" | • 180° turn time (sec) || style="color:inherit;" | 7.2 | | style="color:inherit;" | • 180° turn time (sec) || style="color:inherit;" | 7.2 | ||
|- | |- | ||
| style="color:inherit;" | • Damage || style="color:inherit;" | | | style="color:inherit;" | • Damage || style="color:inherit;" | 15,867 | ||
|- | |- | ||
| style="color:inherit;" | • Range (km) || style="color:inherit;" | 0 | | style="color:inherit;" | • Range (km) || style="color:inherit;" | 8.0 | ||
|- | |- | ||
| style="color:inherit;" | • Speed (kt) || style="color:inherit;" | 61 | | style="color:inherit;" | • Speed (kt) || style="color:inherit;" | 61 | ||
| Line 166: | Line 174: | ||
| style="color:inherit;" | • Detectability (km) || style="color:inherit;" | 1.3 | | style="color:inherit;" | • Detectability (km) || style="color:inherit;" | 1.3 | ||
|- | |- | ||
| style="color:inherit;" | • Flooding chance (%) || style="color:inherit;" | | | style="color:inherit;" | • Flooding chance (%) || style="color:inherit;" | 265 | ||
|} | |} | ||
</div> | </div> | ||
| Line 188: | Line 196: | ||
| style="color:inherit;" | • Name || style="color:inherit;" | 105 mm Spr.Gr. Kz. | | style="color:inherit;" | • Name || style="color:inherit;" | 105 mm Spr.Gr. Kz. | ||
|- | |- | ||
| style="color:inherit;" | • Arrangement || style="color:inherit;" | | | style="color:inherit;" | • Arrangement || style="color:inherit;" | 4x2 105mm | ||
|- | |- | ||
| style="color:inherit;" | • Rate of fire (shots/min) || style="color:inherit;" | 17.9 | | style="color:inherit;" | • Rate of fire (shots/min) || style="color:inherit;" | 17.9 | ||
| Line 256: | Line 264: | ||
! style="background-color:#1a3244; color:#ffffff; font-weight:bold;" | EXPLOSIONS / SALVO !! style="background-color:#1a3244; color:#ffffff; font-weight:bold;" | DAMAGE !! style="background-color:#1a3244; color:#ffffff; font-weight:bold;" | HIT CHANCE !! style="background-color:#1a3244; color:#ffffff; font-weight:bold;" | ACTION ZONE (km) | ! style="background-color:#1a3244; color:#ffffff; font-weight:bold;" | EXPLOSIONS / SALVO !! style="background-color:#1a3244; color:#ffffff; font-weight:bold;" | DAMAGE !! style="background-color:#1a3244; color:#ffffff; font-weight:bold;" | HIT CHANCE !! style="background-color:#1a3244; color:#ffffff; font-weight:bold;" | ACTION ZONE (km) | ||
|- | |- | ||
| style="color:inherit;" | 4 || style="color:inherit;" | | | style="color:inherit;" | 4 || style="color:inherit;" | 1330 || style="color:inherit;" | 90% || style="color:inherit;" | 3.5–5.2 | ||
|} | |} | ||
| Line 286: | Line 294: | ||
! style="background-color:#1a3244; color:#ffffff; font-weight:bold;" | EXPLOSIONS / SALVO !! style="background-color:#1a3244; color:#ffffff; font-weight:bold;" | DAMAGE !! style="background-color:#1a3244; color:#ffffff; font-weight:bold;" | HIT CHANCE !! style="background-color:#1a3244; color:#ffffff; font-weight:bold;" | ACTION ZONE (km) | ! style="background-color:#1a3244; color:#ffffff; font-weight:bold;" | EXPLOSIONS / SALVO !! style="background-color:#1a3244; color:#ffffff; font-weight:bold;" | DAMAGE !! style="background-color:#1a3244; color:#ffffff; font-weight:bold;" | HIT CHANCE !! style="background-color:#1a3244; color:#ffffff; font-weight:bold;" | ACTION ZONE (km) | ||
|- | |- | ||
| style="color:inherit;" | 4 || style="color:inherit;" | | | style="color:inherit;" | 4 || style="color:inherit;" | 1330 || style="color:inherit;" | 90% || style="color:inherit;" | 3.5–5.2 | ||
|} | |} | ||
</div> | </div> | ||
| Line 306: | Line 314: | ||
==Gallery== | ==Gallery== | ||
<div class="b-popup"><div class="b-popup_head js-tech-nav_head"><div><h2>WoWs Gallery</h2></div><span class="b-tech-nav_arrow"></span></div><div class="b-popup_content" style="display: none;"><div> | <div class="b-popup"><div class="b-popup_head js-tech-nav_head"><div><h2>WoWs Gallery</h2></div><span class="b-tech-nav_arrow"></span></div><div class="b-popup_content" style="display: none;"><div>[[File:Asturiasinport.png|thumb]]<gallery> | ||
<gallery> | |||
</gallery> | </gallery> | ||
</div></div></div> | </div></div></div> | ||
| Line 317: | Line 323: | ||
</gallery> | </gallery> | ||
</div></div></div> | </div></div></div> | ||
{{WoWS Ship Changelog Insert|1= | |||
*Preliminary characteristics. | |||
*The burst fire bonuses to AP shell penetration and damage have been removed. | |||
*Burst fire cooldown time reduced from 45 to 27 s. | |||
*Time interval between burst fire salvoes increased from 1.2 to 2 s. | |||
*Burst fire reload time increased from 27 to 28 s. | |||
*Main battery reload time increased from 12 to 13 s. | |||
*Burst Fire reload time increased from 28 to 32 s. | |||
*Number of Repair Party charges has been reduced from 3 to 2. | |||
*Update 12.4: | |||
**Available for testing by supertesters in the game starting from Update 12.4. | |||
*Update 12.6: | |||
**Available from sequential bundle #4 of the Spanish Cruisers event (for Gold Spanish Tokens). | |||
*Update 12.8: | |||
**Introduced into the game as a researchable ship in Update 12.8. | |||
*Update 13.2: | |||
**Fixed several issues with armor for the ship. | |||
}} | |||
[[Category:Ships of Spain]] | [[Category:Ships of Spain]] | ||
Latest revision as of 17:07, 7 August 2026

VII
5,700,000
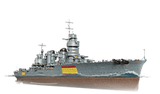
Asturias — Spain Tech Tree Tier VII Cruiser.
Ties between the Fascist regime in Italy and the Francoists strengthened after the latter claimed victory in the Spanish Civil War. These ties also manifested themselves in the field of naval construction: Spain planned to get to grips with the latest achievements in Italian shipbuilding in an effort to strengthen its fleet. Italian company Ansaldo furnished Spain with three projects for a heavy cruiser that differed from each other in the composition of their armament. One of the options included four 203 mm twin-gun mounts.
Pros
- Easy to shoot accurately at long ranges
- Burst Fire alternative fire mode available
- High top speed
Cons
- Low level of protection against HE shells
Ship Stats
Hull Information
Main Battery
Torpedoes
Secondary Battery
Airstrike
AA Defense
Compatible Upgrades
| Slot 1 |
 |
 |
 |

| |
|---|---|---|---|---|---|
| Slot 2 |
 |
 |
 |

| |
| Slot 3 |
 |
 |
 |
 |

|
| Slot 4 |
 |
 |
 |

|
Consumables
- Slot 1: Damage Control Party
 (5.0s action, 60.0s cooldown)
 - Slot 2: Repair Party
 (3 charges, 28.0s action, 80.0s cooldown, 186 hp/s)
 - Slot 3: Hydroacoustic Search
 (3 charges, 100.0s action, 120.0s cooldown) or Defensive AA Fire
  (3 charges, 40.0s action, 80.0s cooldown)
 - Slot 4: Spotting Aircraft
 (4 charges, 100.0s action, 240.0s cooldown) or Patrol Fighter
  (3 charges, 60.0s action, 90.0s cooldown)
Gallery
WoWs Gallery

Historical Gallery
Ship Change Log
Categories:
