Ship:Hobart
Automated stats update via wiki pipeline |
Added Ship Change Log. |
||
| (5 intermediate revisions by 4 users not shown) | |||
| Line 2: | Line 2: | ||
__NOTOC____NOEDITSECTION__ | __NOTOC____NOEDITSECTION__ | ||
<div class="b-description gw-frame-1"><div class="b-description-img b-description-img__indent b-description-img__single"><div style="width:160px; height:102px; opacity:.5; border-radius:2px; position:absolute; left:0; top:0; z-index:1; -webkit-transition:all 0.2s ease-out 0.1s; transition:all 0.2s ease-out 0.1s;">[[File:Wows_anno_flag_commonwealth.png|160px]]</div><div class="l-description-img_class"><span class="b-description-img_type b-description-img_type__Cruiser b-description-img_type__Cruiser-Tech Tree"></span><span class="b-description-img_class">VI</span></div><div class="b-description-img_vehicle">[[File:Ship_PUSC016_Hobart.png|160px|link=|left]]</div><div class="l-description-img_price"><span class="b-description-img_price b-description-img_price__gold"><span title="''{{#var:ship_name}}'' was first released for sale on | <div class="b-description gw-frame-1"><div class="b-description-img b-description-img__indent b-description-img__single"><div style="width:160px; height:102px; opacity:.5; border-radius:2px; position:absolute; left:0; top:0; z-index:1; -webkit-transition:all 0.2s ease-out 0.1s; transition:all 0.2s ease-out 0.1s;">[[File:Wows_anno_flag_commonwealth.png|160px]]</div><div class="l-description-img_class"><span class="b-description-img_type b-description-img_type__Cruiser b-description-img_type__Cruiser-Tech Tree"></span><span class="b-description-img_class">VI</span></div><div class="b-description-img_vehicle">[[File:Ship_PUSC016_Hobart.png|160px|link=|left]]</div><div class="l-description-img_price"><span class="b-description-img_price b-description-img_price__gold"><span title="''{{#var:ship_name}}'' was first released for sale on 13 March 2024.">3,000,000</span></span></div></div><p>[[Ship:{{#var:ship_name}}|{{#var:ship_name}}]] — Commonwealth Tech Tree Tier VI [[Ship:Cruiser|Cruiser]].</p><p>Originally named Apollo, this warship was one of three ships constructed in Britain following the "improved Leander" design. She deviated from the prototype in her different powerplant layout and silhouette. In 1939, she joined the Royal Australian Navy and was renamed HMAS Hobart. During World War II, the cruiser participated in the Mediterranean campaign, in combat operations off the coast of Somalia, and in operations in the Indian and Pacific Oceans. HMAS Hobart was also present at the signing ceremony of Japan's surrender in Tokyo Bay.</p><p> </p></div> | ||
===Pros=== | ===Pros=== | ||
* | * Access to long-range Submarine Surveillance consumable and long-range Depth Charge Airstrike | ||
* | * Access to Crawling Smoke Generator and Hydroacoustic Search consumables | ||
===Cons=== | === Cons === | ||
* | * Weak armor | ||
* | * Low gun traverse speed | ||
| Line 21: | Line 21: | ||
| style="color:inherit;" | • Hit Points || style="color:inherit;" | 24200 || style="color:inherit;" | 27400 | | style="color:inherit;" | • Hit Points || style="color:inherit;" | 24200 || style="color:inherit;" | 27400 | ||
|- | |- | ||
| style="color:inherit;" | • Torpedo protection damage reduction (%) || colspan="2" style="color:inherit;" | | | style="color:inherit;" | • Torpedo protection damage reduction (%) || colspan="2" style="color:inherit;" | 0 | ||
|} | |} | ||
</div> | </div> | ||
| Line 29: | Line 29: | ||
! style="background-color:#1a3244; color:#ffffff; font-weight:bold;" | ARMOR DETAIL !! style="background-color:#1a3244; color:#ffffff; font-weight:bold;" | | ! style="background-color:#1a3244; color:#ffffff; font-weight:bold;" | ARMOR DETAIL !! style="background-color:#1a3244; color:#ffffff; font-weight:bold;" | | ||
|- | |- | ||
| style="color:inherit;" | • Belt (mm) || style="color:inherit;" | | | style="color:inherit;" | • Belt (mm) || style="color:inherit;" | 100 | ||
|- | |- | ||
| style="color:inherit;" | • Deck (mm) || style="color:inherit;" | | | style="color:inherit;" | • Deck (mm) || style="color:inherit;" | 32 | ||
|- | |- | ||
| style="color:inherit;" | • Superstructure (mm) || style="color:inherit;" | | | style="color:inherit;" | • Superstructure (mm) || style="color:inherit;" | 10 | ||
|- | |- | ||
| style="color:inherit;" | • Extremities (mm) || style="color:inherit;" | | | style="color:inherit;" | • Extremities (mm) || style="color:inherit;" | 16 | ||
|} | |} | ||
</div> | </div> | ||
| Line 47: | Line 47: | ||
| style="color:inherit;" | • Turning circle radius (m) || style="color:inherit;" | 640 || style="color:inherit;" | 640 | | style="color:inherit;" | • Turning circle radius (m) || style="color:inherit;" | 640 || style="color:inherit;" | 640 | ||
|- | |- | ||
| style="color:inherit;" | • Rudder-shift time (sec) || style="color:inherit;" | | | style="color:inherit;" | • Rudder-shift time (sec) || style="color:inherit;" | 10.6 || style="color:inherit;" | 7.6 | ||
|} | |} | ||
</div> | </div> | ||
| Line 148: | Line 148: | ||
<div style="border: 2px solid rgba(212,175,55,0.8); border-radius: 3px; margin-bottom: 1em; overflow: hidden;"> | <div style="border: 2px solid rgba(212,175,55,0.8); border-radius: 3px; margin-bottom: 1em; overflow: hidden;"> | ||
{| class="wikitable" style="margin:0; color:inherit; width:100%" | {| class="wikitable" style="margin:0; color:inherit; width:100%" | ||
! style="background-color:#1a3244; color:#ffffff; font-weight:bold;" | TORPEDO LAUNCHERS !! style="background-color:#1a3244; color:#ffffff; font-weight:bold;" | | ! style="background-color:#1a3244; color:#ffffff; font-weight:bold;" | TORPEDO LAUNCHERS !! style="background-color:#1a3244; color:#ffffff; font-weight:bold;" | 533 mm Mk IX | ||
|- | |- | ||
| style="color:inherit;" | • | | style="color:inherit;" | • Torpedo tubes (launchers × tubes) || style="color:inherit;" | 2 × 4 | ||
|- | |- | ||
| style="color:inherit;" | • Torpedo name || style="color:inherit;" | | | style="color:inherit;" | • Torpedo name || style="color:inherit;" | 533 mm Mk IX | ||
|- | |- | ||
| style="color:inherit;" | • Reload time (sec) || style="color:inherit;" | 96 | | style="color:inherit;" | • Reload time (sec) || style="color:inherit;" | 96 | ||
|- | |- | ||
| style="color:inherit;" | • 180° turn time (sec) || style="color:inherit;" | 7.2 | | style="color:inherit;" | • 180° turn time (sec) || style="color:inherit;" | 7.2 | ||
|- | |- | ||
| style="color:inherit;" | • Damage || style="color:inherit;" | | | style="color:inherit;" | • Damage || style="color:inherit;" | 15,433 | ||
|- | |- | ||
| style="color:inherit;" | • Range (km) || style="color:inherit;" | 0 | | style="color:inherit;" | • Range (km) || style="color:inherit;" | 10.0 | ||
|- | |- | ||
| style="color:inherit;" | • Speed (kt) || style="color:inherit;" | 62 | | style="color:inherit;" | • Speed (kt) || style="color:inherit;" | 62 | ||
| Line 166: | Line 166: | ||
| style="color:inherit;" | • Detectability (km) || style="color:inherit;" | 1.3 | | style="color:inherit;" | • Detectability (km) || style="color:inherit;" | 1.3 | ||
|- | |- | ||
| style="color:inherit;" | • Flooding chance (%) || style="color:inherit;" | | | style="color:inherit;" | • Flooding chance (%) || style="color:inherit;" | 257 | ||
|} | |} | ||
</div> | </div> | ||
</div></div></div> | </div></div></div> | ||
| Line 188: | Line 189: | ||
| style="color:inherit;" | • Name || style="color:inherit;" | 102 mm HE 35 lb | | style="color:inherit;" | • Name || style="color:inherit;" | 102 mm HE 35 lb | ||
|- | |- | ||
| style="color:inherit;" | • Arrangement || style="color:inherit;" | | | style="color:inherit;" | • Arrangement || style="color:inherit;" | 4x2 102mm | ||
|- | |- | ||
| style="color:inherit;" | • Rate of fire (shots/min) || style="color:inherit;" | 20.0 | | style="color:inherit;" | • Rate of fire (shots/min) || style="color:inherit;" | 20.0 | ||
| Line 258: | Line 259: | ||
! style="background-color:#1a3244; color:#ffffff; font-weight:bold;" | EXPLOSIONS / SALVO !! style="background-color:#1a3244; color:#ffffff; font-weight:bold;" | DAMAGE !! style="background-color:#1a3244; color:#ffffff; font-weight:bold;" | HIT CHANCE !! style="background-color:#1a3244; color:#ffffff; font-weight:bold;" | ACTION ZONE (km) | ! style="background-color:#1a3244; color:#ffffff; font-weight:bold;" | EXPLOSIONS / SALVO !! style="background-color:#1a3244; color:#ffffff; font-weight:bold;" | DAMAGE !! style="background-color:#1a3244; color:#ffffff; font-weight:bold;" | HIT CHANCE !! style="background-color:#1a3244; color:#ffffff; font-weight:bold;" | ACTION ZONE (km) | ||
|- | |- | ||
| style="color:inherit;" | 2 || style="color:inherit;" | | | style="color:inherit;" | 2 || style="color:inherit;" | 1120 || style="color:inherit;" | 90% || style="color:inherit;" | 3.5–5.8 | ||
|} | |} | ||
| Line 288: | Line 289: | ||
! style="background-color:#1a3244; color:#ffffff; font-weight:bold;" | EXPLOSIONS / SALVO !! style="background-color:#1a3244; color:#ffffff; font-weight:bold;" | DAMAGE !! style="background-color:#1a3244; color:#ffffff; font-weight:bold;" | HIT CHANCE !! style="background-color:#1a3244; color:#ffffff; font-weight:bold;" | ACTION ZONE (km) | ! style="background-color:#1a3244; color:#ffffff; font-weight:bold;" | EXPLOSIONS / SALVO !! style="background-color:#1a3244; color:#ffffff; font-weight:bold;" | DAMAGE !! style="background-color:#1a3244; color:#ffffff; font-weight:bold;" | HIT CHANCE !! style="background-color:#1a3244; color:#ffffff; font-weight:bold;" | ACTION ZONE (km) | ||
|- | |- | ||
| style="color:inherit;" | 2 || style="color:inherit;" | | | style="color:inherit;" | 2 || style="color:inherit;" | 1120 || style="color:inherit;" | 90% || style="color:inherit;" | 3.5–5.8 | ||
|} | |} | ||
</div> | </div> | ||
| Line 302: | Line 303: | ||
* '''Slot 1:''' {{Damage Control Party}} (5.0s action, 60.0s cooldown) | * '''Slot 1:''' {{Damage Control Party}} (5.0s action, 60.0s cooldown) | ||
* '''Slot 2:''' {{Defensive AA Fire}} (3 charges, 40.0s action, 80.0s cooldown) '''or''' {{Hydroacoustic Search}} (3 charges, 100.0s action, 120.0s cooldown) | * '''Slot 2:''' {{Defensive AA Fire}} (3 charges, 40.0s action, 80.0s cooldown) '''or''' {{Hydroacoustic Search}} (3 charges, 100.0s action, 120.0s cooldown) | ||
* '''Slot 3:''' {{Smoke Generator}} (3 charges, 102.0s action, 160.0s cooldown) | * '''Slot 3:''' {{Crawling Smoke Generator}} (3 charges, 102.0s action, 160.0s cooldown) | ||
* '''Slot 4:''' {{Submarine Surveillance}} (3 charges, 20.0s action, 120.0s cooldown) | * '''Slot 4:''' {{Submarine Surveillance}} (3 charges, 20.0s action, 120.0s cooldown) | ||
* '''Slot 5:''' {{Repair Party}} (2 charges, 28.0s action, 80.0s cooldown, 121 hp/s) | * '''Slot 5:''' {{Repair Party}} (2 charges, 28.0s action, 80.0s cooldown, 121 hp/s) | ||
| Line 309: | Line 310: | ||
==Gallery== | ==Gallery== | ||
<div class="b-popup"><div class="b-popup_head js-tech-nav_head"><div><h2>WoWs Gallery</h2></div><span class="b-tech-nav_arrow"></span></div><div class="b-popup_content" style="display: none;"><div> | <div class="b-popup"><div class="b-popup_head js-tech-nav_head"><div><h2>WoWs Gallery</h2></div><span class="b-tech-nav_arrow"></span></div><div class="b-popup_content" style="display: none;">[[File:Hobart.png|thumb]]<div> | ||
<gallery> | <gallery> | ||
| Line 320: | Line 321: | ||
</gallery> | </gallery> | ||
</div></div></div> | </div></div></div> | ||
{{WoWS Ship Changelog Insert|1= | |||
*Preliminary characteristics. | |||
*Reduced the splash area of the Depth Charges - the radius in which flooding and fires may occur - to be equal to the damage area. | |||
*Main battery reload time increased from 6.5 to 7.5 s. | |||
*Range of the ASW airstrike decreased from 8 to 7 km. | |||
*Stock Gun Fire Control System firing range reduced from 13.7 to 13.1 km. | |||
*Researchable Gun Fire Control System firing range reduced from 15.1 to 14.4 km. | |||
*Update 13.2: | |||
**Available from sequential bundle #5 of the Commonwealth Cruisers Early Access event (for 500 Commonwealth Tokens). | |||
*Update 13.4: | |||
**Introduced into the game as a researchable ship in Update 13.4. | |||
}} | |||
[[Category:Ships of Commonwealth]] | [[Category:Ships of Commonwealth]] | ||
Latest revision as of 13:12, 7 August 2026

VI
3,000,000
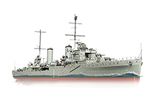
Hobart — Commonwealth Tech Tree Tier VI Cruiser.
Originally named Apollo, this warship was one of three ships constructed in Britain following the "improved Leander" design. She deviated from the prototype in her different powerplant layout and silhouette. In 1939, she joined the Royal Australian Navy and was renamed HMAS Hobart. During World War II, the cruiser participated in the Mediterranean campaign, in combat operations off the coast of Somalia, and in operations in the Indian and Pacific Oceans. HMAS Hobart was also present at the signing ceremony of Japan's surrender in Tokyo Bay.
Pros
- Access to long-range Submarine Surveillance consumable and long-range Depth Charge Airstrike
- Access to Crawling Smoke Generator and Hydroacoustic Search consumables
Cons
- Weak armor
- Low gun traverse speed
Ship Stats
Hull Information
Main Battery
Torpedoes
Secondary Battery
Airstrike
AA Defense
Compatible Upgrades
| Slot 1 |
 |
 |

| ||||
|---|---|---|---|---|---|---|---|
| Slot 2 |
 |
 |
 |

| |||
| Slot 3 |
 |
 |
 |
 |
 |
 |

|
| Slot 4 |
 |
 |
 |

|
Consumables
- Slot 1: Damage Control Party
 (5.0s action, 60.0s cooldown)
 - Slot 2: Defensive AA Fire
 (3 charges, 40.0s action, 80.0s cooldown) or Hydroacoustic Search
  (3 charges, 100.0s action, 120.0s cooldown)
 - Slot 3: Crawling Smoke Generator
 (3 charges, 102.0s action, 160.0s cooldown)
 - Slot 4: Submarine Surveillance
 (3 charges, 20.0s action, 120.0s cooldown)
 - Slot 5: Repair Party
 (2 charges, 28.0s action, 80.0s cooldown, 121 hp/s)
Gallery
WoWs Gallery

Historical Gallery
Ship Change Log
Categories:
