Ship:Grom
Automated stats update via wiki pipeline |
Pockington (talk | contribs) added missing information on launch day |
||
| Line 5: | Line 5: | ||
===Pros=== | ===Pros=== | ||
* | * High maneuverability | ||
* | * High damage per minute | ||
===Cons=== | ===Cons=== | ||
* | * Only HE shells available | ||
* | * Low Torpedo damage | ||
| Line 21: | Line 23: | ||
| style="color:inherit;" | • Hit Points || style="color:inherit;" | 12900 || style="color:inherit;" | 15500 | | style="color:inherit;" | • Hit Points || style="color:inherit;" | 12900 || style="color:inherit;" | 15500 | ||
|- | |- | ||
| style="color:inherit;" | • Torpedo protection damage reduction (%) || colspan="2" style="color:inherit;" | | | style="color:inherit;" | • Torpedo protection damage reduction (%) || colspan="2" style="color:inherit;" | 0 | ||
|} | |} | ||
</div> | </div> | ||
| Line 29: | Line 31: | ||
! style="background-color:#1a3244; color:#ffffff; font-weight:bold;" | ARMOR DETAIL !! style="background-color:#1a3244; color:#ffffff; font-weight:bold;" | | ! style="background-color:#1a3244; color:#ffffff; font-weight:bold;" | ARMOR DETAIL !! style="background-color:#1a3244; color:#ffffff; font-weight:bold;" | | ||
|- | |- | ||
| style="color:inherit;" | • Belt (mm) || style="color:inherit;" | | | style="color:inherit;" | • Belt (mm) || style="color:inherit;" | 16 | ||
|- | |- | ||
| style="color:inherit;" | • Deck (mm) || style="color:inherit;" | | | style="color:inherit;" | • Deck (mm) || style="color:inherit;" | 16 | ||
|- | |- | ||
| style="color:inherit;" | • Superstructure (mm) || style="color:inherit;" | | | style="color:inherit;" | • Superstructure (mm) || style="color:inherit;" | 10 | ||
|- | |- | ||
| style="color:inherit;" | • Extremities (mm) || style="color:inherit;" | | | style="color:inherit;" | • Extremities (mm) || style="color:inherit;" | 16 | ||
|} | |} | ||
</div> | </div> | ||
| Line 47: | Line 49: | ||
| style="color:inherit;" | • Turning circle radius (m) || style="color:inherit;" | 610 || style="color:inherit;" | 610 | | style="color:inherit;" | • Turning circle radius (m) || style="color:inherit;" | 610 || style="color:inherit;" | 610 | ||
|- | |- | ||
| style="color:inherit;" | • Rudder-shift time (sec) || style="color:inherit;" | | | style="color:inherit;" | • Rudder-shift time (sec) || style="color:inherit;" | 6.0 || style="color:inherit;" | 4.3 | ||
|} | |} | ||
</div> | </div> | ||
| Line 123: | Line 125: | ||
<div style="border: 2px solid rgba(212,175,55,0.8); border-radius: 3px; margin-bottom: 1em; overflow: hidden;"> | <div style="border: 2px solid rgba(212,175,55,0.8); border-radius: 3px; margin-bottom: 1em; overflow: hidden;"> | ||
{| class="wikitable" style="margin:0; color:inherit; width:100%" | {| class="wikitable" style="margin:0; color:inherit; width:100%" | ||
! style="background-color:#1a3244; color:#ffffff; font-weight:bold;" | TORPEDO LAUNCHERS !! style="background-color:#1a3244; color:#ffffff; font-weight:bold;" | | ! style="background-color:#1a3244; color:#ffffff; font-weight:bold;" | TORPEDO LAUNCHERS !! style="background-color:#1a3244; color:#ffffff; font-weight:bold;" | Torped M1924 mod 2 | ||
|- | |- | ||
| style="color:inherit;" | • | | style="color:inherit;" | • Torpedo tubes (launchers × tubes) || style="color:inherit;" | 2 × 3 | ||
|- | |- | ||
| style="color:inherit;" | • Torpedo name || style="color:inherit;" | | | style="color:inherit;" | • Torpedo name || style="color:inherit;" | Torped M1924 mod 2 | ||
|- | |- | ||
| style="color:inherit;" | • Reload time (sec) || style="color:inherit;" | 75 | | style="color:inherit;" | • Reload time (sec) || style="color:inherit;" | 75 | ||
|- | |- | ||
| style="color:inherit;" | • 180° turn time (sec) || style="color:inherit;" | 7.2 | | style="color:inherit;" | • 180° turn time (sec) || style="color:inherit;" | 7.2 | ||
|- | |- | ||
| style="color:inherit;" | • Damage || style="color:inherit;" | | | style="color:inherit;" | • Damage || style="color:inherit;" | 7,533 | ||
|- | |- | ||
| style="color:inherit;" | • Range (km) || style="color:inherit;" | | | style="color:inherit;" | • Range (km) || style="color:inherit;" | 7.5 | ||
|- | |- | ||
| style="color:inherit;" | • Speed (kt) || style="color:inherit;" | 72 | | style="color:inherit;" | • Speed (kt) || style="color:inherit;" | 72 | ||
| Line 141: | Line 143: | ||
| style="color:inherit;" | • Detectability (km) || style="color:inherit;" | 1.6 | | style="color:inherit;" | • Detectability (km) || style="color:inherit;" | 1.6 | ||
|- | |- | ||
| style="color:inherit;" | • Flooding chance (%) || style="color:inherit;" | | | style="color:inherit;" | • Flooding chance (%) || style="color:inherit;" | 119 | ||
|} | |} | ||
</div> | </div> | ||
| Line 196: | Line 198: | ||
| style="color:inherit;" | • Number of charges || style="color:inherit;" | 2 | | style="color:inherit;" | • Number of charges || style="color:inherit;" | 2 | ||
|- | |- | ||
| style="color:inherit;" | • Bombs per charge || style="color:inherit;" | | | style="color:inherit;" | • Bombs per charge || style="color:inherit;" | 10 | ||
|- | |- | ||
| style="color:inherit;" | • Reload time (sec) || style="color:inherit;" | 40.0 | | style="color:inherit;" | • Reload time (sec) || style="color:inherit;" | 40.0 | ||
| Line 217: | Line 219: | ||
==Gallery== | ==Gallery== | ||
<div class="b-popup"><div class="b-popup_head js-tech-nav_head"><div><h2>WoWs Gallery</h2></div><span class="b-tech-nav_arrow"></span></div><div class="b-popup_content" style="display: none;"><div> | <div class="b-popup"><div class="b-popup_head js-tech-nav_head"><div><h2>WoWs Gallery</h2></div><span class="b-tech-nav_arrow"></span></div><div class="b-popup_content" style="display: none;"><div>[[File:Grominport.png|thumb]]<gallery> | ||
<gallery> | |||
</gallery> | </gallery> | ||
</div></div></div> | </div></div></div> | ||
Latest revision as of 16:21, 11 July 2026

VII
5,700,000
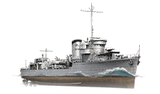
Grom — Europe Tech Tree Tier VII Destroyer.
Grom and Błyskawica entered service in 1937, becoming the strongest European destroyers of their time after the latest French ones. With the outbreak of World War II, the destroyers broke through the Baltic to Britain to help escort wartime supply convoys to Poland. However, the convoys were never organized due to the rapid fall of Poland, and Grom came under the command of the British Navy. Being part of it, she took part in the Norwegian campaign. On May 4, 1940, one of Grom's torpedo tubes was hit by a bomb, which caused the torpedoes to detonate. It took less than three minutes for the ship to sink.
Pros
- High maneuverability
- High damage per minute
Cons
- Only HE shells available
- Low Torpedo damage
Ship Stats
Hull Information
Main Battery
Torpedoes
AA Defense
Depth Charges
Compatible Upgrades
| Slot 1 |
 |
 |

| ||
|---|---|---|---|---|---|
| Slot 2 |
 |
 |

| ||
| Slot 3 |
 |
 |
 |
 |

|
| Slot 4 |
 |
 |
 |

|
Consumables
- Slot 1: Damage Control Party
 (5.0s action, 40.0s cooldown)
 - Slot 2: Smoke Generator
 (3 charges, 20.0s action, 160.0s cooldown)
 - Slot 3: Engine Boost
 (4 charges, 90.0s action, 90.0s cooldown)
Gallery
WoWs Gallery

Historical Gallery
Categories:
