Ship:Ragnar
Automated stats update via wiki pipeline |
Pockington (talk | contribs) corrected info |
||
| (3 intermediate revisions by 2 users not shown) | |||
| Line 5: | Line 5: | ||
===Pros=== | ===Pros=== | ||
* | * Emergency Engine Power consumable available. | ||
* | * High main battery accuracy and armor penetration capabilities. | ||
* Repair Party consumable available. | |||
* Surveillance Radar consumable available. | |||
===Cons=== | ===Cons=== | ||
* | * High detectability. | ||
* | * No torpedo armament. | ||
| Line 21: | Line 23: | ||
| style="color:inherit;" | • Hit Points || style="color:inherit;" | 26500 | | style="color:inherit;" | • Hit Points || style="color:inherit;" | 26500 | ||
|- | |- | ||
| style="color:inherit;" | • Torpedo protection damage reduction (%) || style="color:inherit;" | | | style="color:inherit;" | • Torpedo protection damage reduction (%) || style="color:inherit;" | 0 | ||
|} | |} | ||
</div> | </div> | ||
| Line 29: | Line 31: | ||
! style="background-color:#1a3244; color:#ffffff; font-weight:bold;" | ARMOR DETAIL !! style="background-color:#1a3244; color:#ffffff; font-weight:bold;" | | ! style="background-color:#1a3244; color:#ffffff; font-weight:bold;" | ARMOR DETAIL !! style="background-color:#1a3244; color:#ffffff; font-weight:bold;" | | ||
|- | |- | ||
| style="color:inherit;" | • Belt (mm) || style="color:inherit;" | | | style="color:inherit;" | • Belt (mm) || style="color:inherit;" | 25 | ||
|- | |- | ||
| style="color:inherit;" | • Deck (mm) || style="color:inherit;" | | | style="color:inherit;" | • Deck (mm) || style="color:inherit;" | 19 | ||
|- | |- | ||
| style="color:inherit;" | • Superstructure (mm) || style="color:inherit;" | | | style="color:inherit;" | • Superstructure (mm) || style="color:inherit;" | 13 | ||
|- | |- | ||
| style="color:inherit;" | • Extremities (mm) || style="color:inherit;" | | | style="color:inherit;" | • Extremities (mm) || style="color:inherit;" | 19 | ||
|} | |} | ||
</div> | </div> | ||
| Line 47: | Line 49: | ||
| style="color:inherit;" | • Turning circle radius (m) || style="color:inherit;" | 770 | | style="color:inherit;" | • Turning circle radius (m) || style="color:inherit;" | 770 | ||
|- | |- | ||
| style="color:inherit;" | • Rudder-shift time (sec) || style="color:inherit;" | | | style="color:inherit;" | • Rudder-shift time (sec) || style="color:inherit;" | 5.6 | ||
|} | |} | ||
</div> | </div> | ||
| Line 149: | Line 151: | ||
{| class="wikitable" style="margin:0 0 0.8em 0; width:100%; color:inherit;" | {| class="wikitable" style="margin:0 0 0.8em 0; width:100%; color:inherit;" | ||
! style="background-color:#1a3244; color:#ffffff; font-weight:bold;" | AA ARMAMENT !! style="background-color:#1a3244; color:#ffffff; font-weight:bold;" | MOUNTS × BARRELS | ! style="background-color:#1a3244; color:#ffffff; font-weight:bold;" | AA ARMAMENT !! style="background-color:#1a3244; color:#ffffff; font-weight:bold;" | MOUNTS × BARRELS | ||
|- | |||
| style="color:inherit;" | 152 mm || style="color:inherit;" | 2 × 2 | |||
|- | |- | ||
| style="color:inherit;" | 57 mm || style="color:inherit;" | 2 × 2 | | style="color:inherit;" | 57 mm || style="color:inherit;" | 2 × 2 | ||
| Line 159: | Line 163: | ||
! style="background-color:#1a3244; color:#ffffff; font-weight:bold;" | RANGE !! style="background-color:#1a3244; color:#ffffff; font-weight:bold;" | DPS !! style="background-color:#1a3244; color:#ffffff; font-weight:bold;" | HIT CHANCE !! style="background-color:#1a3244; color:#ffffff; font-weight:bold;" | ACTION ZONE (km) | ! style="background-color:#1a3244; color:#ffffff; font-weight:bold;" | RANGE !! style="background-color:#1a3244; color:#ffffff; font-weight:bold;" | DPS !! style="background-color:#1a3244; color:#ffffff; font-weight:bold;" | HIT CHANCE !! style="background-color:#1a3244; color:#ffffff; font-weight:bold;" | ACTION ZONE (km) | ||
|- | |- | ||
| style="color:inherit;" | Mid-range || style="color:inherit;" | | | style="color:inherit;" | Mid-range || style="color:inherit;" | 702 || style="color:inherit;" | 100% || style="color:inherit;" | 4.0 | ||
|- | |||
| style="color:inherit;" | Long-range || style="color:inherit;" | 41 || style="color:inherit;" | 100% || style="color:inherit;" | 6.9 | |||
|} | |||
'''Damage by shell explosions''' | |||
{| class="wikitable" style="margin:0 0 0.8em 0; width:100%; color:inherit;" | |||
! style="background-color:#1a3244; color:#ffffff; font-weight:bold;" | EXPLOSIONS / SALVO !! style="background-color:#1a3244; color:#ffffff; font-weight:bold;" | DAMAGE !! style="background-color:#1a3244; color:#ffffff; font-weight:bold;" | HIT CHANCE !! style="background-color:#1a3244; color:#ffffff; font-weight:bold;" | ACTION ZONE (km) | |||
|- | |||
| style="color:inherit;" | 2 || style="color:inherit;" | 1820 || style="color:inherit;" | 100% || style="color:inherit;" | 3.5–6.9 | |||
|} | |} | ||
</div> | </div> | ||
</div></div></div> | </div></div></div> | ||
| Line 172: | Line 186: | ||
| style="color:inherit;" | • Number of charges || style="color:inherit;" | 2 | | style="color:inherit;" | • Number of charges || style="color:inherit;" | 2 | ||
|- | |- | ||
| style="color:inherit;" | • Bombs per charge || style="color:inherit;" | | | style="color:inherit;" | • Bombs per charge || style="color:inherit;" | 4 | ||
|- | |- | ||
| style="color:inherit;" | • Reload time (sec) || style="color:inherit;" | 40.0 | | style="color:inherit;" | • Reload time (sec) || style="color:inherit;" | 40.0 | ||
| Line 189: | Line 203: | ||
* '''Slot 2:''' {{Repair Party}} (2 charges, 14.0s action, 80.0s cooldown, 265 hp/s) | * '''Slot 2:''' {{Repair Party}} (2 charges, 14.0s action, 80.0s cooldown, 265 hp/s) | ||
* '''Slot 3:''' {{Engine Boost}} (2 charges, 60.0s action, 180.0s cooldown) | * '''Slot 3:''' {{Engine Boost}} (2 charges, 60.0s action, 180.0s cooldown) | ||
* '''Slot 4:''' {{Surveillance Radar}} (7.5km, 2 charges, 30.0s action, 120.0s cooldown) | |||
}} | }} | ||
| Line 197: | Line 212: | ||
<gallery> | <gallery> | ||
</gallery> | </gallery> | ||
</div></div></div> | </div>[[File:Ragnar10.jpg|left|thumb]]</div></div> | ||
<div class="b-popup"><div class="b-popup_head js-tech-nav_head"><div><h2>Historical Gallery</h2></div><span class="b-tech-nav_arrow"></span></div><div class="b-popup_content" style="display: none;"><div> | <div class="b-popup"><div class="b-popup_head js-tech-nav_head"><div><h2>Historical Gallery</h2></div><span class="b-tech-nav_arrow"></span></div><div class="b-popup_content" style="display: none;"><div> | ||
Latest revision as of 16:59, 11 July 2026

X
31,000 doubloons
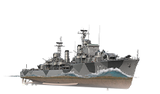
Ragnar — Europe Special Tier X Destroyer.
The main tactical unit of the Swedish fleet was to be a squadron of several destroyers. Tre Kronor-class cruisers acted as squadron leaders, but in the 1940s, the construction of a special squadron leader was considered. On March 21, 1947, three draft designs were presented, with a standard displacement of 2,400, 3,000, and 4,660 tons. The largest of the three projects was lightly armored and armed with two twin-gun mounts housing 152 mm dual-purpose guns.
Pros
- Emergency Engine Power consumable available.
- High main battery accuracy and armor penetration capabilities.
- Repair Party consumable available.
- Surveillance Radar consumable available.
Cons
- High detectability.
- No torpedo armament.
Ship Stats
Hull Information
Main Battery
AA Defense
Depth Charges
Compatible Upgrades
| Slot 1 |
 |
 |

| |
|---|---|---|---|---|
| Slot 2 |
 |
 |
 |

|
| Slot 3 |
 |
 |

| |
| Slot 4 |
 |
 |
 |

|
| Slot 5 |
 |
 |
 |

|
| Slot 6 |
 |
 |

|
Consumables
- Slot 1: Damage Control Party
 (5.0s action, 40.0s cooldown)
 - Slot 2: Repair Party
 (2 charges, 14.0s action, 80.0s cooldown, 265 hp/s)
 - Slot 3: Engine Boost
 (2 charges, 60.0s action, 180.0s cooldown)
 - Slot 4: Surveillance Radar
 (7.5km, 2 charges, 30.0s action, 120.0s cooldown)
Gallery
WoWs Gallery

Historical Gallery
Categories:
