Ship:Harbin
Pockington (talk | contribs) mNo edit summary |
Pockington (talk | contribs) fixed rudder shift, torpedo launcher count and flood chance, added DP mounts, added short and long range AA, added missing flak info, and incorrect asw charge count |
||
| (2 intermediate revisions by the same user not shown) | |||
| Line 49: | Line 49: | ||
| style="color:inherit;" | • Turning circle radius (m) || style="color:inherit;" | 660 || style="color:inherit;" | 660 | | style="color:inherit;" | • Turning circle radius (m) || style="color:inherit;" | 660 || style="color:inherit;" | 660 | ||
|- | |- | ||
| style="color:inherit;" | • Rudder-shift time (sec) || style="color:inherit;" | | | style="color:inherit;" | • Rudder-shift time (sec) || style="color:inherit;" | 9.7 || style="color:inherit;" | 6.9 | ||
|} | |} | ||
</div> | </div> | ||
| Line 152: | Line 152: | ||
! style="background-color:#1a3244; color:#ffffff; font-weight:bold;" | TORPEDO LAUNCHERS !! style="background-color:#1a3244; color:#ffffff; font-weight:bold;" | | ! style="background-color:#1a3244; color:#ffffff; font-weight:bold;" | TORPEDO LAUNCHERS !! style="background-color:#1a3244; color:#ffffff; font-weight:bold;" | | ||
|- | |- | ||
| style="color:inherit;" | • Number of launchers || style="color:inherit;" | | | style="color:inherit;" | • Number of launchers || style="color:inherit;" | 4x3 | ||
|- | |- | ||
| style="color:inherit;" | • Torpedo name || style="color:inherit;" | | | style="color:inherit;" | • Torpedo name || style="color:inherit;" | 533mm 53-56 | ||
|- | |- | ||
| style="color:inherit;" | • Reload time (sec) || style="color:inherit;" | 125.0 | | style="color:inherit;" | • Reload time (sec) || style="color:inherit;" | 125.0 | ||
| Line 160: | Line 160: | ||
| style="color:inherit;" | • 180° turn time (sec) || style="color:inherit;" | 7.2 | | style="color:inherit;" | • 180° turn time (sec) || style="color:inherit;" | 7.2 | ||
|- | |- | ||
| style="color:inherit;" | • Damage || style="color:inherit;" | | | style="color:inherit;" | • Damage || style="color:inherit;" | 17933 | ||
|- | |- | ||
| style="color:inherit;" | • Range (km) || style="color:inherit;" | | | style="color:inherit;" | • Range (km) || style="color:inherit;" | 11 | ||
|- | |- | ||
| style="color:inherit;" | • Speed (kt) || style="color:inherit;" | 62 | | style="color:inherit;" | • Speed (kt) || style="color:inherit;" | 62 | ||
| Line 168: | Line 168: | ||
| style="color:inherit;" | • Detectability (km) || style="color:inherit;" | 0.8 | | style="color:inherit;" | • Detectability (km) || style="color:inherit;" | 0.8 | ||
|- | |- | ||
| style="color:inherit;" | • Flooding chance (%) || style="color:inherit;" | | | style="color:inherit;" | • Flooding chance (%) || style="color:inherit;" | 302% | ||
|} | |} | ||
</div> | </div> | ||
| Line 175: | Line 175: | ||
<div class="b-popup"><div class="b-popup_head js-tech-nav_head"><div><h2>AA Defense</h2></div><span class="b-tech-nav_arrow"></span></div><div class="b-popup_content" style="display: none;"><div> | <div class="b-popup"><div class="b-popup_head js-tech-nav_head"><div><h2>AA Defense</h2></div><span class="b-tech-nav_arrow"></span></div><div class="b-popup_content" style="display: none;"><div> | ||
<div style="border: 2px solid rgba(212,175,55,0.8); border-radius: 3px; margin-bottom: 1em; overflow: hidden;"> | <div style="border: 2px solid rgba(212,175,55,0.8); border-radius: 3px; margin-bottom: 1em; overflow: hidden;"> | ||
{| class="wikitable" style="margin:0 0 0.8em 0; width:100%; color:inherit;" | {| class="wikitable" style="margin:0 0 0.8em 0; width:100%; color:inherit;" | ||
! style="background-color:#1a3244; color:#ffffff; font-weight:bold;" | AA ARMAMENT !! style="background-color:#1a3244; color:#ffffff; font-weight:bold;" | MOUNTS × BARRELS | ! style="background-color:#1a3244; color:#ffffff; font-weight:bold;" | AA ARMAMENT !! style="background-color:#1a3244; color:#ffffff; font-weight:bold;" | MOUNTS × BARRELS | ||
|- | |- | ||
| style="color:inherit;" | 37 mm || style="color:inherit;" | | | style="color:inherit;" | 130 mm || style="color:inherit;" | 5 × 2 | ||
|- | |||
| style="color:inherit;" | 37 mm || style="color:inherit;" | 4 × 4 + 10 × 2 | |||
|- | |- | ||
| style="color:inherit;" | | | style="color:inherit;" | 20 mm || style="color:inherit;" | 8 × 2 | ||
|} | |} | ||
| Line 189: | Line 189: | ||
! style="background-color:#1a3244; color:#ffffff; font-weight:bold;" | RANGE !! style="background-color:#1a3244; color:#ffffff; font-weight:bold;" | DPS !! style="background-color:#1a3244; color:#ffffff; font-weight:bold;" | HIT CHANCE !! style="background-color:#1a3244; color:#ffffff; font-weight:bold;" | ACTION ZONE (km) | ! style="background-color:#1a3244; color:#ffffff; font-weight:bold;" | RANGE !! style="background-color:#1a3244; color:#ffffff; font-weight:bold;" | DPS !! style="background-color:#1a3244; color:#ffffff; font-weight:bold;" | HIT CHANCE !! style="background-color:#1a3244; color:#ffffff; font-weight:bold;" | ACTION ZONE (km) | ||
|- | |- | ||
| style="color:inherit;" | | | style="color:inherit;" | Short-range || style="color:inherit;" | 105 || style="color:inherit;" | 90% || style="color:inherit;" | 2.0 | ||
|- | |- | ||
| style="color:inherit;" | | | style="color:inherit;" | Mid-range || style="color:inherit;" | 252 || style="color:inherit;" | 90% || style="color:inherit;" | 3.5 | ||
|- | |- | ||
| style="color:inherit;" | | | style="color:inherit;" | Long-range || style="color:inherit;" | 84 || style="color:inherit;" | 90% || style="color:inherit;" | 6.0 | ||
|} | |} | ||
''' | '''Damage by shell explosions''' | ||
{| class="wikitable" style="margin:0 0 0.8em 0; width:100%; color:inherit;" | {| class="wikitable" style="margin:0 0 0.8em 0; width:100%; color:inherit;" | ||
! style="background-color:#1a3244; color:#ffffff; font-weight:bold;" | | ! style="background-color:#1a3244; color:#ffffff; font-weight:bold;" | EXPLOSIONS / SALVO !! style="background-color:#1a3244; color:#ffffff; font-weight:bold;" | DAMAGE !! style="background-color:#1a3244; color:#ffffff; font-weight:bold;" | HIT CHANCE !! style="background-color:#1a3244; color:#ffffff; font-weight:bold;" | ACTION ZONE (km) | ||
|- | |- | ||
| style="color:inherit;" | | | style="color:inherit;" | 4 || style="color:inherit;" | 1540 || style="color:inherit;" | 90% || style="color:inherit;" | 3.5–6.0 | ||
|} | |} | ||
</div> | </div> | ||
| Line 219: | Line 213: | ||
| style="color:inherit;" | • Number of charges || style="color:inherit;" | 2 | | style="color:inherit;" | • Number of charges || style="color:inherit;" | 2 | ||
|- | |- | ||
| style="color:inherit;" | • Bombs per charge || style="color:inherit;" | | | style="color:inherit;" | • Bombs per charge || style="color:inherit;" | 10 | ||
|- | |- | ||
| style="color:inherit;" | • Reload time (sec) || style="color:inherit;" | 40.0 | | style="color:inherit;" | • Reload time (sec) || style="color:inherit;" | 40.0 | ||
| Line 225: | Line 219: | ||
</div> | </div> | ||
</div></div></div> | </div></div></div> | ||
Latest revision as of 19:52, 3 July 2026

VIII
9,000,000
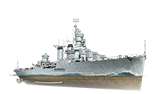
Harbin — Pan-Asia Tech Tree Tier VIII Cruiser.
Between 1939 and 1941, a number of draft designs of a "long-range small light cruiser" were developed. This ship was meant to be capable of fighting enemy destroyers and leaders, spearheading on its own, mining enemy waters, attacking communication lines, and supporting landing operations. The drafts included a project for a cruiser with the MK-6 number, armed with twin mounts housing dual-purpose 130 mm guns. If the ships of this class had actually been built, some of them might have been transferred to the People's Republic of China Navy along with Project 7 destroyers and coastguards.
Pros
- Great damage and long range Deepwater torpedoes.
- Smoke screen generator available
- Good rate of fire for the tier.
Cons
- Weak armor plating.
- Low main battery range.
- HE shells do low damage and have low armor penetration.
Ship Stats
Hull Information
Main Battery
Torpedoes
AA Defense
Depth Charges
Compatible Upgrades
| Slot 1 |
 |
 |

| ||
|---|---|---|---|---|---|
| Slot 2 |
 |
 |

| ||
| Slot 3 |
 |
 |
 |
 |

|
| Slot 4 |
 |
 |
 |

| |
| Slot 5 |
 |
 |
 |

|
Consumables
- Slot 1: Damage Control Party
 (5.0s action, 60.0s cooldown)
 - Slot 2: Smoke Generator
 (3 charges, 30.0s action, 110.0s cooldown)
 - Slot 3: Defensive AA Fire
 (3 charges, 40.0s action, 80.0s cooldown)
 - Slot 4: Repair Party
 (3 charges, 28.0s action, 80.0s cooldown, 119 hp/s)
 - Slot 5: Torpedo Reload Booster
 (2 charges, 1.0s action, 300.0s cooldown)
Gallery
WoWs Gallery

Categories:
