Ship:Scharnhorst B
mNo edit summary |
mNo edit summary |
||
| (2 intermediate revisions by the same user not shown) | |||
| Line 149: | Line 149: | ||
</div></div></div> | </div></div></div> | ||
<div class="b-popup"><div class="b-popup_head js-tech-nav_head"><div><h2>Torpedoes</h2></div><span class="b-tech-nav_arrow"></span></div><div class="b-popup_content" style="display: none;"><div> | <div class="b-popup"><div class="b-popup_head js-tech-nav_head"><div><h2>Torpedoes</h2></div><span class="b-tech-nav_arrow"></span></div><div class="b-popup_content" style="display: none;"><div> | ||
<div style="border: 2px solid rgba(212,175,55,0.8); border-radius: 3px; margin-bottom: 1em; overflow: hidden;"> | <div style="border: 2px solid rgba(212,175,55,0.8); border-radius: 3px; margin-bottom: 1em; overflow: hidden;"> | ||
{| class="wikitable" style="margin:0; color:inherit; width:100%" | {| class="wikitable" style="margin:0; color:inherit; width:100%" | ||
! style="background-color:#1a3244; color:#ffffff; font-weight:bold;" | TORPEDO LAUNCHERS !! style="background-color:#1a3244; color:#ffffff; font-weight:bold;" | | ! style="background-color:#1a3244; color:#ffffff; font-weight:bold;" | TORPEDO LAUNCHERS !! style="background-color:#1a3244; color:#ffffff; font-weight:bold;" | G7a T1 | ||
|- | |- | ||
| style="color:inherit;" | • | | style="color:inherit;" | • Torpedo tubes (launchers × tubes) || style="color:inherit;" | 2 × 3 | ||
|- | |- | ||
| style="color:inherit;" | • Torpedo name || style="color:inherit;" | | | style="color:inherit;" | • Torpedo name || style="color:inherit;" | G7a T1 | ||
|- | |- | ||
| style="color:inherit;" | • Reload time (sec) || style="color:inherit;" | 68 | | style="color:inherit;" | • Reload time (sec) || style="color:inherit;" | 68 | ||
|- | |- | ||
| style="color:inherit;" | • 180° turn time (sec) || style="color:inherit;" | 7.2 | | style="color:inherit;" | • 180° turn time (sec) || style="color:inherit;" | 7.2 | ||
|- | |- | ||
| style="color:inherit;" | • Damage || style="color:inherit;" | | | style="color:inherit;" | • Damage || style="color:inherit;" | 13,700 | ||
|- | |- | ||
| style="color:inherit;" | • Range (km) || style="color:inherit;" | 0 | | style="color:inherit;" | • Range (km) || style="color:inherit;" | 6.0 | ||
|- | |- | ||
| style="color:inherit;" | • Speed (kt) || style="color:inherit;" | 64 | | style="color:inherit;" | • Speed (kt) || style="color:inherit;" | 64 | ||
| Line 169: | Line 170: | ||
| style="color:inherit;" | • Detectability (km) || style="color:inherit;" | 1.3 | | style="color:inherit;" | • Detectability (km) || style="color:inherit;" | 1.3 | ||
|- | |- | ||
| style="color:inherit;" | • Flooding chance (%) || style="color:inherit;" | | | style="color:inherit;" | • Flooding chance (%) || style="color:inherit;" | 227 | ||
|} | |} | ||
</div> | </div> | ||
| Line 329: | Line 330: | ||
</gallery> | </gallery> | ||
</div></div></div> | </div></div></div> | ||
{{WoWS Ship Changelog Insert|1= | |||
*Available for purchase in the Premium Store during the Black Friday sale from November 29 to December 6, 2019. Could also drop from Black Friday containers. | |||
*Update 0.8.10: | |||
**Available for testing by supertesters in the game starting from Update 0.8.10. | |||
*Update 0.8.11: | |||
**The main battery dispersion ellipse was adjusted to that of American and British battleships. | |||
*Update 0.9.0: | |||
**Fixed camera errors during the game. | |||
*Update 0.9.2: | |||
**Penetration of 105 mm secondary battery HE shells increased from 18 to 26 mm. | |||
*Update 0.9.5: | |||
**Small changes to geometry and textures. | |||
*Update 0.10.0: | |||
**Increased accuracy of secondary battery guns | |||
**The firing range of the secondary battery was increased to 6.3 km. | |||
*Update 0.11.1: | |||
**Acceleration slightly decreased while engine is damaged. | |||
}} | |||
[[Category:Ships of Germany]] | [[Category:Ships of Germany]] | ||
Latest revision as of 10:01, 2 August 2026

VII
7,500 doubloons
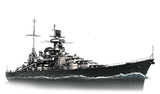
Scharnhorst B — Germany Premium Tier VII Battleship.
The lead ship of her class, Scharnhorst, was built at the Wilhelmshaven shipyard. At the beginning of World War II, the battleship took an active part in raid operations. After repairs in 1943, the ship was relocated to Norway with the goal of interrupting deliveries to the U.S.S.R via the Arctic convoys. On December 26, during a raid on the JW-55B convoy, Scharnhorst took heavy damage from battleship Duke of York and was sunk by torpedoes from cruisers Jamaica and Belfast.
Pros
- High survivability
- High secondary battery gun efficiency
- Engine Boost consumable available
Cons
- AP shells with low armor penetration
- Low damage per salvo
Ship Stats
Hull Information
Main Battery
Torpedoes
Secondary Battery
Airstrike
AA Defense
Compatible Upgrades
| Slot 1 |
 |
 |
 |

| |
|---|---|---|---|---|---|
| Slot 2 |
 |

| |||
| Slot 3 |
 |
 |
 |
 |

|
| Slot 4 |
 |
 |
 |

|
Consumables
- Slot 1: Damage Control Party
 (15.0s action, 80.0s cooldown)
 - Slot 2: Repair Party
 (4 charges, 28.0s action, 80.0s cooldown, 281.5 hp/s)
 - Slot 3: Spotting Aircraft
 (4 charges, 100.0s action, 240.0s cooldown) or Patrol Fighter
  (3 charges, 60.0s action, 90.0s cooldown)

