Ship:San Diego
No edit summary |
Pockington (talk | contribs) added missing information on launch day |
||
| Line 48: | Line 48: | ||
| style="color:inherit;" | • Turning circle radius (m) || style="color:inherit;" | 610 | | style="color:inherit;" | • Turning circle radius (m) || style="color:inherit;" | 610 | ||
|- | |- | ||
| style="color:inherit;" | • Rudder-shift time (sec) || style="color:inherit;" | | | style="color:inherit;" | • Rudder-shift time (sec) || style="color:inherit;" | 7.3 | ||
|} | |} | ||
</div> | </div> | ||
| Line 110: | Line 110: | ||
! style="background-color:#1a3244; color:#ffffff; font-weight:bold;" | SAP SHELL !! style="background-color:#1a3244; color:#ffffff; font-weight:bold;" | | ! style="background-color:#1a3244; color:#ffffff; font-weight:bold;" | SAP SHELL !! style="background-color:#1a3244; color:#ffffff; font-weight:bold;" | | ||
|- | |- | ||
| style="color:inherit;" | • Name || style="color:inherit;" | | | style="color:inherit;" | • Name || style="color:inherit;" | 127mm SC Mk38 | ||
|- | |- | ||
| style="color:inherit;" | • Maximum damage || style="color:inherit;" | 1800 | | style="color:inherit;" | • Maximum damage || style="color:inherit;" | 1800 | ||
| Line 119: | Line 119: | ||
|- | |- | ||
| style="color:inherit;" | • Penetration (mm) || style="color:inherit;" | 36 | | style="color:inherit;" | • Penetration (mm) || style="color:inherit;" | 36 | ||
|- | |- | ||
| style="color:inherit;" | • Ricochet start (°) || style="color:inherit;" | 70 | | style="color:inherit;" | • Ricochet start (°) || style="color:inherit;" | 70 | ||
|- | |- | ||
| style="color:inherit;" | • Always ricochet (°) || style="color:inherit;" | 80 | | style="color:inherit;" | • Always ricochet (°) || style="color:inherit;" | 80 | ||
|} | |} | ||
</div> | </div> | ||
| Line 159: | Line 153: | ||
<div style="border: 2px solid rgba(212,175,55,0.8); border-radius: 3px; margin-bottom: 1em; overflow: hidden;"> | <div style="border: 2px solid rgba(212,175,55,0.8); border-radius: 3px; margin-bottom: 1em; overflow: hidden;"> | ||
{| class="wikitable" style="margin:0; color:inherit; width:100%" | {| class="wikitable" style="margin:0; color:inherit; width:100%" | ||
! style="background-color:#1a3244; color:#ffffff; font-weight:bold;" | TORPEDO LAUNCHERS !! style="background-color:#1a3244; color:#ffffff; font-weight:bold;" | | ! style="background-color:#1a3244; color:#ffffff; font-weight:bold;" | TORPEDO LAUNCHERS !! style="background-color:#1a3244; color:#ffffff; font-weight:bold;" | Mk15 mod. 3 | ||
|- | |- | ||
| style="color:inherit;" | • | | style="color:inherit;" | • Torpedo tubes (launchers × tubes) || style="color:inherit;" | 2 × 4 | ||
|- | |- | ||
| style="color:inherit;" | • Torpedo name || style="color:inherit;" | | | style="color:inherit;" | • Torpedo name || style="color:inherit;" | Mk15 mod. 3 | ||
|- | |- | ||
| style="color:inherit;" | • Reload time (sec) || style="color:inherit;" | 87 | | style="color:inherit;" | • Reload time (sec) || style="color:inherit;" | 87 | ||
|- | |- | ||
| style="color:inherit;" | • 180° turn time (sec) || style="color:inherit;" | 7.2 | | style="color:inherit;" | • 180° turn time (sec) || style="color:inherit;" | 7.2 | ||
|- | |- | ||
| style="color:inherit;" | • Damage || style="color:inherit;" | | | style="color:inherit;" | • Damage || style="color:inherit;" | 16,633 | ||
|- | |- | ||
| style="color:inherit;" | • Range (km) || style="color:inherit;" | | | style="color:inherit;" | • Range (km) || style="color:inherit;" | 4.5 | ||
|- | |- | ||
| style="color:inherit;" | • Speed (kt) || style="color:inherit;" | 65 | | style="color:inherit;" | • Speed (kt) || style="color:inherit;" | 65 | ||
| Line 177: | Line 171: | ||
| style="color:inherit;" | • Detectability (km) || style="color:inherit;" | 1.3 | | style="color:inherit;" | • Detectability (km) || style="color:inherit;" | 1.3 | ||
|- | |- | ||
| style="color:inherit;" | • Flooding chance (%) || style="color:inherit;" | | | style="color:inherit;" | • Flooding chance (%) || style="color:inherit;" | 279 | ||
|} | |} | ||
</div> | </div> | ||
| Line 208: | Line 202: | ||
{| class="wikitable" style="margin:0 0 0.8em 0; width:100%; color:inherit;" | {| class="wikitable" style="margin:0 0 0.8em 0; width:100%; color:inherit;" | ||
! style="background-color:#1a3244; color:#ffffff; font-weight:bold;" | AA ARMAMENT !! style="background-color:#1a3244; color:#ffffff; font-weight:bold;" | MOUNTS × BARRELS | ! style="background-color:#1a3244; color:#ffffff; font-weight:bold;" | AA ARMAMENT !! style="background-color:#1a3244; color:#ffffff; font-weight:bold;" | MOUNTS × BARRELS | ||
|- | |||
| style="color:inherit;" | 127 mm || style="color:inherit;" | 8 × 2 | |||
|- | |- | ||
| style="color:inherit;" | 40 mm || style="color:inherit;" | 1 × 4 + 3 × 2 | | style="color:inherit;" | 40 mm || style="color:inherit;" | 1 × 4 + 3 × 2 | ||
| Line 221: | Line 217: | ||
|- | |- | ||
| style="color:inherit;" | Mid-range || style="color:inherit;" | 91 || style="color:inherit;" | 90% || style="color:inherit;" | 3.5 | | style="color:inherit;" | Mid-range || style="color:inherit;" | 91 || style="color:inherit;" | 90% || style="color:inherit;" | 3.5 | ||
|- | |||
| style="color:inherit;" | Long-range || style="color:inherit;" | 168 || style="color:inherit;" | 90% || style="color:inherit;" | 5.8 | |||
|} | |||
'''Damage by shell explosions''' | |||
{| class="wikitable" style="margin:0 0 0.8em 0; width:100%; color:inherit;" | |||
! style="background-color:#1a3244; color:#ffffff; font-weight:bold;" | EXPLOSIONS / SALVO !! style="background-color:#1a3244; color:#ffffff; font-weight:bold;" | DAMAGE !! style="background-color:#1a3244; color:#ffffff; font-weight:bold;" | HIT CHANCE !! style="background-color:#1a3244; color:#ffffff; font-weight:bold;" | ACTION ZONE (km) | |||
|- | |||
| style="color:inherit;" | 7 || style="color:inherit;" | 1540 || style="color:inherit;" | 90% || style="color:inherit;" | 3.5–5.8 | |||
|} | |} | ||
</div> | </div> | ||
Latest revision as of 00:47, 10 July 2026

VIII
13,000 doubloons
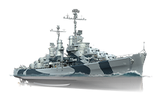
San Diego — U.S.A. Premium Tier VIII Cruiser.
USS San Diego, an Atlanta-class cruiser, accompanied aircraft carriers in the Battle of Midway, the Solomon Islands campaign, and the Battle of Guadalcanal during World War II. Along with British and American aircraft carriers, the cruiser participated in the landings on Bougainville and Tarawa, then took part in the landings on Kwajalein, Eniwetok, and the Marshall Islands, as well as in the raids on Truk Island and Wake Island. USS San Diego fought in the first Battle of the Philippine Sea. In 1945, the cruiser participated in attacks on Okinawa and Tokyo. Over the course of the war, the ship was awarded 18 battle stars.
Pros
- High damage per minute from both her SAP and AP shells
- Improved DFAA consumable
- Has access to the Main Battery Reload Booster consumable
Cons
- Does not have access to HE shells
- Does not have access to the Surveillance Radar consumable
Ship Stats
Hull Information
Main Battery
Torpedoes
Airstrike
AA Defense
Compatible Upgrades
| Slot 1 |
 |
 |

| |
|---|---|---|---|---|
| Slot 2 |
 |
 |
 |

|
| Slot 3 |
 |
 |
 |

|
| Slot 4 |
 |
 |
 |

|
| Slot 5 |
 |
 |
 |

|
Consumables
- Slot 1: Damage Control Party
 (5.0s action, 60.0s cooldown)
 - Slot 2: Repair Party
 (3 charges, 28.0s action, 80.0s cooldown, 139.5 hp/s)
 - Slot 3: Hydroacoustic Search
 (3 charges, 100.0s action, 120.0s cooldown)
 - Slot 4: Defensive AA Fire
 (4 charges, 30.0s action, 60.0s cooldown)
 - Slot 5: Main Battery Reload Booster
 (2 charges, 15.0s action, 180.0s cooldown)

