Ship:L'Aventurier
No edit summary |
No edit summary |
||
| (2 intermediate revisions by the same user not shown) | |||
| Line 18: | Line 18: | ||
! style="background-color:#1a3244; color:#ffffff; font-weight:bold;" | SURVIVABILITY !! style="background-color:#1a3244; color:#ffffff; font-weight:bold;" | L'Aventurier (A) !! style="background-color:#1a3244; color:#ffffff; font-weight:bold;" | L'Aventurier (B) | ! style="background-color:#1a3244; color:#ffffff; font-weight:bold;" | SURVIVABILITY !! style="background-color:#1a3244; color:#ffffff; font-weight:bold;" | L'Aventurier (A) !! style="background-color:#1a3244; color:#ffffff; font-weight:bold;" | L'Aventurier (B) | ||
|- | |- | ||
| style="color:inherit;" | • Hit Points || style="color:inherit;" | | | style="color:inherit;" | • Hit Points || style="color:inherit;" | 15000 || style="color:inherit;" | 16700 | ||
|- | |- | ||
| style="color:inherit;" | • Torpedo protection damage reduction (%) || colspan="2" style="color:inherit;" | — | | style="color:inherit;" | • Torpedo protection damage reduction (%) || colspan="2" style="color:inherit;" | — | ||
| Line 30: | Line 30: | ||
| style="color:inherit;" | • Belt (mm) || style="color:inherit;" | — | | style="color:inherit;" | • Belt (mm) || style="color:inherit;" | — | ||
|- | |- | ||
| style="color:inherit;" | • Deck (mm) || style="color:inherit;" | | | style="color:inherit;" | • Deck (mm) || style="color:inherit;" | 19 | ||
|- | |- | ||
| style="color:inherit;" | • Superstructure (mm) || style="color:inherit;" | | | style="color:inherit;" | • Superstructure (mm) || style="color:inherit;" | 13 | ||
|- | |- | ||
| style="color:inherit;" | • Extremities (mm) || style="color:inherit;" | | | style="color:inherit;" | • Extremities (mm) || style="color:inherit;" | 19 | ||
|} | |} | ||
</div> | </div> | ||
| Line 71: | Line 71: | ||
| style="color:inherit;" | • Arrangement || colspan="2" style="color:inherit;" | 3×2 130mm | | style="color:inherit;" | • Arrangement || colspan="2" style="color:inherit;" | 3×2 130mm | ||
|- | |- | ||
| style="color:inherit;" | • Firing range (km) || style="color:inherit;" | 10.9 || style="color:inherit;" | | | style="color:inherit;" | • Firing range (km) || style="color:inherit;" | 10.9 || style="color:inherit;" | 10.9 | ||
|- | |- | ||
| style="color:inherit;" | • Reload time (sec) || colspan="2" style="color:inherit;" | 4.7 | | style="color:inherit;" | • Reload time (sec) || colspan="2" style="color:inherit;" | 4.7 | ||
| Line 149: | Line 149: | ||
! style="background-color:#1a3244; color:#ffffff; font-weight:bold;" | TORPEDO LAUNCHERS !! style="background-color:#1a3244; color:#ffffff; font-weight:bold;" | PFPT031 !! style="background-color:#1a3244; color:#ffffff; font-weight:bold;" | PFPT021 | ! style="background-color:#1a3244; color:#ffffff; font-weight:bold;" | TORPEDO LAUNCHERS !! style="background-color:#1a3244; color:#ffffff; font-weight:bold;" | PFPT031 !! style="background-color:#1a3244; color:#ffffff; font-weight:bold;" | PFPT021 | ||
|- | |- | ||
| style="color:inherit;" | • Number of launchers || style="color:inherit;" | | | style="color:inherit;" | • Number of launchers || style="color:inherit;" | 3×3 || style="color:inherit;" | 3×3 | ||
|- | |- | ||
| style="color:inherit;" | • Torpedo name || style="color:inherit;" | | | style="color:inherit;" | • Torpedo name || style="color:inherit;" | 550 mm || style="color:inherit;" | 550 mm | ||
|- | |- | ||
| style="color:inherit;" | • Reload time (sec) || style="color:inherit;" | 125.0 || style="color:inherit;" | 125.0 | | style="color:inherit;" | • Reload time (sec) || style="color:inherit;" | 125.0 || style="color:inherit;" | 125.0 | ||
| Line 157: | Line 157: | ||
| style="color:inherit;" | • 180° turn time (sec) || style="color:inherit;" | 7.2 || style="color:inherit;" | 7.2 | | style="color:inherit;" | • 180° turn time (sec) || style="color:inherit;" | 7.2 || style="color:inherit;" | 7.2 | ||
|- | |- | ||
| style="color:inherit;" | • Damage || style="color:inherit;" | | | style="color:inherit;" | • Damage || style="color:inherit;" | 17,467 || style="color:inherit;" | 19,533 | ||
|- | |- | ||
| style="color:inherit;" | • Range (km) || style="color:inherit;" | 0 | | style="color:inherit;" | • Range (km) || style="color:inherit;" | 10.0 || style="color:inherit;" | 11.0 | ||
|- | |- | ||
| style="color:inherit;" | • Speed (kt) || style="color:inherit;" | 69 || style="color:inherit;" | 70 | | style="color:inherit;" | • Speed (kt) || style="color:inherit;" | 69 || style="color:inherit;" | 70 | ||
| Line 165: | Line 165: | ||
| style="color:inherit;" | • Detectability (km) || style="color:inherit;" | 1.5 || style="color:inherit;" | 1.5 | | style="color:inherit;" | • Detectability (km) || style="color:inherit;" | 1.5 || style="color:inherit;" | 1.5 | ||
|- | |- | ||
| style="color:inherit;" | • Flooding chance (%) || style="color:inherit;" | | | style="color:inherit;" | • Flooding chance (%) || style="color:inherit;" | 293% || style="color:inherit;" | 332% | ||
|} | |} | ||
</div> | </div> | ||
| Line 186: | Line 186: | ||
! style="background-color:#1a3244; color:#ffffff; font-weight:bold;" | RANGE !! style="background-color:#1a3244; color:#ffffff; font-weight:bold;" | DPS !! style="background-color:#1a3244; color:#ffffff; font-weight:bold;" | HIT CHANCE !! style="background-color:#1a3244; color:#ffffff; font-weight:bold;" | ACTION ZONE (km) | ! style="background-color:#1a3244; color:#ffffff; font-weight:bold;" | RANGE !! style="background-color:#1a3244; color:#ffffff; font-weight:bold;" | DPS !! style="background-color:#1a3244; color:#ffffff; font-weight:bold;" | HIT CHANCE !! style="background-color:#1a3244; color:#ffffff; font-weight:bold;" | ACTION ZONE (km) | ||
|- | |- | ||
| style="color:inherit;" | Short-range || style="color:inherit;" | | | style="color:inherit;" | Short-range || style="color:inherit;" | 20 || style="color:inherit;" | 95% || style="color:inherit;" | 1.5 | ||
|- | |- | ||
| style="color:inherit;" | Mid-range || style="color:inherit;" | 119 || style="color:inherit;" | 100% || style="color:inherit;" | 3.5 | | style="color:inherit;" | Mid-range || style="color:inherit;" | 119 || style="color:inherit;" | 100% || style="color:inherit;" | 3.5 | ||
| Line 205: | Line 205: | ||
! style="background-color:#1a3244; color:#ffffff; font-weight:bold;" | RANGE !! style="background-color:#1a3244; color:#ffffff; font-weight:bold;" | DPS !! style="background-color:#1a3244; color:#ffffff; font-weight:bold;" | HIT CHANCE !! style="background-color:#1a3244; color:#ffffff; font-weight:bold;" | ACTION ZONE (km) | ! style="background-color:#1a3244; color:#ffffff; font-weight:bold;" | RANGE !! style="background-color:#1a3244; color:#ffffff; font-weight:bold;" | DPS !! style="background-color:#1a3244; color:#ffffff; font-weight:bold;" | HIT CHANCE !! style="background-color:#1a3244; color:#ffffff; font-weight:bold;" | ACTION ZONE (km) | ||
|- | |- | ||
| style="color:inherit;" | Short-range || style="color:inherit;" | | | style="color:inherit;" | Short-range || style="color:inherit;" | 20 || style="color:inherit;" | 95% || style="color:inherit;" | 2.0 | ||
|- | |- | ||
| style="color:inherit;" | Mid-range || style="color:inherit;" | 119 || style="color:inherit;" | 100% || style="color:inherit;" | 3.5 | | style="color:inherit;" | Mid-range || style="color:inherit;" | 119 || style="color:inherit;" | 100% || style="color:inherit;" | 3.5 | ||
| Line 235: | Line 235: | ||
{{Ship Consumables Section|consumables= | {{Ship Consumables Section|consumables= | ||
* '''Slot 1:''' {{Damage Control Party}} (5.0s action, 40.0s cooldown) | * '''Slot 1:''' {{Damage Control Party}} (5.0s action, 40.0s cooldown) | ||
* '''Slot 2:''' {{Engine | * '''Slot 2:''' {{Emergency Engine Power}} (5 charges, 85.5s action, 90.0s cooldown) | ||
}} | }} | ||
Latest revision as of 14:40, 9 July 2026

VIII
8,900,000
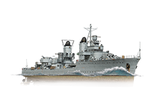
L'Aventurier — France Tech Tree Tier VIII Destroyer.
This destroyer is essentially an enlarged version of Le Hardi, featuring upgraded anti-aircraft and torpedo armament. The Spanish Civil War highlighted the heightened threat to ships posed by aviation, so in the late 1930s and early 1940s, consideration was given to reworking the Le Hardi project to enhance the power of her air defense systems.
Pros
- Access to the Emergency Engine Power consumable
- High torpedo damage
- High maneuverability
Cons
- Smoke Generator consumable unavailable
- Low speed
Ship Stats
Hull Information
Main Battery
Torpedoes
AA Defense
Depth Charges
Compatible Upgrades
| Slot 1 |
 |
 |

| |
|---|---|---|---|---|
| Slot 2 |
 |
 |

| |
| Slot 3 |
 |
 |
 |

|
| Slot 4 |
 |
 |
 |

|
| Slot 5 |
 |
 |
 |

|
Consumables
- Slot 1: Damage Control Party
 (5.0s action, 40.0s cooldown)
 - Slot 2: Emergency Engine Power
 (5 charges, 85.5s action, 90.0s cooldown)
Gallery
WoWs Gallery
Historical Gallery
Categories:
