Ship:Black
m Stat additions and images |
Pockington (talk | contribs) added missing information on launch day |
||
| Line 46: | Line 46: | ||
| style="color:inherit;" | • Turning circle radius (m) || style="color:inherit;" | 560 | | style="color:inherit;" | • Turning circle radius (m) || style="color:inherit;" | 560 | ||
|- | |- | ||
| style="color:inherit;" | • Rudder-shift time (sec) || style="color:inherit;" | 3. | | style="color:inherit;" | • Rudder-shift time (sec) || style="color:inherit;" | 3.0 | ||
|} | |} | ||
</div> | </div> | ||
| Line 147: | Line 147: | ||
<div style="border: 2px solid rgba(212,175,55,0.8); border-radius: 3px; margin-bottom: 1em; overflow: hidden;"> | <div style="border: 2px solid rgba(212,175,55,0.8); border-radius: 3px; margin-bottom: 1em; overflow: hidden;"> | ||
{| class="wikitable" style="margin:0; color:inherit; width:100%" | {| class="wikitable" style="margin:0; color:inherit; width:100%" | ||
! style="background-color:#1a3244; color:#ffffff; font-weight:bold;" | TORPEDO LAUNCHERS !! style="background-color:#1a3244; color:#ffffff; font-weight:bold;" | | ! style="background-color:#1a3244; color:#ffffff; font-weight:bold;" | TORPEDO LAUNCHERS !! style="background-color:#1a3244; color:#ffffff; font-weight:bold;" | Mk29 | ||
|- | |- | ||
| style="color:inherit;" | • | | style="color:inherit;" | • Torpedo tubes (launchers × tubes) || style="color:inherit;" | 2 × 5 | ||
|- | |- | ||
| style="color:inherit;" | • Torpedo name || style="color:inherit;" | | | style="color:inherit;" | • Torpedo name || style="color:inherit;" | Mk29 | ||
|- | |- | ||
| style="color:inherit;" | • Reload time (sec) || style="color:inherit;" | 96 | | style="color:inherit;" | • Reload time (sec) || style="color:inherit;" | 96 | ||
|- | |- | ||
| style="color:inherit;" | • 180° turn time (sec) || style="color:inherit;" | 7.2 | | style="color:inherit;" | • 180° turn time (sec) || style="color:inherit;" | 7.2 | ||
|- | |- | ||
| style="color:inherit;" | • Damage || style="color:inherit;" | | | style="color:inherit;" | • Damage || style="color:inherit;" | 21,600 | ||
|- | |- | ||
| style="color:inherit;" | • Range (km) || style="color:inherit;" | | | style="color:inherit;" | • Range (km) || style="color:inherit;" | 13.7 | ||
|- | |- | ||
| style="color:inherit;" | • Speed (kt) || style="color:inherit;" | 43 | | style="color:inherit;" | • Speed (kt) || style="color:inherit;" | 43 | ||
| Line 165: | Line 165: | ||
| style="color:inherit;" | • Detectability (km) || style="color:inherit;" | 0.9 | | style="color:inherit;" | • Detectability (km) || style="color:inherit;" | 0.9 | ||
|- | |- | ||
| style="color:inherit;" | • Flooding chance (%) || style="color:inherit;" | | | style="color:inherit;" | • Flooding chance (%) || style="color:inherit;" | 206 | ||
|} | |} | ||
</div> | </div> | ||
| Line 174: | Line 174: | ||
{| class="wikitable" style="margin:0 0 0.8em 0; width:100%; color:inherit;" | {| class="wikitable" style="margin:0 0 0.8em 0; width:100%; color:inherit;" | ||
! style="background-color:#1a3244; color:#ffffff; font-weight:bold;" | AA ARMAMENT !! style="background-color:#1a3244; color:#ffffff; font-weight:bold;" | MOUNTS × BARRELS | ! style="background-color:#1a3244; color:#ffffff; font-weight:bold;" | AA ARMAMENT !! style="background-color:#1a3244; color:#ffffff; font-weight:bold;" | MOUNTS × BARRELS | ||
|- | |||
| style="color:inherit;" | 127 mm || style="color:inherit;" | 5 × 1 | |||
|- | |- | ||
| style="color:inherit;" | 40 mm || style="color:inherit;" | 3 × 2 | | style="color:inherit;" | 40 mm || style="color:inherit;" | 3 × 2 | ||
| Line 187: | Line 189: | ||
|- | |- | ||
| style="color:inherit;" | Mid-range || style="color:inherit;" | 70 || style="color:inherit;" | 100% || style="color:inherit;" | 3.5 | | style="color:inherit;" | Mid-range || style="color:inherit;" | 70 || style="color:inherit;" | 100% || style="color:inherit;" | 3.5 | ||
|- | |||
| style="color:inherit;" | Long-range || style="color:inherit;" | 77 || style="color:inherit;" | 100% || style="color:inherit;" | 5.8 | |||
|} | |||
'''Damage by shell explosions''' | |||
{| class="wikitable" style="margin:0 0 0.8em 0; width:100%; color:inherit;" | |||
! style="background-color:#1a3244; color:#ffffff; font-weight:bold;" | EXPLOSIONS / SALVO !! style="background-color:#1a3244; color:#ffffff; font-weight:bold;" | DAMAGE !! style="background-color:#1a3244; color:#ffffff; font-weight:bold;" | HIT CHANCE !! style="background-color:#1a3244; color:#ffffff; font-weight:bold;" | ACTION ZONE (km) | |||
|- | |||
| style="color:inherit;" | 4 || style="color:inherit;" | 1540 || style="color:inherit;" | 100% || style="color:inherit;" | 3.5–5.8 | |||
|} | |} | ||
</div> | </div> | ||
| Line 199: | Line 210: | ||
| style="color:inherit;" | • Number of charges || style="color:inherit;" | 2 | | style="color:inherit;" | • Number of charges || style="color:inherit;" | 2 | ||
|- | |- | ||
| style="color:inherit;" | • Bombs per charge || style="color:inherit;" | | | style="color:inherit;" | • Bombs per charge || style="color:inherit;" | 10 | ||
|- | |- | ||
| style="color:inherit;" | • Reload time (sec) || style="color:inherit;" | 40.0 | | style="color:inherit;" | • Reload time (sec) || style="color:inherit;" | 40.0 | ||
| Line 216: | Line 227: | ||
* '''Slot 2:''' {{Smoke Generator}} (3 charges, 30.0s action, 160.0s cooldown) | * '''Slot 2:''' {{Smoke Generator}} (3 charges, 30.0s action, 160.0s cooldown) | ||
* '''Slot 3:''' {{Engine Boost}} (3 charges, 120.0s action, 120.0s cooldown) '''or''' {{Defensive AA Fire}} (4 charges, 40.0s action, 80.0s cooldown) | * '''Slot 3:''' {{Engine Boost}} (3 charges, 120.0s action, 120.0s cooldown) '''or''' {{Defensive AA Fire}} (4 charges, 40.0s action, 80.0s cooldown) | ||
}} | }} '''or''' {{Surveillance Radar}} (7.5km, 19.0s action, 120.0s cooldown) | ||
==Gallery== | ==Gallery== | ||
Latest revision as of 22:01, 9 July 2026

IX
28,500 doubloons
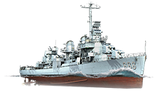
Black — U.S.A. Premium Tier IX Destroyer.
USS Black, a Fletcher-class destroyer, was involved in patrol operations in the central part of the Pacific Ocean during World War II, and she took part in landings on Saipan and Guam, the Battle of Leyte Gulf, and raids on Okinawa. Over the course of World War II, the ship was awarded six battle stars.
Pros
- Surveillance Radar consumable available
- Enhanced Smoke Generator consumable available
Cons
- Low speed
- Low torpedo speed
Ship Stats
Hull Information
Main Battery
Torpedoes
AA Defense
Depth Charges
Compatible Upgrades
| Slot 1 |
 |
 |

| ||
|---|---|---|---|---|---|
| Slot 2 |
 |
 |
 |
 |

|
| Slot 3 |
 |
 |
 |
 |

|
| Slot 4 |
 |
 |
 |

| |
| Slot 5 |
 |
 |
 |

| |
| Slot 6 |
 |
 |
 |

|
Consumables
- Slot 1: Damage Control Party
 (5.0s action, 40.0s cooldown)
 - Slot 2: Smoke Generator
 (3 charges, 30.0s action, 160.0s cooldown)
 - Slot 3: Engine Boost
 (3 charges, 120.0s action, 120.0s cooldown) or Defensive AA Fire
  (4 charges, 40.0s action, 80.0s cooldown) or Surveillance Radar
  (7.5km, 19.0s action, 120.0s cooldown)


