Ship:Småland
Undo revision 36511 by Texas Fried Chicken (talk) Tag: Undo |
Pockington (talk | contribs) corrected info |
||
| (2 intermediate revisions by 2 users not shown) | |||
| Line 49: | Line 49: | ||
| style="color:inherit;" | • Turning circle radius (m) || style="color:inherit;" | 660 | | style="color:inherit;" | • Turning circle radius (m) || style="color:inherit;" | 660 | ||
|- | |- | ||
| style="color:inherit;" | • Rudder-shift time (sec) || style="color:inherit;" | | | style="color:inherit;" | • Rudder-shift time (sec) || style="color:inherit;" | 4.3 | ||
|} | |} | ||
</div> | </div> | ||
| Line 150: | Line 150: | ||
<div style="border: 2px solid rgba(212,175,55,0.8); border-radius: 3px; margin-bottom: 1em; overflow: hidden;"> | <div style="border: 2px solid rgba(212,175,55,0.8); border-radius: 3px; margin-bottom: 1em; overflow: hidden;"> | ||
{| class="wikitable" style="margin:0; color:inherit; width:100%" | {| class="wikitable" style="margin:0; color:inherit; width:100%" | ||
! style="background-color:#1a3244; color:#ffffff; font-weight:bold;" | TORPEDO LAUNCHERS !! style="background-color:#1a3244; color:#ffffff; font-weight:bold;" | | ! style="background-color:#1a3244; color:#ffffff; font-weight:bold;" | TORPEDO LAUNCHERS !! style="background-color:#1a3244; color:#ffffff; font-weight:bold;" | Torped M1943 mod 1 | ||
|- | |- | ||
| style="color:inherit;" | • | | style="color:inherit;" | • Torpedo tubes (launchers × tubes) || style="color:inherit;" | 1 × 5, 1 × 3 | ||
|- | |- | ||
| style="color:inherit;" | • Torpedo name || style="color:inherit;" | | | style="color:inherit;" | • Torpedo name || style="color:inherit;" | Torped M1943 mod 1 | ||
|- | |- | ||
| style="color:inherit;" | • Reload time (sec) || style="color:inherit;" | 100 | | style="color:inherit;" | • Reload time (sec) || style="color:inherit;" | 100 | ||
|- | |- | ||
| style="color:inherit;" | • 180° turn time (sec) || style="color:inherit;" | 7.2 | | style="color:inherit;" | • 180° turn time (sec) || style="color:inherit;" | 7.2 | ||
|- | |- | ||
| style="color:inherit;" | • Damage || style="color:inherit;" | | | style="color:inherit;" | • Damage || style="color:inherit;" | 10,700 | ||
|- | |- | ||
| style="color:inherit;" | • Range (km) || style="color:inherit;" | 0 | | style="color:inherit;" | • Range (km) || style="color:inherit;" | 12.0 | ||
|- | |- | ||
| style="color:inherit;" | • Speed (kt) || style="color:inherit;" | 76 | | style="color:inherit;" | • Speed (kt) || style="color:inherit;" | 76 | ||
| Line 168: | Line 168: | ||
| style="color:inherit;" | • Detectability (km) || style="color:inherit;" | 1.6 | | style="color:inherit;" | • Detectability (km) || style="color:inherit;" | 1.6 | ||
|- | |- | ||
| style="color:inherit;" | • Flooding chance (%) || style="color:inherit;" | | | style="color:inherit;" | • Flooding chance (%) || style="color:inherit;" | 173 | ||
|} | |} | ||
</div> | </div> | ||
</div></div></div> | </div></div></div> | ||
| Line 177: | Line 178: | ||
{| class="wikitable" style="margin:0 0 0.8em 0; width:100%; color:inherit;" | {| class="wikitable" style="margin:0 0 0.8em 0; width:100%; color:inherit;" | ||
! style="background-color:#1a3244; color:#ffffff; font-weight:bold;" | AA ARMAMENT !! style="background-color:#1a3244; color:#ffffff; font-weight:bold;" | MOUNTS × BARRELS | ! style="background-color:#1a3244; color:#ffffff; font-weight:bold;" | AA ARMAMENT !! style="background-color:#1a3244; color:#ffffff; font-weight:bold;" | MOUNTS × BARRELS | ||
|- | |||
| style="color:inherit;" | 120 mm || style="color:inherit;" | 2 × 2 | |||
|- | |- | ||
| style="color:inherit;" | 40 mm || style="color:inherit;" | 6 × 1 | | style="color:inherit;" | 40 mm || style="color:inherit;" | 6 × 1 | ||
| Line 188: | Line 191: | ||
|- | |- | ||
| style="color:inherit;" | Mid-range || style="color:inherit;" | 346.5 || style="color:inherit;" | 100% || style="color:inherit;" | 4.0 | | style="color:inherit;" | Mid-range || style="color:inherit;" | 346.5 || style="color:inherit;" | 100% || style="color:inherit;" | 4.0 | ||
|- | |||
| style="color:inherit;" | Long-range || style="color:inherit;" | 143.5 || style="color:inherit;" | 100% || style="color:inherit;" | 6.0 | |||
|} | |||
'''Damage by shell explosions''' | |||
{| class="wikitable" style="margin:0 0 0.8em 0; width:100%; color:inherit;" | |||
! style="background-color:#1a3244; color:#ffffff; font-weight:bold;" | EXPLOSIONS / SALVO !! style="background-color:#1a3244; color:#ffffff; font-weight:bold;" | DAMAGE !! style="background-color:#1a3244; color:#ffffff; font-weight:bold;" | HIT CHANCE !! style="background-color:#1a3244; color:#ffffff; font-weight:bold;" | ACTION ZONE (km) | |||
|- | |||
| style="color:inherit;" | 6 || style="color:inherit;" | 1890 || style="color:inherit;" | 100% || style="color:inherit;" | 3.5–6.0 | |||
|} | |} | ||
</div> | </div> | ||
| Line 200: | Line 212: | ||
| style="color:inherit;" | • Number of charges || style="color:inherit;" | 2 | | style="color:inherit;" | • Number of charges || style="color:inherit;" | 2 | ||
|- | |- | ||
| style="color:inherit;" | • Bombs per charge || style="color:inherit;" | | | style="color:inherit;" | • Bombs per charge || style="color:inherit;" | 8 | ||
|- | |- | ||
| style="color:inherit;" | • Reload time (sec) || style="color:inherit;" | 40.0 | | style="color:inherit;" | • Reload time (sec) || style="color:inherit;" | 40.0 | ||
| Line 217: | Line 229: | ||
* '''Slot 2:''' {{Engine Boost}} (4 charges, 60.0s action, 100.0s cooldown) | * '''Slot 2:''' {{Engine Boost}} (4 charges, 60.0s action, 100.0s cooldown) | ||
* '''Slot 3:''' {{Repair Party}} (3 charges, 14.0s action, 80.0s cooldown, 192 hp/s) | * '''Slot 3:''' {{Repair Party}} (3 charges, 14.0s action, 80.0s cooldown, 192 hp/s) | ||
* '''Slot 4:''' {{Surveillance Radar}} (7.5km, 3 charges, 20.0s action, 120.0s cooldown) | |||
}} | }} | ||
| Line 224: | Line 237: | ||
<gallery> | <gallery> | ||
</gallery> | </gallery>[[File:Smaland.jpg|left|thumb]]</div></div></div> | ||
</div></div></div> | |||
<div class="b-popup"><div class="b-popup_head js-tech-nav_head"><div><h2>Historical Gallery</h2></div><span class="b-tech-nav_arrow"></span></div><div class="b-popup_content" style="display: none;"><div> | <div class="b-popup"><div class="b-popup_head js-tech-nav_head"><div><h2>Historical Gallery</h2></div><span class="b-tech-nav_arrow"></span></div><div class="b-popup_content" style="display: none;"><div> | ||
Latest revision as of 16:58, 11 July 2026

X
31,000 doubloons
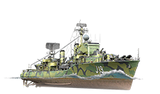
Småland — Europe Special Tier X Destroyer.
Småland, the second Halland-class destroyer, was laid down in Gothenburg at the Eriksberg shipyard in 1951, launched in October 1952, and entered service in January 1956. The commander of the Swedish Navy, Admiral Strömbek, became the "godfather" of the destroyer. He served in the same destroyer flotilla with Småland's sister ship, Halland. She was decommissioned in 1979 and stricken from the register in July 1984. In 1987, the ship was transferred to the Gothenburg Maritime Center as a museum ship, where she is still located.
Pros
- High main battery damage per minute
- High torpedo speed and range
- High AA defense efficiency
Cons
- Low torpedo damage
- Smoke Generator consumable unavailable
Ship Stats
Hull Information
Main Battery
Torpedoes
AA Defense
Depth Charges
Compatible Upgrades
| Slot 1 |
 |
 |

| |
|---|---|---|---|---|
| Slot 2 |
 |
 |
 |

|
| Slot 3 |
 |
 |
 |

|
| Slot 4 |
 |
 |
 |

|
| Slot 5 |
 |
 |
 |

|
| Slot 6 |
 |
 |
 |

|
Consumables
- Slot 1: Damage Control Party
 (5.0s action, 40.0s cooldown)
 - Slot 2: Engine Boost
 (4 charges, 60.0s action, 100.0s cooldown)
 - Slot 3: Repair Party
 (3 charges, 14.0s action, 80.0s cooldown, 192 hp/s)
 - Slot 4: Surveillance Radar
 (7.5km, 3 charges, 20.0s action, 120.0s cooldown)
Gallery
WoWs Gallery

Historical Gallery
Categories:
