Ship:Shimakaze
No edit summary |
Pockington (talk | contribs) added missing information on launch day |
||
| Line 23: | Line 23: | ||
| style="color:inherit;" | • Hit Points || style="color:inherit;" | 17900 | | style="color:inherit;" | • Hit Points || style="color:inherit;" | 17900 | ||
|- | |- | ||
| style="color:inherit;" | • Torpedo protection damage reduction (%) || style="color:inherit;" | | | style="color:inherit;" | • Torpedo protection damage reduction (%) || style="color:inherit;" | 0 | ||
|} | |} | ||
</div> | </div> | ||
| Line 49: | Line 49: | ||
| style="color:inherit;" | • Turning circle radius (m) || style="color:inherit;" | 690 | | style="color:inherit;" | • Turning circle radius (m) || style="color:inherit;" | 690 | ||
|- | |- | ||
| style="color:inherit;" | • Rudder-shift time (sec) || style="color:inherit;" | 3. | | style="color:inherit;" | • Rudder-shift time (sec) || style="color:inherit;" | 3.0 | ||
|} | |} | ||
</div> | </div> | ||
| Line 150: | Line 150: | ||
<div style="border: 2px solid rgba(212,175,55,0.8); border-radius: 3px; margin-bottom: 1em; overflow: hidden;"> | <div style="border: 2px solid rgba(212,175,55,0.8); border-radius: 3px; margin-bottom: 1em; overflow: hidden;"> | ||
{| class="wikitable" style="margin:0; color:inherit; width:100%" | {| class="wikitable" style="margin:0; color:inherit; width:100%" | ||
! style="background-color:#1a3244; color:#ffffff; font-weight:bold;" | TORPEDO LAUNCHERS !! style="background-color:#1a3244; color:#ffffff; font-weight:bold;" | Type 93 !! style="background-color:#1a3244; color:#ffffff; font-weight:bold;" | Type 93 mod. 3 !! style="background-color:#1a3244; color:#ffffff; font-weight:bold;" | F3 | ! style="background-color:#1a3244; color:#ffffff; font-weight:bold;" | TORPEDO LAUNCHERS !! style="background-color:#1a3244; color:#ffffff; font-weight:bold;" | Type 93 !! style="background-color:#1a3244; color:#ffffff; font-weight:bold;" | Type 93 mod. 3 !! style="background-color:#1a3244; color:#ffffff; font-weight:bold;" | Type F3 | ||
|- | |- | ||
| style="color:inherit;" | • | | style="color:inherit;" | • Torpedo tubes (launchers × tubes) || style="color:inherit;" | 3 × 5 || style="color:inherit;" | 3 × 5 || style="color:inherit;" | 3 × 5 | ||
|- | |- | ||
| style="color:inherit;" | • Torpedo name || style="color:inherit;" | Type 93 || style="color:inherit;" | Type 93 mod. 3 || style="color:inherit;" | F3 | | style="color:inherit;" | • Torpedo name || style="color:inherit;" | Type 93 || style="color:inherit;" | Type 93 mod. 3 || style="color:inherit;" | Type F3 | ||
|- | |- | ||
| style="color:inherit;" | • Reload time (sec) || style="color:inherit;" | 150 | | style="color:inherit;" | • Reload time (sec) || style="color:inherit;" | 150 || style="color:inherit;" | 150 || style="color:inherit;" | 150 | ||
|- | |- | ||
| style="color:inherit;" | • 180° turn time (sec) || style="color:inherit;" | 7.2 || style="color:inherit;" | 7.2 || style="color:inherit;" | 7.2 | | style="color:inherit;" | • 180° turn time (sec) || style="color:inherit;" | 7.2 || style="color:inherit;" | 7.2 || style="color:inherit;" | 7.2 | ||
|- | |- | ||
| style="color:inherit;" | • Damage || style="color:inherit;" | | | style="color:inherit;" | • Damage || style="color:inherit;" | 20,967 || style="color:inherit;" | 23,767 || style="color:inherit;" | 21,367 | ||
|- | |- | ||
| style="color:inherit;" | • Range (km) || style="color:inherit;" | 0 | | style="color:inherit;" | • Range (km) || style="color:inherit;" | 20.0 || style="color:inherit;" | 12.0 || style="color:inherit;" | 8.0 | ||
|- | |- | ||
| style="color:inherit;" | • Speed (kt) || style="color:inherit;" | 62 || style="color:inherit;" | 67 || style="color:inherit;" | 76 | | style="color:inherit;" | • Speed (kt) || style="color:inherit;" | 62 || style="color:inherit;" | 67 || style="color:inherit;" | 76 | ||
| Line 168: | Line 168: | ||
| style="color:inherit;" | • Detectability (km) || style="color:inherit;" | 2.5 || style="color:inherit;" | 1.7 || style="color:inherit;" | 1.8 | | style="color:inherit;" | • Detectability (km) || style="color:inherit;" | 2.5 || style="color:inherit;" | 1.7 || style="color:inherit;" | 1.8 | ||
|- | |- | ||
| style="color:inherit;" | • Flooding chance (%) || style="color:inherit;" | | | style="color:inherit;" | • Flooding chance (%) || style="color:inherit;" | 355 || style="color:inherit;" | 406 || style="color:inherit;" | 361 | ||
|} | |} | ||
</div> | </div> | ||
| Line 177: | Line 177: | ||
{| class="wikitable" style="margin:0 0 0.8em 0; width:100%; color:inherit;" | {| class="wikitable" style="margin:0 0 0.8em 0; width:100%; color:inherit;" | ||
! style="background-color:#1a3244; color:#ffffff; font-weight:bold;" | AA ARMAMENT !! style="background-color:#1a3244; color:#ffffff; font-weight:bold;" | MOUNTS × BARRELS | ! style="background-color:#1a3244; color:#ffffff; font-weight:bold;" | AA ARMAMENT !! style="background-color:#1a3244; color:#ffffff; font-weight:bold;" | MOUNTS × BARRELS | ||
|- | |||
| style="color:inherit;" | 127 mm || style="color:inherit;" | 3x2 | |||
|- | |- | ||
| style="color:inherit;" | 25 mm || style="color:inherit;" | 2 × 3 + 1 × 2 + 14 × 1 | | style="color:inherit;" | 25 mm || style="color:inherit;" | 2 × 3 + 1 × 2 + 14 × 1 | ||
| Line 186: | Line 188: | ||
|- | |- | ||
| style="color:inherit;" | Short-range || style="color:inherit;" | 98 || style="color:inherit;" | 95% || style="color:inherit;" | 2.5 | | style="color:inherit;" | Short-range || style="color:inherit;" | 98 || style="color:inherit;" | 95% || style="color:inherit;" | 2.5 | ||
|- | |||
| style="color:inherit;" | Long-range || style="color:inherit;" | 49 || style="color:inherit;" | 100% || style="color:inherit;" | 5.8 | |||
|} | |} | ||
'''Damage by shell explosions''' | |||
{| class="wikitable" style="margin:0 0 0.8em 0; width:100%; color:inherit;" | |||
! style="background-color:#1a3244; color:#ffffff; font-weight:bold;" | EXPLOSIONS / SALVO !! style="background-color:#1a3244; color:#ffffff; font-weight:bold;" | DAMAGE !! style="background-color:#1a3244; color:#ffffff; font-weight:bold;" | HIT CHANCE !! style="background-color:#1a3244; color:#ffffff; font-weight:bold;" | ACTION ZONE (km) | |||
|- | |||
| style="color:inherit;" | 2 || style="color:inherit;" | 1610 || style="color:inherit;" | 100% || style="color:inherit;" | 3.5–5.8 | |||
|} | |||
</div> | </div> | ||
</div></div></div> | </div></div></div> | ||
| Line 198: | Line 210: | ||
| style="color:inherit;" | • Number of charges || style="color:inherit;" | 2 | | style="color:inherit;" | • Number of charges || style="color:inherit;" | 2 | ||
|- | |- | ||
| style="color:inherit;" | • Bombs per charge || style="color:inherit;" | | | style="color:inherit;" | • Bombs per charge || style="color:inherit;" | 16 | ||
|- | |- | ||
| style="color:inherit;" | • Reload time (sec) || style="color:inherit;" | 40.0 | | style="color:inherit;" | • Reload time (sec) || style="color:inherit;" | 40.0 | ||
Latest revision as of 16:45, 9 July 2026

X
19,300,000
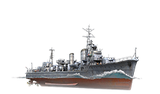
Shimakaze — Japan Tech Tree Tier X Destroyer.
An experimental fast "cruiser destroyer" boasting a heavy-duty power plant, reinforced AA defenses, and powerful torpedo armament. Improved performance was to be achieved by utilizing new boilers. Shimakaze was laid down in August 1941 and entered service in May 1943. She was to have been the lead ship in a series of 16 destroyers, but no sister ships were ever completed. Shimakaze participated in the evacuation of the Aleutian Islands, escorted convoys between 1943 and 1944, and engaged in the Battles of Leyte Gulf and Ormoc Bay.
Pros
- Numerous torpedo tubes
- Low detectability
- Three different options for the torpedo armament
Cons
- Low HP
- Long torpedo releoad
- Low AA defense efficiency
Ship Stats
Hull Information
Main Battery
Torpedoes
AA Defense
Depth Charges
Compatible Upgrades
| Slot 1 |
 |
 |

| ||
|---|---|---|---|---|---|
| Slot 2 |
 |
 |

| ||
| Slot 3 |
 |
 |
 |
 |

|
| Slot 4 |
 |
 |
 |

| |
| Slot 5 |
 |
 |
 |

| |
| Slot 6 |
 |
 |
 |
 |

|
Consumables
- Slot 1: Damage Control Party
 (5.0s action, 40.0s cooldown)
 - Slot 2: Smoke Generator
 (3 charges, 20.0s action, 160.0s cooldown)
 - Slot 3: Engine Boost
 (3 charges, 120.0s action, 120.0s cooldown)
Gallery
WoWs Gallery

Historical Gallery
Categories:
