Ship:Mogami
Added pros and cons, image, hull information |
DinhTuan1206 (talk | contribs) Added missing HE&AP |
||
| (2 intermediate revisions by 2 users not shown) | |||
| Line 5: | Line 5: | ||
===Pros=== | ===Pros=== | ||
* High damage per minute with 155's HE shells | * High damage per minute with 155's HE shells | ||
* High firing accuracy of the 203's main battery | * High firing accuracy of the 203's main battery | ||
| Line 50: | Line 49: | ||
| style="color:inherit;" | • Turning circle radius (m) || style="color:inherit;" | 750 || style="color:inherit;" | 750 | | style="color:inherit;" | • Turning circle radius (m) || style="color:inherit;" | 750 || style="color:inherit;" | 750 | ||
|- | |- | ||
| style="color:inherit;" | • Rudder-shift time (sec) || style="color:inherit;" | | | style="color:inherit;" | • Rudder-shift time (sec) || style="color:inherit;" | 9.3 || style="color:inherit;" | 7.1 | ||
|} | |} | ||
</div> | </div> | ||
| Line 73: | Line 72: | ||
! style="background-color:#1a3244; color:#ffffff; font-weight:bold;" | MAIN BATTERY !! style="background-color:#1a3244; color:#ffffff; font-weight:bold;" | 155 mm/60 3rd Year Type in a triple-gun turret !! style="background-color:#1a3244; color:#ffffff; font-weight:bold;" | 203 mm/50 3rd Year Type No.2 in a Model E3/E turret | ! style="background-color:#1a3244; color:#ffffff; font-weight:bold;" | MAIN BATTERY !! style="background-color:#1a3244; color:#ffffff; font-weight:bold;" | 155 mm/60 3rd Year Type in a triple-gun turret !! style="background-color:#1a3244; color:#ffffff; font-weight:bold;" | 203 mm/50 3rd Year Type No.2 in a Model E3/E turret | ||
|- | |- | ||
| style="color:inherit;" | • Arrangement || style="color:inherit;" | 5×3 | | style="color:inherit;" | • Arrangement || style="color:inherit;" | 5×3 155mm || style="color:inherit;" | 5×2 203mm | ||
|- | |- | ||
| style="color:inherit;" | • Firing range (km) || style="color:inherit;" | 14.25 || style="color:inherit;" | 14.25 | | style="color:inherit;" | • Firing range (km) || style="color:inherit;" | 14.25 || style="color:inherit;" | 14.25 | ||
| Line 87: | Line 86: | ||
<div style="border: 2px solid rgba(212,175,55,0.8); border-radius: 3px; margin-bottom: 1em; overflow: hidden;"> | <div style="border: 2px solid rgba(212,175,55,0.8); border-radius: 3px; margin-bottom: 1em; overflow: hidden;"> | ||
{| class="wikitable" style="margin:0; color:inherit; width:100%" | {| class="wikitable" style="margin:0; color:inherit; width:100%" | ||
! style="background-color:#1a3244; color:#ffffff; font-weight:bold;" | DISPERSION !! style="background-color:#1a3244; color:#ffffff; font-weight:bold;" | | ! style="background-color:#1a3244; color:#ffffff; font-weight:bold;" | DISPERSION !! style="background-color:#1a3244; color:#ffffff; font-weight:bold;" | 155 mm/60 3rd Year Type in a triple-gun turret !! style="background-color:#1a3244; color:#ffffff; font-weight:bold;" | 203 mm/50 3rd Year Type No.2 in a Model E3/E turret | ||
|- | |- | ||
| style="color:inherit;" | • Dispersion type || style="color:inherit;" | Standard CA/CL dispersion | | style="color:inherit;" | • Dispersion type || style="color:inherit;" | Standard CA/CL dispersion || style="color:inherit;" | Standard DD dispersion | ||
|- | |- | ||
| style="color:inherit;" | • Dispersion formula || style="color:inherit;" | Dispersion (m) = 6.9 × range(km) + 33 | | style="color:inherit;" | • Dispersion formula || style="color:inherit;" | Dispersion (m) = 6.9 × range(km) + 33 || style="color:inherit;" | Dispersion (m) = 7.5 × range(km) + 15 | ||
|- | |- | ||
| style="color:inherit;" | • Sigma || style="color:inherit;" | 2.0 | | style="color:inherit;" | • Sigma || style="color:inherit;" | 2.0 || style="color:inherit;" | 2.0 | ||
|- | |- | ||
| style="color:inherit;" | • Maximum dispersion (m) || style="color:inherit;" | 131 | | style="color:inherit;" | • Maximum dispersion (m) || style="color:inherit;" | 131 || style="color:inherit;" | 122 | ||
|- | |- | ||
| style="color:inherit;" | • Dispersion at 5 km || style="color:inherit;" | 68 | | style="color:inherit;" | • Dispersion at 5 km || style="color:inherit;" | 68 || style="color:inherit;" | 53 | ||
|- | |- | ||
| style="color:inherit;" | • Dispersion at 10 km || style="color:inherit;" | 102 | | style="color:inherit;" | • Dispersion at 10 km || style="color:inherit;" | 102 || style="color:inherit;" | 90 | ||
|- | |- | ||
| style="color:inherit;" | • Dispersion at 14.25 km || style="color:inherit;" | 131 | | style="color:inherit;" | • Dispersion at 14.25 km || style="color:inherit;" | 131 || style="color:inherit;" | 122 | ||
|} | |} | ||
</div> | </div> | ||
| Line 107: | Line 106: | ||
<div style="border: 2px solid rgba(212,175,55,0.8); border-radius: 3px; margin-bottom: 1em; overflow: hidden;"> | <div style="border: 2px solid rgba(212,175,55,0.8); border-radius: 3px; margin-bottom: 1em; overflow: hidden;"> | ||
{| class="wikitable" style="margin:0; color:inherit; width:100%" | {| class="wikitable" style="margin:0; color:inherit; width:100%" | ||
! style="background-color:#1a3244; color:#ffffff; font-weight:bold;" | HE SHELL !! style="background-color:#1a3244; color:#ffffff; font-weight:bold;" | | ! style="background-color:#1a3244; color:#ffffff; font-weight:bold;" | HE SHELL !! style="background-color:#1a3244; color:#ffffff; font-weight:bold;" | 155 mm/60 3rd Year Type in a triple-gun turret !! style="background-color:#1a3244; color:#ffffff; font-weight:bold;" | 203 mm/50 3rd Year Type No.2 in a Model E3/E turret | ||
|- | |- | ||
| style="color:inherit;" | • Name || style="color:inherit;" | 155 mm HE Type0 | | style="color:inherit;" | • Name || style="color:inherit;" | 155 mm HE Type0 || style="color:inherit;" | 203mm HE Type0 | ||
|- | |- | ||
| style="color:inherit;" | • Maximum damage || style="color:inherit;" | 2600 | | style="color:inherit;" | • Maximum damage || style="color:inherit;" | 2600 || style="color:inherit;" | 3300 | ||
|- | |- | ||
| style="color:inherit;" | • Fire chance (%) || style="color:inherit;" | 10.0% | | style="color:inherit;" | • Fire chance (%) || style="color:inherit;" | 10.0% || style="color:inherit;" | 17.0% | ||
|- | |- | ||
| style="color:inherit;" | • Shell velocity (m/s) || style="color:inherit;" | 925 | | style="color:inherit;" | • Shell velocity (m/s) || style="color:inherit;" | 925 || style="color:inherit;" | 840 | ||
|- | |- | ||
| style="color:inherit;" | • Shell weight (kg) || style="color:inherit;" | 55.87 | | style="color:inherit;" | • Shell weight (kg) || style="color:inherit;" | 55.87 || style="color:inherit;" | 125.85 | ||
|- | |- | ||
| style="color:inherit;" | • Penetration (mm) || style="color:inherit;" | 31 | | style="color:inherit;" | • Penetration (mm) || style="color:inherit;" | 31 || style="color:inherit;" | 34 | ||
|} | |} | ||
</div> | </div> | ||
| Line 126: | Line 125: | ||
<div style="border: 2px solid rgba(212,175,55,0.8); border-radius: 3px; margin-bottom: 1em; overflow: hidden;"> | <div style="border: 2px solid rgba(212,175,55,0.8); border-radius: 3px; margin-bottom: 1em; overflow: hidden;"> | ||
{| class="wikitable" style="margin:0; color:inherit; width:100%" | {| class="wikitable" style="margin:0; color:inherit; width:100%" | ||
! style="background-color:#1a3244; color:#ffffff; font-weight:bold;" | AP SHELL !! style="background-color:#1a3244; color:#ffffff; font-weight:bold;" | | ! style="background-color:#1a3244; color:#ffffff; font-weight:bold;" | AP SHELL !! style="background-color:#1a3244; color:#ffffff; font-weight:bold;" | 155 mm/60 3rd Year Type in a triple-gun turret !! style="background-color:#1a3244; color:#ffffff; font-weight:bold;" | 203 mm/50 3rd Year Type No.2 in a Model E3/E turret | ||
|- | |- | ||
| style="color:inherit;" | • Name || style="color:inherit;" | 155 mm AP/APC Type91 | | style="color:inherit;" | • Name || style="color:inherit;" | 155 mm AP/APC Type91 || style="color:inherit;" | 203mm AP Type91 | ||
|- | |- | ||
| style="color:inherit;" | • Maximum damage || style="color:inherit;" | 3300 | | style="color:inherit;" | • Maximum damage || style="color:inherit;" | 3300 || style="color:inherit;" | 4700 | ||
|- | |- | ||
| style="color:inherit;" | • Shell velocity (m/s) || style="color:inherit;" | 925 | | style="color:inherit;" | • Shell velocity (m/s) || style="color:inherit;" | 925 || style="color:inherit;" | 840 | ||
|- | |- | ||
| style="color:inherit;" | • Shell weight (kg) || style="color:inherit;" | 55.87 | | style="color:inherit;" | • Shell weight (kg) || style="color:inherit;" | 55.87 || style="color:inherit;" | 125.85 | ||
|- | |- | ||
| style="color:inherit;" | • Fuse time (sec) || style="color:inherit;" | 0.01 | | style="color:inherit;" | • Fuse time (sec) || style="color:inherit;" | 0.01 || style="color:inherit;" | 0.033 | ||
|- | |- | ||
| style="color:inherit;" | • Ricochet start (°) || style="color:inherit;" | 45 | | style="color:inherit;" | • Ricochet start (°) || style="color:inherit;" | 45 || style="color:inherit;" | 45 | ||
|- | |- | ||
| style="color:inherit;" | • Always ricochet (°) || style="color:inherit;" | 60 | | style="color:inherit;" | • Always ricochet (°) || style="color:inherit;" | 60 || style="color:inherit;" | 60 | ||
|- | |- | ||
| style="color:inherit;" | • Normalisation (°) || style="color:inherit;" | 7 | | style="color:inherit;" | • Normalisation (°) || style="color:inherit;" | 7 || style="color:inherit;" | 7 | ||
|- | |- | ||
| style="color:inherit;" | • Arming threshold (mm) || style="color:inherit;" | 26 | | style="color:inherit;" | • Arming threshold (mm) || style="color:inherit;" | 26 || style="color:inherit;" | 34 | ||
|} | |} | ||
</div> | </div> | ||
| Line 151: | Line 150: | ||
<div style="border: 2px solid rgba(212,175,55,0.8); border-radius: 3px; margin-bottom: 1em; overflow: hidden;"> | <div style="border: 2px solid rgba(212,175,55,0.8); border-radius: 3px; margin-bottom: 1em; overflow: hidden;"> | ||
{| class="wikitable" style="margin:0; color:inherit; width:100%" | {| class="wikitable" style="margin:0; color:inherit; width:100%" | ||
! style="background-color:#1a3244; color:#ffffff; font-weight:bold;" | TORPEDO LAUNCHERS !! style="background-color:#1a3244; color:#ffffff; font-weight:bold;" | | ! style="background-color:#1a3244; color:#ffffff; font-weight:bold;" | TORPEDO LAUNCHERS !! style="background-color:#1a3244; color:#ffffff; font-weight:bold;" | Type90 mod. 1 | ||
|- | |- | ||
| style="color:inherit;" | • | | style="color:inherit;" | • Torpedo tubes (launchers × tubes) || style="color:inherit;" | 4 × 4 | ||
|- | |- | ||
| style="color:inherit;" | • Torpedo name || style="color:inherit;" | | | style="color:inherit;" | • Torpedo name || style="color:inherit;" | Type90 mod. 1 | ||
|- | |- | ||
| style="color:inherit;" | • Reload time (sec) || style="color:inherit;" | 101 | | style="color:inherit;" | • Reload time (sec) || style="color:inherit;" | 101 | ||
|- | |- | ||
| style="color:inherit;" | • 180° turn time (sec) || style="color:inherit;" | 7.2 | | style="color:inherit;" | • 180° turn time (sec) || style="color:inherit;" | 7.2 | ||
|- | |- | ||
| style="color:inherit;" | • Damage || style="color:inherit;" | | | style="color:inherit;" | • Damage || style="color:inherit;" | 17,233 | ||
|- | |- | ||
| style="color:inherit;" | • Range (km) || style="color:inherit;" | 0 | | style="color:inherit;" | • Range (km) || style="color:inherit;" | 10.0 | ||
|- | |- | ||
| style="color:inherit;" | • Speed (kt) || style="color:inherit;" | 62 | | style="color:inherit;" | • Speed (kt) || style="color:inherit;" | 62 | ||
| Line 169: | Line 168: | ||
| style="color:inherit;" | • Detectability (km) || style="color:inherit;" | 1.6 | | style="color:inherit;" | • Detectability (km) || style="color:inherit;" | 1.6 | ||
|- | |- | ||
| style="color:inherit;" | • Flooding chance (%) || style="color:inherit;" | | | style="color:inherit;" | • Flooding chance (%) || style="color:inherit;" | 287 | ||
|} | |} | ||
</div> | </div> | ||
| Line 191: | Line 190: | ||
| style="color:inherit;" | • Name || style="color:inherit;" | 127 mm HE Type0 | | style="color:inherit;" | • Name || style="color:inherit;" | 127 mm HE Type0 | ||
|- | |- | ||
| style="color:inherit;" | • Arrangement || style="color:inherit;" | | | style="color:inherit;" | • Arrangement || style="color:inherit;" | 4x2 127mm | ||
|- | |- | ||
| style="color:inherit;" | • Rate of fire (shots/min) || style="color:inherit;" | 8.0 | | style="color:inherit;" | • Rate of fire (shots/min) || style="color:inherit;" | 8.0 | ||
| Line 302: | Line 301: | ||
==Gallery== | ==Gallery== | ||
<div class="b-popup"><div class="b-popup_head js-tech-nav_head"> | <div class="b-popup"><div class="b-popup_head js-tech-nav_head"><div><h2>WoWs Gallery</h2></div><span class="b-tech-nav_arrow"></span></div><div class="b-popup_content" style="display: none;">[[File:Mogami.jpg|thumb]]<div> | ||
<gallery> | <gallery> | ||
Latest revision as of 15:35, 15 July 2026

VIII
8,800,000
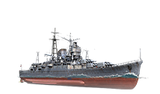
Mogami — Japan Tech Tree Tier VIII Cruiser.
According to the London Naval Treaty, Japan had the right to build cruisers with artillery up to 155 mm. New cruisers with 155 mm guns were ordered, but the weaponry was later replaced with 203 mm (8-inch) guns. During World War II, Mogami participated in the occupation of Indochina, as well as the invasions of Malaya, Sarawak, and Indonesia. She also fought in the Sunda Strait, the Battle of Midway, and the Battle of the Philippine Sea. On October 25, 1944, during the Battle of Leyte Gulf, Mogami was heavily damaged by American torpedo bombers and finally finished off by destroyer Akebono.
Pros
- High damage per minute with 155's HE shells
- High firing accuracy of the 203's main battery
- Heavy torpedo damage
Cons
- Low gun traverse speed
- Low AA defense efficiency
- Limited torpedo launch angles
Ship Stats
Hull Information
Main Battery
Torpedoes
Secondary Battery
Airstrike
AA Defense
Compatible Upgrades
| Slot 1 |
 |
 |

| |||
|---|---|---|---|---|---|---|
| Slot 2 |
 |
 |

| |||
| Slot 3 |
 |
 |
 |
 |
 |

|
| Slot 4 |
 |
 |
 |

| ||
| Slot 5 |
 |
 |
 |

|
Consumables
- Slot 1: Damage Control Party
 (5.0s action, 60.0s cooldown)
 - Slot 2: Defensive AA Fire
 (3 charges, 40.0s action, 80.0s cooldown) or Hydroacoustic Search
  (3 charges, 100.0s action, 120.0s cooldown)
 - Slot 3: Patrol Fighter
 (3 charges, 60.0s action, 90.0s cooldown)
 - Slot 4: Submarine Surveillance
 (3 charges, 20.0s action, 120.0s cooldown)
 - Slot 5: Repair Party
 (2 charges, 28.0s action, 80.0s cooldown, 177.5 hp/s)
Gallery
WoWs Gallery

Historical Gallery
Categories:
