Ship:Kitakaze
Added pros and cons, image, hull information |
Pockington (talk | contribs) added missing information on launch day |
||
| Line 49: | Line 49: | ||
| style="color:inherit;" | • Turning circle radius (m) || style="color:inherit;" | 730 || style="color:inherit;" | 730 | | style="color:inherit;" | • Turning circle radius (m) || style="color:inherit;" | 730 || style="color:inherit;" | 730 | ||
|- | |- | ||
| style="color:inherit;" | • Rudder-shift time (sec) || style="color:inherit;" | | | style="color:inherit;" | • Rudder-shift time (sec) || style="color:inherit;" | 6.5 || style="color:inherit;" | 4.6 | ||
|} | |} | ||
</div> | </div> | ||
| Line 150: | Line 150: | ||
<div style="border: 2px solid rgba(212,175,55,0.8); border-radius: 3px; margin-bottom: 1em; overflow: hidden;"> | <div style="border: 2px solid rgba(212,175,55,0.8); border-radius: 3px; margin-bottom: 1em; overflow: hidden;"> | ||
{| class="wikitable" style="margin:0; color:inherit; width:100%" | {| class="wikitable" style="margin:0; color:inherit; width:100%" | ||
! style="background-color:#1a3244; color:#ffffff; font-weight:bold;" | TORPEDO LAUNCHERS !! style="background-color:#1a3244; color:#ffffff; font-weight:bold;" | | ! style="background-color:#1a3244; color:#ffffff; font-weight:bold;" | TORPEDO LAUNCHERS !! style="background-color:#1a3244; color:#ffffff; font-weight:bold;" | Type 93 mod. 2 !! style="background-color:#1a3244; color:#ffffff; font-weight:bold;" | Type 93 mod. 3 !! style="background-color:#1a3244; color:#ffffff; font-weight:bold;" | Type F3 | ||
|- | |- | ||
| style="color:inherit;" | • | | style="color:inherit;" | • Torpedo tubes (launchers × tubes) || style="color:inherit;" | 1 × 6 || style="color:inherit;" | 1 × 6 || style="color:inherit;" | 1 × 6 | ||
|- | |- | ||
| style="color:inherit;" | • Torpedo name || style="color:inherit;" | | | style="color:inherit;" | • Torpedo name || style="color:inherit;" | Type 93 mod. 2 || style="color:inherit;" | Type 93 mod. 3 || style="color:inherit;" | Type F3 | ||
|- | |- | ||
| style="color:inherit;" | • Reload time (sec) || style="color:inherit;" | 167 | | style="color:inherit;" | • Reload time (sec) || style="color:inherit;" | 167 || style="color:inherit;" | 171 || style="color:inherit;" | 157 | ||
|- | |- | ||
| style="color:inherit;" | • 180° turn time (sec) || style="color:inherit;" | 7.2 || style="color:inherit;" | 7.2 || style="color:inherit;" | 7.2 | | style="color:inherit;" | • 180° turn time (sec) || style="color:inherit;" | 7.2 || style="color:inherit;" | 7.2 || style="color:inherit;" | 7.2 | ||
|- | |- | ||
| style="color:inherit;" | • Damage || style="color:inherit;" | | | style="color:inherit;" | • Damage || style="color:inherit;" | 20,967 || style="color:inherit;" | 23,767 || style="color:inherit;" | 21,367 | ||
|- | |- | ||
| style="color:inherit;" | • Range (km) || style="color:inherit;" | 0 | | style="color:inherit;" | • Range (km) || style="color:inherit;" | 10.0 || style="color:inherit;" | 12.0 || style="color:inherit;" | 8.0 | ||
|- | |- | ||
| style="color:inherit;" | • Speed (kt) || style="color:inherit;" | 67 || style="color:inherit;" | 67 || style="color:inherit;" | 76 | | style="color:inherit;" | • Speed (kt) || style="color:inherit;" | 67 || style="color:inherit;" | 67 || style="color:inherit;" | 76 | ||
| Line 168: | Line 168: | ||
| style="color:inherit;" | • Detectability (km) || style="color:inherit;" | 1.7 || style="color:inherit;" | 1.7 || style="color:inherit;" | 1.8 | | style="color:inherit;" | • Detectability (km) || style="color:inherit;" | 1.7 || style="color:inherit;" | 1.7 || style="color:inherit;" | 1.8 | ||
|- | |- | ||
| style="color:inherit;" | • Flooding chance (%) || style="color:inherit;" | | | style="color:inherit;" | • Flooding chance (%) || style="color:inherit;" | 355 || style="color:inherit;" | 406 || style="color:inherit;" | 361 | ||
|} | |} | ||
</div> | </div> | ||
| Line 179: | Line 179: | ||
{| class="wikitable" style="margin:0 0 0.8em 0; width:100%; color:inherit;" | {| class="wikitable" style="margin:0 0 0.8em 0; width:100%; color:inherit;" | ||
! style="background-color:#1a3244; color:#ffffff; font-weight:bold;" | AA ARMAMENT !! style="background-color:#1a3244; color:#ffffff; font-weight:bold;" | MOUNTS × BARRELS | ! style="background-color:#1a3244; color:#ffffff; font-weight:bold;" | AA ARMAMENT !! style="background-color:#1a3244; color:#ffffff; font-weight:bold;" | MOUNTS × BARRELS | ||
|- | |||
| style="color:inherit;" | 100 mm || style="color:inherit;" | 4 × 2 | |||
|- | |- | ||
| style="color:inherit;" | 25 mm || style="color:inherit;" | 6 × 3 + 18 × 1 | | style="color:inherit;" | 25 mm || style="color:inherit;" | 6 × 3 + 18 × 1 | ||
| Line 188: | Line 190: | ||
|- | |- | ||
| style="color:inherit;" | Mid-range || style="color:inherit;" | 122.5 || style="color:inherit;" | 95% || style="color:inherit;" | 2.5 | | style="color:inherit;" | Mid-range || style="color:inherit;" | 122.5 || style="color:inherit;" | 95% || style="color:inherit;" | 2.5 | ||
|- | |||
| style="color:inherit;" | Long-range || style="color:inherit;" | 115.5 || style="color:inherit;" | 100% || style="color:inherit;" | 5.8 | |||
|} | |||
'''Damage by shell explosions''' | |||
{| class="wikitable" style="margin:0 0 0.8em 0; width:100%; color:inherit;" | |||
! style="background-color:#1a3244; color:#ffffff; font-weight:bold;" | EXPLOSIONS / SALVO !! style="background-color:#1a3244; color:#ffffff; font-weight:bold;" | DAMAGE !! style="background-color:#1a3244; color:#ffffff; font-weight:bold;" | HIT CHANCE !! style="background-color:#1a3244; color:#ffffff; font-weight:bold;" | ACTION ZONE (km) | |||
|- | |||
| style="color:inherit;" | 5 || style="color:inherit;" | 1470 || style="color:inherit;" | 100% || style="color:inherit;" | 3.5–5.8 | |||
|} | |} | ||
| Line 194: | Line 205: | ||
{| class="wikitable" style="margin:0 0 0.8em 0; width:100%; color:inherit;" | {| class="wikitable" style="margin:0 0 0.8em 0; width:100%; color:inherit;" | ||
! style="background-color:#1a3244; color:#ffffff; font-weight:bold;" | AA ARMAMENT !! style="background-color:#1a3244; color:#ffffff; font-weight:bold;" | MOUNTS × BARRELS | ! style="background-color:#1a3244; color:#ffffff; font-weight:bold;" | AA ARMAMENT !! style="background-color:#1a3244; color:#ffffff; font-weight:bold;" | MOUNTS × BARRELS | ||
|- | |||
| style="color:inherit;" | 100 mm || style="color:inherit;" | 4 × 2 | |||
|- | |- | ||
| style="color:inherit;" | 40 mm || style="color:inherit;" | 6 × 2 | | style="color:inherit;" | 40 mm || style="color:inherit;" | 6 × 2 | ||
| Line 205: | Line 218: | ||
|- | |- | ||
| style="color:inherit;" | Mid-range || style="color:inherit;" | 196 || style="color:inherit;" | 100% || style="color:inherit;" | 3.5 | | style="color:inherit;" | Mid-range || style="color:inherit;" | 196 || style="color:inherit;" | 100% || style="color:inherit;" | 3.5 | ||
|- | |||
| style="color:inherit;" | Long-range || style="color:inherit;" | 108.5 || style="color:inherit;" | 100% || style="color:inherit;" | 5.8 | |||
|} | |||
'''Damage by shell explosions''' | |||
{| class="wikitable" style="margin:0 0 0.8em 0; width:100%; color:inherit;" | |||
! style="background-color:#1a3244; color:#ffffff; font-weight:bold;" | EXPLOSIONS / SALVO !! style="background-color:#1a3244; color:#ffffff; font-weight:bold;" | DAMAGE !! style="background-color:#1a3244; color:#ffffff; font-weight:bold;" | HIT CHANCE !! style="background-color:#1a3244; color:#ffffff; font-weight:bold;" | ACTION ZONE (km) | |||
|- | |||
| style="color:inherit;" | 5 || style="color:inherit;" | 1470 || style="color:inherit;" | 100% || style="color:inherit;" | 3.5–5.8 | |||
|} | |} | ||
</div> | </div> | ||
| Line 217: | Line 239: | ||
| style="color:inherit;" | • Number of charges || style="color:inherit;" | 2 | | style="color:inherit;" | • Number of charges || style="color:inherit;" | 2 | ||
|- | |- | ||
| style="color:inherit;" | • Bombs per charge || style="color:inherit;" | | | style="color:inherit;" | • Bombs per charge || style="color:inherit;" | 12 | ||
|- | |- | ||
| style="color:inherit;" | • Reload time (sec) || style="color:inherit;" | 40.0 | | style="color:inherit;" | • Reload time (sec) || style="color:inherit;" | 40.0 | ||
Latest revision as of 16:28, 9 July 2026

IX
13,200,000
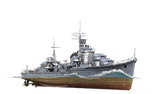
Kitakaze — Japan Tech Tree Tier IX Destroyer.
After experimental destroyer Shimakaze was laid down in 1941, notable for her speed and formidable torpedo armament, a decision was made to include 16 Type C ships in the 5th Naval Armaments Supplement Programme. However, due to losses suffered by the Imperial Navy in 1942, some Type C destroyers were substituted with Type Bs (Akizuki). Seven "improved Type B" ships were ordered in 1943. Their construction was later canceled due to the need to prepare escort ships.
Pros
- Large HP pool
- High damage per minute with AP and HE shells
- Torpedo Reload Booster consumable available
Cons
- AP shells with low armor penetration
- Low maneuverability
- Low torpedo count per salvo
Ship Stats
Hull Information
Main Battery
Torpedoes
AA Defense
Depth Charges
Compatible Upgrades
| Slot 1 |
 |
 |

| ||
|---|---|---|---|---|---|
| Slot 2 |
 |
 |

| ||
| Slot 3 |
 |
 |
 |
 |

|
| Slot 4 |
 |
 |
 |

| |
| Slot 5 |
 |
 |
 |

| |
| Slot 6 |
 |
 |
 |

|
Consumables
- Slot 1: Damage Control Party
 (5.0s action, 40.0s cooldown)
 - Slot 2: Smoke Generator
 (3 charges, 20.0s action, 160.0s cooldown)
 - Slot 3: Engine Boost
 (3 charges, 120.0s action, 120.0s cooldown)
 - Slot 4: Torpedo Reload Booster
 (3 charges, 1.0s action, 160.0s cooldown)
Gallery
WoWs Gallery

Historical Gallery
Categories:
