Ship:Monaghan
m Formatting |
m Ship Changelog |
||
| (One intermediate revision by one other user not shown) | |||
| Line 48: | Line 48: | ||
| style="color:inherit;" | • Turning circle radius (m) || style="color:inherit;" | 560 || style="color:inherit;" | 560 | | style="color:inherit;" | • Turning circle radius (m) || style="color:inherit;" | 560 || style="color:inherit;" | 560 | ||
|- | |- | ||
| style="color:inherit;" | • Rudder-shift time (sec) || style="color:inherit;" | 4 | | style="color:inherit;" | • Rudder-shift time (sec) || style="color:inherit;" | 3.4 || style="color:inherit;" | 3.4 | ||
|} | |} | ||
</div> | </div> | ||
| Line 179: | Line 179: | ||
{| class="wikitable" style="margin:0 0 0.8em 0; width:100%; color:inherit;" | {| class="wikitable" style="margin:0 0 0.8em 0; width:100%; color:inherit;" | ||
! style="background-color:#1a3244; color:#ffffff; font-weight:bold;" | AA ARMAMENT !! style="background-color:#1a3244; color:#ffffff; font-weight:bold;" | MOUNTS × BARRELS | ! style="background-color:#1a3244; color:#ffffff; font-weight:bold;" | AA ARMAMENT !! style="background-color:#1a3244; color:#ffffff; font-weight:bold;" | MOUNTS × BARRELS | ||
|- | |||
| style="color:inherit;" | 127 mm || style="color:inherit;" | 4 × 1 | |||
|- | |- | ||
| style="color:inherit;" | 20 mm || style="color:inherit;" | 8 × 1 | | style="color:inherit;" | 20 mm || style="color:inherit;" | 8 × 1 | ||
| Line 188: | Line 190: | ||
|- | |- | ||
| style="color:inherit;" | Short-range || style="color:inherit;" | 87.5 || style="color:inherit;" | 95% || style="color:inherit;" | 2.0 | | style="color:inherit;" | Short-range || style="color:inherit;" | 87.5 || style="color:inherit;" | 95% || style="color:inherit;" | 2.0 | ||
|- | |||
| style="color:inherit;" | Long-range || style="color:inherit;" | 42 || style="color:inherit;" | 100% || style="color:inherit;" | 5.8 | |||
|} | |||
'''Damage by shell explosions''' | |||
{| class="wikitable" style="margin:0 0 0.8em 0; width:100%; color:inherit;" | |||
! style="background-color:#1a3244; color:#ffffff; font-weight:bold;" | EXPLOSIONS / SALVO !! style="background-color:#1a3244; color:#ffffff; font-weight:bold;" | DAMAGE !! style="background-color:#1a3244; color:#ffffff; font-weight:bold;" | HIT CHANCE !! style="background-color:#1a3244; color:#ffffff; font-weight:bold;" | ACTION ZONE (km) | |||
|- | |||
| style="color:inherit;" | 1 || style="color:inherit;" | 1120 || style="color:inherit;" | 100% || style="color:inherit;" | 3.5–5.8 | |||
|} | |} | ||
| Line 194: | Line 205: | ||
{| class="wikitable" style="margin:0 0 0.8em 0; width:100%; color:inherit;" | {| class="wikitable" style="margin:0 0 0.8em 0; width:100%; color:inherit;" | ||
! style="background-color:#1a3244; color:#ffffff; font-weight:bold;" | AA ARMAMENT !! style="background-color:#1a3244; color:#ffffff; font-weight:bold;" | MOUNTS × BARRELS | ! style="background-color:#1a3244; color:#ffffff; font-weight:bold;" | AA ARMAMENT !! style="background-color:#1a3244; color:#ffffff; font-weight:bold;" | MOUNTS × BARRELS | ||
|- | |||
| style="color:inherit;" | 127 mm || style="color:inherit;" | 2 × 1 | |||
|- | |- | ||
| style="color:inherit;" | 40 mm || style="color:inherit;" | 1 × 4 + 3 × 2 | | style="color:inherit;" | 40 mm || style="color:inherit;" | 1 × 4 + 3 × 2 | ||
| Line 207: | Line 220: | ||
|- | |- | ||
| style="color:inherit;" | Mid-range || style="color:inherit;" | 115.5 || style="color:inherit;" | 100% || style="color:inherit;" | 3.5 | | style="color:inherit;" | Mid-range || style="color:inherit;" | 115.5 || style="color:inherit;" | 100% || style="color:inherit;" | 3.5 | ||
|- | |||
| style="color:inherit;" | Long-range || style="color:inherit;" | 10.5 || style="color:inherit;" | 100% || style="color:inherit;" | 5.8 | |||
|} | |||
'''Damage by shell explosions''' | |||
{| class="wikitable" style="margin:0 0 0.8em 0; width:100%; color:inherit;" | |||
! style="background-color:#1a3244; color:#ffffff; font-weight:bold;" | EXPLOSIONS / SALVO !! style="background-color:#1a3244; color:#ffffff; font-weight:bold;" | DAMAGE !! style="background-color:#1a3244; color:#ffffff; font-weight:bold;" | HIT CHANCE !! style="background-color:#1a3244; color:#ffffff; font-weight:bold;" | ACTION ZONE (km) | |||
|- | |||
| style="color:inherit;" | 1 || style="color:inherit;" | 1190 || style="color:inherit;" | 100% || style="color:inherit;" | 3.5–5.8 | |||
|} | |} | ||
</div> | </div> | ||
| Line 219: | Line 241: | ||
| style="color:inherit;" | • Number of charges || style="color:inherit;" | 2 | | style="color:inherit;" | • Number of charges || style="color:inherit;" | 2 | ||
|- | |- | ||
| style="color:inherit;" | • Bombs per charge || style="color:inherit;" | | | style="color:inherit;" | • Bombs per charge || style="color:inherit;" | 8 | ||
|- | |- | ||
| style="color:inherit;" | • Reload time (sec) || style="color:inherit;" | 40.0 | | style="color:inherit;" | • Reload time (sec) || style="color:inherit;" | 40.0 | ||
| Line 254: | Line 276: | ||
</gallery> | </gallery> | ||
</div></div></div> | </div></div></div> | ||
{{WoWS Ship Changelog Insert|1= | |||
*Update 0.7.0: | |||
**Preliminary characteristics. | |||
**Available for testing by supertesters in the game starting from Update 0.7.0. | |||
*Update 0.7.6: | |||
**Minor fixes for ship textures and geometry. | |||
**Fixed minor visual defects of torpedo armament. | |||
**Fixed description of the ship. | |||
**First appeared on sale in June 2018. | |||
*Update 0.7.7: | |||
**For 127mm AP / SC Mk38 armor-piercing shells, the fuse detonation time was reduced from 0.03 to 0.01 s. | |||
**Made minor fixes to geometry and textures on the ship and camouflage. | |||
*Update 0.9.6: | |||
**The torpedo module Mk15 mod.3 was removed from the game. Improved torpedoes will now be installed alongside the Monaghan Hull (B). | |||
*Update 0.10.8: | |||
**The number of depth charges was increased from 1 to 2. | |||
*Update 0.11.6: | |||
**Was made temporarily unavailable for purchase in the Armory due to technical issues. | |||
**Note: not included in the patch notes list from WG. | |||
}} | |||
[[Category:Ships of U.S.A.]] | [[Category:Ships of U.S.A.]] | ||
Latest revision as of 14:29, 15 August 2026

VI
4,500 doubloons
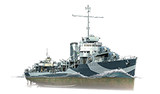
Monaghan — U.S.A. Premium Tier VI Destroyer.
USS Monaghan, a Farragut-class destroyer, was the duty ship during the raid on Pearl Harbor, and she was one of the first to open fire on Japanese aircraft. The destroyer participated in the Battle of the Coral Sea, Battle of Midway, and Battle of the Commander Islands. Monaghan escorted aircraft carriers participating in the landing on the Marshall Islands, Saipan, and Guam. On December 17, 1944, the destroyer was sunk by Typhoon Cobra east of the Philippines. Over the course of World War II, the ship was awarded 12 battle stars.
This ship gets a choice of hull module, which drastically alters the performance of the ship.
Pros
- Heavy torpedo damage
- Torpedo Reload Booster consumable available
- (Hull B) Long range torpedoes
Cons
- High detectability
- (Hull B) Lacks rear-facing main battery armament
Ship Stats
Hull Information
Main Battery
Torpedoes
AA Defense
Depth Charges
Compatible Upgrades
| Slot 1 |
 |
 |

| ||
|---|---|---|---|---|---|
| Slot 2 |
 |
 |

| ||
| Slot 3 |
 |
 |
 |
 |

|
| Slot 4 |
 |
 |
 |

|
Consumables
- Slot 1: Damage Control Party
 (5.0s action, 40.0s cooldown)
 - Slot 2: Smoke Generator
 (3 charges, 20.0s action, 160.0s cooldown)
 - Slot 3: Engine Boost
 (3 charges, 120.0s action, 120.0s cooldown)
 - Slot 4: Defensive AA Fire
 (4 charges, 40.0s action, 80.0s cooldown) or Torpedo Reload Booster
  (3 charges, 1.0s action, 240.0s cooldown)


