Ship:Suzuya
m Reversion Tag: Manual revert |
Pockington (talk | contribs) added missing information on launch day |
||
| Line 47: | Line 47: | ||
| style="color:inherit;" | • Turning circle radius (m) || style="color:inherit;" | 760 | | style="color:inherit;" | • Turning circle radius (m) || style="color:inherit;" | 760 | ||
|- | |- | ||
| style="color:inherit;" | • Rudder-shift time (sec) || style="color:inherit;" | | | style="color:inherit;" | • Rudder-shift time (sec) || style="color:inherit;" | 7.1 | ||
|} | |} | ||
</div> | </div> | ||
| Line 70: | Line 70: | ||
! style="background-color:#1a3244; color:#ffffff; font-weight:bold;" | MAIN BATTERY !! style="background-color:#1a3244; color:#ffffff; font-weight:bold;" | | ! style="background-color:#1a3244; color:#ffffff; font-weight:bold;" | MAIN BATTERY !! style="background-color:#1a3244; color:#ffffff; font-weight:bold;" | | ||
|- | |- | ||
| style="color:inherit;" | • Arrangement || style="color:inherit;" | 5×3 | | style="color:inherit;" | • Arrangement || style="color:inherit;" | 5×3 155mm | ||
|- | |- | ||
| style="color:inherit;" | • Firing range (km) || style="color:inherit;" | 16.5 | | style="color:inherit;" | • Firing range (km) || style="color:inherit;" | 16.5 | ||
| Line 150: | Line 150: | ||
<div style="border: 2px solid rgba(212,175,55,0.8); border-radius: 3px; margin-bottom: 1em; overflow: hidden;"> | <div style="border: 2px solid rgba(212,175,55,0.8); border-radius: 3px; margin-bottom: 1em; overflow: hidden;"> | ||
{| class="wikitable" style="margin:0; color:inherit; width:100%" | {| class="wikitable" style="margin:0; color:inherit; width:100%" | ||
! style="background-color:#1a3244; color:#ffffff; font-weight:bold;" | TORPEDO LAUNCHERS !! style="background-color:#1a3244; color:#ffffff; font-weight:bold;" | | ! style="background-color:#1a3244; color:#ffffff; font-weight:bold;" | TORPEDO LAUNCHERS !! style="background-color:#1a3244; color:#ffffff; font-weight:bold;" | Type 93 mod. 1 | ||
|- | |- | ||
| style="color:inherit;" | • | | style="color:inherit;" | • Torpedo tubes (launchers × tubes) || style="color:inherit;" | 4 × 3 | ||
|- | |- | ||
| style="color:inherit;" | • Torpedo name || style="color:inherit;" | | | style="color:inherit;" | • Torpedo name || style="color:inherit;" | Type 93 mod. 1 | ||
|- | |- | ||
| style="color:inherit;" | • Reload time (sec) || style="color:inherit;" | 180 | | style="color:inherit;" | • Reload time (sec) || style="color:inherit;" | 180 | ||
|- | |- | ||
| style="color:inherit;" | • 180° turn time (sec) || style="color:inherit;" | 7.2 | | style="color:inherit;" | • 180° turn time (sec) || style="color:inherit;" | 7.2 | ||
|- | |- | ||
| style="color:inherit;" | • Damage || style="color:inherit;" | | | style="color:inherit;" | • Damage || style="color:inherit;" | 20,967 | ||
|- | |- | ||
| style="color:inherit;" | • Range (km) || style="color:inherit;" | 0 | | style="color:inherit;" | • Range (km) || style="color:inherit;" | 10.0 | ||
|- | |- | ||
| style="color:inherit;" | • Speed (kt) || style="color:inherit;" | 67 | | style="color:inherit;" | • Speed (kt) || style="color:inherit;" | 67 | ||
| Line 168: | Line 168: | ||
| style="color:inherit;" | • Detectability (km) || style="color:inherit;" | 1.7 | | style="color:inherit;" | • Detectability (km) || style="color:inherit;" | 1.7 | ||
|- | |- | ||
| style="color:inherit;" | • Flooding chance (%) || style="color:inherit;" | | | style="color:inherit;" | • Flooding chance (%) || style="color:inherit;" | 355 | ||
|} | |} | ||
</div> | </div> | ||
| Line 190: | Line 190: | ||
| style="color:inherit;" | • Name || style="color:inherit;" | 127 mm HE Type0 | | style="color:inherit;" | • Name || style="color:inherit;" | 127 mm HE Type0 | ||
|- | |- | ||
| style="color:inherit;" | • Arrangement || style="color:inherit;" | | | style="color:inherit;" | • Arrangement || style="color:inherit;" | 4x2 127mm | ||
|- | |- | ||
| style="color:inherit;" | • Rate of fire (shots/min) || style="color:inherit;" | 8.0 | | style="color:inherit;" | • Rate of fire (shots/min) || style="color:inherit;" | 8.0 | ||
| Line 254: | Line 254: | ||
! style="background-color:#1a3244; color:#ffffff; font-weight:bold;" | EXPLOSIONS / SALVO !! style="background-color:#1a3244; color:#ffffff; font-weight:bold;" | DAMAGE !! style="background-color:#1a3244; color:#ffffff; font-weight:bold;" | HIT CHANCE !! style="background-color:#1a3244; color:#ffffff; font-weight:bold;" | ACTION ZONE (km) | ! style="background-color:#1a3244; color:#ffffff; font-weight:bold;" | EXPLOSIONS / SALVO !! style="background-color:#1a3244; color:#ffffff; font-weight:bold;" | DAMAGE !! style="background-color:#1a3244; color:#ffffff; font-weight:bold;" | HIT CHANCE !! style="background-color:#1a3244; color:#ffffff; font-weight:bold;" | ACTION ZONE (km) | ||
|- | |- | ||
| style="color:inherit;" | 3 || style="color:inherit;" | | | style="color:inherit;" | 3 || style="color:inherit;" | 1540 || style="color:inherit;" | 90% || style="color:inherit;" | 3.5–5.8 | ||
|} | |} | ||
</div> | </div> | ||
Latest revision as of 19:15, 9 July 2026

IX
21,500 doubloons
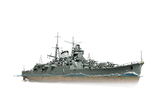
Suzuya — Japan Premium Tier IX Cruiser.
The third Mogami-class cruiser to be built was part of a unique series initially designed as light cruisers but later converted into heavy cruisers. Commissioned in 1937 and armed with fifteen 155 mm guns, Suzuya participated in several major World War II campaigns, including the Indian Ocean raid and the Battle of Midway. On October 25, 1944, during the Battle off Samar, Suzuya was attacked by U.S. carrier-based aircraft and sunk.
Pros
- High main battery damage per minute
- Low detectability
Cons
- Main Battery Reload Booster consumable available
- Low gun traverse speed
- Weak armor
Ship Stats
Hull Information
Main Battery
Torpedoes
Secondary Battery
Airstrike
AA Defense
Compatible Upgrades
| Slot 1 |
 |
 |

| ||
|---|---|---|---|---|---|
| Slot 2 |
 |
 |
 |

| |
| Slot 3 |
 |
 |
 |
 |

|
| Slot 4 |
 |
 |
 |

| |
| Slot 5 |
 |
 |
 |

| |
| Slot 6 |
 |
 |
 |

|
Consumables
- Slot 1: Damage Control Party
 (5.0s action, 60.0s cooldown)
 - Slot 2: Defensive AA Fire
 (3 charges, 40.0s action, 80.0s cooldown) or Hydroacoustic Search
  (3 charges, 100.0s action, 120.0s cooldown)
 - Slot 3: Repair Party
 (4 charges, 28.0s action, 40.0s cooldown, 195 hp/s)
 - Slot 4: Main Battery Reload Booster
 (3 charges, 15.0s action, 100.0s cooldown)
 - Slot 5: Patrol Fighter
 (3 charges, 60.0s action, 90.0s cooldown)
Gallery
WoWs Gallery


Historical Gallery
Categories:
