Ship:Baotou
No edit summary |
Pockington (talk | contribs) m corrected info |
||
| (2 intermediate revisions by one other user not shown) | |||
| Line 22: | Line 22: | ||
| style="color:inherit;" | • Hit Points || style="color:inherit;" | 47200 | | style="color:inherit;" | • Hit Points || style="color:inherit;" | 47200 | ||
|- | |- | ||
| style="color:inherit;" | • Torpedo protection damage reduction (%) || style="color:inherit;" | | | style="color:inherit;" | • Torpedo protection damage reduction (%) || style="color:inherit;" | 19% | ||
|} | |} | ||
</div> | </div> | ||
| Line 30: | Line 30: | ||
! style="background-color:#1a3244; color:#ffffff; font-weight:bold;" | ARMOR DETAIL !! style="background-color:#1a3244; color:#ffffff; font-weight:bold;" | | ! style="background-color:#1a3244; color:#ffffff; font-weight:bold;" | ARMOR DETAIL !! style="background-color:#1a3244; color:#ffffff; font-weight:bold;" | | ||
|- | |- | ||
| style="color:inherit;" | • Belt (mm) || style="color:inherit;" | | | style="color:inherit;" | • Belt (mm) || style="color:inherit;" | 140 | ||
|- | |- | ||
| style="color:inherit;" | • Deck (mm) || style="color:inherit;" | | | style="color:inherit;" | • Deck (mm) || style="color:inherit;" | 30 | ||
|- | |- | ||
| style="color:inherit;" | • Superstructure (mm) || style="color:inherit;" | | | style="color:inherit;" | • Superstructure (mm) || style="color:inherit;" | 13 | ||
|- | |- | ||
| style="color:inherit;" | • Extremities (mm) || style="color:inherit;" | | | style="color:inherit;" | • Extremities (mm) || style="color:inherit;" | 25 | ||
|} | |} | ||
</div> | </div> | ||
| Line 48: | Line 48: | ||
| style="color:inherit;" | • Turning circle radius (m) || style="color:inherit;" | 850 | | style="color:inherit;" | • Turning circle radius (m) || style="color:inherit;" | 850 | ||
|- | |- | ||
| style="color:inherit;" | • Rudder-shift time (sec) || style="color:inherit;" | | | style="color:inherit;" | • Rudder-shift time (sec) || style="color:inherit;" | 11.1 | ||
|} | |} | ||
</div> | </div> | ||
| Line 213: | Line 213: | ||
{| class="wikitable" style="margin:0 0 0.8em 0; width:100%; color:inherit;" | {| class="wikitable" style="margin:0 0 0.8em 0; width:100%; color:inherit;" | ||
! style="background-color:#1a3244; color:#ffffff; font-weight:bold;" | AA ARMAMENT !! style="background-color:#1a3244; color:#ffffff; font-weight:bold;" | MOUNTS × BARRELS | ! style="background-color:#1a3244; color:#ffffff; font-weight:bold;" | AA ARMAMENT !! style="background-color:#1a3244; color:#ffffff; font-weight:bold;" | MOUNTS × BARRELS | ||
|- | |||
| style="color:inherit;" | 180 mm || style="color:inherit;" | 4 × 2 | |||
|- | |- | ||
| style="color:inherit;" | 100 mm || style="color:inherit;" | 6 × 2 | | style="color:inherit;" | 100 mm || style="color:inherit;" | 6 × 2 | ||
| Line 225: | Line 227: | ||
| style="color:inherit;" | Mid-range || style="color:inherit;" | 252 || style="color:inherit;" | 90% || style="color:inherit;" | 4.0 | | style="color:inherit;" | Mid-range || style="color:inherit;" | 252 || style="color:inherit;" | 90% || style="color:inherit;" | 4.0 | ||
|- | |- | ||
| style="color:inherit;" | Long-range || style="color:inherit;" | | | style="color:inherit;" | Long-range || style="color:inherit;" | 178.5 || style="color:inherit;" | 90% || style="color:inherit;" | 6.9 | ||
|} | |} | ||
| Line 232: | Line 234: | ||
! style="background-color:#1a3244; color:#ffffff; font-weight:bold;" | EXPLOSIONS / SALVO !! style="background-color:#1a3244; color:#ffffff; font-weight:bold;" | DAMAGE !! style="background-color:#1a3244; color:#ffffff; font-weight:bold;" | HIT CHANCE !! style="background-color:#1a3244; color:#ffffff; font-weight:bold;" | ACTION ZONE (km) | ! style="background-color:#1a3244; color:#ffffff; font-weight:bold;" | EXPLOSIONS / SALVO !! style="background-color:#1a3244; color:#ffffff; font-weight:bold;" | DAMAGE !! style="background-color:#1a3244; color:#ffffff; font-weight:bold;" | HIT CHANCE !! style="background-color:#1a3244; color:#ffffff; font-weight:bold;" | ACTION ZONE (km) | ||
|- | |- | ||
| style="color:inherit;" | 4 || style="color:inherit;" | | | style="color:inherit;" | 4 || style="color:inherit;" | 1610 || style="color:inherit;" | 90% || style="color:inherit;" | 3.5–6.9 | ||
|} | |} | ||
</div> | </div> | ||
Latest revision as of 01:17, 11 July 2026

IX
21,500 doubloons
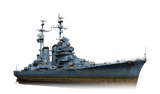
Baotou — Pan-Asia Premium Tier IX Cruiser.
A light cruiser design (Project 84) intended to provide air defense for naval formations was developed in the U.S.S.R. in 1955. Work on the ship was halted the same year. The design documentation could hypothetically have been transferred to the People's Republic of China in the late 1950s along with documentation for several weapon systems, including the 57 mm automatic anti-aircraft gun.
Pros
- Easy to shoot accurately at long ranges
- Combat Instructions significantly reduce consumable cooldown time upon activation
- High-speed, long-range torpedoes
Cons
- Low rate of fire
- Slow torpedo tube reload
Ship Stats
Hull Information
Main Battery
Torpedoes
Secondary Battery
AA Defense
Depth Charges
Compatible Upgrades
| Slot 1 |
 |
 |

| ||
|---|---|---|---|---|---|
| Slot 2 |
 |

| |||
| Slot 3 |
 |
 |
 |
 |

|
| Slot 4 |
 |
 |
 |

| |
| Slot 5 |
 |
 |
 |

| |
| Slot 6 |
 |
 |
 |

|
Consumables
- Slot 1: Damage Control Party
 (3 charges, 10.0s action, 30.0s cooldown)
 - Slot 2: Repair Party
 (3 charges, 28.0s action, 80.0s cooldown, 236 hp/s)
 - Slot 3: Torpedo Reload Booster
 (8 charges, 1.0s action, 160.0s cooldown)

