Ship:Tashkent
No edit summary |
No edit summary |
||
| (One intermediate revision by the same user not shown) | |||
| Line 150: | Line 150: | ||
<div style="border: 2px solid rgba(212,175,55,0.8); border-radius: 3px; margin-bottom: 1em; overflow: hidden;"> | <div style="border: 2px solid rgba(212,175,55,0.8); border-radius: 3px; margin-bottom: 1em; overflow: hidden;"> | ||
{| class="wikitable" style="margin:0; color:inherit; width:100%" | {| class="wikitable" style="margin:0; color:inherit; width:100%" | ||
! style="background-color:#1a3244; color:#ffffff; font-weight:bold;" | TORPEDO LAUNCHERS !! style="background-color:#1a3244; color:#ffffff; font-weight:bold;" | 53-39 mod. 2 !! style="background-color:#1a3244; color:#ffffff; font-weight:bold;" | | ! style="background-color:#1a3244; color:#ffffff; font-weight:bold;" | TORPEDO LAUNCHERS !! style="background-color:#1a3244; color:#ffffff; font-weight:bold;" | 53-39 mod. 2 !! style="background-color:#1a3244; color:#ffffff; font-weight:bold;" | 53-39 mod. 6 / 53-39 mod.2 | ||
|- | |- | ||
| style="color:inherit;" | • Torpedo tubes (launchers × tubes) || style="color:inherit;" | 3 × 3 || style="color:inherit;" | 3 × 3 | | style="color:inherit;" | • Torpedo tubes (launchers × tubes) || style="color:inherit;" | 3 × 3 || style="color:inherit;" | 3 × 3 | ||
|- | |- | ||
| style="color:inherit;" | • Torpedo name || style="color:inherit;" | 53-39 mod. 2 || style="color:inherit;" | | | style="color:inherit;" | • Torpedo name || style="color:inherit;" | 53-39 mod. 2 || style="color:inherit;" | 53-39 mod. 6 / 53-39 mod.2 | ||
|- | |- | ||
| style="color:inherit;" | • Reload time (sec) || style="color:inherit;" | 69 || style="color:inherit;" | 117 | | style="color:inherit;" | • Reload time (sec) || style="color:inherit;" | 69 || style="color:inherit;" | 117 | ||
| Line 179: | Line 179: | ||
{| class="wikitable" style="margin:0 0 0.8em 0; width:100%; color:inherit;" | {| class="wikitable" style="margin:0 0 0.8em 0; width:100%; color:inherit;" | ||
! style="background-color:#1a3244; color:#ffffff; font-weight:bold;" | AA ARMAMENT !! style="background-color:#1a3244; color:#ffffff; font-weight:bold;" | MOUNTS × BARRELS | ! style="background-color:#1a3244; color:#ffffff; font-weight:bold;" | AA ARMAMENT !! style="background-color:#1a3244; color:#ffffff; font-weight:bold;" | MOUNTS × BARRELS | ||
|- | |||
| style="color:inherit;" | 130 mm || style="color:inherit;" | 3 × 2 | |||
|- | |- | ||
| style="color:inherit;" | 76 mm || style="color:inherit;" | 1 × 2 | | style="color:inherit;" | 76 mm || style="color:inherit;" | 1 × 2 | ||
| Line 194: | Line 196: | ||
|- | |- | ||
| style="color:inherit;" | Mid-range || style="color:inherit;" | 80.5 || style="color:inherit;" | 100% || style="color:inherit;" | 3.5 | | style="color:inherit;" | Mid-range || style="color:inherit;" | 80.5 || style="color:inherit;" | 100% || style="color:inherit;" | 3.5 | ||
|- | |||
| style="color:inherit;" | Long-range || style="color:inherit;" | 52.5 || style="color:inherit;" | 100% || style="color:inherit;" | 6.0 | |||
|} | |||
'''Damage by shell explosions''' | |||
{| class="wikitable" style="margin:0 0 0.8em 0; width:100%; color:inherit;" | |||
! style="background-color:#1a3244; color:#ffffff; font-weight:bold;" | EXPLOSIONS / SALVO !! style="background-color:#1a3244; color:#ffffff; font-weight:bold;" | DAMAGE !! style="background-color:#1a3244; color:#ffffff; font-weight:bold;" | HIT CHANCE !! style="background-color:#1a3244; color:#ffffff; font-weight:bold;" | ACTION ZONE (km) | |||
|- | |||
| style="color:inherit;" | 2 || style="color:inherit;" | 460 || style="color:inherit;" | 100% || style="color:inherit;" | 3.5–6.0 | |||
|} | |} | ||
| Line 200: | Line 211: | ||
{| class="wikitable" style="margin:0 0 0.8em 0; width:100%; color:inherit;" | {| class="wikitable" style="margin:0 0 0.8em 0; width:100%; color:inherit;" | ||
! style="background-color:#1a3244; color:#ffffff; font-weight:bold;" | AA ARMAMENT !! style="background-color:#1a3244; color:#ffffff; font-weight:bold;" | MOUNTS × BARRELS | ! style="background-color:#1a3244; color:#ffffff; font-weight:bold;" | AA ARMAMENT !! style="background-color:#1a3244; color:#ffffff; font-weight:bold;" | MOUNTS × BARRELS | ||
|- | |||
| style="color:inherit;" | 130 mm || style="color:inherit;" | 3 × 2 | |||
|- | |- | ||
| style="color:inherit;" | 37 mm || style="color:inherit;" | 6 × 2 | | style="color:inherit;" | 37 mm || style="color:inherit;" | 6 × 2 | ||
| Line 213: | Line 226: | ||
|- | |- | ||
| style="color:inherit;" | Mid-range || style="color:inherit;" | 115.5 || style="color:inherit;" | 100% || style="color:inherit;" | 3.5 | | style="color:inherit;" | Mid-range || style="color:inherit;" | 115.5 || style="color:inherit;" | 100% || style="color:inherit;" | 3.5 | ||
|- | |||
| style="color:inherit;" | Long-range || style="color:inherit;" | 52.5 || style="color:inherit;" | 100% || style="color:inherit;" | 6.0 | |||
|} | |||
'''Damage by shell explosions''' | |||
{| class="wikitable" style="margin:0 0 0.8em 0; width:100%; color:inherit;" | |||
! style="background-color:#1a3244; color:#ffffff; font-weight:bold;" | EXPLOSIONS / SALVO !! style="background-color:#1a3244; color:#ffffff; font-weight:bold;" | DAMAGE !! style="background-color:#1a3244; color:#ffffff; font-weight:bold;" | HIT CHANCE !! style="background-color:#1a3244; color:#ffffff; font-weight:bold;" | ACTION ZONE (km) | |||
|- | |||
| style="color:inherit;" | 2 || style="color:inherit;" | 460 || style="color:inherit;" | 100% || style="color:inherit;" | 3.5–6.0 | |||
|} | |} | ||
</div> | </div> | ||
</div></div></div> | </div></div></div> | ||
Latest revision as of 00:05, 9 July 2026

IX
13,200,000
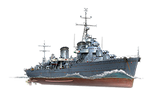
Tashkent — U.S.S.R. Tech Tree Tier IX Destroyer.
In the early 1930s, the Soviet Navy's authorities placed an order for a destroyer leader to be built by the Italian company Odero Terni Orlando. In 1937, a Project 20I destroyer named Tashkent was laid down at the Livorno dockyard. The leader joined the Black Sea Fleet of the U.S.S.R. in 1939, but the intended 130 mm B-2LM twin-gun turrets were fitted only in 1941. During World War II, she took part in the defense of Odessa and Sevastopol, where she was the last vessel to break through to the city under siege.
Pros
- High top speed.
- Powerful main battery.
- Large HP pool.
Cons
- High detectability.
- Poor torpedo range.
- Limited maneuverability
Ship Stats
Hull Information
Main Battery
Torpedoes
AA Defense
Depth Charges
Compatible Upgrades
| Slot 1 |
 |
 |

| ||
|---|---|---|---|---|---|
| Slot 2 |
 |
 |

| ||
| Slot 3 |
 |
 |
 |
 |

|
| Slot 4 |
 |
 |
 |

| |
| Slot 5 |
 |
 |
 |

| |
| Slot 6 |
 |
 |

|
Consumables
- Slot 1: Damage Control Party
 (5.0s action, 40.0s cooldown)
 - Slot 2: Repair Party
 (3 charges, 28.0s action, 80.0s cooldown, 83.5 hp/s) or Smoke Generator
  (4 charges, 30.0s action, 120.0s cooldown)
 - Slot 3: Engine Boost
 (3 charges, 120.0s action, 120.0s cooldown)
Gallery
WoWs Gallery

Historical Gallery
Categories:
