Ship:Benham
No edit summary |
Pockington (talk | contribs) added missing information on launch day |
||
| Line 23: | Line 23: | ||
| style="color:inherit;" | • Hit Points || style="color:inherit;" | 14500 | | style="color:inherit;" | • Hit Points || style="color:inherit;" | 14500 | ||
|- | |- | ||
| style="color:inherit;" | • Torpedo protection damage reduction (%) || style="color:inherit;" | | | style="color:inherit;" | • Torpedo protection damage reduction (%) || style="color:inherit;" | 0 | ||
|} | |} | ||
</div> | </div> | ||
| Line 31: | Line 31: | ||
! style="background-color:#1a3244; color:#ffffff; font-weight:bold;" | ARMOR DETAIL !! style="background-color:#1a3244; color:#ffffff; font-weight:bold;" | | ! style="background-color:#1a3244; color:#ffffff; font-weight:bold;" | ARMOR DETAIL !! style="background-color:#1a3244; color:#ffffff; font-weight:bold;" | | ||
|- | |- | ||
| style="color:inherit;" | • Belt (mm) || style="color:inherit;" | | | style="color:inherit;" | • Belt (mm) || style="color:inherit;" | 19 | ||
|- | |- | ||
| style="color:inherit;" | • Deck (mm) || style="color:inherit;" | | | style="color:inherit;" | • Deck (mm) || style="color:inherit;" | 19 | ||
|- | |- | ||
| style="color:inherit;" | • Superstructure (mm) || style="color:inherit;" | | | style="color:inherit;" | • Superstructure (mm) || style="color:inherit;" | 13 | ||
|- | |- | ||
| style="color:inherit;" | • Extremities (mm) || style="color:inherit;" | | | style="color:inherit;" | • Extremities (mm) || style="color:inherit;" | 19 | ||
|} | |} | ||
</div> | </div> | ||
| Line 150: | Line 150: | ||
<div style="border: 2px solid rgba(212,175,55,0.8); border-radius: 3px; margin-bottom: 1em; overflow: hidden;"> | <div style="border: 2px solid rgba(212,175,55,0.8); border-radius: 3px; margin-bottom: 1em; overflow: hidden;"> | ||
{| class="wikitable" style="margin:0; color:inherit; width:100%" | {| class="wikitable" style="margin:0; color:inherit; width:100%" | ||
! style="background-color:#1a3244; color:#ffffff; font-weight:bold;" | TORPEDO LAUNCHERS !! style="background-color:#1a3244; color:#ffffff; font-weight:bold;" | | ! style="background-color:#1a3244; color:#ffffff; font-weight:bold;" | TORPEDO LAUNCHERS !! style="background-color:#1a3244; color:#ffffff; font-weight:bold;" | 533 mm Mk15 | ||
|- | |- | ||
| style="color:inherit;" | • | | style="color:inherit;" | • Torpedo tubes (launchers × tubes) || style="color:inherit;" | 4 × 4 | ||
|- | |- | ||
| style="color:inherit;" | • Torpedo name || style="color:inherit;" | | | style="color:inherit;" | • Torpedo name || style="color:inherit;" | 533 mm Mk15 | ||
|- | |- | ||
| style="color:inherit;" | • Reload time (sec) || style="color:inherit;" | 85 | | style="color:inherit;" | • Reload time (sec) || style="color:inherit;" | 85 | ||
|- | |- | ||
| style="color:inherit;" | • 180° turn time (sec) || style="color:inherit;" | 7.2 | | style="color:inherit;" | • 180° turn time (sec) || style="color:inherit;" | 7.2 | ||
|- | |- | ||
| style="color:inherit;" | • Damage || style="color:inherit;" | | | style="color:inherit;" | • Damage || style="color:inherit;" | 15,200 | ||
|- | |- | ||
| style="color:inherit;" | • Range (km) || style="color:inherit;" | | | style="color:inherit;" | • Range (km) || style="color:inherit;" | 10.5 | ||
|- | |- | ||
| style="color:inherit;" | • Speed (kt) || style="color:inherit;" | 65 | | style="color:inherit;" | • Speed (kt) || style="color:inherit;" | 65 | ||
| Line 168: | Line 168: | ||
| style="color:inherit;" | • Detectability (km) || style="color:inherit;" | 1.4 | | style="color:inherit;" | • Detectability (km) || style="color:inherit;" | 1.4 | ||
|- | |- | ||
| style="color:inherit;" | • Flooding chance (%) || style="color:inherit;" | | | style="color:inherit;" | • Flooding chance (%) || style="color:inherit;" | 252 | ||
|} | |} | ||
</div> | </div> | ||
| Line 177: | Line 177: | ||
{| class="wikitable" style="margin:0 0 0.8em 0; width:100%; color:inherit;" | {| class="wikitable" style="margin:0 0 0.8em 0; width:100%; color:inherit;" | ||
! style="background-color:#1a3244; color:#ffffff; font-weight:bold;" | AA ARMAMENT !! style="background-color:#1a3244; color:#ffffff; font-weight:bold;" | MOUNTS × BARRELS | ! style="background-color:#1a3244; color:#ffffff; font-weight:bold;" | AA ARMAMENT !! style="background-color:#1a3244; color:#ffffff; font-weight:bold;" | MOUNTS × BARRELS | ||
|- | |||
| style="color:inherit;" | 127 mm || style="color:inherit;" | 4 × 1 | |||
|- | |- | ||
| style="color:inherit;" | 13 mm || style="color:inherit;" | 4 × 1 | | style="color:inherit;" | 13 mm || style="color:inherit;" | 4 × 1 | ||
| Line 186: | Line 188: | ||
|- | |- | ||
| style="color:inherit;" | Short-range || style="color:inherit;" | 45.5 || style="color:inherit;" | 95% || style="color:inherit;" | 1.5 | | style="color:inherit;" | Short-range || style="color:inherit;" | 45.5 || style="color:inherit;" | 95% || style="color:inherit;" | 1.5 | ||
|- | |||
| style="color:inherit;" | Long-range || style="color:inherit;" | 63 || style="color:inherit;" | 100% || style="color:inherit;" | 5.8 | |||
|} | |||
'''Damage by shell explosions''' | |||
{| class="wikitable" style="margin:0 0 0.8em 0; width:100%; color:inherit;" | |||
! style="background-color:#1a3244; color:#ffffff; font-weight:bold;" | EXPLOSIONS / SALVO !! style="background-color:#1a3244; color:#ffffff; font-weight:bold;" | DAMAGE !! style="background-color:#1a3244; color:#ffffff; font-weight:bold;" | HIT CHANCE !! style="background-color:#1a3244; color:#ffffff; font-weight:bold;" | ACTION ZONE (km) | |||
|- | |||
| style="color:inherit;" | 2 || style="color:inherit;" | 1540 || style="color:inherit;" | 100% || style="color:inherit;" | 3.5–5.8 | |||
|} | |} | ||
</div> | </div> | ||
| Line 198: | Line 209: | ||
| style="color:inherit;" | • Number of charges || style="color:inherit;" | 2 | | style="color:inherit;" | • Number of charges || style="color:inherit;" | 2 | ||
|- | |- | ||
| style="color:inherit;" | • Bombs per charge || style="color:inherit;" | | | style="color:inherit;" | • Bombs per charge || style="color:inherit;" | 6 | ||
|- | |- | ||
| style="color:inherit;" | • Reload time (sec) || style="color:inherit;" | 40.0 | | style="color:inherit;" | • Reload time (sec) || style="color:inherit;" | 40.0 | ||
Latest revision as of 21:54, 9 July 2026

IX
28,500 doubloons
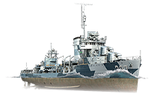
Benham — U.S.A. Premium Tier IX Destroyer.
Benham-class ships repeated the design of their predecessors while featuring more powerful machinery to achieve higher speed. The ships were armed with four torpedo launchers mounted along their sides, and the number of their guns was reduced from five to four. During the attack on Pearl Harbor, USS Benham was escorting aircraft carrier Enterprise to Midway. The destroyer participated in the Doolittle Raid, the Battle of Midway, and the second Battle of the Solomon Islands. On November 15, 1942, during the Battle of Guadalcanal, Benham took a torpedo hit, was abandoned by her crew, and eventually sank.
Pros
- High maneuverability
- Enhanced Smoke Generator consumable
- Large torpedo count with rapid torpedo tube reload
Cons
- Low HP Pool
- Low AA defense efficiency
- Poor shell ballistics
Ship Stats
Hull Information
Main Battery
Torpedoes
AA Defense
Depth Charges
Compatible Upgrades
| Slot 1 |
 |
 |

| ||
|---|---|---|---|---|---|
| Slot 2 |
 |
 |
 |

| |
| Slot 3 |
 |
 |
 |
 |

|
| Slot 4 |
 |
 |
 |

| |
| Slot 5 |
 |
 |
 |

| |
| Slot 6 |
 |
 |
 |

|
Consumables
- Slot 1: Damage Control Party
 (5.0s action, 40.0s cooldown)
 - Slot 2: Smoke Generator
 (3 charges, 30.0s action, 160.0s cooldown)
 - Slot 3: Engine Boost
 (3 charges, 120.0s action, 120.0s cooldown) or Defensive AA Fire
  (4 charges, 40.0s action, 80.0s cooldown)
