Ship:Forrest Sherman
No edit summary |
mNo edit summary |
||
| (One intermediate revision by one other user not shown) | |||
| Line 49: | Line 49: | ||
| style="color:inherit;" | • Turning circle radius (m) || style="color:inherit;" | 680 | | style="color:inherit;" | • Turning circle radius (m) || style="color:inherit;" | 680 | ||
|- | |- | ||
| style="color:inherit;" | • Rudder-shift time (sec) || style="color:inherit;" | | | style="color:inherit;" | • Rudder-shift time (sec) || style="color:inherit;" | 5.3 | ||
|} | |} | ||
</div> | </div> | ||
| Line 126: | Line 126: | ||
! style="background-color:#1a3244; color:#ffffff; font-weight:bold;" | SAP SHELL !! style="background-color:#1a3244; color:#ffffff; font-weight:bold;" | | ! style="background-color:#1a3244; color:#ffffff; font-weight:bold;" | SAP SHELL !! style="background-color:#1a3244; color:#ffffff; font-weight:bold;" | | ||
|- | |- | ||
| style="color:inherit;" | • Name || style="color:inherit;" | | | style="color:inherit;" | • Name || style="color:inherit;" | 127mm CS Mk42 | ||
|- | |- | ||
| style="color:inherit;" | • Maximum damage || style="color:inherit;" | 2700 | | style="color:inherit;" | • Maximum damage || style="color:inherit;" | 2700 | ||
| Line 135: | Line 135: | ||
|- | |- | ||
| style="color:inherit;" | • Penetration (mm) || style="color:inherit;" | 36 | | style="color:inherit;" | • Penetration (mm) || style="color:inherit;" | 36 | ||
|- | |- | ||
| style="color:inherit;" | • Ricochet start (°) || style="color:inherit;" | 65 | | style="color:inherit;" | • Ricochet start (°) || style="color:inherit;" | 65 | ||
|- | |- | ||
| style="color:inherit;" | • Always ricochet (°) || style="color:inherit;" | 75 | | style="color:inherit;" | • Always ricochet (°) || style="color:inherit;" | 75 | ||
|} | |} | ||
</div> | </div> | ||
| Line 152: | Line 146: | ||
<div style="border: 2px solid rgba(212,175,55,0.8); border-radius: 3px; margin-bottom: 1em; overflow: hidden;"> | <div style="border: 2px solid rgba(212,175,55,0.8); border-radius: 3px; margin-bottom: 1em; overflow: hidden;"> | ||
{| class="wikitable" style="margin:0; color:inherit; width:100%" | {| class="wikitable" style="margin:0; color:inherit; width:100%" | ||
! style="background-color:#1a3244; color:#ffffff; font-weight:bold;" | TORPEDO LAUNCHERS !! style="background-color:#1a3244; color:#ffffff; font-weight:bold;" | | ! style="background-color:#1a3244; color:#ffffff; font-weight:bold;" | TORPEDO LAUNCHERS !! style="background-color:#1a3244; color:#ffffff; font-weight:bold;" | Mk17 | ||
|- | |- | ||
| style="color:inherit;" | • | | style="color:inherit;" | • Torpedo tubes (launchers × tubes) || style="color:inherit;" | 4 × 1 | ||
|- | |- | ||
| style="color:inherit;" | • Torpedo name || style="color:inherit;" | Mk17 | | style="color:inherit;" | • Torpedo name || style="color:inherit;" | Mk17 | ||
|- | |- | ||
| style="color:inherit;" | • Reload time (sec) || style="color:inherit;" | 73 | | style="color:inherit;" | • Reload time (sec) || style="color:inherit;" | 73 | ||
|- | |- | ||
| style="color:inherit;" | • 180° turn time (sec) || style="color:inherit;" | 7.2 | | style="color:inherit;" | • 180° turn time (sec) || style="color:inherit;" | 7.2 | ||
|- | |- | ||
| style="color:inherit;" | • Damage || style="color:inherit;" | | | style="color:inherit;" | • Damage || style="color:inherit;" | 17,900 | ||
|- | |- | ||
| style="color:inherit;" | • Range (km) || style="color:inherit;" | | | style="color:inherit;" | • Range (km) || style="color:inherit;" | 16.5 | ||
|- | |- | ||
| style="color:inherit;" | • Speed (kt) || style="color:inherit;" | 66 | | style="color:inherit;" | • Speed (kt) || style="color:inherit;" | 66 | ||
| Line 170: | Line 164: | ||
| style="color:inherit;" | • Detectability (km) || style="color:inherit;" | 1.4 | | style="color:inherit;" | • Detectability (km) || style="color:inherit;" | 1.4 | ||
|- | |- | ||
| style="color:inherit;" | • Flooding chance (%) || style="color:inherit;" | | | style="color:inherit;" | • Flooding chance (%) || style="color:inherit;" | 301 | ||
|} | |} | ||
</div> | </div> | ||
| Line 179: | Line 173: | ||
{| class="wikitable" style="margin:0 0 0.8em 0; width:100%; color:inherit;" | {| class="wikitable" style="margin:0 0 0.8em 0; width:100%; color:inherit;" | ||
! style="background-color:#1a3244; color:#ffffff; font-weight:bold;" | AA ARMAMENT !! style="background-color:#1a3244; color:#ffffff; font-weight:bold;" | MOUNTS × BARRELS | ! style="background-color:#1a3244; color:#ffffff; font-weight:bold;" | AA ARMAMENT !! style="background-color:#1a3244; color:#ffffff; font-weight:bold;" | MOUNTS × BARRELS | ||
|- | |||
| style="color:inherit;" | 127 mm || style="color:inherit;" | 3 × 1 | |||
|- | |- | ||
| style="color:inherit;" | 76 mm || style="color:inherit;" | 2 × 2 | | style="color:inherit;" | 76 mm || style="color:inherit;" | 2 × 2 | ||
| Line 188: | Line 184: | ||
|- | |- | ||
| style="color:inherit;" | Mid-range || style="color:inherit;" | 80.5 || style="color:inherit;" | 100% || style="color:inherit;" | 4.0 | | style="color:inherit;" | Mid-range || style="color:inherit;" | 80.5 || style="color:inherit;" | 100% || style="color:inherit;" | 4.0 | ||
|- | |||
| style="color:inherit;" | Long-range || style="color:inherit;" | 98 || style="color:inherit;" | 100% || style="color:inherit;" | 6.0 | |||
|} | |||
'''Damage by shell explosions''' | |||
{| class="wikitable" style="margin:0 0 0.8em 0; width:100%; color:inherit;" | |||
! style="background-color:#1a3244; color:#ffffff; font-weight:bold;" | EXPLOSIONS / SALVO !! style="background-color:#1a3244; color:#ffffff; font-weight:bold;" | DAMAGE !! style="background-color:#1a3244; color:#ffffff; font-weight:bold;" | HIT CHANCE !! style="background-color:#1a3244; color:#ffffff; font-weight:bold;" | ACTION ZONE (km) | |||
|- | |||
| style="color:inherit;" | 4 || style="color:inherit;" | 1750 || style="color:inherit;" | 100% || style="color:inherit;" | 3.5–6.0 | |||
|} | |} | ||
</div> | </div> | ||
| Line 200: | Line 205: | ||
| style="color:inherit;" | • Number of charges || style="color:inherit;" | 2 | | style="color:inherit;" | • Number of charges || style="color:inherit;" | 2 | ||
|- | |- | ||
| style="color:inherit;" | • Bombs per charge || style="color:inherit;" | | | style="color:inherit;" | • Bombs per charge || style="color:inherit;" | 16 | ||
|- | |- | ||
| style="color:inherit;" | • Reload time (sec) || style="color:inherit;" | 40.0 | | style="color:inherit;" | • Reload time (sec) || style="color:inherit;" | 40.0 | ||
| Line 233: | Line 238: | ||
</gallery> | </gallery> | ||
</div></div></div> | </div></div></div> | ||
{{WoWS Ship Changelog Insert|1= | |||
*Preliminary characteristics. | |||
*Main battery reload time decreased from 2.5 to 2 s. | |||
*Engine Boost consumable replaced with Hydroacoustic Search consumable. | |||
*Main battery reload time decreased from 2 to 1.5 s. | |||
*Torpedo tubes reload time decreased from 81 to 73 s. | |||
*Charges of the Smoke Generator consumable decreased from 3 to 2. | |||
*Update 0.10.11: | |||
**Available for testing by supertesters in the game starting from Update 0.10.11. | |||
*Update 0.11.1: | |||
**Upon Update release, Sherman was available exclusively from the new Firepower containers (2,500 doubloons each) at a drop rate of 5%. | |||
**Two weeks after the patch went live (March 2, 2022): | |||
***Available for purchase in the Armory for 232,000 Coal. | |||
***Available for purchase in the Armory for 34,950 doubloons and in the Premium store. | |||
*Update 0.11.3: | |||
**Minor fixes to geometry and textures of the ship. | |||
*Update 0.11.7: | |||
**Fixed the settings for the Free Look Camera available in battle when clicking the right mouse button. | |||
*Update 15.4: | |||
**Engine Boost consumable added. It will share a slot with Defensive AA Fire and will have the following parameters: | |||
***Maximum speed: +8% | |||
***Number of charges: 3 | |||
***Duration time: 120s | |||
***Cooldown time: 120s | |||
}} | |||
[[Category:Ships of U.S.A.]] | [[Category:Ships of U.S.A.]] | ||
Latest revision as of 04:45, 3 August 2026

X
26,000 doubloons
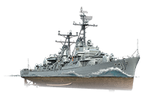
Forrest Sherman — U.S.A. Special Tier X Destroyer.
After the construction of the large and expensive Mitscher class of destroyers, the next series was supposed to be a more economical option. The main focus of the design was on anti-aircraft rather than anti-submarine defenses. The main armament was represented by automatic single mounts with long-barreled 127 mm guns. In the 1950s and 70s, USS Forrest Sherman participated in training exercises and ceremonial operations.
This ship gains access to HE and SAP as main battery ammunition options
Pros
- High damage per minute
- Enhanced Smoke Generator consumable
- Access to the Hydroacoustic Search consumable
Cons
- High detectability
- Low speed
- Small torpedo count with limited torpedo launch angles
Ship Stats
Hull Information
Main Battery
Torpedoes
AA Defense
Depth Charges
Compatible Upgrades
| Slot 1 |
 |
 |

| ||
|---|---|---|---|---|---|
| Slot 2 |
 |
 |
 |
 |

|
| Slot 3 |
 |
 |
 |
 |

|
| Slot 4 |
 |
 |
 |

| |
| Slot 5 |
 |
 |
 |

| |
| Slot 6 |
 |
 |
 |

|
Consumables
- Slot 1: Damage Control Party
 (5.0s action, 40.0s cooldown)
 - Slot 2: Smoke Generator
 (2 charges, 30.0s action, 160.0s cooldown)
 - Slot 3: Hydroacoustic Search
 (3 charges, 100.0s action, 120.0s cooldown)
 - Slot 4: Engine Boost
 (3 charges, 120.0s action, 120.0s cooldown) or Defensive AA Fire
  (4 charges, 40.0s action, 80.0s cooldown)
Gallery
WoWs Gallery

Historical Gallery
Ship Change Log
Categories:
