Ship:Rhein
No edit summary |
No edit summary |
||
| (2 intermediate revisions by the same user not shown) | |||
| Line 23: | Line 23: | ||
| style="color:inherit;" | • Hit Points || style="color:inherit;" | 31500 || style="color:inherit;" | 32300 | | style="color:inherit;" | • Hit Points || style="color:inherit;" | 31500 || style="color:inherit;" | 32300 | ||
|- | |- | ||
| style="color:inherit;" | • Torpedo protection damage reduction (%) || colspan="2" style="color:inherit;" | | | style="color:inherit;" | • Torpedo protection damage reduction (%) || colspan="2" style="color:inherit;" | 16 | ||
|} | |} | ||
</div> | </div> | ||
| Line 31: | Line 31: | ||
! style="background-color:#1a3244; color:#ffffff; font-weight:bold;" | ARMOR DETAIL !! style="background-color:#1a3244; color:#ffffff; font-weight:bold;" | | ! style="background-color:#1a3244; color:#ffffff; font-weight:bold;" | ARMOR DETAIL !! style="background-color:#1a3244; color:#ffffff; font-weight:bold;" | | ||
|- | |- | ||
| style="color:inherit;" | • Belt (mm) || style="color:inherit;" | | | style="color:inherit;" | • Belt (mm) || style="color:inherit;" | 25 | ||
|- | |- | ||
| style="color:inherit;" | • Deck (mm) || style="color:inherit;" | | | style="color:inherit;" | • Deck (mm) || style="color:inherit;" | 20 | ||
|- | |- | ||
| style="color:inherit;" | • Superstructure (mm) || style="color:inherit;" | | | style="color:inherit;" | • Superstructure (mm) || style="color:inherit;" | 10 | ||
|- | |- | ||
| style="color:inherit;" | • Extremities (mm) || style="color:inherit;" | | | style="color:inherit;" | • Extremities (mm) || style="color:inherit;" | 16 | ||
|} | |} | ||
</div> | </div> | ||
| Line 49: | Line 49: | ||
| style="color:inherit;" | • Turning circle radius (m) || style="color:inherit;" | 760 || style="color:inherit;" | 760 | | style="color:inherit;" | • Turning circle radius (m) || style="color:inherit;" | 760 || style="color:inherit;" | 760 | ||
|- | |- | ||
| style="color:inherit;" | • Rudder-shift time (sec) || style="color:inherit;" | | | style="color:inherit;" | • Rudder-shift time (sec) || style="color:inherit;" | 12.1 || style="color:inherit;" | 8.6 | ||
|} | |} | ||
</div> | </div> | ||
| Line 85: | Line 85: | ||
| style="color:inherit;" | • Name || colspan="2" style="color:inherit;" | 88 mm Spr.Gr. | | style="color:inherit;" | • Name || colspan="2" style="color:inherit;" | 88 mm Spr.Gr. | ||
|- | |- | ||
| style="color:inherit;" | • Arrangement || colspan="2" style="color:inherit;" | | | style="color:inherit;" | • Arrangement || colspan="2" style="color:inherit;" | 2x2 88mm | ||
|- | |- | ||
| style="color:inherit;" | • Rate of fire (shots/min) || style="color:inherit;" | 15.0 || style="color:inherit;" | 11.3 | | style="color:inherit;" | • Rate of fire (shots/min) || style="color:inherit;" | 15.0 || style="color:inherit;" | 11.3 | ||
| Line 99: | Line 99: | ||
</div> | </div> | ||
'''Rhein (B)''' | |||
<div style="border: 2px solid rgba(212,175,55,0.8); border-radius: 3px; margin-bottom: 1em; overflow: hidden;"> | |||
{| class="wikitable" style="margin:0; color:inherit; width:100%" | |||
! style="background-color:#1a3244; color:#ffffff; font-weight:bold;" | SECONDARY ARMAMENT 1 !! style="background-color:#1a3244; color:#ffffff; font-weight:bold;" | Automatic !! style="background-color:#1a3244; color:#ffffff; font-weight:bold;" | Manual control | |||
|- | |||
| style="color:inherit;" | • Shell type || colspan="2" style="color:inherit;" | HE | |||
|- | |||
| style="color:inherit;" | • Name || colspan="2" style="color:inherit;" | 105 mm Spr.Gr. Kz. | |||
|- | |||
| style="color:inherit;" | • Arrangement || colspan="2" style="color:inherit;" | 2x2 105mm | |||
|- | |||
| style="color:inherit;" | • Rate of fire (shots/min) || style="color:inherit;" | 71.6 || style="color:inherit;" | | |||
|- | |||
| style="color:inherit;" | • Maximum damage || colspan="2" style="color:inherit;" | 1200 | |||
|- | |||
| style="color:inherit;" | • Shell velocity (m/s) || colspan="2" style="color:inherit;" | 900 | |||
|- | |||
| style="color:inherit;" | • Penetration (mm) || colspan="2" style="color:inherit;" | 26 | |||
|- | |||
| style="color:inherit;" | • Fire chance (%) || colspan="2" style="color:inherit;" | 5.0% | |||
|} | |||
</div> | |||
</div></div></div> | </div></div></div> | ||
| Line 127: | Line 149: | ||
! style="background-color:#1a3244; color:#ffffff; font-weight:bold;" | EXPLOSIONS / SALVO !! style="background-color:#1a3244; color:#ffffff; font-weight:bold;" | DAMAGE !! style="background-color:#1a3244; color:#ffffff; font-weight:bold;" | HIT CHANCE !! style="background-color:#1a3244; color:#ffffff; font-weight:bold;" | ACTION ZONE (km) | ! style="background-color:#1a3244; color:#ffffff; font-weight:bold;" | EXPLOSIONS / SALVO !! style="background-color:#1a3244; color:#ffffff; font-weight:bold;" | DAMAGE !! style="background-color:#1a3244; color:#ffffff; font-weight:bold;" | HIT CHANCE !! style="background-color:#1a3244; color:#ffffff; font-weight:bold;" | ACTION ZONE (km) | ||
|- | |- | ||
| style="color:inherit;" | 1 || style="color:inherit;" | | | style="color:inherit;" | 1 || style="color:inherit;" | 910 || style="color:inherit;" | 100% || style="color:inherit;" | 3.5–4.6 | ||
|} | |} | ||
| Line 153: | Line 175: | ||
! style="background-color:#1a3244; color:#ffffff; font-weight:bold;" | EXPLOSIONS / SALVO !! style="background-color:#1a3244; color:#ffffff; font-weight:bold;" | DAMAGE !! style="background-color:#1a3244; color:#ffffff; font-weight:bold;" | HIT CHANCE !! style="background-color:#1a3244; color:#ffffff; font-weight:bold;" | ACTION ZONE (km) | ! style="background-color:#1a3244; color:#ffffff; font-weight:bold;" | EXPLOSIONS / SALVO !! style="background-color:#1a3244; color:#ffffff; font-weight:bold;" | DAMAGE !! style="background-color:#1a3244; color:#ffffff; font-weight:bold;" | HIT CHANCE !! style="background-color:#1a3244; color:#ffffff; font-weight:bold;" | ACTION ZONE (km) | ||
|- | |- | ||
| style="color:inherit;" | 1 || style="color:inherit;" | | | style="color:inherit;" | 1 || style="color:inherit;" | 1120 || style="color:inherit;" | 100% || style="color:inherit;" | 3.5–5.2 | ||
|} | |} | ||
</div> | </div> | ||
</div></div></div> | </div></div></div> | ||
<div class="b-popup"><div class="b-popup_head js-tech-nav_head"><div><h2>Aircraft</h2></div><span class="b-tech-nav_arrow"></span></div><div class="b-popup_content" style="display: none;"><div> | <div class="b-popup"><div class="b-popup_head js-tech-nav_head"><div><h2>Aircraft</h2></div><span class="b-tech-nav_arrow"></span></div><div class="b-popup_content" style="display: none;"><div> | ||
| Line 165: | Line 188: | ||
|- | |- | ||
| style="color:inherit;" | • Cruise speed (kt) || style="color:inherit;" | 114 | | style="color:inherit;" | • Cruise speed (kt) || style="color:inherit;" | 114 | ||
|- | |||
| style="color:inherit;" | • Maximum speed (kt) || style="color:inherit;" | 154 | |||
|- | |- | ||
| style="color:inherit;" | • Squadrons || style="color:inherit;" | 1 | | style="color:inherit;" | • Squadrons || style="color:inherit;" | 1 | ||
|- | |- | ||
| style="color:inherit;" | • | | style="color:inherit;" | • Aircraft per squadron || style="color:inherit;" | 6 | ||
|- | |- | ||
| style="color:inherit;" | • Plane regeneration time (sec) || style="color:inherit;" | | | style="color:inherit;" | • Plane regeneration time (sec) || style="color:inherit;" | 40.0 | ||
|- | |- | ||
| style="color:inherit;" | • Ammo name || style="color:inherit;" | | | style="color:inherit;" | • Ammo name || style="color:inherit;" | RZ-73 | ||
|- | |- | ||
| style="color:inherit;" | • Ammo type || style="color:inherit;" | ROCKET | | style="color:inherit;" | • Ammo type || style="color:inherit;" | AP ROCKET | ||
|- | |- | ||
| style="color:inherit;" | • Rockets in payload || style="color:inherit;" | 2 | | style="color:inherit;" | • Rockets in payload || style="color:inherit;" | 2 | ||
|- | |- | ||
| style="color:inherit;" | • Damage per rocket || style="color:inherit;" | 1700 | | style="color:inherit;" | • Damage per rocket || style="color:inherit;" | 1700 | ||
|- | |||
| style="color:inherit;" | • Armor penetration (mm) || style="color:inherit;" | 141 | |||
|- | |||
| style="color:inherit;" | • Threshold (mm) || style="color:inherit;" | 25 | |||
|- | |||
| style="color:inherit;" | • Fuse time (sec) || style="color:inherit;" | 0.022 | |||
|- | |- | ||
| style="color:inherit;" | • Preparation time (sec) || style="color:inherit;" | 5.0 | | style="color:inherit;" | • Preparation time (sec) || style="color:inherit;" | 5.0 | ||
| Line 190: | Line 221: | ||
| style="color:inherit;" | • Hit points || style="color:inherit;" | 1300 | | style="color:inherit;" | • Hit points || style="color:inherit;" | 1300 | ||
|- | |- | ||
| style="color:inherit;" | • | | style="color:inherit;" | • Cruise speed (kt) || style="color:inherit;" | 111 | ||
|- | |||
| style="color:inherit;" | • Maximum speed (kt) || style="color:inherit;" | 151 | |||
|- | |- | ||
| style="color:inherit;" | • Squadron size || style="color:inherit;" | 6 | | style="color:inherit;" | • Squadron size || style="color:inherit;" | 6 | ||
| Line 198: | Line 231: | ||
| style="color:inherit;" | • Aircraft on deck || style="color:inherit;" | 9 | | style="color:inherit;" | • Aircraft on deck || style="color:inherit;" | 9 | ||
|- | |- | ||
| style="color:inherit;" | • Preparation time (sec) || style="color:inherit;" | | | style="color:inherit;" | • Preparation time (sec) || style="color:inherit;" | 54.0 | ||
|- | |- | ||
| style="color:inherit;" | • Detectability (km) || style="color:inherit;" | 10.0 | | style="color:inherit;" | • Detectability (km) || style="color:inherit;" | 10.0 | ||
|- | |- | ||
| style="color:inherit;" | • Torpedo name || style="color:inherit;" | | | style="color:inherit;" | • Torpedo name || style="color:inherit;" | F5c | ||
|- | |- | ||
| style="color:inherit;" | • Torpedoes in payload || style="color:inherit;" | 1 | | style="color:inherit;" | • Torpedoes in payload || style="color:inherit;" | 1 | ||
|- | |- | ||
| style="color:inherit;" | • Torpedo damage || style="color:inherit;" | | | style="color:inherit;" | • Torpedo damage || style="color:inherit;" | 3000 | ||
|- | |- | ||
| style="color:inherit;" | • Flood chance (%) || style="color:inherit;" | | | style="color:inherit;" | • Flood chance (%) || style="color:inherit;" | 25 | ||
|- | |- | ||
| style="color:inherit;" | • Torpedo speed (kt) || style="color:inherit;" | 50 | | style="color:inherit;" | • Torpedo speed (kt) || style="color:inherit;" | 50 | ||
|- | |- | ||
| style="color:inherit;" | • Arming distance (m) || style="color:inherit;" | | | style="color:inherit;" | • Arming distance (m) || style="color:inherit;" | 403 | ||
|- | |- | ||
| style="color:inherit;" | • Torpedo range (km) || style="color:inherit;" | 0 | | style="color:inherit;" | • Torpedo range (km) || style="color:inherit;" | 2.0 | ||
|- | |- | ||
| style="color:inherit;" | • Squadrons || style="color:inherit;" | 1 | | style="color:inherit;" | • Squadrons || style="color:inherit;" | 1 | ||
| Line 226: | Line 259: | ||
| style="color:inherit;" | • Hit points || style="color:inherit;" | 1160 | | style="color:inherit;" | • Hit points || style="color:inherit;" | 1160 | ||
|- | |- | ||
| style="color:inherit;" | • | | style="color:inherit;" | • Cruise speed (kt) || style="color:inherit;" | 96 | ||
|- | |||
| style="color:inherit;" | • Maximum speed (kt) || style="color:inherit;" | 136 | |||
|- | |- | ||
| style="color:inherit;" | • Squadron size || style="color:inherit;" | 6 | | style="color:inherit;" | • Squadron size || style="color:inherit;" | 6 | ||
| Line 234: | Line 269: | ||
| style="color:inherit;" | • Aircraft on deck || style="color:inherit;" | 9 | | style="color:inherit;" | • Aircraft on deck || style="color:inherit;" | 9 | ||
|- | |- | ||
| style="color:inherit;" | • Preparation time (sec) || style="color:inherit;" | | | style="color:inherit;" | • Preparation time (sec) || style="color:inherit;" | 50.0 | ||
|- | |- | ||
| style="color:inherit;" | • Detectability (km) || style="color:inherit;" | 10.0 | | style="color:inherit;" | • Detectability (km) || style="color:inherit;" | 10.0 | ||
|- | |- | ||
| style="color:inherit;" | • Bomb name || style="color:inherit;" | | | style="color:inherit;" | • Bomb name || style="color:inherit;" | PC 500a | ||
|- | |- | ||
| style="color:inherit;" | • Bomb type || style="color:inherit;" | BOMB | | style="color:inherit;" | • Bomb type || style="color:inherit;" | AP BOMB | ||
|- | |- | ||
| style="color:inherit;" | • Bombs in payload || style="color:inherit;" | 1 | | style="color:inherit;" | • Bombs in payload || style="color:inherit;" | 1 | ||
|- | |- | ||
| style="color:inherit;" | • Bomb damage || style="color:inherit;" | 4000 | | style="color:inherit;" | • Bomb damage || style="color:inherit;" | 4000 | ||
|- | |||
| style="color:inherit;" | • Armor penetration (mm) || style="color:inherit;" | 169 | |||
|- | |||
| style="color:inherit;" | • Threshold (mm) || style="color:inherit;" | 20 | |||
|- | |||
| style="color:inherit;" | • Fuse time (sec) || style="color:inherit;" | 0.025 | |||
|- | |- | ||
| style="color:inherit;" | • Squadrons || style="color:inherit;" | 1 | | style="color:inherit;" | • Squadrons || style="color:inherit;" | 1 | ||
Latest revision as of 21:30, 12 August 2026

IV
1,000,000
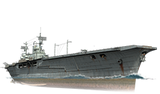
Rhein — Germany Tech Tree Tier IV Aircraft Carrier.
During the 1930s and 1940s, Germany developed several aviation-capable ship designs, including a small carrier specifically intended for serial production during wartime. Her design needed to be budget-friendly and suitable for mass production at civil shipyards. Given the ongoing war, it would have been possible to construct such a ship no earlier than 1944. German engineers envisioned a flight deck with a minimum length of 170 m and the implementation of catapults for takeoff.
Pros
- High secondary battery efficiency
- High AA defense efficiency
- Fast torpedoes with below average damage and low arming distance available
- Above average plane speed
Cons
- AP only rockets and dive bombs available
- Planes have a small HP pool
Ship Stats
Hull Information
Secondary Battery
AA Defense
Aircraft
Compatible Upgrades
| Slot 1 |
 |
 |

|
|---|---|---|---|
| Slot 2 |
 |

|
Consumables
- Slot 1: Damage Control Party
 (30.0s action, 70.0s cooldown)
 - Slot 2: Patrol Fighter
 (4 charges, 600.0s action, 40.0s cooldown)
Gallery
WoWs Gallery
Historical Gallery
Ship Change Log
Categories:
