|
|
| Line 1: |
Line 1: |
| <!-- DO NOT EDIT OR DELETE LINES WITH COMMENTS (it's look like as this or next line) -->
| | {{#vardefine:ship_name|Repulse B}} |
| <!-- Add |Ship=code for manual override -->
| | __NOTOC____NOEDITSECTION__ |
| {{WoWs_Ship
| |
| |Promo=<!-- in case of gift or promo ship write conditions to get it. (optional)-->
| |
| ''{{#var:ship_name}}'' was first released for sale on 3 November 2023 in Update 12.9.
| |
|
| |
|
| |Anno=<!-- you can write below short description for the ship. It will replace the default one. --> | | <div class="b-description gw-frame-1"><div class="b-description-img b-description-img__indent b-description-img__single"><div style="width:160px; height:102px; opacity:.5; border-radius:2px; position:absolute; left:0; top:0; z-index:1; -webkit-transition:all 0.2s ease-out 0.1s; transition:all 0.2s ease-out 0.1s;">[[File:Wows_anno_flag_uk.png|160px]]</div><div class="l-description-img_class"><span class="b-description-img_type b-description-img_type__Battleship b-description-img_type__Battleship-Premium"></span><span class="b-description-img_class">VI</span></div><div class="b-description-img_vehicle">[[File:Ship_PBSB536_Black_Repulse.png|160px|link=|left]]</div><div class="l-description-img_price"><span class="b-description-img_price b-description-img_price__gold"><span title="''{{#var:ship_name}}'' was first released for sale on DD Month YYYY.">5,500 doubloons</span></span></div></div><p>[[Ship:{{#var:ship_name}}|{{#var:ship_name}}]] — U.K. Premium Tier VI [[Ship:Battleship|Battleship]].</p><p>The second ship of the Renown class—HMS Repulse—was laid down in 1915 and entered service in 1916. She took part in the second Battle of Heligoland Bight. Between 1923 and 1924, the ship participated in the round-the-world Empire Cruise and protected international shipping routes during the Spanish Civil War. At the beginning of World War II, she participated in the hunt for Bismarck and the Norwegian campaign. In 1941, the ship joined Force Z, which was supposed to curb Japanese aggression in the Far East. On December 10, 1941, Repulse was sunk by Japanese aircraft in the South China Sea.</p><p> </p></div> |
|
| |
|
| |Performance=
| | ===Pros=== |
| {{AA Sidebar Warning Insert}}
| | * Pro 1 |
| <!--
| | * Pro 2 |
| Insert the PERFORMANCE SECTION below.
| |
| See the [https://wiki.wargaming.net/en/Ship:Style_Guide Style Guide] for guidelines. -->
| |
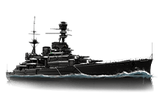
| ''{{#var:ship_name}}'', or ''Repulse Black'', is a clone of ''[[Repulse]]'' with an attractive black skin.
| |
|
| |
|
| Originally laid down as an improved Revenge-class battleship, the Royal Navy suspended construction on ''{{#var:ship_name}}'' and her sister ''Renown'' when it was thought that they wouldn't be completed in time to participate in the First World War. After the success of battlecruisers at the battle of the Falkland Islands, construction restarted, though ''{{#var:ship_name}}'' would see little service in the war However, between the wars, she received two extensive refits to increase her armament, armor and torpedo protection. In World War Two ''{{#var:ship_name}}'' participated in unsuccessful searches for ''[[Gneisenau]]'', and ''[[Scharnhorst]]'', before her redeployment to the Pacific with the ''Prince of Wales'' as part of Force Z. On December 10th, 1941, both capital ships were sunk by Japanese torpedo bombers when attempting to intercept Japanese landings in Malaya.
| | ===Cons=== |
| | * Con 1 |
| | * Con 2 |
|
| |
|
| <h4>The Ship</h4>
| |
| ''{{#var:ship_name}}'' drastically differs from her nation's Tier VI battleship counterparts. Despite losing a twin 381mm turret compared to ''[[Warspite]]'' and ''[[Queen Elizabeth]]'', she makes up for it with battlecruiser dispersion, making ''{{#var:ship_name}}'' the most accurate battleship at Tier VI. As a battlecruiser, ''{{#var:ship_name}}'' trades the heavier armor seen on ''Warspite'' and ''Queen Elizabeth'' for a quick top speed of 31.7 knots, faster than all other battleships in her tier.
| |
|
| |
|
| <h4>Armor</h4> | | ==Ship Stats== |
| ''{{#var:ship_name}}’s'' bow and stern protection is only 16mm compared to most other Tier VI battleships that have 26mm bow and stern plating. This allows every ship with a gun caliber of 228mm or higher to overmatch her bow and stern. The 26mm torpedo protection reaches just above the waterline, allowing well aimed shots along the waterline to penetrate the 229mm plated casemate armor belt protecting the citadel. The main armor belt is covered in 152mm plating with a lighter 38mm belt up to the deck, protecting the citadel well from mid and small caliber salvos. ''{{#var:ship_name}}'' has a large superstructure that is covered in 16mm plating, allowing for smaller caliber shells to penetrate and deal damage.
| | <div class="b-popup"><div class="b-popup_head js-tech-nav_head"><div><h2>Hull Information</h2></div><span class="b-tech-nav_arrow"></span></div><div class="b-popup_content" style="display: none;"><div> |
| | <div style="border: 2px solid rgba(212,175,55,0.8); border-radius: 3px; margin-bottom: 1em; overflow: hidden;"> |
| | {| class="wikitable" style="margin:0; color:inherit; width:100%" |
| | ! style="background-color:#1a3244; color:#ffffff; font-weight:bold;" | SURVIVABILITY !! style="background-color:#1a3244; color:#ffffff; font-weight:bold;" | |
| | |- |
| | | style="color:inherit;" | • Hit Points || style="color:inherit;" | 56100 |
| | |- |
| | | style="color:inherit;" | • Torpedo protection damage reduction (%) || style="color:inherit;" | — |
| | |} |
| | </div> |
|
| |
|
| <h4>Armament</h4> | | <div style="border: 2px solid rgba(212,175,55,0.8); border-radius: 3px; margin-bottom: 1em; overflow: hidden;"> |
| ''{{#var:ship_name}}'' is armed with three twin 381mm turrets with two mounted forward, and one aft. While being the same guns found on ''[[Warspite]]'' and ''[[Queen Elizabeth]]'', ''{{#var:ship_name}}'' has the same dispersion formula found on most other battlecruisers, but benefits from tighter dispersion with a maximum dispersion of 149m and sigma of 2.0. She also reloads three seconds faster than her cousins at 25 seconds. Pairing this excellent accuracy and reload with a respectable range of 19.8km, ''{{#var:ship_name}}'' can comfortably fight at any range and consistently deal damage.
| | {| class="wikitable" style="margin:0; color:inherit; width:100%" |
| | ! style="background-color:#1a3244; color:#ffffff; font-weight:bold;" | ARMOR DETAIL !! style="background-color:#1a3244; color:#ffffff; font-weight:bold;" | |
| | |- |
| | | style="color:inherit;" | • Belt (mm) || style="color:inherit;" | — |
| | |- |
| | | style="color:inherit;" | • Deck (mm) || style="color:inherit;" | — |
| | |- |
| | | style="color:inherit;" | • Superstructure (mm) || style="color:inherit;" | — |
| | |- |
| | | style="color:inherit;" | • Extremities (mm) || style="color:inherit;" | — |
| | |} |
| | </div> |
|
| |
|
| <h4>Anti-Aircraft</h4> | | <div style="border: 2px solid rgba(212,175,55,0.8); border-radius: 3px; margin-bottom: 1em; overflow: hidden;"> |
| ''{{#var:ship_name}}'' does not have the best AA armament when it comes to Tier VI battleships. Hers is the shortest range at only 4km, with long-range continuous damage of only 28 and one weak flak burst.. The mid range AA suite has a firing range of 2.5km and continuous damage of 140. The short range AA batteries have a maximum range of 2km and continuous damage of 106. Players should stick with allies to have a better chance at fending off incoming carrier attacks.
| | {| class="wikitable" style="margin:0; color:inherit; width:100%" |
| | ! style="background-color:#1a3244; color:#ffffff; font-weight:bold;" | MANEUVERABILITY !! style="background-color:#1a3244; color:#ffffff; font-weight:bold;" | |
| | |- |
| | | style="color:inherit;" | • Maximum speed (kt) || style="color:inherit;" | 31.7 |
| | |- |
| | | style="color:inherit;" | • Turning circle radius (m) || style="color:inherit;" | 860 |
| | |- |
| | | style="color:inherit;" | • Rudder-shift time (sec) || style="color:inherit;" | 18.8 |
| | |} |
| | </div> |
|
| |
|
| <h4>Battle-Performance</h4> | | <div style="border: 2px solid rgba(212,175,55,0.8); border-radius: 3px; margin-bottom: 1em; overflow: hidden;"> |
| ''{{#var:ship_name}}'' should use her high speed to get to a flank early in the battle and provide crossfire onto enemy cruisers and battleships. Due to the lack of armor, engaging at mid to long range and using her accurate salvoes to focus broadside enemies. If the ship becomes the target of focus fire, ''{{#var:ship_name}}'' can use her stealthy concealment of 12.57km with <u>Concealment Expert</u> and {{Engine Boost}} to quickly relocate to a different position. She should stick with a supporting cruiser to help fend off attacks from enemy aircraft and destroyers. Overall, ''{{#var:ship_name}}'' is a great support and flanking battlecruiser that can quickly redeploy to other parts of the map to support pushes or retreats.
| | {| class="wikitable" style="margin:0; color:inherit; width:100%" |
| | ! style="background-color:#1a3244; color:#ffffff; font-weight:bold;" | CONCEALMENT !! style="background-color:#1a3244; color:#ffffff; font-weight:bold;" | |
| | |- |
| | | style="color:inherit;" | • Detectability by sea (km) || style="color:inherit;" | 13.97 |
| | |- |
| | | style="color:inherit;" | • Detectability by air (km) || style="color:inherit;" | 9.62 |
| | |- |
| | | style="color:inherit;" | • Detectability after firing main guns in smoke (km) || style="color:inherit;" | 13.19 |
| | |- |
| | | style="color:inherit;" | • Detectability by depths (km) || style="color:inherit;" | 9.62 |
| | |} |
| | </div> |
|
| |
|
| |Pros=<!-- write list of positive points below. use * as in ordinary wiki-list. -->
| | </div></div></div> |
| * Fastest battleship at Tier VI.
| | <div class="b-popup"><div class="b-popup_head js-tech-nav_head"><div><h2>Main Battery</h2></div><span class="b-tech-nav_arrow"></span></div><div class="b-popup_content" style="display: none;"><div><div style="border: 2px solid rgba(212,175,55,0.8); border-radius: 3px; margin-bottom: 1em; overflow: hidden;"> |
| * Accurate main battery guns with battlecruiser dispersion capable of overmatch.
| | {| class="wikitable" style="margin:0; color:inherit; width:100%" |
| * Access to {{Engine Boost}} and {{Spotting Aircraft}} consumables.
| | ! style="background-color:#1a3244; color:#ffffff; font-weight:bold;" | MAIN BATTERY !! style="background-color:#1a3244; color:#ffffff; font-weight:bold;" | |
| | |- |
| | | style="color:inherit;" | • Arrangement || style="color:inherit;" | 3×2 381mm |
| | |- |
| | | style="color:inherit;" | • Firing range (km) || style="color:inherit;" | 19.76 |
| | |- |
| | | style="color:inherit;" | • Reload time (sec) || style="color:inherit;" | 25.0 |
| | |- |
| | | style="color:inherit;" | • Rate of fire (shots/min) || style="color:inherit;" | 2.4 |
| | |- |
| | | style="color:inherit;" | • 180° turn time (sec) || style="color:inherit;" | 30.0 |
| | |} |
| | </div> |
|
| |
|
| |Cons=<!-- write list of negative points below. use * as in ordinary wiki-list. --> | | <div style="border: 2px solid rgba(212,175,55,0.8); border-radius: 3px; margin-bottom: 1em; overflow: hidden;"> |
| * Light armor, especially on the bow and stern.
| | {| class="wikitable" style="margin:0; color:inherit; width:100%" |
| * Only six guns.
| | ! style="background-color:#1a3244; color:#ffffff; font-weight:bold;" | DISPERSION !! style="background-color:#1a3244; color:#ffffff; font-weight:bold;" | |
| * Despite having high speed, Repulse is not maneuverable and has a weak 16% damage reduction TDS.
| | |- |
| * Weak and short ranged AA suite.
| | | style="color:inherit;" | • Dispersion type || style="color:inherit;" | Battlecruiser dispersion |
| | |- |
| | | style="color:inherit;" | • Dispersion formula || style="color:inherit;" | Dispersion (m) = 8.4 × range(km) + 48 |
| | |- |
| | | style="color:inherit;" | • Sigma || style="color:inherit;" | 2.0 |
| | |- |
| | | style="color:inherit;" | • Maximum dispersion (m) || style="color:inherit;" | 213 |
| | |- |
| | | style="color:inherit;" | • Dispersion at 5 km || style="color:inherit;" | 90 |
| | |- |
| | | style="color:inherit;" | • Dispersion at 10 km || style="color:inherit;" | 132 |
| | |- |
| | | style="color:inherit;" | • Dispersion at 15 km || style="color:inherit;" | 174 |
| | |- |
| | | style="color:inherit;" | • Dispersion at 19.76 km || style="color:inherit;" | 214 |
| | |} |
| | </div> |
|
| |
|
| |Research= | | <div style="border: 2px solid rgba(212,175,55,0.8); border-radius: 3px; margin-bottom: 1em; overflow: hidden;"> |
| <!-- Check this! Some do.-->
| | {| class="wikitable" style="margin:0; color:inherit; width:100%" |
| As a premium ship, ''{{#var:ship_name}}'' has no module upgrades to research.
| | ! style="background-color:#1a3244; color:#ffffff; font-weight:bold;" | HE SHELL !! style="background-color:#1a3244; color:#ffffff; font-weight:bold;" | |
| | |- |
| | | style="color:inherit;" | • Name || style="color:inherit;" | 381 mm HE Mk VIIIb |
| | |- |
| | | style="color:inherit;" | • Maximum damage || style="color:inherit;" | 5300 |
| | |- |
| | | style="color:inherit;" | • Fire chance (%) || style="color:inherit;" | 34.0% |
| | |- |
| | | style="color:inherit;" | • Shell velocity (m/s) || style="color:inherit;" | 731.5 |
| | |- |
| | | style="color:inherit;" | • Shell weight (kg) || style="color:inherit;" | 879 |
| | |- |
| | | style="color:inherit;" | • Penetration (mm) || style="color:inherit;" | 95 |
| | |} |
| | </div> |
|
| |
|
| |OptimalConfiguration=<!-- write some general text about selection of optimal configuration below (optional)-->
| |
|
| |
|
| |Upgrades=<!-- write text about best upgrades below, add * after upgrade link to designate that another upgrade may be viable --> | | <div style="border: 2px solid rgba(212,175,55,0.8); border-radius: 3px; margin-bottom: 1em; overflow: hidden;"> |
| | {| class="wikitable" style="margin:0; color:inherit; width:100%" |
| | ! style="background-color:#1a3244; color:#ffffff; font-weight:bold;" | AP SHELL !! style="background-color:#1a3244; color:#ffffff; font-weight:bold;" | |
| | |- |
| | | style="color:inherit;" | • Name || style="color:inherit;" | 381 mm AP Mk XXIIb |
| | |- |
| | | style="color:inherit;" | • Maximum damage || style="color:inherit;" | 11400 |
| | |- |
| | | style="color:inherit;" | • Shell velocity (m/s) || style="color:inherit;" | 731.5 |
| | |- |
| | | style="color:inherit;" | • Shell weight (kg) || style="color:inherit;" | 879 |
| | |- |
| | | style="color:inherit;" | • Fuse time (sec) || style="color:inherit;" | 0.015 |
| | |- |
| | | style="color:inherit;" | • Ricochet start (°) || style="color:inherit;" | 45 |
| | |- |
| | | style="color:inherit;" | • Always ricochet (°) || style="color:inherit;" | 60 |
| | |- |
| | | style="color:inherit;" | • Normalisation (°) || style="color:inherit;" | 6 |
| | |- |
| | | style="color:inherit;" | • Arming threshold (mm) || style="color:inherit;" | 64 |
| | |} |
| | </div> |
| | </div></div></div> |
| | <div class="b-popup"><div class="b-popup_head js-tech-nav_head"><div><h2>Secondary Battery</h2></div><span class="b-tech-nav_arrow"></span></div><div class="b-popup_content" style="display: none;"><div> |
| | <div style="border: 2px solid rgba(212,175,55,0.8); border-radius: 3px; margin-bottom: 1em; overflow: hidden;"> |
| | {| class="wikitable" style="margin:0; color:inherit; width:100%" |
| | ! style="background-color:#1a3244; color:#ffffff; font-weight:bold;" | SECONDARY BATTERY !! style="background-color:#1a3244; color:#ffffff; font-weight:bold;" | |
| | |- |
| | | style="color:inherit;" | • Secondary battery range (km) || style="color:inherit;" | 5.0 |
| | |} |
| | </div> |
|
| |
|
| The recommended upgrades are:
| | <div style="border: 2px solid rgba(212,175,55,0.8); border-radius: 3px; margin-bottom: 1em; overflow: hidden;"> |
| * '''Slot 1''': {{Main Armaments Modification 1}}
| | {| class="wikitable" style="margin:0; color:inherit; width:100%" |
| * '''Slot 2''': {{Engine Room Protection}} or {{Damage Control System Modification 1}}
| | ! style="background-color:#1a3244; color:#ffffff; font-weight:bold;" | SECONDARY ARMAMENT 1 !! style="background-color:#1a3244; color:#ffffff; font-weight:bold;" | |
| * '''Slot 3''': {{Aiming Systems Modification 1}}
| | |- |
| * '''Slot 4''': {{Damage Control System Modification 2}}
| | | style="color:inherit;" | • Shell type || style="color:inherit;" | HE |
| | |- |
| | | style="color:inherit;" | • Name || style="color:inherit;" | 102 mm HE 35 lb |
| | |- |
| | | style="color:inherit;" | • Arrangement || style="color:inherit;" | 3x102mm |
| | |- |
| | | style="color:inherit;" | • Rate of fire (shots/min) || style="color:inherit;" | 10.0 |
| | |- |
| | | style="color:inherit;" | • Maximum damage || style="color:inherit;" | 1500 |
| | |- |
| | | style="color:inherit;" | • Shell velocity (m/s) || style="color:inherit;" | 800 |
| | |- |
| | | style="color:inherit;" | • Penetration (mm) || style="color:inherit;" | 17 |
| | |- |
| | | style="color:inherit;" | • Fire chance (%) || style="color:inherit;" | 6.0% |
| | |} |
| | </div> |
|
| |
|
| |CommanderSkills=<!-- write text about best set of Commander Skills below -->
| | <div style="border: 2px solid rgba(212,175,55,0.8); border-radius: 3px; margin-bottom: 1em; overflow: hidden;"> |
| {{Commander Skills 3 BB | | {| class="wikitable" style="margin:0; color:inherit; width:100%" |
| <!-- Ratings 1,2,3 are legit. Others are ignored. You can use zero to indicate that skill has no effect, but that's just for other editors. -->
| | ! style="background-color:#1a3244; color:#ffffff; font-weight:bold;" | SECONDARY ARMAMENT 2 !! style="background-color:#1a3244; color:#ffffff; font-weight:bold;" | |
| | rating11 = 2 <!-- Gun Feeder --> | | |- |
| | rating12 = <!-- Demolition Expert +1% fire + ASW --> | | | style="color:inherit;" | • Shell type || style="color:inherit;" | HE |
| | rating13 = <!-- Consumables Specialist - Reload Boosts,aircraft,DAAF --> | | |- |
| | rating14 = 2 <!-- Emergency Repair Specialist --> | | | style="color:inherit;" | • Name || style="color:inherit;" | 102 mm HE Mk IX |
| | rating15 = <!-- Incoming Fire Alert --> | | |- |
| | rating16 = <!-- Preventive Maintenance --> | | | style="color:inherit;" | • Arrangement || style="color:inherit;" | 1x102mm |
| | |- |
| | | style="color:inherit;" | • Rate of fire (shots/min) || style="color:inherit;" | 15.0 |
| | |- |
| | | style="color:inherit;" | • Maximum damage || style="color:inherit;" | 1500 |
| | |- |
| | | style="color:inherit;" | • Shell velocity (m/s) || style="color:inherit;" | 811 |
| | |- |
| | | style="color:inherit;" | • Penetration (mm) || style="color:inherit;" | 17 |
| | |- |
| | | style="color:inherit;" | • Fire chance (%) || style="color:inherit;" | 6.0% |
| | |} |
| | </div> |
|
| |
|
| | rating21 = 2 <!-- Grease the Gears -->
| |
| | rating22 = <!-- Inertial Fuse for HE Shells -->
| |
| | rating23 = 1 <!-- Brisk - +10% while unspotted -->
| |
| | rating24 = 2 <!-- Vigilance - +25% torp detect range, +7% TPS -->
| |
| | rating25 = 2 <!-- Priority Target -->
| |
| | rating26 = <!-- AA Defense and ASW Expert - +10% damage -->
| |
|
| |
|
| | rating31 = <!-- Super-Heavy AP Shells - +7.5% AP but +25% fire/fl time -->
| | </div></div></div> |
| | rating32 = <!-- Long-Range Secondary Battery Shells - +20% range -->
| | <div class="b-popup"><div class="b-popup_head js-tech-nav_head"><div><h2>Airstrike</h2></div><span class="b-tech-nav_arrow"></span></div><div class="b-popup_content" style="display: none;"><div> |
| | rating33 = 2 <!-- Adrenaline Rush -->
| |
| | rating34 = 2 <!-- Basics of Survivability -->
| |
| | rating35 = <!-- Improved Repair Part Readiness -->
| |
| | rating36 = <!-- Focus Fire Training - sector reinf. & Airstrike-->
| |
|
| |
|
| | rating41 = <!-- Furious - buff for being on fire--> | | <div style="border: 2px solid rgba(212,175,55,0.8); border-radius: 3px; margin-bottom: 1em; overflow: hidden;"> |
| | rating42 = <!-- Manual Secondary Battery Aiming --> | | {| class="wikitable" style="margin:0; color:inherit; width:100%" |
| | rating43 = <!-- Close Quarters Combat - -10% MB reload if an enemy is spotted close --> | | ! style="background-color:#1a3244; color:#ffffff; font-weight:bold;" | ASW AIRSTRIKE (DEPTH CHARGES) !! style="background-color:#1a3244; color:#ffffff; font-weight:bold;" | |
| | rating44 = 2 <!-- Emergency Repair Expert - DCP,RP +1 charge, +10% action -->
| | |- |
| | rating45 = 3 <!-- Concealment Expert --> | | | style="color:inherit;" | • Range (km) || style="color:inherit;" | 8 |
| | rating46 = 2 <!-- Fire Prevention Expert --> | | |- |
| }}
| | | style="color:inherit;" | • Minimum range (km) || style="color:inherit;" | 0.5 |
| | |- |
| | | style="color:inherit;" | • Reload time (sec) || style="color:inherit;" | 20.0 |
| | |- |
| | | style="color:inherit;" | • Number of aircraft || style="color:inherit;" | 1 |
| | |- |
| | | style="color:inherit;" | • Depth charges in payload || style="color:inherit;" | 1 |
| | |- |
| | | style="color:inherit;" | • Damage || style="color:inherit;" | 2900 |
| | |- |
| | | style="color:inherit;" | • Deployment || style="color:inherit;" | Manual |
| | |} |
| | </div> |
| | </div></div></div> |
| | <div class="b-popup"><div class="b-popup_head js-tech-nav_head"><div><h2>AA Defense</h2></div><span class="b-tech-nav_arrow"></span></div><div class="b-popup_content" style="display: none;"><div> |
| | <div style="border: 2px solid rgba(212,175,55,0.8); border-radius: 3px; margin-bottom: 1em; overflow: hidden;"> |
| | {| class="wikitable" style="margin:0 0 0.8em 0; width:100%; color:inherit;" |
| | ! style="background-color:#1a3244; color:#ffffff; font-weight:bold;" | AA ARMAMENT !! style="background-color:#1a3244; color:#ffffff; font-weight:bold;" | MOUNTS × BARRELS |
| | |- |
| | | style="color:inherit;" | 102 mm || style="color:inherit;" | 6 × 1 |
| | |- |
| | | style="color:inherit;" | 40 mm || style="color:inherit;" | 3 × 8 |
| | |- |
| | | style="color:inherit;" | 13 mm || style="color:inherit;" | 4 × 4 |
| | |- |
| | | style="color:inherit;" | 20 mm || style="color:inherit;" | 8 × 1 |
| | |} |
|
| |
|
| <!-- Where to get the Commander skills matrix for the type of ship
| | '''Continuous damage''' — average DPS within each action zone |
| https://wiki.wargaming.net/en/Category:Ship_Page_Inserts -->
| | {| class="wikitable" style="margin:0 0 0.8em 0; width:100%; color:inherit;" |
| | ! style="background-color:#1a3244; color:#ffffff; font-weight:bold;" | RANGE !! style="background-color:#1a3244; color:#ffffff; font-weight:bold;" | DPS !! style="background-color:#1a3244; color:#ffffff; font-weight:bold;" | HIT CHANCE !! style="background-color:#1a3244; color:#ffffff; font-weight:bold;" | ACTION ZONE (km) |
| | |- |
| | | style="color:inherit;" | Short-range || style="color:inherit;" | 105 || style="color:inherit;" | 70% || style="color:inherit;" | 2.0 |
| | |- |
| | | style="color:inherit;" | Mid-range || style="color:inherit;" | 140 || style="color:inherit;" | 75% || style="color:inherit;" | 2.5 |
| | |- |
| | | style="color:inherit;" | Long-range || style="color:inherit;" | 28 || style="color:inherit;" | 75% || style="color:inherit;" | 4.0 |
| | |} |
|
| |
|
| |Consumables=<!-- write text about selection of Consumables below --> | | '''Damage by shell explosions''' |
| ''{{#var:ship_name}}'' equips the following consumables:
| | {| class="wikitable" style="margin:0 0 0.8em 0; width:100%; color:inherit;" |
| | ! style="background-color:#1a3244; color:#ffffff; font-weight:bold;" | EXPLOSIONS / SALVO !! style="background-color:#1a3244; color:#ffffff; font-weight:bold;" | DAMAGE !! style="background-color:#1a3244; color:#ffffff; font-weight:bold;" | HIT CHANCE !! style="background-color:#1a3244; color:#ffffff; font-weight:bold;" | ACTION ZONE (km) |
| | |- |
| | | style="color:inherit;" | 1 || style="color:inherit;" | 140 || style="color:inherit;" | 75% || style="color:inherit;" | 3.5–4.0 |
| | |} |
| | </div> |
| | </div></div></div> |
|
| |
|
| * '''Slot 1:''' {{Damage Control Party}}
| |
| * '''Slot 2:''' {{Repair Party}} – 4 charges
| |
| * '''Slot 3:''' {{Spotting Aircraft}} – 4 charges
| |
| * '''Slot 4:''' {{Engine Boost}} – 3 charges
| |
|
| |
|
| |Camouflage={{Prem Ship Camo Insert|shiptier=6}}
| | <!-- Add the ship code here to populate the upgrade table --> |
| | {{Ship Upgrades Section|code=PBSB536_Black_Repulse}} |
|
| |
|
| |Signals=<!-- write text about best set of signals below -->
| |
|
| |
|
| {{Signal Flags
| | <!-- Consumables have to be tagged individually on a slot by slot basis --> |
| <!-- The usual 1,2,3 rating; others ignored. Zero may be useful to other editors to remind that the signal has no effect on the ship. --> | | {{Ship Consumables Section|consumables= |
| | Juliet Charlie = 3 <!-- No Detonate --> | | * '''Slot 1:''' {{Damage Control Party}} (15.0s action, 80.0s cooldown) |
| | India Yankee = 3 <!-- -20% Fire duration -->
| | * '''Slot 2:''' {{Repair Party}} (4 charges, 28.0s action, 80.0s cooldown, 280.5 hp/s) |
| | Hotel Yankee = <!-- ram someone -->
| | * '''Slot 3:''' {{Spotting Aircraft}} (4 charges, 100.0s action, 240.0s cooldown) |
| | Juliet Yankee Bissotwo = 1 <!-- -20% flood duration -->
| | * '''Slot 4:''' {{Engine Boost}} (3 charges, 180.0s action, 90.0s cooldown) |
| | Victor Lima = <!-- +1/0.5% (160mm) fire, +4% flood -->
| | }} |
| | India X-Ray = <!-- +1/0.5% (160mm) fire, +5% you detonate -->
| |
| | |
| | Juliet Whiskey Unaone = <!-- +15% flood, +5% you detonate -->
| |
| | Mike Yankee Soxisix = <!-- Secondaries: +5% range, -5% reload, -5% dispersion-->
| |
| | November Echo Setteseven= <!-- +5% AA damage -->
| |
| | Sierra Mike = 2 <!-- +5% speed -->
| |
| | November Foxtrot = 2 <!-- -5% Consumables reload -->
| |
| | India Delta = 3 <!-- +20% HP from Repair Party -->
| |
|
| |
|
| | X-Ray Papa Unaone = <!-- +15% Smoke Gen action time -->
| |
| | Sierra Bravo = <!-- +10% Hydro action time; -10% DFAA reload time -->
| |
| }}
| |
|
| |
|
| |Gallery=<!-- write below list of files with description (if necessary) separated with | --><gallery>
| | ==Gallery== |
| | <div class="b-popup"><div class="b-popup_head js-tech-nav_head"><div><h2>WoWs Gallery</h2></div><span class="b-tech-nav_arrow"></span></div><div class="b-popup_content" style="display: none;"><div> |
|
| |
|
| | <gallery> |
| </gallery> | | </gallery> |
| | </div></div></div> |
|
| |
|
| |History=<!-- write text below -->
| | <div class="b-popup"><div class="b-popup_head js-tech-nav_head"><div><h2>Historical Gallery</h2></div><span class="b-tech-nav_arrow"></span></div><div class="b-popup_content" style="display: none;"><div> |
| <div class="thumb tright"> | |
| {{AnnoWiki|content=
| |
| <h2>''{{#var:ship_name}}'', 1939</h2> | |
| ===Construction===
| |
| :Builder: John Brown & Co., Clydebank, UK
| |
| :Laid down: 25th January 1915
| |
| :Launched: 8th January 1916
| |
| :Commissioned: 18th August 1916
| |
| ----
| |
| ===Specifications===
| |
| :34,600 tons displacement, standard
| |
| :242m length
| |
| :27.5m beam
| |
| :9m draft (mean)
| |
| ----
| |
| ====Performance====
| |
| :30.5 knots at 112,000 shaft horsepower
| |
| :3,650 nm range at 18 knots
| |
| ----
| |
| ====Armor====
| |
| :Main belt: 51-229mm
| |
| :Decks: 25-102mm
| |
| :Turrets: 178-229mm
| |
| :Conning tower: 254mm
| |
| ----
| |
| ====Armament====
| |
| =====Main=====
| |
| :6 (3x2) 381mm rifles
| |
| =====Secondary=====
| |
| :12 (3x4) 102mm rifles
| |
| =====Anti-Aircraft=====
| |
| :6 (6x1) 102mm guns
| |
| :8 (2x4) 40mm guns
| |
| ----
| |
| ====Aircraft====
| |
| :Four (4) float planes, one catapult
| |
| }}
| |
| </div> | |
| | |
| ==DESIGN== | |
| | |
| The ''Renown'' class battlecruisers were originally planned as improved versions of the ''Revenge'' class battleships, but construction was halted with the outbreak of World War I as they would not be ready in a timely manner. Upon becoming First Sea Lord, Admiral Lord Fisher gained approval to restart their construction in January 1915 as battlecruisers that could be built and brought into service quickly. The Director of Naval Construction was able to quickly produce a design which met the First Sea Lord's requirements and the builders agreed to deliver the ships in 15 months. Although they did not manage to meet the ambitious schedule, HMS ''Repulse'' took just 18 months to build. Upon their completion, ''Repulse'' and her sister ship ''Renown'' were the fastest capital ships in the world. ‘’Repulse’’ was the 10th ship in the Royal Navy to carry that name.
| |
| | |
| <h4>First World War</h4>
| |
| | |
| ''Repulse'' was completed in August 1916, two months after the Battle of Jutland. She served as the flagship of the 1st Battlecruiser Squadron with the Grand Fleet for the last two years of the First World War.
| |
| | |
| Over the course of 1917, the Admiralty became more concerned about German efforts in the North Sea to sweep paths through the British-laid minefields intended to restrict the actions of the High Seas Fleet and German submarines. In November 1917 the Admiralty decided on a large operation to destroy the German minesweepers and their escorting light cruisers. Based on intelligence reports, the Admiralty allocated two light cruiser squadrons-the 1st Cruiser Squadron covered by the reinforced 1st Battlecruiser Squadron-with additional support from a battleship force if needed.
| |
| | |
| The German ships-four light cruisers, eight destroyers, three divisions of minesweepers, eight Sperrbrechers and two trawlers-were spotted by the British, and the battlecruiser ''Courageous'' and the light cruiser ''Cardiff'' opened fire. The Germans responded by laying a smoke screen and disengaging. Repulse was detached from the 1st Battle Cruiser Squadron and came up at high speed to join the battle. She opened fire, scoring a single hit on the light cruiser SMS ''Königsberg'' during the battle. When the German battleships SMS ''Kaiser'' and SMS ''Kaiserin'' were spotted, the British broke off their pursuit and Repulse covered their retreat.
| |
| | |
| On 12 December 1917, ''Repulse'' was damaged in a collision with the battlecruiser HMAS ''Australia''. The ship was present at the surrender of the High Seas Fleet at Scapa Flow on 21 November 1918.
| |
| | |
| [[File:Repulse1917.jpeg|none|frame|x250px|link=|HMS Repulse circa 1916-17.]]
| |
| | |
| <h4>Interwar Period</h4>
| |
| | |
| ''Repulse'' began a major refit at Portsmouth in December 1918 to improve her armor protection. Her existing six-inch armor belt was replaced by 9-inch (229 mm) armor plates. The original armor was fitted between the main and upper decks, above the new plates. Additional plating was added to the decks over the magazines, and her anti-torpedo bulge was enlarged. Three 30-foot (9.1 m) rangefinders were also added, as well as eight torpedo tubes in twin mounts on the upper deck. Both flying-off platforms were removed.
| |
| | |
| ''Repulse'' was recommissioned on 1 January 1921 and joined the Battlecruiser Squadron of the Atlantic Fleet. In November 1923, ''Hood'', accompanied by ''Repulse'' and a number of cruisers, set out on a world cruise from west to east via the Panama Canal. They returned home ten months later in September 1924. Shortly after her return, her two three-inch AA guns and two single four-inch gun mounts were removed and replaced with four QF four-inch Mark V AA guns. The Battlecruiser Squadron visited Lisbon in February 1925 to participate in the Vasco da Gama celebrations before continuing on to the Mediterranean for exercises. A squash court was added on the starboard side between the funnels, and a sauna and bubble bath on the quarterdeck for the Prince of Wales' tour of Africa and South America that lasted from March to October. Upon her return, she was refitted from November 1925 to July 1926.
| |
| | |
| After her 1926 refit, she remained with the Battlecruiser Squadron of the Atlantic Fleet until she was paid off in June 1932 prior to beginning her reconstruction in April 1933. Most of the existing layers of horizontal armor were replaced by non-cemented armor plates 2.5–3.5 inches (64–89 mm) thick, and the torpedo control tower was removed from the aft superstructure. A fixed catapult replaced the midships 4-inch triple mount and a hangar was built on each side of the rear funnel to house two aircraft. One additional aircraft could be carried on the deck and another on the catapult itself.
| |
| | |
| Cranes were mounted above each hangar to handle the aircraft. Four prototype QF 4-inch Mark XV dual-purpose guns were added, and two octuple Mark VI 2-pounder mounts were fitted. A pair of quadruple machine gun mountings were added above them. ‘’Repulse’’ received two High-Angle Control System anti-aircraft directors. The two submerged torpedo tubes were removed and the vacant spaces sub-divided and turned into storerooms.
| |
| | |
| ''Repulse'' was assigned to the Mediterranean Fleet when she was recommissioned in April 1936. She transported 500 refugees from Valencia and Palma, Majorca to Marseilles, France in late 1936 after the start of the Spanish Civil War. The ship was present at the Coronation Fleet Review at Spithead on 20 May 1937 for King George VI. Repulse was sent to Haifa in July 1938 to maintain order during the Arab Revolt. She was selected to convey the King and Queen during their May 1939 Canadian Tour and was refitted between October 1938 and March 1939 for this role. The King and Queen ultimately travelled aboard the liner RMS Empress of Australia while Repulse escorted them on the first half of the journey.
| |
| | |
| <h4>Second World War</h4> | |
| | |
| At the beginning of the Second World War, ''Repulse'' was part of the Battlecruiser Squadron of the Home Fleet. She patrolled off the Norwegian coast and in the North Sea in search of German ships, as well as to enforce the blockade for the first months of the war. In late October, she was transferred to Halifax with the aircraft carrier ‘’Furious’’ to protect convoys and search for German raiders. ''Repulse'' and ''Furious'' sortied from Halifax on 23 November in search of the German battleship ''Scharnhorst'' after it had sunk the armed merchant cruiser ''Rawalpindi'', but ''Repulse'' was damaged by heavy seas in a storm and was forced to return to port. ''Repulse'' escorted the convoy bringing most of the 1st Canadian Infantry Division to Britain and was reassigned to the Home Fleet. In February 1940, she accompanied the aircraft carrier Ark Royal on a fruitless search for six German blockade runners that had broken out of Spain.
| |
| | |
| Repulse was assigned to support Allied operations during the Norwegian Campaign in April–June 1940. On 7 April, ''Repulse'', along with the bulk of the Home Fleet, was ordered to sea to intercept what was thought to be another attempt to break-out into the North Atlantic. She was detached the following day to search for a German ship reported by the destroyer HMS ''Glowworm'', but the destroyer had been sunk by the German cruiser ''Admiral Hipper'' before ''Repulse'' arrived. She was then ordered to rendezvous with her sister ''Renown'' south of the Lofoten Islands, off the Norwegian coast. In early June, she was sent to the North Atlantic to search for German raiders and played no part in the evacuation of Norway.
| |
| | |
| Accompanied by ''Renown'' and the 1st Cruiser Squadron, ''Repulse'' attempted to intercept the German battleship ''Gneisenau'' as it sailed from Trondheim to Germany in July. Until May 1941, she escorted convoys and unsuccessfully searched for German ships. On 22 May, ‘’Repulse’’ was diverted to assist in the search for the German battleship ‘’Bismarck’’, but she had to break off the search early on 25 May as she was running low on fuel. The ship was refitted from June–August and received additional light anti-aircraft guns and a surface gunnery radar. She had been intended to replace ''Renown'' in Force H at Gibraltar, but Admiral Somerville informed the Admiralty that he was convinced that ''Repulse'' was totally unsuited for any operation which involved facing modern heavy ships or aircraft. The Admiralty, after consideration, changed their plans and the battleship ''Nelson'' was sent instead. ''Repulse'' escorted a troop convoy around the Cape of Good Hope from August to October and was transferred to East Indies Command.
| |
| | |
| In late 1941 Winston Churchill decided to send a small group of fast capital ships to deter expected Japanese aggression. In November, ''Repulse'', which was in the Indian Ocean, was ordered to rendezvous with the new battleship ''Prince of Wales''. The carrier ''Indomitable'' was assigned to join them, but was delayed when she ran aground in the Caribbean. ''Prince of Wales'' and ''Repulse'' and their escorting destroyers comprised Force Z, which arrived in Singapore on 2 December 1941. On the evening of 8 December, Force Z departed for an attempt to destroy Japanese troop convoys and protect the army's seaward flanks from Japanese landings in their rear.
| |
| | |
| [[File:Repulse1941.jpg|none|frame|x250px|link=|HMS Repulse leaving Singapore, 8th December 1941.]]
| |
| | |
| Force Z was spotted during the afternoon of 9 December by the Japanese submarine I-65, and floatplanes from several Japanese cruisers spotted the British ships later that afternoon and shadowed them until dark. Admiral Sir Tom Phillips decided to cancel the operation as the Japanese were now alerted. Force Z turned back during the evening, after having tried to deceive the Japanese that they were heading to Singora. At 00:50 on 10 December, Admiral Philips received a signal of enemy landings at Kuantan and correspondingly altered course so that he would arrive shortly after dawn.
| |
| | |
| The crew of ''I-58'' spotted Force Z at 02:20, reported their position, and fired five torpedoes, all of which missed. Based on this report the Japanese launched 11 reconnaissance aircraft before dawn to locate Force Z. Several hours later, 86 bombers from the 22nd Air Flotilla based in Saigon were launched carrying bombs or torpedoes. The crew of a Mitsubishi G3M reconnaissance bomber spotted the British at 10:15 and radioed in several reports. The pilot was ordered to maintain contact and to broadcast a directional signal that the other Japanese bombers could follow.
| |
| Repulse is at the bottom of the frame, having been hit by a bomb, 10 December 1941
| |
| | |
| The first attack began at 11:13 when 250 kilograms (551 lb) bombs were dropped from eight aircraft. ''Repulse'' was straddled by two bombs, then hit by a third which penetrated through the hangar to explode on the armored deck below. This inflicted a number of casualties and damaged her Supermarine Walrus seaplane. Anti-aircraft fire damaged five of the Japanese bombers. In the ensuing attacks, ''Repulse'' was skilfully handled and managed to avoid 19 torpedoes as well as the more bombs. However, ''Repulse'' was then caught by a synchronised pincer attack by 17 torpedo bombers and hit by four or five torpedoes in rapid succession. The gunners on ''Repulse'' shot down two planes and heavily damaged eight more, but the torpedo damage proved fatal. ''Repulse'' listed severely to port, quickly capsized and went down by the stern with the loss of 508 officers and men.
| |
| | |
| [[File:ForceZAttack.jpg|none|frame|x250px|link=|Force Z under attack by Japanese aircraft, 10th December 1941. HMS ''Repulse'' is at the bottom of the image.]]
| |
| | |
| ''HMS Repulse'' was entitled to the following battle honors, including those earned by previous ships of her name.
| |
| | |
| Cadiz 1596 - Martinique 1762 - The Saintes 1762 - Norway 1940 - Atlantic 1940 - ''Bismarck'' 1941
| |
| | |
| ==In-game historical inaccuracies==
| |
| * ''Repulse'' is depicted after her 1933-1936 reconstruction. Her original 1916 configuration does not exist in World of Warships.
| |
| * ''Repulse'' was armed with 8x2 533mm above-water beam-firing torpedo tubes. The doors for these tubes are modeled, but the doors are closed and the torpedoes are not part of her armament.
| |
| | |
| |HistoricalGallery=<!-- write below list of files with description (if necessary) separated with | --><gallery>
| |
|
| |
|
| | <gallery> |
| </gallery> | | </gallery> |
| | </div></div></div> |
|
| |
|
| |Video=<!-- put below video clips with using template VideoYT. You can use html-tags for formatting. -->
| | [[Category:Ships of U.K.]] |
| | | [[Category:Battleships]] |
| |Ref= <!-- write below -->
| | [[Category:Tier VI ships]] |
| <references />
| | [[Category:Premium ships]]<!-- DO NOT DELETE THIS LINE. DO NOT INSERT ANYTHING BELOW THIS LINE --> |
| | |
| {{WoWS Ship Changelog Insert|1=
| |
| *Available for purchase in the Premium Store during the Black Friday 2023 sale during Update 12.9 in November 2023.
| |
| *Update 12.10:
| |
| **Added fixes to the textures and other visuals of the ship.
| |
| }}
| |
| | |
| }}<!-- DO NOT DELETE THIS LINE. DO NOT INSERT ANYTHING BELOW THIS LINE -->
| |



 (15.0s action, 80.0s cooldown)
 (4 charges, 28.0s action, 80.0s cooldown, 280.5 hp/s)
 (4 charges, 100.0s action, 240.0s cooldown)
 (3 charges, 180.0s action, 90.0s cooldown)