|
|
| Line 1: |
Line 1: |
| <!-- DO NOT EDIT OR DELETE LINES WITH COMMENTS (it's look like as this or next line)
| | {{#vardefine:ship_name|Scharnhorst B}} |
| -->{{WoWs_Ship
| | __NOTOC____NOEDITSECTION__ |
| |Promo<!-- in case of gift or promo ship write conditions to get it. -->
| |
|
| |
|
| |Anno=<!-- you can write below short description for the ship. it will replace default once. -->
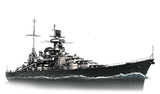
| | <div class="b-description gw-frame-1"><div class="b-description-img b-description-img__indent b-description-img__single"><div style="width:160px; height:102px; opacity:.5; border-radius:2px; position:absolute; left:0; top:0; z-index:1; -webkit-transition:all 0.2s ease-out 0.1s; transition:all 0.2s ease-out 0.1s;">[[File:Wows_anno_flag_germany.png|160px]]</div><div class="l-description-img_class"><span class="b-description-img_type b-description-img_type__Battleship b-description-img_type__Battleship-Premium"></span><span class="b-description-img_class">VII</span></div><div class="b-description-img_vehicle">[[File:Ship_PGSB597_Black_Scharnhorst.png|160px|link=|left]]</div><div class="l-description-img_price"><span class="b-description-img_price b-description-img_price__gold"><span title="''{{#var:ship_name}}'' was first released for sale on DD Month YYYY.">7,500 doubloons</span></span></div></div><p>[[Ship:{{#var:ship_name}}|{{#var:ship_name}}]] — Germany Premium Tier VII [[Ship:Battleship|Battleship]].</p><p>The lead ship of her class, Scharnhorst, was built at the Wilhelmshaven shipyard. At the beginning of World War II, the battleship took an active part in raid operations. After repairs in 1943, the ship was relocated to Norway with the goal of interrupting deliveries to the U.S.S.R via the Arctic convoys. On December 26, during a raid on the JW-55B convoy, Scharnhorst took heavy damage from battleship Duke of York and was sunk by torpedoes from cruisers Jamaica and Belfast.</p><p> </p></div> |
| A German battleship designed for raider operations and fighting cruisers, including battlecruisers. When ''{{#var:ship_name}}'' was built, she was faster than any ship of her type. The rather small caliber of her main battery guns was her main drawback, but that was offset by her higher rate of fire.<br><br>''{{#var:ship_name}}'' first went on sale on 29 November 2019 via Black Friday containers.<br>
| |
|
| |
|
| |Performance=<!-- write text about performance in battles below -->
| | ===Pros=== |
| {{AA Sidebar Warning Insert}}
| | * Pro 1 |
| ''{{#var:ship_name}}'' is in all respects save her paint scheme identical to ''[[Scharnhorst]]''.
| | * Pro 2 |
|
| |
|
| A rather peculiar capital ship, ''{{#var:ship_name}}'' in World of Warships is officially a battleship, but frequently plays more like a battlecruiser. Her characteristics are very cruiser-like: top speed above 30 knots with a decent rudder shift time, plus a smaller-caliber main battery than other battleships that trades alpha damage and penetration for good rate of fire and muzzle velocity. These disparities set her clearly apart from from her Tier VII counterparts and sister-ship ''[[Gneisenau]]''.
| | ===Cons=== |
| | * Con 1 |
| | * Con 2 |
|
| |
|
| Her unique traits present her with a plethora of roles to play. ''{{#var:ship_name}}'' performs very well as a cruiser hunter or destroyer killer; her undersized shells will not over-penetrate as often, allowing for increased damage output per salvo against light-skinned targets. She is also adept at engaging distracted or over-extended battleships. If forced to go toe-to-toe with another battleship, she must use her superior speed to control the engagement, unique turtle-back armor style to mitigate damage, and employ her torpedoes for punishing strikes. While her frontal and citadel armor are good, her side armor is weak enough to take devastating damage from enemy salvos if presented broadside. ''{{#var:ship_name}}'' is most comfortable at mid-to-short distance engagements, where she can use her speed to stay at range and dodge oncoming shells, or close the gap to utilize her solid secondary armament suite and deck torpedo launchers to surprise her foes — further enhanced by the correct [[Ship:Commander|commander skills]].
| |
|
| |
|
| |Pros=<!-- write list of positive points below. use * as in ordinary wiki-list. -->
| | ==Ship Stats== |
| * Unrivaled reload on a battleship; practically the fastest in the game at 20 seconds.
| | <div class="b-popup"><div class="b-popup_head js-tech-nav_head"><div><h2>Hull Information</h2></div><span class="b-tech-nav_arrow"></span></div><div class="b-popup_content" style="display: none;"><div> |
| * Very good turret traverse, puts several cruisers and certain destroyers to shame.
| | <div style="border: 2px solid rgba(212,175,55,0.8); border-radius: 3px; margin-bottom: 1em; overflow: hidden;"> |
| * Her Armor piercing shells have a high chance of penetrating destroyers rather than over-penetrating. Especially true when the target is angled bow or stern to her.
| | {| class="wikitable" style="margin:0; color:inherit; width:100%" |
| * Strong secondaries and torpedoes for close in brawling.
| | ! style="background-color:#1a3244; color:#ffffff; font-weight:bold;" | SURVIVABILITY !! style="background-color:#1a3244; color:#ffffff; font-weight:bold;" | |
| * High speed and good maneuverability feel more like a cruiser than a battleship.
| | |- |
| * Very durable; her turtleback armor scheme means she is very hard to citadel when close.
| | | style="color:inherit;" | • Hit Points || style="color:inherit;" | 56300 |
| * Exceptionally versatile. Can be played as a battlecruiser, a typical battleship, or a flanker, depending on the map, team composition, and upgrade/commander skill configuration.
| | |- |
| * Good anti-aircraft suite; when fully built for anti-air duties, she is deadly to enemy planes.
| | | style="color:inherit;" | • Torpedo protection damage reduction (%) || style="color:inherit;" | — |
| * Underestimating her guns can prove fatal to enemy ships.
| | |} |
| * Easily can counter most destroyers due to fast reload and quick rudder shift time.
| | </div> |
|
| |
|
| |Cons=<!-- write list of negative points below. use * as in ordinary wiki-list. --> | | <div style="border: 2px solid rgba(212,175,55,0.8); border-radius: 3px; margin-bottom: 1em; overflow: hidden;"> |
| * Lower alpha strike potential and penetration compared to her larger-gunned peers.
| | {| class="wikitable" style="margin:0; color:inherit; width:100%" |
| * Low gun caliber prevents overmatching in most cases, leading to more bounces as well as non-penetrations than most battleships.
| | ! style="background-color:#1a3244; color:#ffffff; font-weight:bold;" | ARMOR DETAIL !! style="background-color:#1a3244; color:#ffffff; font-weight:bold;" | |
| * Large turning radius.
| | |- |
| * Turrets and torpedo tubes are incapacitated very often, especially when brawling.
| | | style="color:inherit;" | • Belt (mm) || style="color:inherit;" | — |
| * Bow armor can be overmatched by battleships she will encounter when up-tiered into Tier VIII and IX games.
| | |- |
| * Armor-piercing shells lose a lot of penetration value at long range, even against equal-tiered targets.
| | | style="color:inherit;" | • Deck (mm) || style="color:inherit;" | — |
| | |- |
| | | style="color:inherit;" | • Superstructure (mm) || style="color:inherit;" | — |
| | |- |
| | | style="color:inherit;" | • Extremities (mm) || style="color:inherit;" | — |
| | |} |
| | </div> |
|
| |
|
| |Research=<!-- write text about priority sequence of research below --> | | <div style="border: 2px solid rgba(212,175,55,0.8); border-radius: 3px; margin-bottom: 1em; overflow: hidden;"> |
| As a premium ship, ''{{#var:ship_name}}'' doesn't have any upgrades to research.
| | {| class="wikitable" style="margin:0; color:inherit; width:100%" |
| | ! style="background-color:#1a3244; color:#ffffff; font-weight:bold;" | MANEUVERABILITY !! style="background-color:#1a3244; color:#ffffff; font-weight:bold;" | |
| | |- |
| | | style="color:inherit;" | • Maximum speed (kt) || style="color:inherit;" | 30.0 |
| | |- |
| | | style="color:inherit;" | • Turning circle radius (m) || style="color:inherit;" | 800 |
| | |- |
| | | style="color:inherit;" | • Rudder-shift time (sec) || style="color:inherit;" | 18.9 |
| | |} |
| | </div> |
|
| |
|
| |OptimalConfiguration=<!-- write some general text about selection of optimal configuration below (optional)--> | | <div style="border: 2px solid rgba(212,175,55,0.8); border-radius: 3px; margin-bottom: 1em; overflow: hidden;"> |
| | {| class="wikitable" style="margin:0; color:inherit; width:100%" |
| | ! style="background-color:#1a3244; color:#ffffff; font-weight:bold;" | CONCEALMENT !! style="background-color:#1a3244; color:#ffffff; font-weight:bold;" | |
| | |- |
| | | style="color:inherit;" | • Detectability by sea (km) || style="color:inherit;" | 15.19 |
| | |- |
| | | style="color:inherit;" | • Detectability by air (km) || style="color:inherit;" | 9.94 |
| | |- |
| | | style="color:inherit;" | • Detectability after firing main guns in smoke (km) || style="color:inherit;" | 11.68 |
| | |- |
| | | style="color:inherit;" | • Detectability by depths (km) || style="color:inherit;" | 9.94 |
| | |} |
| | </div> |
|
| |
|
| | </div></div></div> |
| | <div class="b-popup"><div class="b-popup_head js-tech-nav_head"><div><h2>Main Battery</h2></div><span class="b-tech-nav_arrow"></span></div><div class="b-popup_content" style="display: none;"><div><div style="border: 2px solid rgba(212,175,55,0.8); border-radius: 3px; margin-bottom: 1em; overflow: hidden;"> |
| | {| class="wikitable" style="margin:0; color:inherit; width:100%" |
| | ! style="background-color:#1a3244; color:#ffffff; font-weight:bold;" | MAIN BATTERY !! style="background-color:#1a3244; color:#ffffff; font-weight:bold;" | |
| | |- |
| | | style="color:inherit;" | • Arrangement || style="color:inherit;" | 3×3 283mm |
| | |- |
| | | style="color:inherit;" | • Firing range (km) || style="color:inherit;" | 19.87 |
| | |- |
| | | style="color:inherit;" | • Reload time (sec) || style="color:inherit;" | 20.0 |
| | |- |
| | | style="color:inherit;" | • Rate of fire (shots/min) || style="color:inherit;" | 3 |
| | |- |
| | | style="color:inherit;" | • 180° turn time (sec) || style="color:inherit;" | 25.0 |
| | |} |
| | </div> |
|
| |
|
| |Upgrades=<!-- write text about best upgrades below --> | | <div style="border: 2px solid rgba(212,175,55,0.8); border-radius: 3px; margin-bottom: 1em; overflow: hidden;"> |
| The recommended upgrades for ''{{#var:ship_name}}'' are as follows:
| | {| class="wikitable" style="margin:0; color:inherit; width:100%" |
| * '''Slot 1''': {{Main Armaments Modification 1}}<nowiki>*</nowiki>
| | ! style="background-color:#1a3244; color:#ffffff; font-weight:bold;" | DISPERSION !! style="background-color:#1a3244; color:#ffffff; font-weight:bold;" | |
| * '''Slot 2''': {{Damage Control System Modification 1}}
| | |- |
| * '''Slot 3''': {{AA Guns Modification 1}}<nowiki>*</nowiki>
| | | style="color:inherit;" | • Dispersion type || style="color:inherit;" | Standard BB dispersion |
| * '''Slot 4''': {{Damage Control System Modification 2}}
| | |- |
| | | style="color:inherit;" | • Dispersion formula || style="color:inherit;" | Dispersion (m) = 10 × range(km) + 60 |
| | |- |
| | | style="color:inherit;" | • Sigma || style="color:inherit;" | 2.0 |
| | |- |
| | | style="color:inherit;" | • Maximum dispersion (m) || style="color:inherit;" | 258 |
| | |- |
| | | style="color:inherit;" | • Dispersion at 5 km || style="color:inherit;" | 110 |
| | |- |
| | | style="color:inherit;" | • Dispersion at 10 km || style="color:inherit;" | 160 |
| | |- |
| | | style="color:inherit;" | • Dispersion at 15 km || style="color:inherit;" | 210 |
| | |- |
| | | style="color:inherit;" | • Dispersion at 19.87 km || style="color:inherit;" | 259 |
| | |} |
| | </div> |
|
| |
|
| | <div style="border: 2px solid rgba(212,175,55,0.8); border-radius: 3px; margin-bottom: 1em; overflow: hidden;"> |
| | {| class="wikitable" style="margin:0; color:inherit; width:100%" |
| | ! style="background-color:#1a3244; color:#ffffff; font-weight:bold;" | HE SHELL !! style="background-color:#1a3244; color:#ffffff; font-weight:bold;" | |
| | |- |
| | | style="color:inherit;" | • Name || style="color:inherit;" | 283 mm Spr.Gr. L/4.5 Kz. |
| | |- |
| | | style="color:inherit;" | • Maximum damage || style="color:inherit;" | 3200 |
| | |- |
| | | style="color:inherit;" | • Fire chance (%) || style="color:inherit;" | 20.0% |
| | |- |
| | | style="color:inherit;" | • Shell velocity (m/s) || style="color:inherit;" | 890 |
| | |- |
| | | style="color:inherit;" | • Shell weight (kg) || style="color:inherit;" | 315 |
| | |- |
| | | style="color:inherit;" | • Penetration (mm) || style="color:inherit;" | 71 |
| | |} |
| | </div> |
|
| |
|
| The module chosen for '''Upgrade Slot 3''' will largely determine how ''{{#var:ship_name}}'' will play. Equipping {{Aiming Systems Modification 1}} is fairly common, and helps make both her main and secondary batteries more accurate. Players who take '''AA Guns Modification 1''' are hedging their bets against enemy carriers at the expense of a higher chance of off-target shots. Neither of these choices lock the ship into a particular playstyle, and leave each player plenty of options with regard to maximizing ''{{#var:ship_name}}''’s impact on the battle.
| |
|
| |
|
| At the other end of the spectrum, highly aggressive players will equip {{Secondary Battery Modification 1}} in this slot; coupled with the Advanced Firing Training skill and a Mike Yankee Soxisix ({{Mike Yankee Soxisix|Size=18px}}) flag, ''{{#var:ship_name}}''’s secondary battery range pushes out past 7.5km. In this configuration, ''{{#var:ship_name}}'' puts out a punishing amount of secondary fire at a very long range; however, getting the most out of such a build requires that she spend significant amounts of time in close-combat with enemy ships. Players opting for this style of build are also encouraged to equip {{Auxiliary Armaments Modification 1}} in '''Upgrade Slot 1''' to help ensure the longevity of their secondary battery guns while under enemy fire.
| | <div style="border: 2px solid rgba(212,175,55,0.8); border-radius: 3px; margin-bottom: 1em; overflow: hidden;"> |
| | {| class="wikitable" style="margin:0; color:inherit; width:100%" |
| | ! style="background-color:#1a3244; color:#ffffff; font-weight:bold;" | AP SHELL !! style="background-color:#1a3244; color:#ffffff; font-weight:bold;" | |
| | |- |
| | | style="color:inherit;" | • Name || style="color:inherit;" | 283 mm P.Spr.Gr. L/4.4 |
| | |- |
| | | style="color:inherit;" | • Maximum damage || style="color:inherit;" | 7600 |
| | |- |
| | | style="color:inherit;" | • Shell velocity (m/s) || style="color:inherit;" | 890 |
| | |- |
| | | style="color:inherit;" | • Shell weight (kg) || style="color:inherit;" | 330 |
| | |- |
| | | style="color:inherit;" | • Fuse time (sec) || style="color:inherit;" | 0.01 |
| | |- |
| | | style="color:inherit;" | • Ricochet start (°) || style="color:inherit;" | 45 |
| | |- |
| | | style="color:inherit;" | • Always ricochet (°) || style="color:inherit;" | 60 |
| | |- |
| | | style="color:inherit;" | • Normalisation (°) || style="color:inherit;" | 6 |
| | |- |
| | | style="color:inherit;" | • Arming threshold (mm) || style="color:inherit;" | 47 |
| | |} |
| | </div> |
| | </div></div></div> |
| | <div class="b-popup"><div class="b-popup_head js-tech-nav_head"><div><h2>Torpedoes</h2></div><span class="b-tech-nav_arrow"></span></div><div class="b-popup_content" style="display: none;"><div> |
| | <div style="border: 2px solid rgba(212,175,55,0.8); border-radius: 3px; margin-bottom: 1em; overflow: hidden;"> |
| | {| class="wikitable" style="margin:0; color:inherit; width:100%" |
| | ! style="background-color:#1a3244; color:#ffffff; font-weight:bold;" | TORPEDO LAUNCHERS !! style="background-color:#1a3244; color:#ffffff; font-weight:bold;" | |
| | |- |
| | | style="color:inherit;" | • Number of launchers || style="color:inherit;" | 1 |
| | |- |
| | | style="color:inherit;" | • Torpedo name || style="color:inherit;" | PGPT611 |
| | |- |
| | | style="color:inherit;" | • Reload time (sec) || style="color:inherit;" | 68.0 |
| | |- |
| | | style="color:inherit;" | • 180° turn time (sec) || style="color:inherit;" | 7.2 |
| | |- |
| | | style="color:inherit;" | • Damage || style="color:inherit;" | 38100 |
| | |- |
| | | style="color:inherit;" | • Range (km) || style="color:inherit;" | 0.2 |
| | |- |
| | | style="color:inherit;" | • Speed (kt) || style="color:inherit;" | 64 |
| | |- |
| | | style="color:inherit;" | • Detectability (km) || style="color:inherit;" | 1.3 |
| | |- |
| | | style="color:inherit;" | • Flooding chance (%) || style="color:inherit;" | 2.27% |
| | |} |
| | </div> |
|
| |
|
| |CommanderSkills=<!-- write text about best set of Commander Skills below --> | | </div></div></div> |
| | <div class="b-popup"><div class="b-popup_head js-tech-nav_head"><div><h2>Secondary Battery</h2></div><span class="b-tech-nav_arrow"></span></div><div class="b-popup_content" style="display: none;"><div> |
| | <div style="border: 2px solid rgba(212,175,55,0.8); border-radius: 3px; margin-bottom: 1em; overflow: hidden;"> |
| | {| class="wikitable" style="margin:0; color:inherit; width:100%" |
| | ! style="background-color:#1a3244; color:#ffffff; font-weight:bold;" | SECONDARY BATTERY !! style="background-color:#1a3244; color:#ffffff; font-weight:bold;" | |
| | |- |
| | | style="color:inherit;" | • Secondary battery range (km) || style="color:inherit;" | 6.3 |
| | |} |
| | </div> |
|
| |
|
| {{Commander Skills 3 BB
| | <div style="border: 2px solid rgba(212,175,55,0.8); border-radius: 3px; margin-bottom: 1em; overflow: hidden;"> |
| <!-- Ratings 1,2,3 are legit. Others are ignored.--> | | {| class="wikitable" style="margin:0; color:inherit; width:100%" |
| | rating11 = <!-- Gun Feeder --> | | ! style="background-color:#1a3244; color:#ffffff; font-weight:bold;" | SECONDARY ARMAMENT 1 !! style="background-color:#1a3244; color:#ffffff; font-weight:bold;" | |
| | rating12 = <!-- Pyrotechnician --> | | |- |
| | rating13 = <!-- Consumables Specialist --> | | | style="color:inherit;" | • Shell type || style="color:inherit;" | HE |
| | rating14 = 2 <!-- Emergency Repair Specialist --> | | |- |
| | rating15 = <!-- Incoming Fire Alert --> | | | style="color:inherit;" | • Name || style="color:inherit;" | 150 mm Spr.Gr. L/4.5 |
| | rating16 = <!-- Preventive Maintenance --> | | |- |
| | | style="color:inherit;" | • Arrangement || style="color:inherit;" | 2x150mm |
| | |- |
| | | style="color:inherit;" | • Rate of fire (shots/min) || style="color:inherit;" | 8.0 |
| | |- |
| | | style="color:inherit;" | • Maximum damage || style="color:inherit;" | 1700 |
| | |- |
| | | style="color:inherit;" | • Shell velocity (m/s) || style="color:inherit;" | 875 |
| | |- |
| | | style="color:inherit;" | • Penetration (mm) || style="color:inherit;" | 38 |
| | |- |
| | | style="color:inherit;" | • Fire chance (%) || style="color:inherit;" | 8.0% |
| | |} |
| | </div> |
|
| |
|
| | rating21 = 2 <!-- Grease the Gears -->
| | <div style="border: 2px solid rgba(212,175,55,0.8); border-radius: 3px; margin-bottom: 1em; overflow: hidden;"> |
| | rating22 = <!-- Inertial Fuse for HE Shells --> | | {| class="wikitable" style="margin:0; color:inherit; width:100%" |
| | rating23 = <!-- Consumables Enhancements --> | | ! style="background-color:#1a3244; color:#ffffff; font-weight:bold;" | SECONDARY ARMAMENT 2 !! style="background-color:#1a3244; color:#ffffff; font-weight:bold;" | |
| | rating24 = 2 <!-- Vigilance --> | | |- |
| | rating25 = 2 <!-- Priority Target --> | | | style="color:inherit;" | • Shell type || style="color:inherit;" | HE |
| | rating26 = <!-- AA Gunner --> | | |- |
| | | style="color:inherit;" | • Name || style="color:inherit;" | 150 mm Spr.Gr. L/4.5 |
| | |- |
| | | style="color:inherit;" | • Arrangement || style="color:inherit;" | 1x150mm |
| | |- |
| | | style="color:inherit;" | • Rate of fire (shots/min) || style="color:inherit;" | 8.0 |
| | |- |
| | | style="color:inherit;" | • Maximum damage || style="color:inherit;" | 1700 |
| | |- |
| | | style="color:inherit;" | • Shell velocity (m/s) || style="color:inherit;" | 875 |
| | |- |
| | | style="color:inherit;" | • Penetration (mm) || style="color:inherit;" | 38 |
| | |- |
| | | style="color:inherit;" | • Fire chance (%) || style="color:inherit;" | 8.0% |
| | |} |
| | </div> |
|
| |
|
| | rating31 = <!-- Super-Heavy AP Shells -->
| | <div style="border: 2px solid rgba(212,175,55,0.8); border-radius: 3px; margin-bottom: 1em; overflow: hidden;"> |
| | rating32 = <!-- Long-Range Secondary Battery Shells --> | | {| class="wikitable" style="margin:0; color:inherit; width:100%" |
| | rating33 = 2 <!-- Adrenaline Rush --> | | ! style="background-color:#1a3244; color:#ffffff; font-weight:bold;" | SECONDARY ARMAMENT 3 !! style="background-color:#1a3244; color:#ffffff; font-weight:bold;" | |
| | rating34 = 2 <!-- Basics of Survivability --> | | |- |
| | rating35 = <!-- Enhanced Anti-Torpedo Protection --> | | | style="color:inherit;" | • Shell type || style="color:inherit;" | HE |
| | rating36 = <!-- Expert AA Marksman --> | | |- |
| | | style="color:inherit;" | • Name || style="color:inherit;" | 105 mm Spr.Gr. Kz. |
| | |- |
| | | style="color:inherit;" | • Arrangement || style="color:inherit;" | 2x105mm |
| | |- |
| | | style="color:inherit;" | • Rate of fire (shots/min) || style="color:inherit;" | 17.9 |
| | |- |
| | | style="color:inherit;" | • Maximum damage || style="color:inherit;" | 1200 |
| | |- |
| | | style="color:inherit;" | • Shell velocity (m/s) || style="color:inherit;" | 900 |
| | |- |
| | | style="color:inherit;" | • Penetration (mm) || style="color:inherit;" | 26 |
| | |- |
| | | style="color:inherit;" | • Fire chance (%) || style="color:inherit;" | 5.0% |
| | |} |
| | </div> |
|
| |
|
| | rating41 = <!-- Swift in Silence -->
| | </div></div></div> |
| | rating42 = <!-- Improved Secondary Battery Aiming -->
| | <div class="b-popup"><div class="b-popup_head js-tech-nav_head"><div><h2>Airstrike</h2></div><span class="b-tech-nav_arrow"></span></div><div class="b-popup_content" style="display: none;"><div> |
| | rating43 = <!-- Close Quarters Combat -->
| |
| | rating44 = 2 <!-- Emergency Repair Expert -->
| |
| | rating45 = <!-- Concealment Expert -->
| |
| | rating46 = 2 <!-- Fire Prevention Expert -->
| |
| }}
| |
|
| |
|
| |Consumables=<!-- write text about selection of Consumables below --> | | <div style="border: 2px solid rgba(212,175,55,0.8); border-radius: 3px; margin-bottom: 1em; overflow: hidden;"> |
| ''{{#var:ship_name}}'' can equip the following consumables:
| | {| class="wikitable" style="margin:0; color:inherit; width:100%" |
| * '''Slot 1:''' {{Damage Control Party}}
| | ! style="background-color:#1a3244; color:#ffffff; font-weight:bold;" | ASW AIRSTRIKE (DEPTH CHARGES) !! style="background-color:#1a3244; color:#ffffff; font-weight:bold;" | |
| * '''Slot 2:''' {{Repair Party}}
| | |- |
| * '''Slot 3:''' {{Spotting Aircraft}} '''or''' {{Catapult Fighter}}
| | | style="color:inherit;" | • Range (km) || style="color:inherit;" | 9 |
| | |- |
| | | style="color:inherit;" | • Minimum range (km) || style="color:inherit;" | 0.5 |
| | |- |
| | | style="color:inherit;" | • Reload time (sec) || style="color:inherit;" | 25.0 |
| | |- |
| | | style="color:inherit;" | • Number of aircraft || style="color:inherit;" | 1 |
| | |- |
| | | style="color:inherit;" | • Depth charges in payload || style="color:inherit;" | 1 |
| | |- |
| | | style="color:inherit;" | • Damage || style="color:inherit;" | 3400 |
| | |- |
| | | style="color:inherit;" | • Deployment || style="color:inherit;" | Manual |
| | |} |
| | </div> |
| | </div></div></div> |
| | <div class="b-popup"><div class="b-popup_head js-tech-nav_head"><div><h2>AA Defense</h2></div><span class="b-tech-nav_arrow"></span></div><div class="b-popup_content" style="display: none;"><div> |
| | <div style="border: 2px solid rgba(212,175,55,0.8); border-radius: 3px; margin-bottom: 1em; overflow: hidden;"> |
| | {| class="wikitable" style="margin:0 0 0.8em 0; width:100%; color:inherit;" |
| | ! style="background-color:#1a3244; color:#ffffff; font-weight:bold;" | AA ARMAMENT !! style="background-color:#1a3244; color:#ffffff; font-weight:bold;" | MOUNTS × BARRELS |
| | |- |
| | | style="color:inherit;" | 105 mm || style="color:inherit;" | 7 × 2 |
| | |- |
| | | style="color:inherit;" | 37 mm || style="color:inherit;" | 8 × 2 |
| | |- |
| | | style="color:inherit;" | 20 mm || style="color:inherit;" | 5 × 4 + 10 × 1 |
| | |} |
|
| |
|
| |Camouflage=<!-- write text about useful camouflage below --> | | '''Continuous damage''' — average DPS within each action zone |
| {{Prem Ship Camo Insert|shiptier=7}}
| | {| class="wikitable" style="margin:0 0 0.8em 0; width:100%; color:inherit;" |
| | ! style="background-color:#1a3244; color:#ffffff; font-weight:bold;" | RANGE !! style="background-color:#1a3244; color:#ffffff; font-weight:bold;" | DPS !! style="background-color:#1a3244; color:#ffffff; font-weight:bold;" | HIT CHANCE !! style="background-color:#1a3244; color:#ffffff; font-weight:bold;" | ACTION ZONE (km) |
| | |- |
| | | style="color:inherit;" | Short-range || style="color:inherit;" | 136.5 || style="color:inherit;" | 70% || style="color:inherit;" | 2.0 |
| | |- |
| | | style="color:inherit;" | Mid-range || style="color:inherit;" | 38.5 || style="color:inherit;" | 75% || style="color:inherit;" | 3.5 |
| | |- |
| | | style="color:inherit;" | Long-range || style="color:inherit;" | 154 || style="color:inherit;" | 75% || style="color:inherit;" | 5.2 |
| | |} |
|
| |
|
| |Signals=<!-- write text about best set of signals below --> | | '''Damage by shell explosions''' |
| {{Signal Flags
| | {| class="wikitable" style="margin:0 0 0.8em 0; width:100%; color:inherit;" |
| | November Echo Setteseven = 2 | | ! style="background-color:#1a3244; color:#ffffff; font-weight:bold;" | EXPLOSIONS / SALVO !! style="background-color:#1a3244; color:#ffffff; font-weight:bold;" | DAMAGE !! style="background-color:#1a3244; color:#ffffff; font-weight:bold;" | HIT CHANCE !! style="background-color:#1a3244; color:#ffffff; font-weight:bold;" | ACTION ZONE (km) |
| | Mike Yankee Soxisix = 3 | | |- |
| | India X-Ray = 1 | | | style="color:inherit;" | 5 || style="color:inherit;" | 1140 || style="color:inherit;" | 75% || style="color:inherit;" | 3.5–5.2 |
| | Juliet Whiskey Unaone = | | |} |
| | Victor Lima = 1 | | </div> |
| | Hotel Yankee = 1 | | </div></div></div> |
|
| |
|
| | November Foxtrot = 2
| |
| | Sierra Mike = 3
| |
| | India Delta = 3
| |
| | Juliet Yankee Bissotwo = 1
| |
| | India Yankee = 3
| |
| | Juliet Charlie = 1
| |
|
| |
|
| }} | | <!-- Add the ship code here to populate the upgrade table --> |
| | {{Ship Upgrades Section|code=PGSB597_Black_Scharnhorst}} |
|
| |
|
| |Gallery=<!-- write below list of files with description (if necessary) separated with | --><gallery>
| |
| File:ScharnhorstTakesTheLead.jpg|''Scharnhorst'' takes the lead.
| |
| File:ScharnhorstEngages.jpg|''Scharnhorst'' engages the enemy, leading a battleship and a cruiser.
| |
| File:ScharnhorstAngles.jpg|''Scharnhorst'' returns fire while angling against two enemy battleships.
| |
| File:ScharnhorstDodges.jpg|''Scharnhorst'' dodges a cruiser fired torpedo with ease. The cruiser was not so lucky.
| |
| File:DeadAmagi.jpg|''Scharnhorst'' moves on to its' next target after destroying an enemy ''[[Amagi]]''.
| |
| File:KutuzovJoinsAmagi.jpg|A ''[[Mikhail Kutuzov]]'' joins the ''[[Amagi]]'' in Davy Jones's Locker.
| |
| File:ScharnhorstColorado.jpg|''Scharnhorst'' attacks her next victim after destroying an enemy ''[[Colorado]]''.
| |
| File:ScharnhorstAirRaid.jpg|''Scharnhorst'' scrambles a catapult fighter in an attempt to fight off enemy aircraft after destroying an enemy ''[[Colorado]]''.
| |
| File:PCEE034_Scharnhorst.png|[[Ship:Flags#List_of_Ship_Flags|Flag]] of ''Scharnhorst''. Given to players who purchased a special bundle containing ''Scharnhorst''.
| |
| </gallery>
| |
|
| |
|
| |History=<!-- write text below -->
| | <!-- Consumables have to be tagged individually on a slot by slot basis --> |
| <div class="thumb tright">
| | {{Ship Consumables Section|consumables= |
| {{AnnoWiki|content= | | * '''Slot 1:''' {{Damage Control Party}} (15.0s action, 80.0s cooldown) |
| <h2> ''Scharnhorst'', 1939</h2>
| | * '''Slot 2:''' {{Repair Party}} (4 charges, 28.0s action, 80.0s cooldown, 281.5 hp/s) |
| ====Construction====
| | * '''Slot 3:''' {{Spotting Aircraft}} (4 charges, 100.0s action, 240.0s cooldown) '''or''' {{Patrol Fighter}} (3 charges, 60.0s action, 90.0s cooldown) |
| :Builder: Kriegsmarinewerft Wilhemshaven,<br> Wilhemshaven, Germany
| |
| :Laid down: 15th June 1935
| |
| :Launched: 3rd October 1936
| |
| :Commissioned: 7th January 1939
| |
| ----
| |
| ====Specifications====
| |
| :31,552 tons displacement, standard
| |
| :234.9m Length
| |
| :30m beam | |
| :8.69m draft
| |
| ----
| |
| ====Machinery====
| |
| :Twelve Wagner high-pressure oil-fired boilers
| |
| :Three Brown, Boveri & Co geared steam turbines
| |
| :6,108 tons of oil
| |
| ----
| |
| ====Performance====
| |
| :31 knots at 160,050 shaft horsepower
| |
| :7,100nm at 19 knots
| |
| ----
| |
| ====Armor====
| |
| :Main Belt: 320mm-70mm
| |
| :Torpedo Bulkhead: 32mm
| |
| :Decks: 95mm-50mm
| |
| :Conning Tower: 350mm
| |
| :Turrets: 360mm-180mm
| |
| :Barbettes: 350mm-200mm
| |
| :Fore and Aft Plating: 25mm
| |
| ----
| |
| ====Armament====
| |
| =====Main=====
| |
| :Nine (3x3) 28.3cm/54.5 SK C/34 guns
| |
| =====Secondary=====
| |
| :Twelve (4x2, 4x1) 15cm/55 SK C/28 guns
| |
| :Fourteen (7x2) 10.5cm/65 SK C/33 dual-purpose guns
| |
| =====Anti-aircraft=====
| |
| :Sixteen (8x2) 37mm SK C/30 AA guns
| |
| :Fourteen (2x4, 6x1) 20mm SK C/30 or C/38 AA guns
| |
| ====Aircraft Facilities====
| |
| :3 Arado Ar 196A floatplanes
| |
| :1 aircraft catapult | |
| ----
| |
| ====Complement====
| |
| :56 officers, 1,613 sailors
| |
| }}
| |
| {{AnnoWiki|content=
| |
| <h2> ''{{#var:ship_name}}'', 1943</h2>
| |
| ====Specifications====
| |
| :32,358 tons displacement, standard
| |
| :234.9m Length
| |
| :30m beam
| |
| :9.9m draft
| |
| ----
| |
| ====Armament====
| |
| =====Main=====
| |
| :Nine (3x3) 28.3cm/54.5 SK C/34 guns
| |
| =====Secondary=====
| |
| :Twelve (4x2, 4x1) 15cm/55 SK C/28 guns
| |
| :Fourteen (7x2) 10.5cm/65 SK C/33 dual-purpose guns
| |
| =====Anti-aircraft=====
| |
| :Sixteen (8x2) 37mm SK C/30 AA guns
| |
| :Thirty-Eight (7x4, 10x1) 20mm SK C/30 or C/38 AA guns
| |
| =====Torpedoes=====
| |
| :Six (2x3) 53.3cm G7a T1 torpedoes
| |
| ====Aircraft Facilities====
| |
| :3 Arado Ar 196A floatplanes
| |
| :1 aircraft catapult
| |
| }} | | }} |
| </div>
| |
|
| |
|
| [[File:Scharnhorst,1939.jpg|none|thumb|x350px|link=|''Scharnhorst'', circa 1939.]]
| |
| === History ===
| |
| ==== Design ====
| |
| With the commissioning of the last ''[[Ship:Admiral Graf Spee|Deutschland]]''-class vessel in 1936, the Kriegsmarine found itself in possession of warships that could outrun almost every ship that outgunned them, while being able to outgun almost every ship that could outrun them. The few exceptions to this were the British battlecruisers HMS ''Renown'', HMS ''Repulse'', and HMS ''Hood'', and the Japanese battleships of the ''[[Kongo]]'' class. The entry of ''Deutschland'' and her sister ships into service led the French begin designing a new class of battlecruisers — the ''[[Dunkerque]]'' class — which would be larger, stronger, and faster.
| |
|
| |
|
| Having learned the intended operational specifications of ''Dunkerque'' and her sisters, German designers began development on improved versions of the ''Deutschland''-class, known as ''Panzerschiff D'' and ''Panzerschiff E''. Shortly after, however, the French laid down ''Strasbourg'', which was a more heavily-armored ''Dunkerque'' and would again outclass the nascent German designs. The Kriegsmarine responded by designing an even more powerful ship, this time with a third turret — to help overcome the difference in firepower between the two classes — a tougher armor scheme, and a stronger propulsion to allow high speeds.
| | ==Gallery== |
| | <div class="b-popup"><div class="b-popup_head js-tech-nav_head"><div><h2>WoWs Gallery</h2></div><span class="b-tech-nav_arrow"></span></div><div class="b-popup_content" style="display: none;"><div> |
|
| |
|
| This step was — strictly speaking — not entirely legal. The Treaty of Versailles forbade Germany from possessing any warship in excess of 10,000 tons displacement. With the new class being designed for a displacement in excess of 30,000 tons, they were in clear violation of their treaty obligations. Subsequently, Hitler reached out to Great Britain and initiated negotiations of a new Anglo-German Naval Treaty, which partially legitimized the construction of the new ships. Whether the treaty fully covered the legitimacy of the new ships remains topic of discussion even today.
| | <gallery> |
| | | </gallery> |
| The armament of these ships consisted of three triple turrets with 283mm guns, the same caliber as those found on the ''Deutschland'' class. However, these guns were modified to increase their performance: the barrel was lengthened, and the weight of the shell increased. Additionally, the reloading and hoist system saw an improvement to allow a faster rate of fire, with reloads of 17 seconds being achieved during trials. Despite these improvements, German command knew that the 283mm guns were not competitive against larger surface units and planned early on to replace these guns with more powerful 380m twin turrets (the same as would later be mounted on the ''[[Bismarck]]'' class). One of the reasons to not install the turrets from the get-go was to not provoke the ire of their British neighbors, as negotiations with them were ongoing.
| | </div></div></div> |
| | |
| The secondary armament was a mixed load out of twelve 150mm guns, mounted in four twin and four single mountings, and a dual purpose battery of seven twin 105mm guns. In 1942 — following the usage of these ships as merchant raiders — both ''Scharnhorst'' and ''[[Gneisenau]]'' received two triple torpedo launchers that had been removed from light cruisers ''[[Nürnberg]]'' and ''Leipzig''. The mid-range anti aircraft armament consisted of eight twin 37mm ''Flakzwilling 30'', which were designed as a weapon against medium bombers; against mono planes, however, these guns would have limited effectiveness. Short range AA was provided by a steadily increasing number of 20mm guns in both single and quad mountings.
| |
| | |
| The propulsion was upgraded from the ''Deutschland''s. Unlike the diesel propulsion of their immediate predecessors, the ''Scharnhorst'' class went back to traditional steam propulsion, able to crank out 125,000 shaft horsepower across three shafts; output could be pushed up to over 160,000 in times of great need. This gave the ''Scharnhorst'' class a design speed of 31 knots, with the highest noted speed being above 33 knots. A stern catapult would allow them to operate seaplanes for the purposes of scouting.
| |
| | |
| The protection of the ''Scharnhorst'' class was drastically improved. The main armor belt was 320mm thick, and behind it followed a 105-110mm strong turtleback, which would deflect shells away from the vitals at short combat ranges. The horizontal protection consisted of a 50mm strong main deck, and the vital areas had an additional 80-95mm strong armored deck.
| |
| | |
| During their service these ships saw several modifications. The most important ones were the addition of an Atlantic bow in 1939 to improve the seaworthiness, the removal of the optical rangefinders of the A-turret in 1941 due to the lenses being constantly coated with water, the aforementioned addition of triple-tube torpedo launchers in 1942, and the continual addition of radar and sensory equipment for the purpose of detecting and engaging opposing vessels.
| |
| | |
| ==== Service ====
| |
| ''Scharnhorst'' officially completed trials in July 1939 and all modifications were completed near the end of August 1939. She began World War II by returning to Kiel where she received repairs for blast damage sustained during training. On 21 November 1939, both ''Scharnhorst'' and ''Gneisenau'' were ordered to sea in the Arctic. During this patrol, they encountered and sank the armed merchant cruiser HMS ''Rawalpindi'', returning to Germany for maintenance in January 1940.
| |
| | |
| Having completed a second, failed sortie into the North Sea, the pair returned to port in time to participate in the invasion of Norway. Sailing in April, they, along with ten destroyers, were to cover the invasion of Narvik. Encountering HMS ''Renown'' on 9 April, ''Gneisenau'' came off the worse in an inconclusive engagement, with ''Scharnhorst'' sustaining significant environmental damage from the heavy seas.
| |
|
| |
|
| Returning to port and making good all damage, both ''Scharnhorst'' and ''Gneisenau'' again sailed in support of German operations in Norway in June. On 8 June 1940, they encountered aircraft carrier HMS ''Glorious'' and her escorts, destroyers HMS ''Ardent'' and HMS ''Acasta''. They sank ''Glorious'', but ''Scharnhorst'' was torpedoed by ''Acasta'' and was forced to make for Trondheim. ''Scharnhorst'' eventually returned to Germany in June, but it would be the end of the year before she was back in action.
| | <div class="b-popup"><div class="b-popup_head js-tech-nav_head"><div><h2>Historical Gallery</h2></div><span class="b-tech-nav_arrow"></span></div><div class="b-popup_content" style="display: none;"><div> |
|
| |
|
| In late December 1940, both ''Scharnhorst'' and ''Gneisenau'' sailed as part of Operation Berlin in the Atlantic. Forced back to port by bad weather and mechanical failures, both ships returned within days, but sortied again on 22 January 1941. This time they managed to break into the Atlantic, and proceeded to sink twenty-two ships, returning to Brest in occupied France in March 1941. Here they became favorite targets of the Royal Air Force, with both ships being severely damaged and spending much of the year under repair and refit. It was here where both ships were refit with torpedo banks that had been landed by cruisers ''Leipzig'' and ''[[Nürnberg]]''.
| | <gallery> |
| | |
| Having been joined in the meantime by cruiser ''[[Prinz Eugen]]'' on 11 February 1942, both ''Scharnhorst'' and ''Gneisenau'' left Brest for Operation Cerberus (which famously became known as the "Channel Dash"). While the force managed to evade British attacks, both ''Gneisenau'' and ''Scharnhorst'' struck mines, ''Scharnhorst'' twice. All ships reached Kiel on 13 February. ''Scharnhorst'' spent several months under repair.
| |
| | |
| It was not until January 1943 when ''Scharnhorst'' was finally returned to action, and she was sent to the Arctic. With the increasing presence of Allied air and sea power, ''Scharnhorst'' failed to make port in Narvik until March, her earlier attempts having been abortive. Moving to Altafjord, she remained at anchor — with the exception of a single sortie with ''[[Tirpitz]]'' — until December 1943.
| |
| | |
| Her final voyage (which is now referred to as the Battle of the North Cape) began on Christmas Day, 1943. Ordered to intercept two Russia-bound convoys, she sortied with five destroyers under the command of ''Konteradmiral'' Erich Bey. Having intercepted one of the convoys on 26 December, ''Scharnhorst'', which had separated from her destroyer screen, was in turn intercepted by the convoy screen, which contained battleship HMS ''[[Duke of York]]'', heavy cruiser HMS ''Norfolk'', light cruisers HMS ''[[Belfast]]'', HMS ''Jamaica'', and HMS ''Sheffield'', and eight destroyers. Engaged, ''Scharnhorst'' fought against numerically superior forces blind, as her FuMO 27 radar was disabled early on due to shellfire from ''Norfolk''. Eventually, ''Scharnhorst'' was damaged by gunfire, then torpedoed, finally sinking with heavy loss of life.
| |
| | |
| ===Historical Inaccuracies===
| |
| * ''Scharnhorst''’s camouflage represents her appearance when she was sunk in the Battle of the North Cape in December 1943. She is still wearing her coat of arms which was removed in September 1939.
| |
| * ''Scharnhorst''’s camouflage when she took part in Operation Zitronella in September 1943 is missing.
| |
| * ''Scharnhorst''’s paint scheme during Operation Cerberus in February 1942 is also missing.
| |
| | |
| |HistoricalGallery=<!-- write below list of files with description (if necessary) separated with | --><gallery>
| |
| File:Scharn_crest.png|The wappen (coat of arms) of ''Scharnhorst''.
| |
| File:Scharnhorst_launching.jpg|Launching ceremony of ''Scharnhorst'', 3 October 1936.
| |
| File:Scharnhorst03.jpg|''Scharnhorst'' underway, date and location unknown.
| |
| File:Scharnhorst01.jpg|''Scharnhorst'', circa 1939.
| |
| File:Scharnhorst guns.jpg|''Scharnhorst'' in port during the winter of 1939–1940.
| |
| File:Scharnport.jpg|''Scharnhorst'' in Kiel during the winter of 1939-1940.
| |
| File:Scharnice.jpg|An icy view of ''Scharnhorst'''s forward battery, 1939-1940.
| |
| File:Bundesarchiv DVM 10 Bild-23-63-46, Schlachtschiff "Scharnhorst".jpg|''Scharnhorst'' in port.
| |
| File:El buque alemán Scharnhorst durante la batalla contra el Glorious.jpg|''Scharnhorst'' firing against HMS ''Glorious''.
| |
| File:Bundesarchiv DVM 10 Bild-23-63-12, Schlachtschiff "Scharnhorst".jpg|''Scharnhorst'' at sea.
| |
| File:ScharnCD1.jpeg|''[[Gneisenau]]'' (fore) and ''Scharnhorst'' (distance) as seen from ''[[Prinz Eugen]]'' during Operation Cerberus, February 1942.
| |
| File:Shan&Gn.jpg|Second view of ''Gneisenau'' (fore) and ''Scharnhorst'' (distance) from ''Prinz Eugen'' during Operation Cerberus, February 1942.
| |
| File:Scharnhorst-22.jpg|Aerial reconnaissance photo of ''Scharnhorst'' in Kiel after the Channel Dash, 1942.
| |
| File:21_zps7844a880.jpg|''Scharnhorst'' in Altafjord, Norway, 1943.
| |
| File:Scharnhorst survivors A 021202.jpg|Survivors from ''Scharnhorst'' disembarking in Scapa Flow.
| |
| File:Scharnhorst-WHV-April-2011.jpg|Memorial in Wilhelmshaven, Germany for ''Scharnhorst'''s crew.
| |
| </gallery> | | </gallery> |
| | </div></div></div> |
|
| |
|
| |Video=<!-- put below video clips with using template VideoYT. You can use html-tags for formatting. -->
| | [[Category:Ships of Germany]] |
| {{VideoYT|wx_XX0Ef7Qg}}
| | [[Category:Battleships]] |
| {{VideoYT|l-sQsHpSaY4}}
| | [[Category:Tier VII ships]] |
| {{VideoYT|ieDlY1ZmHrY}}
| | [[Category:Premium ships]]<!-- DO NOT DELETE THIS LINE. DO NOT INSERT ANYTHING BELOW THIS LINE --> |
| | |
| |Ref= <!-- write below -->
| |
| # [https://en.wikipedia.org/wiki/German_battleship_Scharnhorst German battleship ''Scharnhorst'' - Wikipedia]
| |
| # [https://en.wikipedia.org/wiki/Scharnhorst-class_battleship ''Scharnhorst''-class battleship - Wikipedia]
| |
| <references />
| |
| | |
| {{WoWS Ship Changelog Insert|1=
| |
| *Available for testing by supertesters in the game starting from Update 0.8.10.
| |
| *Available for purchase in the Premium Store during the Black Friday sale from November 29 to December 6, 2019. Could also drop from Black Friday containers.
| |
| *Update 0.8.11:
| |
| **The main battery dispersion ellipse was adjusted to that of American and British battleships.
| |
| *Update 0.9.0:
| |
| **Fixed camera errors during the game.
| |
| *Update 0.9.2:
| |
| **Penetration of 105 mm secondary battery HE shells increased from 18 to 26 mm.
| |
| *Update 0.9.5:
| |
| **Small changes to geometry and textures.
| |
| *Update 0.10.0:
| |
| **Increased accuracy of secondary battery guns
| |
| **The firing range of the secondary battery was increased to 6.3 km.
| |
| *Update 0.11.1:
| |
| **Acceleration slightly decreased while engine is damaged.
| |
| }}
| |
| }}<!-- DO NOT DELETE THIS LINE. DO NOT INSERT ANYTHING BELOW THIS LINE -->
| |



 (15.0s action, 80.0s cooldown)
 (4 charges, 28.0s action, 80.0s cooldown, 281.5 hp/s)
 (4 charges, 100.0s action, 240.0s cooldown) or Patrol Fighter
  (3 charges, 60.0s action, 90.0s cooldown)