|
|
| Line 1: |
Line 1: |
| <!-- DO NOT EDIT OR DELETE LINES WITH COMMENTS (it's look like as this or next line) -->
| | {{#vardefine:ship_name|Nino Bixio}} |
| <!-- Add |Ship=code for manual override -->
| | __NOTOC____NOEDITSECTION__ |
| {{WoWs_Ship | |
| |Promo=
| |
|
| |
|
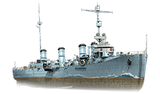
| |Anno=<!-- you can write below short description for the ship. it will replace the default one. --> | | <div class="b-description gw-frame-1"><div class="b-description-img b-description-img__indent b-description-img__single"><div style="width:160px; height:102px; opacity:.5; border-radius:2px; position:absolute; left:0; top:0; z-index:1; -webkit-transition:all 0.2s ease-out 0.1s; transition:all 0.2s ease-out 0.1s;">[[File:Wows_anno_flag_italy.png|160px]]</div><div class="l-description-img_class"><span class="b-description-img_type b-description-img_type__Cruiser b-description-img_type__Cruiser-Tech Tree"></span><span class="b-description-img_class">II</span></div><div class="b-description-img_vehicle">[[File:Ship_PISC102_Nino_Bixio.png|160px|link=|left]]</div><div class="l-description-img_price"><span class="b-description-img_price b-description-img_price__gold"><span title="''{{#var:ship_name}}'' was first released for sale on DD Month YYYY.">85,000</span></span></div></div><p>[[Ship:{{#var:ship_name}}|{{#var:ship_name}}]] — Italy Tech Tree Tier II [[Ship:Cruiser|Cruiser]].</p><p>At the beginning of the 20th century, the idea of a fast scout cruiser was popular in many countries. The first ship of that kind in the Italian Navy was armored cruiser Quarto. This was followed by the Nino Bixio class—they were larger than their predecessor and had more convenient artillery arrangement. During World War I, the lead ship of the series participated in the interception of Austro-Hungarian raiders and in the defense of the Entente transports. Nino Bixio served in the Navy until the end of the 1920s.</p><p> </p></div> |
|
| |
|
| |Performance=<!-- write text about performance in battles below -->
| | ===Pros=== |
| | * Pro 1 |
| | * Pro 2 |
|
| |
|
| Tier II Italian cruiser ''Nino Bixio'' is the first characteristic ship of her line. Her main appealing features include the trademark SAP shells, excellent maneuverability, and high speed.
| | ===Cons=== |
| | * Con 1 |
| | * Con 2 |
|
| |
|
| ''Nino Bixio’s'' firepower includes eight 120mm guns in single turrets, with three each on the port and starboard sides, and two aft. Because of this peculiar layout, not all of ''Nino Bixio’s'' guns can be aimed at any single enemy. While her guns have potential for a high alpha strike, her slow reload time of 12 seconds prevents her from rapidly damaging enemies. The main feature of her guns is her access to Semi-Armor Piercing ([[Ship:Ammo#SAP_shells|SAP]]) shells, instead of HE shells found on most other ships. This allows ''Nino Bixio'' to heavily damage destroyers and other lightly armored targets. However, this strength is held back by her inability to set fires or effectively damage ship modules. In terms of AP performance, her unusually good ballistics compared to other Tier II cruisers and penetration allow her to outclass many cruisers at her tier, despite her smaller 120mm guns.
| |
|
| |
|
| ''Nino Bixio'' does not get access to torpedo armament, which is a disadvantage in close range engagements, where many of her peers have torpedoes. Being a cruiser designed before World War I, ''Nino Bixio'' has incredibly poor AA defenses. However, being a Tier II ship, she will not face any aircraft carriers in battle. In addition, she has poor secondary armament, featuring inaccurate guns of a low caliber, and below average damage output.
| | ==Ship Stats== |
| | <div class="b-popup"><div class="b-popup_head js-tech-nav_head"><div><h2>Hull Information</h2></div><span class="b-tech-nav_arrow"></span></div><div class="b-popup_content" style="display: none;"><div> |
| | <div style="border: 2px solid rgba(212,175,55,0.8); border-radius: 3px; margin-bottom: 1em; overflow: hidden;"> |
| | {| class="wikitable" style="margin:0; color:inherit; width:100%" |
| | ! style="background-color:#1a3244; color:#ffffff; font-weight:bold;" | SURVIVABILITY !! style="background-color:#1a3244; color:#ffffff; font-weight:bold;" | Nino Bixio (A) !! style="background-color:#1a3244; color:#ffffff; font-weight:bold;" | Nino Bixio (B) |
| | |- |
| | | style="color:inherit;" | • Hit Points || style="color:inherit;" | 15500 || style="color:inherit;" | 16600 |
| | |- |
| | | style="color:inherit;" | • Torpedo protection damage reduction (%) || colspan="2" style="color:inherit;" | — |
| | |} |
| | </div> |
|
| |
|
| ''Nino Bixio’s'' survivability on paper appears to be quite poor. This is partly true, as she has a feeble health pool of only 16,600 when fully upgraded. Her armor is just as bad; she is covered in a mere 6 millimeters of armor. However, ''Nino Bixio'' does have access to a steep turtleback armor layer, whose 38 millimeter thickness can protect her against some low caliber AP shells. Because of her slim hull shape, many battleship AP shells are liable to either overpenetrate ''Nino Bixio'', or miss her entirely at closer ranges.
| | <div style="border: 2px solid rgba(212,175,55,0.8); border-radius: 3px; margin-bottom: 1em; overflow: hidden;"> |
| | {| class="wikitable" style="margin:0; color:inherit; width:100%" |
| | ! style="background-color:#1a3244; color:#ffffff; font-weight:bold;" | ARMOR DETAIL !! style="background-color:#1a3244; color:#ffffff; font-weight:bold;" | |
| | |- |
| | | style="color:inherit;" | • Belt (mm) || style="color:inherit;" | — |
| | |- |
| | | style="color:inherit;" | • Deck (mm) || style="color:inherit;" | — |
| | |- |
| | | style="color:inherit;" | • Superstructure (mm) || style="color:inherit;" | — |
| | |- |
| | | style="color:inherit;" | • Extremities (mm) || style="color:inherit;" | — |
| | |} |
| | </div> |
|
| |
|
| In terms of handling, ''Nino Bixio'' is strong. She is the fastest cruiser at her tier, reaching speeds close to 27 knots without Sierra Mike equipped. She also features a quick rudder shift time of 4.8 seconds fully upgraded, and a very tight turning circle of only 480 meters. Captains of ''Nino Bixio'' should be alert to incoming fire, and use her superb handling to evade the enemy’s shells, as her armor and health are weak. ''Nino Bixio'' also features excellent concealment for her tier, allowing her to effectively control engagements, and carry out surprise attacks on enemies.
| | <div style="border: 2px solid rgba(212,175,55,0.8); border-radius: 3px; margin-bottom: 1em; overflow: hidden;"> |
| | {| class="wikitable" style="margin:0; color:inherit; width:100%" |
| | ! style="background-color:#1a3244; color:#ffffff; font-weight:bold;" | MANEUVERABILITY !! style="background-color:#1a3244; color:#ffffff; font-weight:bold;" | Nino Bixio (A) !! style="background-color:#1a3244; color:#ffffff; font-weight:bold;" | Nino Bixio (B) |
| | |- |
| | | style="color:inherit;" | • Maximum speed (kt) || style="color:inherit;" | 26.8 || style="color:inherit;" | 26.8 |
| | |- |
| | | style="color:inherit;" | • Turning circle radius (m) || style="color:inherit;" | 480 || style="color:inherit;" | 480 |
| | |- |
| | | style="color:inherit;" | • Rudder-shift time (sec) || style="color:inherit;" | 8.7 || style="color:inherit;" | 6.2 |
| | |} |
| | </div> |
|
| |
|
| Taking all of her characteristics into account, captains of ''Nino Bixio'' should adopt a conservative playstyle, using allies and islands as cover to stay safe while crippling enemy cruisers and destroyers with her effective SAP rounds. She should avoid close range fights, as her weak armor and lack of torpedoes will mean a quick punishment for overly aggressive play.
| | <div style="border: 2px solid rgba(212,175,55,0.8); border-radius: 3px; margin-bottom: 1em; overflow: hidden;"> |
| | {| class="wikitable" style="margin:0; color:inherit; width:100%" |
| | ! style="background-color:#1a3244; color:#ffffff; font-weight:bold;" | CONCEALMENT !! style="background-color:#1a3244; color:#ffffff; font-weight:bold;" | Nino Bixio (A) !! style="background-color:#1a3244; color:#ffffff; font-weight:bold;" | Nino Bixio (B) |
| | |- |
| | | style="color:inherit;" | • Detectability by sea (km) || style="color:inherit;" | 7.86 || style="color:inherit;" | 7.86 |
| | |- |
| | | style="color:inherit;" | • Detectability by air (km) || style="color:inherit;" | 3.96 || style="color:inherit;" | 3.96 |
| | |- |
| | | style="color:inherit;" | • Detectability after firing main guns in smoke (km) || colspan="2" style="color:inherit;" | 2.94 |
| | |- |
| | | style="color:inherit;" | • Detectability by depths (km) || style="color:inherit;" | 3.96 || style="color:inherit;" | 3.96 |
| | |} |
| | </div> |
|
| |
|
| | </div></div></div> |
| | <div class="b-popup"><div class="b-popup_head js-tech-nav_head"><div><h2>Main Battery</h2></div><span class="b-tech-nav_arrow"></span></div><div class="b-popup_content" style="display: none;"><div><div style="border: 2px solid rgba(212,175,55,0.8); border-radius: 3px; margin-bottom: 1em; overflow: hidden;"> |
| | {| class="wikitable" style="margin:0; color:inherit; width:100%" |
| | ! style="background-color:#1a3244; color:#ffffff; font-weight:bold;" | MAIN BATTERY !! style="background-color:#1a3244; color:#ffffff; font-weight:bold;" | SDT 2 mod.1 !! style="background-color:#1a3244; color:#ffffff; font-weight:bold;" | SDT 2 mod.2 |
| | |- |
| | | style="color:inherit;" | • Arrangement || colspan="2" style="color:inherit;" | 8×1 120mm |
| | |- |
| | | style="color:inherit;" | • Firing range (km) || style="color:inherit;" | 10.34 || style="color:inherit;" | 11.37 |
| | |- |
| | | style="color:inherit;" | • Reload time (sec) || colspan="2" style="color:inherit;" | 5.5 |
| | |- |
| | | style="color:inherit;" | • Rate of fire (shots/min) || colspan="2" style="color:inherit;" | 10.9 |
| | |- |
| | | style="color:inherit;" | • 180° turn time (sec) || colspan="2" style="color:inherit;" | 15.0 |
| | |} |
| | </div> |
|
| |
|
| |Pros=<!-- write list of positive points below. use * as in ordinary wiki-list. --> | | <div style="border: 2px solid rgba(212,175,55,0.8); border-radius: 3px; margin-bottom: 1em; overflow: hidden;"> |
| * SAP shells are quite effective against destroyers and lightly armored targets
| | {| class="wikitable" style="margin:0; color:inherit; width:100%" |
| * Excellent handling allows her to evade a great deal of incoming fire
| | ! style="background-color:#1a3244; color:#ffffff; font-weight:bold;" | DISPERSION !! style="background-color:#1a3244; color:#ffffff; font-weight:bold;" | |
| * The fastest Tier II cruiser
| | |- |
| * Good Handling
| | | style="color:inherit;" | • Dispersion type || style="color:inherit;" | Standard CA/CL dispersion |
| * Good AP penetration
| | |- |
| | | style="color:inherit;" | • Dispersion formula || style="color:inherit;" | Dispersion (m) = 6.9 × range(km) + 33 |
| | |- |
| | | style="color:inherit;" | • Sigma || style="color:inherit;" | 2.0 |
| | |- |
| | | style="color:inherit;" | • Maximum dispersion (m) || style="color:inherit;" | 104 |
| | |- |
| | | style="color:inherit;" | • Dispersion at 5 km || style="color:inherit;" | 68 |
| | |- |
| | | style="color:inherit;" | • Dispersion at 10 km || style="color:inherit;" | 102 |
| | |- |
| | | style="color:inherit;" | • Dispersion at 10.34 km || style="color:inherit;" | 104 |
| | |} |
| | </div> |
|
| |
|
| |Cons=<!-- write list of negative points below. use * as in ordinary wiki-list. -->
| |
| * Weak armor and a small HP pool
| |
| * Long reload time of 12 seconds
| |
| * No torpedoes
| |
| * Cannot effectively damage highly armored targets due to lack of fire starting capabilities
| |
| * Small caliber guns compared to her peers
| |
|
| |
|
| |Research=<!-- write text about priority sequence of research below --> | | <div style="border: 2px solid rgba(212,175,55,0.8); border-radius: 3px; margin-bottom: 1em; overflow: hidden;"> |
| # '''Hull:''' Upgrade to Hull (B) first. Research of this module also unlocks progression to Tier III ''[[Taranto]]''.
| | {| class="wikitable" style="margin:0; color:inherit; width:100%" |
| # '''Gun Fire Control System:''' Upgrade to SDT 2 mod.2 for an extra 10% range on the main battery.
| | ! style="background-color:#1a3244; color:#ffffff; font-weight:bold;" | SAP SHELL !! style="background-color:#1a3244; color:#ffffff; font-weight:bold;" | |
| | |- |
| | | style="color:inherit;" | • Name || style="color:inherit;" | PIPA103 |
| | |- |
| | | style="color:inherit;" | • Maximum damage || style="color:inherit;" | 1300 |
| | |- |
| | | style="color:inherit;" | • Shell velocity (m/s) || style="color:inherit;" | 840 |
| | |- |
| | | style="color:inherit;" | • Shell weight (kg) || style="color:inherit;" | 22.75 |
| | |- |
| | | style="color:inherit;" | • Penetration (mm) || style="color:inherit;" | 34.2 |
| | |- |
| | | style="color:inherit;" | • Fuse time (sec) || style="color:inherit;" | 0.03 |
| | |- |
| | | style="color:inherit;" | • Ricochet start (°) || style="color:inherit;" | 60 |
| | |- |
| | | style="color:inherit;" | • Always ricochet (°) || style="color:inherit;" | 75 |
| | |- |
| | | style="color:inherit;" | • Normalisation (°) || style="color:inherit;" | 45 |
| | |- |
| | | style="color:inherit;" | • Arming threshold (mm) || style="color:inherit;" | 25 |
| | |} |
| | </div> |
|
| |
|
| |OptimalConfiguration=<!-- write some general text about selection of optimal configuration below (optional)-->
| | </div></div></div> |
| | <div class="b-popup"><div class="b-popup_head js-tech-nav_head"><div><h2>Secondary Battery</h2></div><span class="b-tech-nav_arrow"></span></div><div class="b-popup_content" style="display: none;"><div> |
| | <div style="border: 2px solid rgba(212,175,55,0.8); border-radius: 3px; margin-bottom: 1em; overflow: hidden;"> |
| | {| class="wikitable" style="margin:0; color:inherit; width:100%" |
| | ! style="background-color:#1a3244; color:#ffffff; font-weight:bold;" | SECONDARY BATTERY !! style="background-color:#1a3244; color:#ffffff; font-weight:bold;" | |
| | |- |
| | | style="color:inherit;" | • Secondary battery range (km) || style="color:inherit;" | 3.2 |
| | |} |
| | </div> |
|
| |
|
| |Upgrades=<!-- write text about best upgrades below, add * after upgrade link to designate that another upgrade may be viable --> | | <div style="border: 2px solid rgba(212,175,55,0.8); border-radius: 3px; margin-bottom: 1em; overflow: hidden;"> |
| Recommended:
| | {| class="wikitable" style="margin:0; color:inherit; width:100%" |
| * '''Slot 1''': {{Main Armaments Modification 1}}
| | ! style="background-color:#1a3244; color:#ffffff; font-weight:bold;" | SECONDARY ARMAMENT 1 !! style="background-color:#1a3244; color:#ffffff; font-weight:bold;" | |
| | |- |
| | | style="color:inherit;" | • Shell type || style="color:inherit;" | HE |
| | |- |
| | | style="color:inherit;" | • Name || style="color:inherit;" | 76 mm proiettili HE 1909 |
| | |- |
| | | style="color:inherit;" | • Arrangement || style="color:inherit;" | 1x76mm |
| | |- |
| | | style="color:inherit;" | • Rate of fire (shots/min) || style="color:inherit;" | 10.0 |
| | |- |
| | | style="color:inherit;" | • Maximum damage || style="color:inherit;" | 1100 |
| | |- |
| | | style="color:inherit;" | • Shell velocity (m/s) || style="color:inherit;" | 815 |
| | |- |
| | | style="color:inherit;" | • Penetration (mm) || style="color:inherit;" | 13 |
| | |- |
| | | style="color:inherit;" | • Fire chance (%) || style="color:inherit;" | 4.0% |
| | |} |
| | </div> |
|
| |
|
| |CommanderSkills=<!-- write text about best set of Commander Skills below -->
| |
|
| |
|
| {{Commander Skills 3 CR
| |
| <!-- Ratings 1,2,3 are legit. Others are ignored.-->
| |
| | rating11 = <!-- Grease the Gears -->
| |
| | rating12 = <!-- Swift Fish -->
| |
| | rating13 = <!-- Consumables Specialist -->
| |
| | rating14 = <!-- Gun Feeder -->
| |
| | rating15 = <!-- Incoming Fire Alert -->
| |
| | rating16 = 2 <!-- Last Stand -->
| |
|
| |
|
| | rating21 = <!-- Pyrotechnician -->
| | </div></div></div> |
| | rating22 = <!-- Fill the Tubes -->
| | <div class="b-popup"><div class="b-popup_head js-tech-nav_head"><div><h2>AA Defense</h2></div><span class="b-tech-nav_arrow"></span></div><div class="b-popup_content" style="display: none;"><div> |
| | rating23 = <!-- Consumables Enhancements -->
| | <div style="border: 2px solid rgba(212,175,55,0.8); border-radius: 3px; margin-bottom: 1em; overflow: hidden;"> |
| | rating24 = <!-- Eye in the Sky -->
| | '''Nino Bixio (A)''' |
| | rating25 = 2 <!-- Priority Target -->
| |
| | rating26 = <!-- Expert AA Marksman -->
| |
|
| |
|
| | rating31 = 2 <!-- Heavy HE and SAP Shells --> | | {| class="wikitable" style="margin:0 0 0.8em 0; width:100%; color:inherit;" |
| | rating32 = <!-- Enhanced Torpedo Explosive Charge --> | | ! style="background-color:#1a3244; color:#ffffff; font-weight:bold;" | AA ARMAMENT !! style="background-color:#1a3244; color:#ffffff; font-weight:bold;" | MOUNTS × BARRELS |
| | rating33 = 2 <!-- Adrenaline Rush --> | | |- |
| | rating34 = <!-- Heavy AP Shells --> | | | style="color:inherit;" | 8 mm || style="color:inherit;" | 2 × 1 |
| | rating35 = <!-- Superintendent --> | | |} |
| | rating36 = <!-- Survivability Expert --> | |
|
| |
|
| | rating41 = 2 <!-- Top Grade Gunner --> | | '''Continuous damage''' — average DPS within each action zone |
| | rating42 = 2 <!-- Outnumbered --> | | {| class="wikitable" style="margin:0 0 0.8em 0; width:100%; color:inherit;" |
| | rating43 = <!-- Radio Location --> | | ! style="background-color:#1a3244; color:#ffffff; font-weight:bold;" | RANGE !! style="background-color:#1a3244; color:#ffffff; font-weight:bold;" | DPS !! style="background-color:#1a3244; color:#ffffff; font-weight:bold;" | HIT CHANCE !! style="background-color:#1a3244; color:#ffffff; font-weight:bold;" | ACTION ZONE (km) |
| | rating44 = <!-- Inertial Fuse for HE Shells --> | | |- |
| | rating45 = 2 <!-- Concealment Expert --> | | | style="color:inherit;" | Short-range || style="color:inherit;" | 10.5 || style="color:inherit;" | 85% || style="color:inherit;" | 1.5 |
| | rating46 = <!-- AA Gunner --> | | |} |
| }}
| |
|
| |
|
| |Consumables=<!-- write text about selection of Consumables below -->
| | '''Nino Bixio (B)''' |
| ''{{#var:ship_name}}'' equips: | |
| * '''Slot 1:''' {{Damage Control Party}}
| |
|
| |
|
| |Camouflage=<!-- write text about useful camouflage below --> | | {| class="wikitable" style="margin:0 0 0.8em 0; width:100%; color:inherit;" |
| | ! style="background-color:#1a3244; color:#ffffff; font-weight:bold;" | AA ARMAMENT !! style="background-color:#1a3244; color:#ffffff; font-weight:bold;" | MOUNTS × BARRELS |
| | |- |
| | | style="color:inherit;" | 40 mm || style="color:inherit;" | 2 × 1 |
| | |} |
|
| |
|
| | '''Continuous damage''' — average DPS within each action zone |
| | {| class="wikitable" style="margin:0 0 0.8em 0; width:100%; color:inherit;" |
| | ! style="background-color:#1a3244; color:#ffffff; font-weight:bold;" | RANGE !! style="background-color:#1a3244; color:#ffffff; font-weight:bold;" | DPS !! style="background-color:#1a3244; color:#ffffff; font-weight:bold;" | HIT CHANCE !! style="background-color:#1a3244; color:#ffffff; font-weight:bold;" | ACTION ZONE (km) |
| | |- |
| | | style="color:inherit;" | Mid-range || style="color:inherit;" | 24.5 || style="color:inherit;" | 90% || style="color:inherit;" | 2.5 |
| | |} |
| | </div> |
| | </div></div></div> |
|
| |
|
|
| |
|
| |Signals=<!-- write text about best set of signals below -->
| | <!-- Add the ship code here to populate the upgrade table --> |
| | {{Ship Upgrades Section|code=PISC102_Nino_Bixio}} |
|
| |
|
| {{Signal Flags
| |
| | November Echo Setteseven =
| |
| | Mike Yankee Soxisix =
| |
| | India X-Ray =
| |
| | Juliet Whiskey Unaone =
| |
| | Victor Lima =
| |
| | Hotel Yankee =
| |
|
| |
|
| | November Foxtrot = 2
| | <!-- Consumables have to be tagged individually on a slot by slot basis --> |
| | Sierra Mike = 2
| | {{Ship Consumables Section|consumables= |
| | India Delta =
| | * '''Slot 1:''' {{Damage Control Party}} (5.0s action, 60.0s cooldown) |
| | Juliet Yankee Bissotwo = | | }} |
| | India Yankee =
| |
| | Juliet Charlie = 2
| |
|
| |
|
| | Zulu = 2
| |
| | India Bravo Terrathree = 2
| |
| | Equal Speed Charlie London = 2
| |
| | Zulu Hotel = 2
| |
| | Papa Papa = 2
| |
|
| |
|
| | Wyvern =
| | ==Gallery== |
| | Red Dragon =
| | <div class="b-popup"><div class="b-popup_head js-tech-nav_head"><div><h2>WoWs Gallery</h2></div><span class="b-tech-nav_arrow"></span></div><div class="b-popup_content" style="display: none;"><div> |
| | Dragon Flag =
| |
| | Ouroboros =
| |
| | Hydra =
| |
| | Basilisk =
| |
| | |
| | Leviathan =
| |
| | Scylla =
| |
| }}
| |
| | |
| |Gallery=<!-- write below list of files with description (if necessary) separated with | --><gallery>
| |
|
| |
|
| | <gallery> |
| </gallery> | | </gallery> |
| | </div></div></div> |
|
| |
|
| |History=<!-- write text below -->
| | <div class="b-popup"><div class="b-popup_head js-tech-nav_head"><div><h2>Historical Gallery</h2></div><span class="b-tech-nav_arrow"></span></div><div class="b-popup_content" style="display: none;"><div> |
| | |
| <div class="thumb tright">
| |
| {{AnnoWiki|content=
| |
| <h2>''{{#var:ship_name}}'', 1914</h2> | |
| ===Construction=== | |
| :Cantiere di Castellammare di Stabia; Castellammare di Stabia, Italy
| |
| :Laid down: 15 February 1911
| |
| :Launched: 30 December 1911
| |
| :Commissioned: 5 May 1914
| |
| ---- | |
| ===Specifications===
| |
| :3,575 tons displacement, normal
| |
| :4,141 tons displacement, full
| |
| :140.3m length
| |
| :13m beam
| |
| :4.4m draft (4.7m full load)
| |
| ----
| |
| ====Machinery====
| |
| :Fourteen (14) Blechynden mied-firing boilers
| |
| :Three (3) Curtiss steam turbines
| |
| :750 tons coal, 180 tons oil
| |
| ----
| |
| ====Performance====
| |
| :26.5 knots at 26,500 shaft horsepower
| |
| :1,400 nautical miles at 13 knots
| |
| ----
| |
| ====Armor====
| |
| :Decks: 40mm deck and slopes
| |
| :Conning tower: 100mm
| |
| ----
| |
| ====Armament====
| |
| =====Main=====
| |
| :Six (6x1) 120mm/50 Armstrong Modello 1909
| |
| =====Secondary=====
| |
| :Six (6x1) 76mm/50 Vickers Modello 1909
| |
| =====Anti-Aircraft=====
| |
| :Two (2x1) 40mm/39 Vickers-Terni Modello 1917
| |
| =====Torpedoes=====
| |
| :Six (2x3) 533mm torpedo tubes
| |
| ----
| |
| ====Complement====
| |
| :336 (14 officers, 322 NCOs and sailors)
| |
| }}
| |
| </div> | |
| | |
| ===History===
| |
| ====Design====
| |
| | |
| After the success of the scout cruiser (esploratori) ''Quarto'', the Regia Marina sought to procure a new class of the ship types, which would become the ''Nino Bixio''-class.
| |
| | |
| The esploratori concept was born out of the need for fast scouts that could be used to make contact with the enemy and report their position, as well as fight enemy scout vessels. For this, the Regia Marina had built an ‘unprotected’ turbine powered protected cruiser, ''Quarto'', which had used ten Blechyden boilers (eight coal-fired, two oil-fired) and four Parsons steam turbines. This produced 25,000 shp, giving the 3,440-ton fully loaded) cruiser a top speed of 28 knots. Armor was limited to the 40mm protected deck and the 100mm conning tower, and the armament was based on powerful 120mm cannons with 76mm anti-torpedo boats as backup. Torpedo tubes and minelaying capacity were included.
| |
| | |
| Based on this design, the Regia Marina ordered two more esploratori, which were some 500 tons heavier and would have, it was hoped, more powerful machinery. The result was the ''Nino Bixio''-class. Weighing in at 4,141 tons fully loaded they were significantly heavier than Quarto, mostly due to the more powerful machinery. The design was reduced to three shafts (with Curtiss turbines), but now had fourteen Blechynden mixed-firing boilers, with the overall length and breadth of the cruiser increasing by 7 and 0.2 meters respectively. Though the machinery was more powerful in output per shaft, overall power was reduced (to 22,500 shp - 8,000 shp on the outer shafts, 6,500 shp on the centerline) and this combined with the increased displacement caused the top speed to fall to 26.5 knots. Adding insult to injury the Curtiss turbines were far more unreliable compared to the Parsons turbines, further reducing the usefulness of the ‘improved’ vessels compared to ''Quarto''.
| |
|
| |
| Although the armament remained the same, a benefit of the longer hull was the improved placement of the guns, allowing five rather than three 120mm guns to bear to a broadside. The main battery consisted of six 120mm/50 Armstrong Modello 1909 in single mounts, which fired 22.75 kg shells at a velocity of 840 m/s and a rate of fire of six rounds per minute. The anti-torpedo boat armament consisted of six 3”(76mm)/50 Vickers Modello 1909, which fired 6 kg shells at a velocity of 815 m/s and a rate of 10 rpm. At their maximum elevation of +20°, range was 10,000 meters. Two beam 450mm single torpedo tubes were fitted, and minelaying capacity was 200 mines.
| |
| | |
| | |
| ====Service==== | |
| | |
| ''Nino Bixio'' was laid down at the Royal Yards at Castellamare di Stabia on 15 February 1911, and was launched before the year was out (30 December 1911). Fitting out dragged on, however, and the ships was only completed on 5 May 1914. Trials had been run in 1913, and were disappointing – at a normal displacement (3,515 tons) she had managed to work up to 24,000 shp, for a top speed of only 26.82 knots, far short of the intended 29 knots. She commissioned on the day she was considered completed, and was named after Nino Bixio, a significant figure of the Risorgimento movement – he had served in the Sardinian Navy before these wars, before joining Giuseppe Garibaldi on land with his Alpine Hunters, and later accompanied Garibaldi on his expedition of the thousand. Later, he became a politician. The ship’s motto was ''Obbedire e tacere'' (Obey and be silent).
| |
| | |
| Joining the Regia Marina on 1 July 1914, ''Nino Bixio'' was initially stationed in Cyrenaica, moving from various ports in eastern Libya, until her return to Italy when she made Taranto on 16 August 1914.
| |
| | |
| When Italy entered the First World War on 23 May 1915, Nino Bixio was stationed at Brindisi along with the other Italian scout cruisers (her sister Marsala, and Quarto). This allowed them to cover the Otranto barrage, a network put in place by Entente and Allied forces to prevent Austrian and German submarines from breaking out into the Mediterranean. In practice the barrage was useless, but regardless it served as a major target for Austrian surface forces, which repeatedly attempted to attack it. On 5 June ''Nino Bixio'', escorted by four destroyers (two French, two Italian), conducted a bombardment of Austrian positions on the islands of Lissa and Sant’Andrea.
| |
| | |
| On 29 December 1915 Nino Bixio took part in the Battle of Durazzo. The Austrians had deployed a scout cruiser and five destroyers to destroy two Italian destroyers reported off the coast of Durazzo. The Austrian force blundered into the freshly laid Italian minefield, losing one destroyer and suffering damage to another, with another fouling a screw. The Austrian force called for backup (an armored cruiser and four torpedo boats), knowing Allied ships would soon be on top of them. Two allied forces were in a position to respond, each consisting of a pair of light cruisers with destroyer escorts. ''Nino Bixio'' was in the second force, carrying the flag of Rear Admiral Alfonso Belleni. The first group had managed to engage the Austrian force, which was fleeing northwest, but Belleni’s group was able to cut them off, forcing them to turn away to the southwest. However, in the running fight they were further behind the other forces, and so their gunfire was relatively ineffective. When the Austrians finally made their break north, they were able to slip by in the dark, with the brief gunfight resulting in a single hit to the topsides of ''Nino Bixio''.
| |
| | |
| On 2 August 1916, ''Nino Bixio'' was briefly involved in another battle, the Action off Cattaro, where she briefly (and ineffectually) traded fire with the Austrian cruiser ''Aspern''. Shortly after the clash, she came under attack by Austrian submarine ''U-4'', but the two torpedoes missed the esploratori. In May of 1917 she missed another chance to grapple with her foes, as she had no steam in her boilers during the Austrian raid that resulted in the Battle of the Otranto Straits, thus preventing her from taking part. On the evening of 3 September, she, along with British cruiser ''Weymouth'' and an escort of two Italian and two French destroyers, slipped anchor to escort a force of torpedo floatplanes and MTBs for a planned raid on Cattaro, but were forced to cancel the operation and return to port due to the poor weather. This would be the last major chance she had at clashing with the Austrian surface forces, and her life continued in routine missions since then. As of 4 November 1918, when the Austro-Hungarian empire capitulated to Italy, ''Nino Bixio'' had conducted a total of 54 war missions.
| |
| | |
| Much of 1919 was spent on peacekeeping missions. Her first deployment was to Spalato (Split) from 24 February to 10 July, until she sailed to Zara (Zadar), where she remained until the 19th. She then went on a chain of diplomatic missions around the former Ottoman empire, which ended on 19 October. Another chain of missions in this theme were conducted throughout 1921-1922, before arriving in Taranto once more on 4 March 1922 for a refit. On 10 July 1924 she was put under the command of the light division, though in August she was briefly deployed to Navarino. At the end of 1925 she was assigned to the Scout Division (Divisione Esploratori). In 1927 she was assigned to the Scouting Group along with the light scout (esploratore leggere) ''Premuda'', the former German ''S-113'', based in Taranto, but at the end of October it was re-assigned to Pola, but this was more a paper assignment, as in reality she served as a barracks ship at Trieste for the crew of the new treaty cruiser ''Trieste''.
| |
| | |
| Although much of the ship was still in fair condition, the ever-present issues with her machinery, which had steadily gotten worse as the cruisers aged, had left the warship with little value to the Regia Marina. ''Nino Bixio'' was disarmed on 1 March 1929, and officially stricken from the naval register on 15 March 1929, after which she was sold for scrapping,
| |
| | |
| | |
| |HistoricalGallery=<!-- write below list of files with description (if necessary) separated with | --><gallery>
| |
|
| |
|
| | <gallery> |
| </gallery> | | </gallery> |
| | </div></div></div> |
|
| |
|
| |Video=<!-- put below video clips with using template VideoYT. You can use html-tags for formatting. -->
| | [[Category:Ships of Italy]] |
| | | [[Category:Cruisers]] |
| |Ref= <!-- write below -->
| | [[Category:Tier II ships]] |
| <references />
| | <!-- DO NOT DELETE THIS LINE. DO NOT INSERT ANYTHING BELOW THIS LINE --> |
| | |
| * [https://en.wikipedia.org/wiki/Italian_cruiser_Nino_Bixio Italian cruiser ''Nino Bixio'' - Wikipedia]
| |
| * [https://en.wikipedia.org/wiki/Nino_Bixio-class_cruiser ''Nino Bixio''-class cruiser - Wikipedia]
| |
| | |
| {{WoWS Ship Changelog Insert|1=
| |
| *Available for testing by supertesters in the game starting from Update 0.8.7.
| |
| {{WoWS Ship Testing Changes Insert|1=
| |
| *<span class="plainlinks">[https://www.reddit.com/r/WorldOfWarships/comments/cgsmpp/st_new_ships/ July 23, 2019]</span>:
| |
| **Preliminary characteristics.
| |
| *<span class="plainlinks">[https://www.reddit.com/r/WorldOfWarships/comments/ct0948/st_changes_to_test_ships/ Aug 20, 2019]</span>:
| |
| **Removed the 10% damage limit for semi-armor-piercing shell penetrations against destroyers.
| |
| **Improved ricochet angles of semi-armor-piercing shells from 60-85 degrees to 80-85 degrees.
| |
| *<span class="plainlinks">[https://www.reddit.com/r/WorldOfWarships/comments/dhqyq9/st_changes_to_test_ships/ Oct 14, 2019]</span>:
| |
| **Main battery reload time decreased from 13 to 12 s.
| |
| }}
| |
| *Introduced in Update 0.8.10.
| |
| *Update 0.10.0:
| |
| **Acceleration and braking dynamics were decreased to standard values.
| |
| *Update 0.10.10:
| |
| **Secondary battery maximum firing range increased to 3.2 km.
| |
| *Update 0.11.1:
| |
| **Ricochet angles for SAP shells changed from 80-85 degrees to 60-75 degrees in an unlisted change, likely due to sharing shells with low tier Italian destroyers which had their shells changed during testing in {{WoWS DevBlog Link Insert|275}}.
| |
| *Update 12.2:
| |
| **Maximum SAP shell damage reduced from 2,800 to 2,600.
| |
| **Main battery reload time reduced from 12 to 11 s.
| |
| *Update 13.0:
| |
| **Fixed Commander skill recommendations for the ship.
| |
| }}
| |
| }}<!-- DO NOT DELETE THIS LINE. DO NOT INSERT ANYTHING BELOW THIS LINE -->
| |



 (5.0s action, 60.0s cooldown)