|
|
| Line 1: |
Line 1: |
| <!-- DO NOT EDIT OR DELETE LINES WITH COMMENTS (it's look like as this or next line)
| | {{#vardefine:ship_name|G-101}} |
| -->{{WoWs_Ship|Promo=<!-- in case of gift or promo ship write conditions to get it. (optional)-->
| | __NOTOC____NOEDITSECTION__ |
|
| |
|
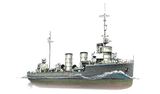
| |Anno=<!-- you can write below short description for the ship. it will replace default once. --> | | <div class="b-description gw-frame-1"><div class="b-description-img b-description-img__indent b-description-img__single"><div style="width:160px; height:102px; opacity:.5; border-radius:2px; position:absolute; left:0; top:0; z-index:1; -webkit-transition:all 0.2s ease-out 0.1s; transition:all 0.2s ease-out 0.1s;">[[File:Wows_anno_flag_germany.png|160px]]</div><div class="l-description-img_class"><span class="b-description-img_type b-description-img_type__Destroyer b-description-img_type__Destroyer-Tech Tree"></span><span class="b-description-img_class">III</span></div><div class="b-description-img_vehicle">[[File:Ship_PGSD103_G_101.png|160px|link=|left]]</div><div class="l-description-img_price"><span class="b-description-img_price b-description-img_price__gold"><span title="''{{#var:ship_name}}'' was first released for sale on DD Month YYYY.">249,000</span></span></div></div><p>[[Ship:{{#var:ship_name}}|{{#var:ship_name}}]] — Germany Tech Tree Tier III [[Ship:Destroyer|Destroyer]].</p><p>In 1910 and 1912, Argentina ordered several modern destroyers, some of which were built at the German shipyards of Germaniawerft and Schichau. With the outbreak of World War I, however, the ships were requisitioned and assigned to the 2nd Destroyer Division of the German Navy. SMS G-101, originally laid down as ARA Santiago, entered service in March 1915. The following year, along with the other destroyers of her series, she participated in the Battle of Jutland. After the end of World War I, the ships were interned in Scapa Flow.</p><p> </p></div> |
| This destroyer was built in Germany for the Argentine Navy. However, she was commissioned into the Imperial German Navy at the outbreak of World War I. Compared to ''[[V-25]]'' class destroyers, she was larger in size and had more guns, but was slower.<!-- <br><br>{{Model3DViewer|589a708f79d146caad9662fceeb1198e}}-->
| |
|
| |
|
| |Performance=<!-- write text about performance in battles below -->
| | ===Pros=== |
| ''{{#var:ship_name}}'' improves upon ''[[Ship:V-25|V-25]]'' with a substantial boost to main battery firepower. With a larger health pool, fast reloading armaments and high main battery DPM she can confidently operate in a mid-range support role. To be most effective Captains will need to consider her substandard main battery range, long shell flight times and large detectability radius when choosing targets.<br />
| | * Pro 1 |
| | * Pro 2 |
|
| |
|
| ''Speed''<br />
| | ===Cons=== |
| In contrast to the majority of Tier III destroyers, ''{{#var:ship_name}}'' is the slowest and heaviest with the upgraded hull, taking almost 19 seconds to come up to maximum speed. Rudder shift time improves to 2.9 seconds; however, she retains her large turning radius. Dodging incoming torpedoes in either configuration will test a captain’s abilities to judge incoming fire angles. Planning engagements well in advance is highly recommended as ''{{#var:ship_name}}'' needs room to maneuver.<br />
| | * Con 1 |
| | * Con 2 |
|
| |
|
| ''Concealment''<br />
| |
| As one of the largest Tier III destroyers, ''{{#var:ship_name}}'' has a length of 95 m with the widest beam. The enemy will see you coming well in advance as her size places her near the top of the Tier III and IV destroyer air and surface detectability range.<br />
| |
|
| |
|
| ''Armor''<br />
| | ==Ship Stats== |
| ''{{#var:ship_name}}'' retains her 6 mm fore and aft armor with 10 mm side-plating on both hulls, with the improved hull (B) giving a substantial increase in HP. This still does not give her the ability to contest caps, and captains should instead engage targets of opportunity at a distance.<br />
| | <div class="b-popup"><div class="b-popup_head js-tech-nav_head"><div><h2>Hull Information</h2></div><span class="b-tech-nav_arrow"></span></div><div class="b-popup_content" style="display: none;"><div> |
| | <div style="border: 2px solid rgba(212,175,55,0.8); border-radius: 3px; margin-bottom: 1em; overflow: hidden;"> |
| | {| class="wikitable" style="margin:0; color:inherit; width:100%" |
| | ! style="background-color:#1a3244; color:#ffffff; font-weight:bold;" | SURVIVABILITY !! style="background-color:#1a3244; color:#ffffff; font-weight:bold;" | G-101 (A) !! style="background-color:#1a3244; color:#ffffff; font-weight:bold;" | G-101 (B) |
| | |- |
| | | style="color:inherit;" | • Hit Points || style="color:inherit;" | 8300 || style="color:inherit;" | 11000 |
| | |- |
| | | style="color:inherit;" | • Torpedo protection damage reduction (%) || colspan="2" style="color:inherit;" | — |
| | |} |
| | </div> |
|
| |
|
| ''Main Battery''<br />
| | <div style="border: 2px solid rgba(212,175,55,0.8); border-radius: 3px; margin-bottom: 1em; overflow: hidden;"> |
| ''{{#var:ship_name}}''’s main battery is where this ship shines. She gets an additional gun of the same 105 mm caliber on the upgraded ''[[Ship:V-25|V-25]]'', arranged in an A-P-XY profile. Exposing only 28 degrees of broadside on either side brings all four turrets on target, with the starboard side having 13 degrees more range of motion than the port side. Add a 4 second reload and 18 second, 180 degree turret traverse time, and ''{{#var:ship_name}}'' has the best DPM of all her tier counterparts and is near the top of all Tier III tech tree ships. However, her range and shell flight times are abysmal, being out-matched by almost every other ship at tier. You will need to get close, very close, to take advantage of her DPM.<br />
| | {| class="wikitable" style="margin:0; color:inherit; width:100%" |
| | ! style="background-color:#1a3244; color:#ffffff; font-weight:bold;" | ARMOR DETAIL !! style="background-color:#1a3244; color:#ffffff; font-weight:bold;" | |
| | |- |
| | | style="color:inherit;" | • Belt (mm) || style="color:inherit;" | — |
| | |- |
| | | style="color:inherit;" | • Deck (mm) || style="color:inherit;" | — |
| | |- |
| | | style="color:inherit;" | • Superstructure (mm) || style="color:inherit;" | — |
| | |- |
| | | style="color:inherit;" | • Extremities (mm) || style="color:inherit;" | — |
| | |} |
| | </div> |
|
| |
|
| ''Torpedoes''<br />
| | <div style="border: 2px solid rgba(212,175,55,0.8); border-radius: 3px; margin-bottom: 1em; overflow: hidden;"> |
| Captains transitioning from ''[[Ship:V-25|V-25]]'' will feel comfortable in ''{{#var:ship_name}}'' as she retains much of the same characteristics of ''[[Ship:V-25|V-25]]''’s 500 mm upgraded torpedoes. The forward-firing single tubes along with the two twin launchers amidships give her the ability to assault smoke screens head on, but not as aggressively as ''[[Ship:V-25|V-25]]'' because of ''{{#var:ship_name}}''’s much larger size and turning radius. Her torpedoes still offer great damage and low detectability among Tier III-IV ships with a decent flood chance, but remain among the slowest. Once upgraded, ''{{#var:ship_name}}'' can fire her torpedoes undetected, but captains need to appropriately manage the small window between her torpedo range and surface concealment.<br />
| | {| class="wikitable" style="margin:0; color:inherit; width:100%" |
| | ! style="background-color:#1a3244; color:#ffffff; font-weight:bold;" | MANEUVERABILITY !! style="background-color:#1a3244; color:#ffffff; font-weight:bold;" | G-101 (A) !! style="background-color:#1a3244; color:#ffffff; font-weight:bold;" | G-101 (B) |
| | |- |
| | | style="color:inherit;" | • Maximum speed (kt) || style="color:inherit;" | 33.5 || style="color:inherit;" | 33.5 |
| | |- |
| | | style="color:inherit;" | • Turning circle radius (m) || style="color:inherit;" | 520 || style="color:inherit;" | 520 |
| | |- |
| | | style="color:inherit;" | • Rudder-shift time (sec) || style="color:inherit;" | 5.3 || style="color:inherit;" | 3.8 |
| | |} |
| | </div> |
|
| |
|
| ''Consumables''<br />
| | <div style="border: 2px solid rgba(212,175,55,0.8); border-radius: 3px; margin-bottom: 1em; overflow: hidden;"> |
| ''{{#var:ship_name}}'' has access to the standard Damage Control Party and Engine Boost consumables available to most of her peers, but has a shorter duration smoke generator. This makes it of limited offensive use, and it is better utilized as a defensive measure to cover an escape.<br />
| | {| class="wikitable" style="margin:0; color:inherit; width:100%" |
| | ! style="background-color:#1a3244; color:#ffffff; font-weight:bold;" | CONCEALMENT !! style="background-color:#1a3244; color:#ffffff; font-weight:bold;" | G-101 (A) !! style="background-color:#1a3244; color:#ffffff; font-weight:bold;" | G-101 (B) |
| | |- |
| | | style="color:inherit;" | • Detectability by sea (km) || style="color:inherit;" | 6.46 || style="color:inherit;" | 6.46 |
| | |- |
| | | style="color:inherit;" | • Detectability by air (km) || style="color:inherit;" | 2.46 || style="color:inherit;" | 2.46 |
| | |- |
| | | style="color:inherit;" | • Detectability after firing main guns in smoke (km) || colspan="2" style="color:inherit;" | 2.13 |
| | |- |
| | | style="color:inherit;" | • Detectability by depths (km) || style="color:inherit;" | 2.46 || style="color:inherit;" | 2.46 |
| | |} |
| | </div> |
|
| |
|
| ''Summary''<br />
| | </div></div></div> |
| Like her Tier II counterpart, ''{{#var:ship_name}}'' is a versatile destroyer that presents a good mix of both gunboat and torpedo boat play styles. Captains that choose to play her as a gunboat will find her equally capable against cruisers and destroyers by managing the appropriate shell types. Those that favor/prefer torpedo boats will appreciate the hard-hitting torpedoes and forward firing angles but need to closely monitor detectability ranges in order to stay concealed. ''{{#var:ship_name}}'' sets the stage for the higher tier destroyers of the line.<br />
| | <div class="b-popup"><div class="b-popup_head js-tech-nav_head"><div><h2>Main Battery</h2></div><span class="b-tech-nav_arrow"></span></div><div class="b-popup_content" style="display: none;"><div><div style="border: 2px solid rgba(212,175,55,0.8); border-radius: 3px; margin-bottom: 1em; overflow: hidden;"> |
| | {| class="wikitable" style="margin:0; color:inherit; width:100%" |
| | ! style="background-color:#1a3244; color:#ffffff; font-weight:bold;" | MAIN BATTERY !! style="background-color:#1a3244; color:#ffffff; font-weight:bold;" | FKS Typ 3 Mod. 1 !! style="background-color:#1a3244; color:#ffffff; font-weight:bold;" | FKS Typ 3 Mod. 2 |
| | |- |
| | | style="color:inherit;" | • Arrangement || colspan="2" style="color:inherit;" | 4×1 105mm |
| | |- |
| | | style="color:inherit;" | • Firing range (km) || style="color:inherit;" | 8.18 || style="color:inherit;" | 9.0 |
| | |- |
| | | style="color:inherit;" | • Reload time (sec) || colspan="2" style="color:inherit;" | 4.0 |
| | |- |
| | | style="color:inherit;" | • Rate of fire (shots/min) || colspan="2" style="color:inherit;" | 15 |
| | |- |
| | | style="color:inherit;" | • 180° turn time (sec) || colspan="2" style="color:inherit;" | 18.0 |
| | |} |
| | </div> |
|
| |
|
| |Pros=<!-- write list of positive points below. use * as in ordinary wiki-list. --> | | <div style="border: 2px solid rgba(212,175,55,0.8); border-radius: 3px; margin-bottom: 1em; overflow: hidden;"> |
| * Highest HP of the Tier III destroyers
| | {| class="wikitable" style="margin:0; color:inherit; width:100%" |
| * Very fast firing guns
| | ! style="background-color:#1a3244; color:#ffffff; font-weight:bold;" | DISPERSION !! style="background-color:#1a3244; color:#ffffff; font-weight:bold;" | |
| * Upgraded torpedoes can be launched from stealth
| | |- |
| * Retains the same torpedo firing angles as ''[[Ship:V-25|V-25]]'', including the forward firing torpedoes
| | | style="color:inherit;" | • Dispersion type || style="color:inherit;" | Standard DD dispersion |
| | |- |
| | | style="color:inherit;" | • Dispersion formula || style="color:inherit;" | Dispersion (m) = 7.5 × range(km) + 15 |
| | |- |
| | | style="color:inherit;" | • Sigma || style="color:inherit;" | 2.0 |
| | |- |
| | | style="color:inherit;" | • Maximum dispersion (m) || style="color:inherit;" | 76 |
| | |- |
| | | style="color:inherit;" | • Dispersion at 5 km || style="color:inherit;" | 52 |
| | |- |
| | | style="color:inherit;" | • Dispersion at 8.18 km || style="color:inherit;" | 76 |
| | |} |
| | </div> |
|
| |
|
| |Cons=<!-- write list of negative points below. use * as in ordinary wiki-list. --> | | <div style="border: 2px solid rgba(212,175,55,0.8); border-radius: 3px; margin-bottom: 1em; overflow: hidden;"> |
| * Tied for highest base detection range of all Tier III destroyers
| | {| class="wikitable" style="margin:0; color:inherit; width:100%" |
| * Slowest Tier III destroyer
| | ! style="background-color:#1a3244; color:#ffffff; font-weight:bold;" | HE SHELL !! style="background-color:#1a3244; color:#ffffff; font-weight:bold;" | |
| * High shell arcs
| | |- |
| * Short smokescreen duration, of limited use offensively
| | | style="color:inherit;" | • Name || style="color:inherit;" | 105 mm Spr.Gr. L/3.89 |
| | |- |
| | | style="color:inherit;" | • Maximum damage || style="color:inherit;" | 1200 |
| | |- |
| | | style="color:inherit;" | • Fire chance (%) || style="color:inherit;" | 5.0% |
| | |- |
| | | style="color:inherit;" | • Shell velocity (m/s) || style="color:inherit;" | 715 |
| | |- |
| | | style="color:inherit;" | • Shell weight (kg) || style="color:inherit;" | 18.2 |
| | |- |
| | | style="color:inherit;" | • Penetration (mm) || style="color:inherit;" | 26 |
| | |} |
| | </div> |
|
| |
|
| |Research=<!-- write text about priority sequence of research below -->
| |
| ''G-101'' starts off with a pretty generous health pool for a Tier III destroyer, but her detection range works against her. Spend early experience gains on Hull (B) to improve survivability, then take the improved Fire Control System module that extends her gun range. The improved Torpedo module (which provides faster fish and more range) is a fairly minimal upgrade and can be saved for last.
| |
|
| |
|
| |OptimalConfiguration=<!-- write some general text about selection of optimal configuration below (optional)--> | | <div style="border: 2px solid rgba(212,175,55,0.8); border-radius: 3px; margin-bottom: 1em; overflow: hidden;"> |
| | {| class="wikitable" style="margin:0; color:inherit; width:100%" |
| | ! style="background-color:#1a3244; color:#ffffff; font-weight:bold;" | AP SHELL !! style="background-color:#1a3244; color:#ffffff; font-weight:bold;" | |
| | |- |
| | | style="color:inherit;" | • Name || style="color:inherit;" | 105 mm P.Spr.Gr. L/3.8 |
| | |- |
| | | style="color:inherit;" | • Maximum damage || style="color:inherit;" | 2300 |
| | |- |
| | | style="color:inherit;" | • Shell velocity (m/s) || style="color:inherit;" | 715 |
| | |- |
| | | style="color:inherit;" | • Shell weight (kg) || style="color:inherit;" | 18.2 |
| | |- |
| | | style="color:inherit;" | • Fuse time (sec) || style="color:inherit;" | 0.01 |
| | |- |
| | | style="color:inherit;" | • Ricochet start (°) || style="color:inherit;" | 45 |
| | |- |
| | | style="color:inherit;" | • Always ricochet (°) || style="color:inherit;" | 60 |
| | |- |
| | | style="color:inherit;" | • Normalisation (°) || style="color:inherit;" | 10 |
| | |- |
| | | style="color:inherit;" | • Arming threshold (mm) || style="color:inherit;" | 18 |
| | |} |
| | </div> |
| | </div></div></div> |
| | <div class="b-popup"><div class="b-popup_head js-tech-nav_head"><div><h2>Torpedoes</h2></div><span class="b-tech-nav_arrow"></span></div><div class="b-popup_content" style="display: none;"><div> |
| | <div style="border: 2px solid rgba(212,175,55,0.8); border-radius: 3px; margin-bottom: 1em; overflow: hidden;"> |
| | {| class="wikitable" style="margin:0; color:inherit; width:100%" |
| | ! style="background-color:#1a3244; color:#ffffff; font-weight:bold;" | TORPEDO LAUNCHERS !! style="background-color:#1a3244; color:#ffffff; font-weight:bold;" | PGPT003 !! style="background-color:#1a3244; color:#ffffff; font-weight:bold;" | PGPT004 |
| | |- |
| | | style="color:inherit;" | • Number of launchers || style="color:inherit;" | 2 || style="color:inherit;" | 2 |
| | |- |
| | | style="color:inherit;" | • Torpedo name || style="color:inherit;" | PGPT003 || style="color:inherit;" | PGPT004 |
| | |- |
| | | style="color:inherit;" | • Reload time (sec) || style="color:inherit;" | 38.0 || style="color:inherit;" | 38.0 |
| | |- |
| | | style="color:inherit;" | • 180° turn time (sec) || style="color:inherit;" | 7.2 || style="color:inherit;" | 7.2 |
| | |- |
| | | style="color:inherit;" | • Damage || style="color:inherit;" | 29400 || style="color:inherit;" | 29400 |
| | |- |
| | | style="color:inherit;" | • Range (km) || style="color:inherit;" | 0.2 || style="color:inherit;" | 0.2 |
| | |- |
| | | style="color:inherit;" | • Speed (kt) || style="color:inherit;" | 49 || style="color:inherit;" | 52 |
| | |- |
| | | style="color:inherit;" | • Detectability (km) || style="color:inherit;" | 0.9 || style="color:inherit;" | 1.0 |
| | |- |
| | | style="color:inherit;" | • Flooding chance (%) || style="color:inherit;" | 1.73% || style="color:inherit;" | 1.73% |
| | |} |
| | </div> |
|
| |
|
| |Upgrades=<!-- write text about best upgrades below -->
| | </div></div></div> |
| The recommended upgrades for ''{{#var:ship_name}}'' are as follows:
| |
| * '''Slot 1''': {{Main Armaments Modification 1}}
| |
| * '''Slot 2''': {{Engine Room Protection}}
| |
|
| |
|
| |CommanderSkills=<!-- write text about best set of Commander Skills below -->
| |
| Low-tier German DDs need skills that allow them to survive longer. Priority Target, Preventative Maintenance, High Alert, Last Stand, Vigilance, Survivability Expert, Concealment Expert, and Advanced Firing Training will all help in this regard.
| |
|
| |
|
| {{Commander Skills 3 DD
| | <!-- Add the ship code here to populate the upgrade table --> |
| <!-- Ratings 1,2,3 are legit. Others are ignored.--> | | {{Ship Upgrades Section|code=PGSD103_G_101}} |
| | rating11 = 1 <!-- Grease the Gears -->
| |
| | rating12 = 2 <!-- Liquidator -->
| |
| | rating13 = <!-- Consumables Specialist --> | |
| | rating14 = <!-- Gun Feeder -->
| |
| | rating15 = <!-- Incoming Fire Alert -->
| |
| | rating16 = <!-- Preventive Maintenance -->
| |
|
| |
|
| | rating21 = <!-- Pyrotechnician -->
| |
| | rating22 = 3 <!-- Swift Fish -->
| |
| | rating23 = <!-- Consumables Enhancements -->
| |
| | rating24 = <!-- Extra-Heavy AP Shells -->
| |
| | rating25 = 2 <!-- Priority Target -->
| |
| | rating26 = 3 <!-- Last Stand -->
| |
|
| |
|
| | rating31 = 2 <!-- Main Battery & AA Specialist -->
| | <!-- Consumables have to be tagged individually on a slot by slot basis --> |
| | rating32 = 3 <!-- Fill the Tubes --> | | {{Ship Consumables Section|consumables= |
| | rating33 = 2 <!-- Adrenaline Rush -->
| | * '''Slot 1:''' {{Damage Control Party}} (5.0s action, 40.0s cooldown) |
| | rating34 = <!-- Inertial Fuse for HE Shells -->
| | * '''Slot 2:''' {{Smoke Generator}} (3 charges, 20.0s action, 160.0s cooldown) |
| | rating35 = 2 <!-- Superintendent -->
| | * '''Slot 3:''' {{Engine Boost}} (3 charges, 120.0s action, 120.0s cooldown) |
| | rating36 = 3 <!-- Survivability Expert -->
| |
| | |
| | rating41 = <!-- Main Battery & AA Expert -->
| |
| | rating42 = 1 <!-- Swift in Silence -->
| |
| | rating43 = 1 <!-- Radio Location -->
| |
| | rating44 = <!-- Fearless Brawler -->
| |
| | rating45 = 3 <!-- Concealment Expert -->
| |
| | rating46 = 1 <!-- Dazzle -->
| |
| }} | | }} |
|
| |
|
| |Consumables=<!-- write text about selection of Consumables below -->
| |
| ''{{#var:ship_name}}'' equips the following consumables:
| |
| * '''Slot 1:''' {{Damage Control Party}}
| |
| * '''Slot 2:''' {{Smoke Generator}}
| |
| * '''Slot 3:''' {{Engine Boost}}
| |
|
| |
| |Camouflage=<!-- write text about useful camouflage below -->
| |
|
| |
| |Signals=<!-- write text about best set of signals below -->
| |
| Players looking to quickly grind down the German destroyer line should mount the following [[Ship:Flags|signals]]: Equal Speed Charlie London ({{Equal Speed Charlie London|Size=18px}}) for faster XP gain, Sierra Mike ({{Sierra Mike|Size=18px}}) to compensate for her rather slow speed, and Zulu Hotel ({{Zulu Hotel|Size=18px}}) for faster commander retraining if the player transferred the commander from the preceding ship. Juliet Whiskey Unaone ({{Juliet Whiskey Unaone|Size=18px}}) is not recommended as battleships will be infrequent in the matchmaking spread, and early tier battleships do not have very much torpedo protection. Furthermore, ''G-101'' has quick-reloading torpedo tubes.
| |
|
| |
| {{Signal Flags
| |
| | November Echo Setteseven =
| |
| | Mike Yankee Soxisix =
| |
| | India X-Ray = 2
| |
| | Juliet Whiskey Unaone =
| |
| | Victor Lima = 2
| |
| | Hotel Yankee =
| |
|
| |
| | November Foxtrot = 2
| |
| | Sierra Mike = 3
| |
| | India Delta =
| |
| | Juliet Yankee Bissotwo =
| |
| | India Yankee =
| |
| | Juliet Charlie =
| |
|
| |
| | Zulu =
| |
| | India Bravo Terrathree =
| |
| | Equal Speed Charlie London = 3
| |
| | Zulu Hotel = 2
| |
| | Papa Papa =
| |
|
| |
|
| | Wyvern =
| | ==Gallery== |
| | Red Dragon = 2
| | <div class="b-popup"><div class="b-popup_head js-tech-nav_head"><div><h2>WoWs Gallery</h2></div><span class="b-tech-nav_arrow"></span></div><div class="b-popup_content" style="display: none;"><div> |
| | Dragon Flag = 2
| |
| | Ouroboros =
| |
| | Hydra =
| |
| }}
| |
|
| |
|
| |Gallery=<!-- write below list of files with description (if necessary) separated with | --><gallery>
| | <gallery> |
| File:G101prepares.jpg
| |
| File:G101AttacksIsokaze.jpg|The G-101 favors extremely aggressive gameplay. The enemy [[ship:Isokaze|''Isokaze'']] is confused by the constant turns and forward torpedo arcs.
| |
| File:G101KillsIsokaze.jpg|The ''G-101'' unleashes its torpedoes after a successful dodge.
| |
| File:G101Langley.jpg|The ''G-101'' combines fast torpedo reloads, different torpedo arcs, and great guns to make the ultimate ship for intimidating the enemy.
| |
| File:G101Ram.jpg|After exhausting all options, the ''G-101'' has no choice but to ram an enemy [[ship:Kuma|''Kuma'']] in reverse, resulting in a [[ship:Achievements|Die Hard]] achievement.
| |
| </gallery> | | </gallery> |
| | </div></div></div> |
|
| |
|
| |History=<!-- write text below -->
| | <div class="b-popup"><div class="b-popup_head js-tech-nav_head"><div><h2>Historical Gallery</h2></div><span class="b-tech-nav_arrow"></span></div><div class="b-popup_content" style="display: none;"><div> |
| ===Construction===
| |
| :Germaniawerft; Kiel, Germany
| |
| :Laid down: 1914
| |
| :Launched: 12 August 1914
| |
| :Commissioned: 4 March 1915
| |
| | |
| ===Specifications===
| |
| :1,116 tons displacement, standard
| |
| :95.3m length
| |
| :9.5m beam
| |
| :3.8m draft (mean)
| |
| | |
| ====Machinery====
| |
| :3 boilers, 2 turbines
| |
| | |
| ====Performance====
| |
| :33.5 knots at 28,000 shaft horsepower
| |
| :2,420nm at 20 knots
| |
| | |
| ====Armament====
| |
| =====Main=====
| |
| :Four (4x1) 105mm guns
| |
| =====Torpedoes=====
| |
| :Six (2x1, 2x2) 500mm torpedo tubes
| |
| | |
| ===History===
| |
| ====Design====
| |
| SMS ''G-101'' was the lead ship of the G-101 class of German destroyers in World War I. Originally laid down as a group of four large destroyers for the Argentian navy, these ships were seized by the Kaiserliche Marine upon the outbreak of World War I, and were modified to be equipped with German weaponry. Originally armed with four (4x1) 10.2cm guns and six 53.3cm torpedo tubes, their loadout was changed to four (4x1) 8.8cm German naval guns and six (2x1, 2x2) 50cm torpedo tubes arranged in the standard layout of German destroyers and torpedo boats, and these ships were capable of reaching 33.5 knots. In 1916, SMS ''G-101'', SMS ''G-103'' and SMS ''G-104'' all received 10.5cm guns of the same design; however, SMS ''G-102'' received slightly different guns of the same size but different calibre and manufacturer.
| |
| | |
| ====Service====
| |
| SMS ''G-101'' (ex-''Santiego del Estero'')
| |
| | |
| Originally ordered by Argentina as ''Santiego del Estero'', requisitioned by the Kaiserliche Marine in August 1914 and modified to carry German armaments. Notable actions include her presence at the Battle of Jutland, alongside ''G-102'', ''B-97'', and'' B-112'', comprising the 3rd Half Flotilla of the Second Torpedo Boat Flotilla, Battlecruiser Force. Later on, ''G-101'', ''G-103'', ''G-104'' and ''V-100'' took part in a Scandinavian convoy attack in December 1917. Scuttled at Scapa Flow in 1919, later salvaged, but sunk in a heavy gale in 1925.
| |
| | |
| SMS ''G-102'' (ex-''San Luis'')
| |
| | |
| Originally ordered by Argentina as ''San Luis'', requisitioned by the Kaiserliche Marine in August 1914 and modified to carry German armaments. She was present at the Battle of Jutland, alongside ''G-101'', ''B-97'', and ''B-112'', comprising the 3rd Half Flotilla of the Second Torpedo Boat Flotilla, Battlecruiser Force. Scuttled at Scapa Flow in 1919, later salvaged, ceded to the USA, and was finally sunk as a bombing target in 1920.
| |
| | |
| SMS ''G-103'' (ex-''Santa Fé'')
| |
| | |
| Originally ordered by Argentina as ''Santa Fé'', requisitioned by the Kaiserliche Marine in August 1914 and modified to carry German armaments. She was present at the Battle of Jutland, alongside ''G-104'', ''B-109'', ''B-110'', and ''B-111'', comprising the 4th Half Flotilla of the Second Torpedo Boat Flotilla, Battlecruiser Force. Later on, ''G-101'', ''G-103'', ''G-104'' and ''V-100'' took part in a Scandinavian Convoy Attack in December 1917. Scuttled at Scapa Flow in 1919, later salvaged, later scrapped in 1926.
| |
| | |
| SMS ''G-104'' (ex-''Tucuman'')
| |
|
| |
|
| Originally ordered by Argentina as ''Tucuman'', requisitioned by the Kaiserliche Marine in August 1914 and modified to carry German armaments. She was present at the Battle of Jutland, alongside ''G-103'', ''B-109'', ''B-110'', and ''B-111'', comprising the 4th Half Flotilla of the Second Torpedo Boat Flotilla, Battlecruiser Force. Later on, ''G-101'', ''G-103'', ''G-104'' and ''V-100'' took part in a Scandinavian Convoy Attack in December 1917. Scuttled at Scapa Flow in 1919, later salvaged, later scrapped in 1926.
| | <gallery> |
| | |
| |HistoricalGallery=<!-- write below list of files with description (if necessary) separated with | --><gallery>
| |
| File:G-101.jpeg|''G-101'' underway.
| |
| File:G-101_005.jpg|''G-101'' underway, 1916.
| |
| Image:G101.jpg|''G-101'' at anchor, date unknown.
| |
| File:44.jpg|Line drawing of ''G-101''.
| |
| </gallery> | | </gallery> |
| | </div></div></div> |
|
| |
|
| |Video=<!-- put below video clips with using template VideoYT. You can use html-tags for formatting. -->
| | [[Category:Ships of Germany]] |
| | | [[Category:Destroyers]] |
| |Ref= <!-- write below -->
| | [[Category:Tier III ships]] |
| <references />
| | <!-- DO NOT DELETE THIS LINE. DO NOT INSERT ANYTHING BELOW THIS LINE --> |
| # [https://en.wikipedia.org/wiki/G101-class_torpedo_boat ''G101''-class torpedo boat - Wikipedia]
| |
| | |
| {{WoWS Ship Changelog Insert|1=
| |
| *Available to supertesters in the game starting from Update 0.5.15.
| |
| *Introduced into the game as a researchable ship in Update 0.5.16.
| |
| *Update 0.6.6:
| |
| **Fixed targeting sectors of the torpedo tubes. On the right single-tube torpedo tube, the sector is equated to the left (reduced by 10 degrees), and on paired torpedo tubes, it is increased by 12 degrees towards the stern.
| |
| *Update 0.6.12:
| |
| **Detectability when firing main guns in smoke changed to 2.13 km.
| |
| *Update 0.6.13:
| |
| **Fire extinguishing time now 30 s instead of 60 s.
| |
| *Update 0.6.15:
| |
| **Minor fixes to ship textures and geometry.
| |
| *Update 0.8.5:
| |
| **Credits earnings increased by +5%.
| |
| **Experience earnings increased by +5%.
| |
| *Update 0.10.9:
| |
| **Ship flag was changed to Kaiserliche Marine flag for historical reasons.
| |
| *Update 12.5:
| |
| **The penetration of HE shells fired by 105 mm main battery guns has been increased from 18 to 26 mm.
| |
| }}
| |
| | |
| }}<!-- DO NOT DELETE THIS LINE. DO NOT INSERT ANYTHING BELOW THIS LINE -->
| |



 (5.0s action, 40.0s cooldown)
 (3 charges, 20.0s action, 160.0s cooldown)
 (3 charges, 120.0s action, 120.0s cooldown)