|
|
| Line 1: |
Line 1: |
| <!-- DO NOT EDIT OR DELETE LINES WITH COMMENTS (it's look like as this or next line)
| | {{#vardefine:ship_name|Bismarck}} |
| -->{{WoWs_Ship|Promo=<!-- in case of gift or promo ship write conditions to get it. -->
| | __NOTOC____NOEDITSECTION__ |
|
| |
|
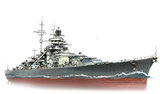
| |Anno=<!-- you can write below short description for the ship. it will replace default once. --> | | <div class="b-description gw-frame-1"><div class="b-description-img b-description-img__indent b-description-img__single"><div style="width:160px; height:102px; opacity:.5; border-radius:2px; position:absolute; left:0; top:0; z-index:1; -webkit-transition:all 0.2s ease-out 0.1s; transition:all 0.2s ease-out 0.1s;">[[File:Wows_anno_flag_germany.png|160px]]</div><div class="l-description-img_class"><span class="b-description-img_type b-description-img_type__Battleship b-description-img_type__Battleship-Tech Tree"></span><span class="b-description-img_class">VIII</span></div><div class="b-description-img_vehicle">[[File:Ship_PGSB108_Bismarck.png|160px|link=|left]]</div><div class="l-description-img_price"><span class="b-description-img_price b-description-img_price__gold"><span title="''{{#var:ship_name}}'' was first released for sale on DD Month YYYY.">11,000,000</span></span></div></div><p>[[Ship:{{#var:ship_name}}|{{#var:ship_name}}]] — Germany Tech Tree Tier VIII [[Ship:Battleship|Battleship]].</p><p>The original plan was for the new ship to be armed with eight 330 mm guns; however, their caliber was increased to 380 mm when France and Italy started building battleships with such armament. In May 1941, battleship Bismarck and battlecruiser Prinz Eugen set off on a hunt for convoys in the Atlantic Ocean. On their way, they were intercepted by British ships Prince of Wales and Hood. After taking several hits, Hood exploded, and the German raiders headed for the Atlantic. The British fleet pursued their enemy. On May 26, rudder damage rendered Bismarck uncontrollable. In the battle that followed, the battleship was sunk.</p><p> </p></div> |
| By the start of World War II, ''Bismarck'' was one of the mightiest battleships in the world, owing to her advanced gun fire control system and powerful artillery. Rugged construction — coupled with elaborate subdivision into compartments and a vast expanse of armor — ensured a high level of endurance.
| |
|
| |
|
| |Performance=<!-- write text about performance in battles below -->
| | ===Pros=== |
| {{AA Sidebar Warning Insert}}
| | * Pro 1 |
| | * Pro 2 |
|
| |
|
| The historical pinnacle of German battleship construction, ''Bismarck'' stands as one of the heartiest battleships at Tier VIII. While her main battery may not look as impressive as that of ''[[Amagi]]'', and doesn't have ''[[North Carolina]]''’s range — or even her sister ''[[Tirpitz]]''’s torpedoes — ''Bismarck'' has the perfect mix of ingredients to make her an excellent brawler.
| | ===Cons=== |
| | * Con 1 |
| | * Con 2 |
|
| |
|
| For starters, her secondary battery is the most impressive of all the Tier VIII battleships. It comes with a stock range of 7.6km, and with the right mix of modules and commander skills can be pushed to a range of over 11.0 km, farther than the range of a similarly-equipped ''[[Yamato]]''. This creates a large radius around her which enemy units must respect or pay a hefty price. Additionally, her handling is superb for a ship her size; she's quick to respond to rudder commands, and her turning circle is better than that of ''[[Amagi]]''. Easily the most impressive thing about ''Bismarck'' is her survivability. Like her sister ''Tirpitz'', she is exceptionally difficult to land citadel hits against; only long-range plunging fire has a good chance of doing so. The closer she gets, the better her armor scheme protects her from incoming fire. She will take more than her fair share of regular penetration damage from enemy armor-piercing rounds, but that damage repairs better than citadel damage.
| |
|
| |
|
| ''Bismarck'' has another trick up her sleeve that sets her apart from ''Tirpitz'': access to the {{Hydroacoustic Search}} consumable. This provides her with large windows of time where she is functionally immune to long range torpedoes, and also provides detection of enemy ships hidden in [[Ship:Smoke Screens|smoke screens]] when pushing into capture zones.
| | ==Ship Stats== |
| | <div class="b-popup"><div class="b-popup_head js-tech-nav_head"><div><h2>Hull Information</h2></div><span class="b-tech-nav_arrow"></span></div><div class="b-popup_content" style="display: none;"><div> |
| | <div style="border: 2px solid rgba(212,175,55,0.8); border-radius: 3px; margin-bottom: 1em; overflow: hidden;"> |
| | {| class="wikitable" style="margin:0; color:inherit; width:100%" |
| | ! style="background-color:#1a3244; color:#ffffff; font-weight:bold;" | SURVIVABILITY !! style="background-color:#1a3244; color:#ffffff; font-weight:bold;" | Bismarck (A) !! style="background-color:#1a3244; color:#ffffff; font-weight:bold;" | Bismarck (B) |
| | |- |
| | | style="color:inherit;" | • Hit Points || style="color:inherit;" | 64500 || style="color:inherit;" | 69200 |
| | |- |
| | | style="color:inherit;" | • Torpedo protection damage reduction (%) || colspan="2" style="color:inherit;" | — |
| | |} |
| | </div> |
|
| |
|
| When all of that is paired with an above-average anti-aircraft suite, ''Bismarck'' is a very well-rounded, highly survivable battleship that is friendly to players of all skill levels.
| | <div style="border: 2px solid rgba(212,175,55,0.8); border-radius: 3px; margin-bottom: 1em; overflow: hidden;"> |
| | {| class="wikitable" style="margin:0; color:inherit; width:100%" |
| | ! style="background-color:#1a3244; color:#ffffff; font-weight:bold;" | ARMOR DETAIL !! style="background-color:#1a3244; color:#ffffff; font-weight:bold;" | |
| | |- |
| | | style="color:inherit;" | • Belt (mm) || style="color:inherit;" | — |
| | |- |
| | | style="color:inherit;" | • Deck (mm) || style="color:inherit;" | — |
| | |- |
| | | style="color:inherit;" | • Superstructure (mm) || style="color:inherit;" | — |
| | |- |
| | | style="color:inherit;" | • Extremities (mm) || style="color:inherit;" | — |
| | |} |
| | </div> |
|
| |
|
| |Pros=<!-- write list of positive points below. use * as in ordinary wiki-list. --> | | <div style="border: 2px solid rgba(212,175,55,0.8); border-radius: 3px; margin-bottom: 1em; overflow: hidden;"> |
| * Fast turret traverse and main battery reload time (26 seconds) for a battleship.
| | {| class="wikitable" style="margin:0; color:inherit; width:100%" |
| * Outstanding secondary battery. With the right upgrades and commander skills, her secondary battery range can be extended past 11.0 km, allowing ''{{#var:ship_name}}'' to whittle down enemy ships before closing in for the kill.
| | ! style="background-color:#1a3244; color:#ffffff; font-weight:bold;" | MANEUVERABILITY !! style="background-color:#1a3244; color:#ffffff; font-weight:bold;" | Bismarck (A) !! style="background-color:#1a3244; color:#ffffff; font-weight:bold;" | Bismarck (B) |
| * Has access to the {{Hydroacoustic Search}} consumable, making her very difficult to torpedo from long range.
| | |- |
| * Above average anti-aircraft suite.
| | | style="color:inherit;" | • Maximum speed (kt) || style="color:inherit;" | 31.0 || style="color:inherit;" | 31.0 |
| * Surprisingly nimble for a battleship of her size, with an excellent top speed (30 knots).
| | |- |
| * Exceptionally durable with a good armor layout; has the vaunted "turtleback" armor making her almost immune to citadel damage except from super-battleship guns (i.e. [[Yamato]], [[Shikishima]]).
| | | style="color:inherit;" | • Turning circle radius (m) || style="color:inherit;" | 850 || style="color:inherit;" | 850 |
| * Secondaries can take a [[Destroyers|destroyer]] down fairly quickly if it doesn't dodge or use smoke.
| | |- |
| * Many hit points
| | | style="color:inherit;" | • Rudder-shift time (sec) || style="color:inherit;" | 29.2 || style="color:inherit;" | 20.9 |
| | |} |
| | </div> |
|
| |
|
| |Cons=<!-- write list of negative points below. use * as in ordinary wiki-list. --> | | <div style="border: 2px solid rgba(212,175,55,0.8); border-radius: 3px; margin-bottom: 1em; overflow: hidden;"> |
| * No torpedoes like those found on her sister [[Tirpitz]].
| | {| class="wikitable" style="margin:0; color:inherit; width:100%" |
| * Only has eight (8) barrels, while nearly every other ship at this tier has nine (9) or more of a higher caliber.
| | ! style="background-color:#1a3244; color:#ffffff; font-weight:bold;" | CONCEALMENT !! style="background-color:#1a3244; color:#ffffff; font-weight:bold;" | Bismarck (A) !! style="background-color:#1a3244; color:#ffffff; font-weight:bold;" | Bismarck (B) |
| * Armor scheme remains vulnerable to full penetrations by armor-piercing shells when showing the flat broadside of the ship to the enemy; ''{{#var:ship_name}}'' may not take citadel damage, but a lot of regular penetration damage hurts just as badly.
| | |- |
| * Main guns' accuracy can be disappointing at times, especially without Aiming System Modification upgrade.
| | | style="color:inherit;" | • Detectability by sea (km) || style="color:inherit;" | 15.89 || style="color:inherit;" | 15.89 |
| * Despite her secondaries' range, their reliability can be inconsistent even with a proper build. They also don't work well against another battleship (105mm's will usually not penetrate their superstructure), especially at extremely close range (i.e. 6km or less).
| | |- |
| | | style="color:inherit;" | • Detectability by air (km) || style="color:inherit;" | 10.0 || style="color:inherit;" | 10.0 |
| | |- |
| | | style="color:inherit;" | • Detectability after firing main guns in smoke (km) || colspan="2" style="color:inherit;" | 15.05 |
| | |- |
| | | style="color:inherit;" | • Detectability by depths (km) || style="color:inherit;" | 10.0 || style="color:inherit;" | 10.0 |
| | |} |
| | </div> |
|
| |
|
| |Research=<!-- write text about priority sequence of research below --> | | </div></div></div> |
| Hull (B) is the best thing for players to research first, as it maximizes her anti-aircraft armament and provides additional hit points. The propulsion upgrade is the next best module to invest experience gains in; having all 31 knots to play with gives ''Bismarck'' more flexibility to close with the enemy or respond to new threats as required.
| | <div class="b-popup"><div class="b-popup_head js-tech-nav_head"><div><h2>Main Battery</h2></div><span class="b-tech-nav_arrow"></span></div><div class="b-popup_content" style="display: none;"><div><div style="border: 2px solid rgba(212,175,55,0.8); border-radius: 3px; margin-bottom: 1em; overflow: hidden;"> |
| | {| class="wikitable" style="margin:0; color:inherit; width:100%" |
| | ! style="background-color:#1a3244; color:#ffffff; font-weight:bold;" | MAIN BATTERY !! style="background-color:#1a3244; color:#ffffff; font-weight:bold;" | FKS Typ 8 Mod. 1 !! style="background-color:#1a3244; color:#ffffff; font-weight:bold;" | FKS Typ 8 Mod. 2 |
| | |- |
| | | style="color:inherit;" | • Arrangement || colspan="2" style="color:inherit;" | 4×2 380mm |
| | |- |
| | | style="color:inherit;" | • Firing range (km) || style="color:inherit;" | 19.28 || style="color:inherit;" | 21.21 |
| | |- |
| | | style="color:inherit;" | • Reload time (sec) || colspan="2" style="color:inherit;" | 26.0 |
| | |- |
| | | style="color:inherit;" | • Rate of fire (shots/min) || colspan="2" style="color:inherit;" | 2.3 |
| | |- |
| | | style="color:inherit;" | • 180° turn time (sec) || colspan="2" style="color:inherit;" | 36.0 |
| | |} |
| | </div> |
|
| |
|
| |OptimalConfiguration= | | <div style="border: 2px solid rgba(212,175,55,0.8); border-radius: 3px; margin-bottom: 1em; overflow: hidden;"> |
| | {| class="wikitable" style="margin:0; color:inherit; width:100%" |
| | ! style="background-color:#1a3244; color:#ffffff; font-weight:bold;" | DISPERSION !! style="background-color:#1a3244; color:#ffffff; font-weight:bold;" | |
| | |- |
| | | style="color:inherit;" | • Dispersion type || style="color:inherit;" | Standard BB dispersion |
| | |- |
| | | style="color:inherit;" | • Dispersion formula || style="color:inherit;" | Dispersion (m) = 10 × range(km) + 60 |
| | |- |
| | | style="color:inherit;" | • Sigma || style="color:inherit;" | 1.8 |
| | |- |
| | | style="color:inherit;" | • Maximum dispersion (m) || style="color:inherit;" | 252 |
| | |- |
| | | style="color:inherit;" | • Dispersion at 5 km || style="color:inherit;" | 110 |
| | |- |
| | | style="color:inherit;" | • Dispersion at 10 km || style="color:inherit;" | 160 |
| | |- |
| | | style="color:inherit;" | • Dispersion at 15 km || style="color:inherit;" | 210 |
| | |- |
| | | style="color:inherit;" | • Dispersion at 19.28 km || style="color:inherit;" | 253 |
| | |} |
| | </div> |
|
| |
|
| |Upgrades=<!-- write text about best upgrades below --> | | <div style="border: 2px solid rgba(212,175,55,0.8); border-radius: 3px; margin-bottom: 1em; overflow: hidden;"> |
| The recommended upgrades for ''{{#var:ship_name}}'' are as follows:
| | {| class="wikitable" style="margin:0; color:inherit; width:100%" |
| * '''Slot 1:''' {{Auxiliary Armaments Modification 1}} for more survivability of the [[Ship:Anti-Aircraft_Fire|AA mounts]] and of the [[Ship:Secondary Armament|secondary battery]].
| | ! style="background-color:#1a3244; color:#ffffff; font-weight:bold;" | HE SHELL !! style="background-color:#1a3244; color:#ffffff; font-weight:bold;" | |
| * '''Slot 2:''' {{Damage Control System Modification 1}} to improve her overall survival in battle.
| | |- |
| * '''Slot 3:''' {{Secondary Battery Modification 1}} for better accuracy and more range for the [[Ship:Secondary Armament|secondary battery guns]]
| | | style="color:inherit;" | • Name || style="color:inherit;" | 380 mm Spr.Gr. L/4.6 |
| * '''Slot 4:''' {{Damage Control System Modification 2}} to further improve her overall survival. {{Steering Gears Modification 1}} is also an option to improve her maneuverability.
| | |- |
| * '''Slot 5:''' {{Concealment System Modification 1}} to reduce her detection range and increase incoming enemy shell dispersion.
| | | style="color:inherit;" | • Maximum damage || style="color:inherit;" | 4400 |
| | |- |
| | | style="color:inherit;" | • Fire chance (%) || style="color:inherit;" | 34.0% |
| | |- |
| | | style="color:inherit;" | • Shell velocity (m/s) || style="color:inherit;" | 820 |
| | |- |
| | | style="color:inherit;" | • Shell weight (kg) || style="color:inherit;" | 800 |
| | |- |
| | | style="color:inherit;" | • Penetration (mm) || style="color:inherit;" | 95 |
| | |} |
| | </div> |
|
| |
|
| |CommanderSkills=
| |
|
| |
|
| {{Commander Skills 3 BB
| | <div style="border: 2px solid rgba(212,175,55,0.8); border-radius: 3px; margin-bottom: 1em; overflow: hidden;"> |
| <!-- Ratings 1,2,3 are legit. Others are ignored.--> | | {| class="wikitable" style="margin:0; color:inherit; width:100%" |
| | rating11 = <!-- Gun Feeder --> | | ! style="background-color:#1a3244; color:#ffffff; font-weight:bold;" | AP SHELL !! style="background-color:#1a3244; color:#ffffff; font-weight:bold;" | |
| | rating12 = 2 <!-- Pyrotechnician --> | | |- |
| | rating13 = <!-- Consumables Specialist --> | | | style="color:inherit;" | • Name || style="color:inherit;" | 380 mm P.Spr.Gr. L/4.4 |
| | rating14 = <!-- Emergency Repair Specialist --> | | |- |
| | rating15 = <!-- Incoming Fire Alert -->
| | | style="color:inherit;" | • Maximum damage || style="color:inherit;" | 11600 |
| | rating16 = <!-- Preventive Maintenance --> | | |- |
| | | style="color:inherit;" | • Shell velocity (m/s) || style="color:inherit;" | 820 |
| | |- |
| | | style="color:inherit;" | • Shell weight (kg) || style="color:inherit;" | 800 |
| | |- |
| | | style="color:inherit;" | • Fuse time (sec) || style="color:inherit;" | 0.033 |
| | |- |
| | | style="color:inherit;" | • Ricochet start (°) || style="color:inherit;" | 45 |
| | |- |
| | | style="color:inherit;" | • Always ricochet (°) || style="color:inherit;" | 60 |
| | |- |
| | | style="color:inherit;" | • Normalisation (°) || style="color:inherit;" | 6 |
| | |- |
| | | style="color:inherit;" | • Arming threshold (mm) || style="color:inherit;" | 63 |
| | |} |
| | </div> |
| | </div></div></div> |
| | <div class="b-popup"><div class="b-popup_head js-tech-nav_head"><div><h2>Secondary Battery</h2></div><span class="b-tech-nav_arrow"></span></div><div class="b-popup_content" style="display: none;"><div> |
| | <div style="border: 2px solid rgba(212,175,55,0.8); border-radius: 3px; margin-bottom: 1em; overflow: hidden;"> |
| | {| class="wikitable" style="margin:0; color:inherit; width:100%" |
| | ! style="background-color:#1a3244; color:#ffffff; font-weight:bold;" | SECONDARY BATTERY !! style="background-color:#1a3244; color:#ffffff; font-weight:bold;" | |
| | |- |
| | | style="color:inherit;" | • Secondary battery range (km) || style="color:inherit;" | 7.6 |
| | |} |
| | </div> |
|
| |
|
| | rating21 = 2 <!-- Grease the Gears -->
| | <div style="border: 2px solid rgba(212,175,55,0.8); border-radius: 3px; margin-bottom: 1em; overflow: hidden;"> |
| | rating22 = <!-- Inertial Fuse for HE Shells --> | | {| class="wikitable" style="margin:0; color:inherit; width:100%" |
| | rating23 = <!-- Consumables Enhancements --> | | ! style="background-color:#1a3244; color:#ffffff; font-weight:bold;" | SECONDARY ARMAMENT 1 !! style="background-color:#1a3244; color:#ffffff; font-weight:bold;" | |
| | rating24 = <!-- Vigilance --> | | |- |
| | rating25 = <!-- Priority Target --> | | | style="color:inherit;" | • Shell type || style="color:inherit;" | HE |
| | rating26 = <!-- AA Gunner --> | | |- |
| | | style="color:inherit;" | • Name || style="color:inherit;" | 150 mm Spr.Gr. L/4.5 |
| | |- |
| | | style="color:inherit;" | • Arrangement || style="color:inherit;" | 2x150mm |
| | |- |
| | | style="color:inherit;" | • Rate of fire (shots/min) || style="color:inherit;" | 8.0 |
| | |- |
| | | style="color:inherit;" | • Maximum damage || style="color:inherit;" | 1700 |
| | |- |
| | | style="color:inherit;" | • Shell velocity (m/s) || style="color:inherit;" | 875 |
| | |- |
| | | style="color:inherit;" | • Penetration (mm) || style="color:inherit;" | 38 |
| | |- |
| | | style="color:inherit;" | • Fire chance (%) || style="color:inherit;" | 8.0% |
| | |} |
| | </div> |
|
| |
|
| | rating31 = <!-- Super-Heavy AP Shells -->
| | <div style="border: 2px solid rgba(212,175,55,0.8); border-radius: 3px; margin-bottom: 1em; overflow: hidden;"> |
| | rating32 = 3 <!-- Long-Range Secondary Battery Shells --> | | {| class="wikitable" style="margin:0; color:inherit; width:100%" |
| | rating33 = 2 <!-- Adrenaline Rush --> | | ! style="background-color:#1a3244; color:#ffffff; font-weight:bold;" | SECONDARY ARMAMENT 2 !! style="background-color:#1a3244; color:#ffffff; font-weight:bold;" | |
| | rating34 = 2 <!-- Basics of Survivability --> | | |- |
| | rating35 = <!-- Enhanced Anti-Torpedo Protection --> | | | style="color:inherit;" | • Shell type || style="color:inherit;" | HE |
| | rating36 = <!-- Expert AA Marksman --> | | |- |
| | | style="color:inherit;" | • Name || style="color:inherit;" | 105 mm Spr.Gr. Kz. |
| | |- |
| | | style="color:inherit;" | • Arrangement || style="color:inherit;" | 2x105mm |
| | |- |
| | | style="color:inherit;" | • Rate of fire (shots/min) || style="color:inherit;" | 17.9 |
| | |- |
| | | style="color:inherit;" | • Maximum damage || style="color:inherit;" | 1200 |
| | |- |
| | | style="color:inherit;" | • Shell velocity (m/s) || style="color:inherit;" | 900 |
| | |- |
| | | style="color:inherit;" | • Penetration (mm) || style="color:inherit;" | 26 |
| | |- |
| | | style="color:inherit;" | • Fire chance (%) || style="color:inherit;" | 5.0% |
| | |} |
| | </div> |
|
| |
|
| | rating41 = <!-- Swift in Silence -->
| | <div style="border: 2px solid rgba(212,175,55,0.8); border-radius: 3px; margin-bottom: 1em; overflow: hidden;"> |
| | rating42 = 2 <!-- Improved Secondary Battery Aiming --> | | {| class="wikitable" style="margin:0; color:inherit; width:100%" |
| | rating43 = 2 <!-- Close Quarters Combat --> | | ! style="background-color:#1a3244; color:#ffffff; font-weight:bold;" | SECONDARY ARMAMENT 3 !! style="background-color:#1a3244; color:#ffffff; font-weight:bold;" | |
| | rating44 = 3 <!-- Emergency Repair Expert --> | | |- |
| | rating45 = <!-- Concealment Expert --> | | | style="color:inherit;" | • Shell type || style="color:inherit;" | HE |
| | rating46 = 2 <!-- Fire Prevention Expert --> | | |- |
| }} | | | style="color:inherit;" | • Name || style="color:inherit;" | PGGS003_105_mm_SKC_33 |
| | |- |
| | | style="color:inherit;" | • Arrangement || style="color:inherit;" | 2x105mm |
| | |- |
| | | style="color:inherit;" | • Rate of fire (shots/min) || style="color:inherit;" | 17.9 |
| | |- |
| | | style="color:inherit;" | • Maximum damage || style="color:inherit;" | 1200 |
| | |- |
| | | style="color:inherit;" | • Shell velocity (m/s) || style="color:inherit;" | 900 |
| | |- |
| | | style="color:inherit;" | • Penetration (mm) || style="color:inherit;" | 26 |
| | |- |
| | | style="color:inherit;" | • Fire chance (%) || style="color:inherit;" | 5.0% |
| | |} |
| | </div> |
|
| |
|
| |Consumables=<!-- write text about selection of Consumables below --> | | <div style="border: 2px solid rgba(212,175,55,0.8); border-radius: 3px; margin-bottom: 1em; overflow: hidden;"> |
| ''{{#var:ship_name}}'' can equip the following consumables:
| | {| class="wikitable" style="margin:0; color:inherit; width:100%" |
| * '''Slot 1:''' {{Damage Control Party}}
| | ! style="background-color:#1a3244; color:#ffffff; font-weight:bold;" | SECONDARY ARMAMENT 4 !! style="background-color:#1a3244; color:#ffffff; font-weight:bold;" | |
| * '''Slot 2:''' {{Repair Party}}
| | |- |
| * '''Slot 3:''' {{Spotting Aircraft}} '''or''' {{Catapult Fighter}}
| | | style="color:inherit;" | • Shell type || style="color:inherit;" | HE |
| * '''Slot 4:''' {{Hydroacoustic Search}}
| | |- |
| Catapult Fighter is recommended, since Bismarck's range is already quite good.
| | | style="color:inherit;" | • Name || style="color:inherit;" | PGGS002_150mm_SKC_28_RF |
| | |- |
| | | style="color:inherit;" | • Arrangement || style="color:inherit;" | 2x150mm |
| | |- |
| | | style="color:inherit;" | • Rate of fire (shots/min) || style="color:inherit;" | 8.0 |
| | |- |
| | | style="color:inherit;" | • Maximum damage || style="color:inherit;" | 1700 |
| | |- |
| | | style="color:inherit;" | • Shell velocity (m/s) || style="color:inherit;" | 875 |
| | |- |
| | | style="color:inherit;" | • Penetration (mm) || style="color:inherit;" | 38 |
| | |- |
| | | style="color:inherit;" | • Fire chance (%) || style="color:inherit;" | 8.0% |
| | |} |
| | </div> |
| | </div></div></div> |
| | <div class="b-popup"><div class="b-popup_head js-tech-nav_head"><div><h2>Airstrike</h2></div><span class="b-tech-nav_arrow"></span></div><div class="b-popup_content" style="display: none;"><div> |
|
| |
|
| |Camouflage=<!-- write text about useful camouflage below --> | | <div style="border: 2px solid rgba(212,175,55,0.8); border-radius: 3px; margin-bottom: 1em; overflow: hidden;"> |
| {{TT Ship Camo Insert|shiptier=8}}
| | {| class="wikitable" style="margin:0; color:inherit; width:100%" |
| | ! style="background-color:#1a3244; color:#ffffff; font-weight:bold;" | ASW AIRSTRIKE (DEPTH CHARGES) !! style="background-color:#1a3244; color:#ffffff; font-weight:bold;" | |
| | |- |
| | | style="color:inherit;" | • Range (km) || style="color:inherit;" | 10 |
| | |- |
| | | style="color:inherit;" | • Minimum range (km) || style="color:inherit;" | 0.5 |
| | |- |
| | | style="color:inherit;" | • Reload time (sec) || style="color:inherit;" | 30.0 |
| | |- |
| | | style="color:inherit;" | • Number of aircraft || style="color:inherit;" | 1 |
| | |- |
| | | style="color:inherit;" | • Depth charges in payload || style="color:inherit;" | 2 |
| | |- |
| | | style="color:inherit;" | • Damage || style="color:inherit;" | 4200 |
| | |- |
| | | style="color:inherit;" | • Deployment || style="color:inherit;" | Manual |
| | |} |
| | </div> |
| | </div></div></div> |
| | <div class="b-popup"><div class="b-popup_head js-tech-nav_head"><div><h2>AA Defense</h2></div><span class="b-tech-nav_arrow"></span></div><div class="b-popup_content" style="display: none;"><div> |
| | <div style="border: 2px solid rgba(212,175,55,0.8); border-radius: 3px; margin-bottom: 1em; overflow: hidden;"> |
| | '''Bismarck (A)''' |
|
| |
|
| |Signals=<!-- write text about best set of signals below --> | | {| class="wikitable" style="margin:0 0 0.8em 0; width:100%; color:inherit;" |
| Players who have followed the '''Secondary Battery Build''' above will want to equip Mike Yankee Soxisix ({{Mike Yankee Soxisix|Size=18px}}) and India Delta ({{India Delta|Size=18px}}) signals in order to further boost the effectiveness of their secondaries and {{Repair Party}} consumable, respectively.
| | ! style="background-color:#1a3244; color:#ffffff; font-weight:bold;" | AA ARMAMENT !! style="background-color:#1a3244; color:#ffffff; font-weight:bold;" | MOUNTS × BARRELS |
| | |- |
| | | style="color:inherit;" | 105 mm || style="color:inherit;" | 8 × 2 |
| | |- |
| | | style="color:inherit;" | 37 mm || style="color:inherit;" | 8 × 2 |
| | |- |
| | | style="color:inherit;" | 20 mm || style="color:inherit;" | 2 × 4 + 12 × 1 |
| | |} |
|
| |
|
| Players following the '''Anti-Aircraft Build''' may wish to equip November Echo Setteseven ({{November Echo Setteseven|Size=18px}}) for the bonus to AA gun damage.
| | '''Continuous damage''' — average DPS within each action zone |
| | {| class="wikitable" style="margin:0 0 0.8em 0; width:100%; color:inherit;" |
| | ! style="background-color:#1a3244; color:#ffffff; font-weight:bold;" | RANGE !! style="background-color:#1a3244; color:#ffffff; font-weight:bold;" | DPS !! style="background-color:#1a3244; color:#ffffff; font-weight:bold;" | HIT CHANCE !! style="background-color:#1a3244; color:#ffffff; font-weight:bold;" | ACTION ZONE (km) |
| | |- |
| | | style="color:inherit;" | Short-range || style="color:inherit;" | 108.5 || style="color:inherit;" | 70% || style="color:inherit;" | 2.0 |
| | |- |
| | | style="color:inherit;" | Mid-range || style="color:inherit;" | 38.5 || style="color:inherit;" | 75% || style="color:inherit;" | 3.5 |
| | |- |
| | | style="color:inherit;" | Long-range || style="color:inherit;" | 175 || style="color:inherit;" | 75% || style="color:inherit;" | 5.2 |
| | |} |
|
| |
|
| {{Signal Flags | | '''Damage by shell explosions''' |
| | November Echo Setteseven = 2 | | {| class="wikitable" style="margin:0 0 0.8em 0; width:100%; color:inherit;" |
| | Mike Yankee Soxisix = 3 | | ! style="background-color:#1a3244; color:#ffffff; font-weight:bold;" | EXPLOSIONS / SALVO !! style="background-color:#1a3244; color:#ffffff; font-weight:bold;" | DAMAGE !! style="background-color:#1a3244; color:#ffffff; font-weight:bold;" | HIT CHANCE !! style="background-color:#1a3244; color:#ffffff; font-weight:bold;" | ACTION ZONE (km) |
| | India X-Ray = 1 | | |- |
| | Juliet Whiskey Unaone = | | | style="color:inherit;" | 7 || style="color:inherit;" | 1600 || style="color:inherit;" | 75% || style="color:inherit;" | 3.5–5.2 |
| | Victor Lima = 1 | | |} |
| | Hotel Yankee = 1 | |
|
| |
|
| | November Foxtrot = 2
| | '''Bismarck (B)''' |
| | Sierra Mike = 3
| |
| | India Delta = 3
| |
| | Juliet Yankee Bissotwo = 2
| |
| | India Yankee = 2
| |
| | Juliet Charlie =
| |
|
| |
|
| }}
| | {| class="wikitable" style="margin:0 0 0.8em 0; width:100%; color:inherit;" |
| | ! style="background-color:#1a3244; color:#ffffff; font-weight:bold;" | AA ARMAMENT !! style="background-color:#1a3244; color:#ffffff; font-weight:bold;" | MOUNTS × BARRELS |
| | |- |
| | | style="color:inherit;" | 105 mm || style="color:inherit;" | 8 × 2 |
| | |- |
| | | style="color:inherit;" | 37 mm || style="color:inherit;" | 10 × 2 |
| | |- |
| | | style="color:inherit;" | 20 mm || style="color:inherit;" | 16 × 4 + 14 × 1 |
| | |} |
|
| |
|
| |Gallery=<!-- write below list of files with description (if necessary) separated with | --><gallery> | | '''Continuous damage''' — average DPS within each action zone |
| | {| class="wikitable" style="margin:0 0 0.8em 0; width:100%; color:inherit;" |
| | ! style="background-color:#1a3244; color:#ffffff; font-weight:bold;" | RANGE !! style="background-color:#1a3244; color:#ffffff; font-weight:bold;" | DPS !! style="background-color:#1a3244; color:#ffffff; font-weight:bold;" | HIT CHANCE !! style="background-color:#1a3244; color:#ffffff; font-weight:bold;" | ACTION ZONE (km) |
| | |- |
| | | style="color:inherit;" | Short-range || style="color:inherit;" | 287 || style="color:inherit;" | 70% || style="color:inherit;" | 2.0 |
| | |- |
| | | style="color:inherit;" | Mid-range || style="color:inherit;" | 178.5 || style="color:inherit;" | 75% || style="color:inherit;" | 3.5 |
| | |- |
| | | style="color:inherit;" | Long-range || style="color:inherit;" | 161 || style="color:inherit;" | 75% || style="color:inherit;" | 5.2 |
| | |} |
|
| |
|
| </gallery> | | '''Damage by shell explosions''' |
| | {| class="wikitable" style="margin:0 0 0.8em 0; width:100%; color:inherit;" |
| | ! style="background-color:#1a3244; color:#ffffff; font-weight:bold;" | EXPLOSIONS / SALVO !! style="background-color:#1a3244; color:#ffffff; font-weight:bold;" | DAMAGE !! style="background-color:#1a3244; color:#ffffff; font-weight:bold;" | HIT CHANCE !! style="background-color:#1a3244; color:#ffffff; font-weight:bold;" | ACTION ZONE (km) |
| | |- |
| | | style="color:inherit;" | 7 || style="color:inherit;" | 1600 || style="color:inherit;" | 75% || style="color:inherit;" | 3.5–5.2 |
| | |} |
| | </div> |
| | </div></div></div> |
|
| |
|
| |History=<!-- write text below -->
| |
| <div class="thumb tright">
| |
| {{AnnoWiki|content=
| |
| <h2>''{{#var:ship_name}}'', 1941</h2>
| |
| <h3>Construction</h3>
| |
| :Blohm and Voss Shipbuilding Company; Hamburg, Germany
| |
| :Laid down: 1 July 1936
| |
| :Launched: 14 February 1939
| |
| :Commissioned: 24 August 1940
| |
| ----
| |
| ====Specifications====
| |
| :41,700 metric tons displacement, standard
| |
| :50,300 metric tons displacement, max
| |
| :250.5m length
| |
| :36m beam
| |
| :8.7m draft
| |
| ----
| |
| ====Machinery====
| |
| :12 boilers, 3 turbines
| |
| ----
| |
| ====Performance====
| |
| :29 knots at 138,000 shaft horsepower
| |
| :8,410nm at 15 knots
| |
| ----
| |
| ====Armor====
| |
| :Main belt: 320mm mid, 60mm forward, 80mm aft
| |
| :Upper belt: 145mm
| |
| :Torpedo bulkhead: 45mm
| |
| :Decks: 51mm main, 83-121mm armored deck, 102mm armored deck slopes
| |
| :Bulkheads: 180-220mm
| |
| :Barbettes and Turrets: 340mm barbette, 360mm face, 220mm side,<br> 320mm rear, 180mm roof, 102mm secondary turrets
| |
| :Conning tower: 356mm
| |
| ----
| |
| ====Armament====
| |
| =====Main=====
| |
| :Eight (4x2) 380mm guns
| |
| =====Secondary=====
| |
| :Twelve (6x2) 150mm guns
| |
| :Sixteen (8x2) 105mm guns
| |
| =====Anti-Aircraft=====
| |
| :Sixteen (8x2) 37mm guns
| |
| :Twelve (12x1) 20mm guns
| |
| ----
| |
| ====Aircraft====
| |
| :Four (4) Arado Ar 196 floatplanes
| |
| }}</div>
| |
| [[File:Bismarck_(1939).jpg|500px|link=]]
| |
| ===History===
| |
|
| |
|
| ====Design====
| | <!-- Add the ship code here to populate the upgrade table --> |
| Following the construction of modern Battleships in France and Italy, Germany saw once again the need to counter other navies with their own class of modern fast Battleships.
| | {{Ship Upgrades Section|code=PGSB108_Bismarck}} |
|
| |
|
| With a displacement of 39,500 tons when lightly loaded, and 50,400 when fully loaded, these ships were the largest Battleships in Europe during WW2. The official displacement, as a means to not provoke the United Kingdom, was 35,000 tons. The overall length was 250.5m, with a beam of 36m and a maximum draft of 10.2m.
| |
|
| |
|
| Main battery was initially set out to be caliber 33cm, which at the planned displacement would have allowed for a heavily armored and fast ship. However after the Richelieu class turned out to be carrying 380mm guns, the design was reworked and the armament would consist of eight 380mm guns in four twin turrets. The decision to go back to twin turrets was mostly due to two factors. For one, the German method of Fire Control preferred to have the main battery split into two even groups, so that each group would fire while the other one is reloading, to have shorter breaks between the salvos and to get range data faster. Also, German engineers struggled to develop a sufficient hoist system for triple turrets of that caliber.
| | <!-- Consumables have to be tagged individually on a slot by slot basis --> |
| This 38cm SK/34 gun fired an 800kg heavy projectile at ranges of up to 36.5km, with a theoretical maximum rate of fire of 3.3 rounds per minute and gun. However, those kind of fire rates would stress the ammunition hoists to the point where a mechanical failure is very likely, thus those kind of reloads were rarely executed.
| | {{Ship Consumables Section|consumables= |
| Secondary armament consisted of a mixed battery of 15cm and 10.5cm dual purpose guns. The 15cm gun was mounted in three twin turrets on each side of the ship, and would engage targets at ranges up to 23km, while the 10.5cm gun was mounted in four twins on each side with a range against surface units of 17km, and an AA ceiling of 12.5km.
| | * '''Slot 1:''' {{Damage Control Party}} (15.0s action, 80.0s cooldown) |
| Anti Aircraft Armament initially consisted of sixteen twin-mounted 37mm ''Flakzwilling 30'', an accurate but slow firing medium-range weapon. This gun would continue to see service on both ''Bismarck'' and ''Tirpitz'' until their destruction. Short range AA as design was covered by 18 20mm guns, of which eight were mounted in quads, the rest in single mounts. For Tirpitz this number would be increased throughout her career to at least 78 guns.
| | * '''Slot 2:''' {{Repair Party}} (4 charges, 28.0s action, 80.0s cooldown, 322.5 hp/s) |
| | * '''Slot 3:''' {{Spotting Aircraft}} (4 charges, 100.0s action, 240.0s cooldown) '''or''' {{Patrol Fighter}} (3 charges, 60.0s action, 90.0s cooldown) |
| | * '''Slot 4:''' {{Hydroacoustic Search}} (3 charges, 100.0s action, 120.0s cooldown) |
| | }} |
|
| |
|
| The armor protection had to be reduced after the main battery was increased to 38cm, this leads to the main belt being actually thinner on preceding classes. The main armor belt had a thickness of 320mm, although on Tirpitz it was slightly thinner at 315mm. The upper belt designed to defeat Cruiser caliber shells was 145mm strong. Following the belt was the typical turtleback, with a thickness of 110mm at the magazines and 100mm at the machinery, and this was again followed up by a 45mm thick torpedo bulkhead. The horizontal protection consisted of a 50mm strong upper deck, which was increased to 80mm in some locations, and on the citadel another armored deck with 95mm (100mm on Tirpitz) above the magazines, and 80mm above the machinery.
| |
| The main battery was protected by a 360mm frontal plate, and 220-150mm sides. The barbettes would be 340mm thick above the weather deck, and below it was reduced to 220mm. The secondary turrets were much more vulnerable with only 100mm face plates and 80mm barbettes.
| |
|
| |
|
| The propulsion on the ''Bismarck''-class was a high-pressure steam plant like it was used on Destroyers and the ''Scharnhorst''-class before. Twelve boilers would create steam with a temperature of up to 480°C, and three turbines with a combined designed power output of 138,000hp would then turn the shafts of the ship. During trials the highest attained speed was 30.1kn at 150,170shp, although Tirpitz never overloaded her engines so her maximum speed remains unknown. A twin rudder was installed to allow maneuvers. When sailing at 15kn, a Cruising range of 8,400 nautical miles was possible.
| | ==Gallery== |
| | <div class="b-popup"><div class="b-popup_head js-tech-nav_head"><div><h2>WoWs Gallery</h2></div><span class="b-tech-nav_arrow"></span></div><div class="b-popup_content" style="display: none;"><div> |
|
| |
|
| Like all ''Scharnhorst''-class, the ''Bismarck''-class had aviation facilities. Four Arado AR196 could be carried in the hangers amidships, and be launched via the installed catapults.
| | <gallery> |
| Fire control did not differ greatly from the preceding Battleships, with numerous optical rangefinders and radar equipment for gunnery. Like on the ''Scharnhorst''-class, the rangefinder mounted in A turret was removed during the winter of 1940/41, as spraywater caused it to be of little use in rough weather conditions.
| | </gallery> |
| | | </div></div></div> |
| ====Service====
| |
| In the course of the warship's eight-month career under its sole commanding officer, ''Kapitän zur See'' Ernst Lindemann, ''Bismarck'' conducted only one offensive operation: Operation Rheinübung in May 1941. The ship, along with the heavy cruiser ''[[Prinz Eugen]]'', was to break into the Atlantic Ocean and raid Allied shipping from North America to Great Britain. The British Admiralty learned of the sortie and ordered several ships to patrol the three possible break-out points into the Atlantic. ''Bismarck'' and ''Prinz Eugen'' were detected moving into the Denmark Strait by the HMS ''Suffolk'' and ''Norfolk'' on 23 May 1941 at approximately 19:22. ''Bismarck'', the lead ship, went to action stations and Captain Lindemann announced at 20:30 to the crew “''Feind in Sicht an Backbord, Schiff nimmt Gefecht auf!'' (Enemy sighted to port. Engage!)”. ''Bismarck'' fired several salvos but failed to score a direct hit. Heavily outgunned, the British cruisers retired to a safe distance and shadowed the ''Bismarck'' until reinforcements could arrive. Due to heavy vibration from the main guns firing, ''Bismarck''’s forward radar failed. Admiral Lütjens ordered ''Prinz Eugen'' to take the lead position and provide radar coverage.
| |
| | |
| The following morning, ''Prinz Eugen'' detected a ship by hydrophone and at 05:45 sighted two ships which were initially misidentified as cruisers. The two ships were, in fact, the battlecruiser HMS ''[[Hood]]'', pride of the Royal Navy, and HMS ''Prince of Wales'', the newest battleship in the British arsenal (she was so new that she still had a variety of shipyard personnel on board testing and maintaining her machinery). At 05:53 the British battleships opened fire on the two German ships. The British admiral on board ''Hood'' had intended on targeting ''Bismarck'' first, but due to the change in the German battle line ''Hood'' targeted ''Prinz Eugen'' instead. The German force — on the orders of Admiral Lütjens — did not open fire. After roughly two minutes of fire, Captain Lindemann grew tired of not being given the order to open fire and issued the following directive: "''Ich lasse mir doch nicht mein Schiff unter dem Arsch wegschießen. Feuererlaubnis!'' (I'm not letting my ship get shot out from under my arse. Open fire!)". At 06:01, the fifth salvo fired by ''Bismarck'' at a range of 18,000 meters (20,000 yards) struck ''Hood'' near her mainmast. The 380mm (15-inch) shell plunged through her decks and caused a magazine detonation. The resulting explosion broke ''Hood'' into three sections; she sank in a mere three minutes, taking all but three of her crew with her.
| |
|
| |
|
| ''Bismarck'' and ''Prinz Eugen'' then turned their attention to the bewildered ''Prince of Wales''. During this part of the engagement, ''Bismarck'' landed seven hits and took three damaging hits in return. ''Prince of Wales'' disengaged from the battle and the ''Bismarck'' and ''Prinz Eugen'' continued their mission. This engagement of 24 May 1941 became known as the Battle of the Denmark Strait and was an unqualified disaster for the Royal Navy.
| | <div class="b-popup"><div class="b-popup_head js-tech-nav_head"><div><h2>Historical Gallery</h2></div><span class="b-tech-nav_arrow"></span></div><div class="b-popup_content" style="display: none;"><div> |
|
| |
|
| The damage caused to ''Bismarck'' dictated that she return for repairs and that ''Prinz Eugen'' continue on into the open Atlantic to commence raiding. It has been reported that Admiral Lütjens and Captain Lindemann argued about which port to return to, with Lindemann advocating a course back through the Denmark Strait to return to Bergen, Norway. Lütjens overruled him and ordered a ''Bismarck'' to make for Saint Nazaire, France.
| | <gallery> |
| | |
| The destruction of ''Hood'' spurred a relentless pursuit by the Royal Navy involving dozens of warships, with Prime Minister Winston Churchill demanding that the ''Bismarck'' be sunk. Two days later, heading for the relative safety of occupied France, ''Bismarck'' was attacked by obsolescent Fairey Swordfish biplane torpedo bombers from the aircraft carrier HMS ''Ark Royal''; one scored a hit that rendered the battleship's steering gear inoperable. In her final battle the following morning, ''Bismarck'' was neutralized by a sustained bombardment from a British fleet led by the British battleships HMS ''[[King George V]]'' and HMS ''Rodney''. ''Bismarck'' was eventually scuttled by her crew, and sank with heavy loss of life. Most experts agree that the battle damage would have caused her to sink eventually, regardless.
| |
| | |
| The remains of ''Bismarck'' lie beneath 15,800 feet (4,800 meters) of water approximately 400 miles (650 km) west of Brest, France. The wreck was located in June 1989 by famed naval archaeologist Robert Ballard, and has since been further surveyed by several other expeditions. An expedition led by filmmaker in 2002 noted that despite the torpedo damage to ''Bismarck''’s outer hull, none of the torpedoes that struck her had actually penetrated her protective torpedo bulkhead.
| |
| | |
| ====Historical Inaccuracies====
| |
| * Hull (B) is ahistorical; ''Bismarck''’s anti-aircraft complement was never upgraded.
| |
| * The 37 mm Flak LM/42 anti-aircraft gun entered service in autumn 1943; ''Bismarck'' was sunk in May 1941.
| |
| * "The Last Conquest" [[Ship:Camouflage#Special Camouflage|camouflage]] has two large Iron Cross symbols on red banners on the deck of ''Bismarck'', one on the bow and another on the stern. These markings were actually painted over prior to Operation Rheinübung. There is also no evidence that her turret roofs were painted yellow.
| |
| | |
| |HistoricalGallery=<!-- write below list of files with description (if necessary) separated with | --><gallery>
| |
| File:Bismarck_crest.png|The wappen (coat of arms) of ''Bismarck''.
| |
| File:Bismarck_launching.jpg|Launching ceremony of ''Bismarck'', 14 February 1939.
| |
| File:Bundesarchiv DVM 10 Bild-23-63-41, Schlachtschiff "Bismarck".jpg|''Bismarck'' on trials in the summer of 1940; the rangefinders had not yet been installed.
| |
| File:Bismarck (1939).jpg|''Bismarck'' in 1940.
| |
| File:Bundesarchiv Bild 101II-MN-1361-16A, Schlachtschiff Bismarck, Indienststellung.jpg|''Bismarck'' in port in Hamburg.
| |
| File:Bb bismarck.png|3D rendering of ''Bismarck'' during Operation Rheinübung, May 1941.
| |
| File:Bismarck01.jpg|''Bismarck'' in the Baltic Sea — as seen from ''[[Prinz Eugen]]'' — departing Gotenhafen (now Gdynia, Poland), 19 May 1941.
| |
| File:Bundesarchiv Bild 146-1989-012-03, Schlachtschiff Bismarck in der Ostsee.jpg|''Bismarck'', photographed from ''[[Prinz Eugen]]'', in the Baltic at the outset of Operation Rheinübung, 19 May 1941.
| |
| File:Bismarck reconnaissance.jpg|A British aerial reconnaissance photo taken by Flying Officer Michael Suckling shows ''Bismarck'' anchored in Norway, 22 May 1941.
| |
| File:Bundesarchiv Bild 146-1984-055-14, Schlachtschiff Bismarck, nach Seegefecht.jpg|''Bismarck'' as seen from ''[[Prinz Eugen]]'' during the Battle of the Denmark Strait, 24 May 1941.
| |
| File:Bundesarchiv Bild 146-1968-015-25, Schlachtschiff Bismarck, Seegefecht.jpg|''Bismarck'' firing her main battery during the Battle of the Denmark Strait, 24 May 1941.
| |
| File:HMS Ark Royal swordfish.jpg|A Swordfish returns to HMS ''Ark Royal'' after making a torpedo attack against ''Bismarck''.
| |
| File:Rodney firing on Bismarck.png|HMS ''Rodney'' firing on ''Bismarck'', which can be seen burning in the distance, 27 May 1941.
| |
| File:HMS Dorsetshire Bismarck survivors.jpg|HMS ''Dorsetshire'' picking up survivors following the sinking of ''Bismarck'', 27 May 1941.
| |
| File:Bismarck illustration.png|Painting by Ken Marschall depicting ''Argo'' exploring the wreck. Famed naval archaeologist Robert Ballard discovered the wreck of ''Bismarck'' in June 1989.
| |
| File:Bundesarchiv Bild 193-06-7-16, Schlachtschiff Bismarck.jpg|A 150mm turret, similar to those installed as secondary batteries aboard ''Bismarck''.
| |
| </gallery> | | </gallery> |
| | </div></div></div> |
|
| |
|
| |Video=<!-- put below video clips with using template VideoYT. You can use html-tags for formatting. -->
| | [[Category:Ships of Germany]] |
| {{VideoYT|u-zWBtyWe8Q}}{{VideoYT|IE4oLRiRgWY}}
| | [[Category:Battleships]] |
| | | [[Category:Tier VIII ships]] |
| |Ref= <!-- write below -->
| | <!-- DO NOT DELETE THIS LINE. DO NOT INSERT ANYTHING BELOW THIS LINE --> |
| # [https://en.wikipedia.org/wiki/German_battleship_Bismarck German battleship ''Bismarck'' - Wikipedia]
| |
| # [https://en.wikipedia.org/wiki/Bismarck-class_battleship ''Bismarck''-class battleship - Wikipedia]
| |
| # [https://worldofwarships.com/en/news/history/bis-tory/ Chasing Bismarck - News - World of Warships]
| |
| # [https://worldofwarships.com/en/news/general-news/dry-dock-bismarck/ Dry Dock: Bismarck - News - World of Warships]
| |
| # [https://worldofwarships.com/en/news/general-news/sabaton-bismarck-music-video/ Sabaton Pays Tribute to Bismarck - News - World of Warships]
| |
| # [https://worldofwarships.com/en/news/history/gunter-lutjens/ The History of Günther Lütjens - News - World of Warships]
| |
| # [https://www.youtube.com/watch?v=QBs64WXToL0 Bismarck. A musical tribute from Sabaton and World of Warships - World of Warships Official Channel - YouTube]
| |
| # [https://www.youtube.com/watch?v=IE4oLRiRgWY Dry Dock: Bismarck - World of Warships Official Channel - YouTube]
| |
| # [https://www.youtube.com/watch?v=WeSXCPQU5y8 German Commander Günther Lütjens - World of Warships Official Channel - YouTube]
| |
| # https://en.wikipedia.org/wiki/Ernst_Lindemann<br />
| |
| # https://en.wikipedia.org/wiki/G%C3%BCnther_L%C3%BCtjens
| |
| <references />
| |
| <br />
| |
| | |
| {{WoWS Ship Changelog Insert|1=
| |
| *Available for testing by supertesters in the game starting from Update 0.5.9.
| |
| *Introduced into the game as a researchable ship in Update 0.5.10.
| |
| *Update 0.5.12:
| |
| **Fixed display of navigation lights at low settings.
| |
| *Update 0.5.13:
| |
| **In the text description of the armoring, the thickness of the citadel's armor was corrected.
| |
| *Update 0.5.14:
| |
| **For permanent camouflage, the discount on ship maintenance was increased from 5% to 10%.
| |
| *Update 0.6.0:
| |
| **Improved Hydroacoustic search was replaced with the standard one for Tier VIII ships.
| |
| *Update 0.6.6:
| |
| **Improved appearance of the ship using a special technology for high-quality rendering of thin elements (mainly rigging).
| |
| *Update 0.6.8:
| |
| **For 105-mm secondary battery shells, the chance of setting fire was reduced from 9% to 5%, and the damage from 1300 to 1200.
| |
| **The range of the secondary battery was increased from 7 to 7.5 km.
| |
| *Update 0.6.12:
| |
| **Detectability when firing main guns in smoke changed to 15.05 km.
| |
| **Detection range of the Arado Ar.196 aircraft was increased from 4 km to 7 km in air, and to 8 km by sea.
| |
| *Update 0.6.14:
| |
| **Improved display of thin elements. The changes do not affect the game balance in any way.
| |
| *Update 0.7.1:
| |
| **Fixed textures for the Bismarck Hull (A).
| |
| *Update 0.7.10:
| |
| **The range of the Hydroacoustic Search consumable was unified - 5 km for detecting ships, 3.5 km for detecting torpedoes.
| |
| *Update 0.8.5:
| |
| **Credit earnings increased by 5%.
| |
| **XP earnings increased by 5%.
| |
| *Update 0.8.6:
| |
| **The armor penetration of the secondary high-explosive projectile was increased from 18 to 26 mm. With this change, the 105-mm secondary battery guns of German ships will be able to penetrate the plating of destroyers, cruisers, and battleships of Tier VI-VII.
| |
| *Update 0.8.11:
| |
| **The main battery dispersion ellipse was adjusted to that of American and British battleships.
| |
| *Update 0.9.5:
| |
| **Small changes to geometry and textures.
| |
| *Update 0.10.0:
| |
| **Increased accuracy of secondary battery guns.
| |
| **The firing range of the secondary battery was increased to 7.6 km.
| |
| *Update 0.11.6:
| |
| **Minor fixes to the model and textures of the ship.
| |
| *Update 0.11.11:
| |
| **Minor updates to geometry and textures.
| |
| *Update 12.0:
| |
| **Improved the geometry and textures of the Varg and "The Last Conquest" camoflauges.
| |
| }}
| |
| | |
| }}<!-- DO NOT DELETE THIS LINE. DO NOT INSERT ANYTHING BELOW THIS LINE -->
| |



 (15.0s action, 80.0s cooldown)
 (4 charges, 28.0s action, 80.0s cooldown, 322.5 hp/s)
 (4 charges, 100.0s action, 240.0s cooldown) or Patrol Fighter
  (3 charges, 60.0s action, 90.0s cooldown)
 (3 charges, 100.0s action, 120.0s cooldown)