|
|
| Line 1: |
Line 1: |
| <!-- DO NOT EDIT OR DELETE LINES WITH COMMENTS (it's look like as this or next line)
| | {{#vardefine:ship_name|Edinburgh}} |
| -->{{WoWs_Ship|Promo=<!-- in case of gift or promo ship write conditions to get it. -->
| | __NOTOC____NOEDITSECTION__ |
|
| |
|
| |Anno=<!-- you can write below short description for the ship. it will replace default once. -->
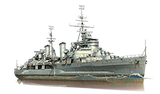
| | <div class="b-description gw-frame-1"><div class="b-description-img b-description-img__indent b-description-img__single"><div style="width:160px; height:102px; opacity:.5; border-radius:2px; position:absolute; left:0; top:0; z-index:1; -webkit-transition:all 0.2s ease-out 0.1s; transition:all 0.2s ease-out 0.1s;">[[File:Wows_anno_flag_uk.png|160px]]</div><div class="l-description-img_class"><span class="b-description-img_type b-description-img_type__Cruiser b-description-img_type__Cruiser-Tech Tree"></span><span class="b-description-img_class">VIII</span></div><div class="b-description-img_vehicle">[[File:Ship_PBSC108_Edinburgh.png|160px|link=|left]]</div><div class="l-description-img_price"><span class="b-description-img_price b-description-img_price__gold"><span title="''{{#var:ship_name}}'' was first released for sale on DD Month YYYY.">8,800,000</span></span></div></div><p>[[Ship:{{#var:ship_name}}|{{#var:ship_name}}]] — U.K. Tech Tree Tier VIII [[Ship:Cruiser|Cruiser]].</p><p>In August 1933, given the construction of the Mogami-class ships in Japan, the development of light cruiser projects with four triple-gun main turrets commenced. Two cruisers were built under the 1936 program. HMS Edinburgh entered service in 1939 and then escorted convoys and participated in both the raid on the Lofoten Islands and the hunt for Bismarck. On April 20, 1942, Edinburgh took two torpedo hits while carrying $20 million for Lend-Lease. The ship was attacked while being towed to Murmansk. She was able to sink one German destroyer but was eventually destroyed.</p><p> </p></div> |
| The most powerful light cruiser in the Royal Navy during World War II. Outrivaled most other same-type ships in terms of armor protection. She inherited powerful main guns from her predecessors. Among other Royal Navy cruisers of the 1930s, ''Edinburgh'' carried more powerful AA weapons.<!-- <br><br>{{Model3DViewer|219d5ce21da544ec96eebd210bdce620}}-->
| |
|
| |
|
| |Performance=<!-- write text about performance in battles below -->
| | ===Pros=== |
| {{AA Sidebar Warning Insert}}
| | * Pro 1 |
| | * Pro 2 |
|
| |
|
| Tier VIII ''Edinburgh'' is a further refinement of ''[[Fiji]]'', although she was actually built earlier. She retains the main features of ''Fiji'', but improves the concealment and comes with the option of stealth radar.
| | ===Cons=== |
| | * Con 1 |
| | * Con 2 |
|
| |
|
| <h4>The Ship</h4>
| |
| ''Edinburgh'' will feel familiar to players who have experienced ''Fiji''. She retains many of the characteristics of her predecessor, making the transition a relatively easy one. Her rather low top speed of 32.5 knots will be familiar, as is her improved acceleration and energy retention in turns. Although she is slower than many cruisers, she is able to reach her top speed more quickly and maintain a faster speed when turning. Her rudder shift of 9.6 seconds and turning circle of 730 meters are fairly typical for a Tier VIII cruiser, but her energy retention and improved acceleration mean she feels far more nimble when maneuvering.
| |
|
| |
|
| ''Edinburgh'' carries a standard cruiser {{Damage Control Party}} with a 5 second action time and 60 seconds between uses. In her second consumable slot ''Edinburgh'' has a {{Specialized Repair Teams}}. This can repair up to 40% of her total HP, including all fire or flood damage received as well as an impressive 50% of citadel damage received. With 3 charges as standard, ''Edinburgh'' can recover up to 43,680 HP if all her charges are used to their best effect.
| | ==Ship Stats== |
| Her third slot features a {{Hydroacoustic Search}} with three uses. This will detect enemy ships at 4 km, torpedoes at 3.5 km, and submerged submarines at 2 km. It has an action time of 100 seconds and a cooldown of 120 seconds. Her Hydroacoustic Search can aid in hunting destroyers, or to provide advance warning of unwelcome attention if firing from smoke.
| | <div class="b-popup"><div class="b-popup_head js-tech-nav_head"><div><h2>Hull Information</h2></div><span class="b-tech-nav_arrow"></span></div><div class="b-popup_content" style="display: none;"><div> |
| ''Edinburgh'' has several options in her fourth consumable slot. {{Spotting Aircraft}} and {{Catapult Fighter}} are niche, and wasteful, options that do not play to ''Edinburgh''’s strengths. Her fighters will launch three aircraft which will patrol around the ship for up to 60 seconds while an enemy CV is allowed to attack unhindered. Spotting Aircraft will provide a 20% boost to her main battery range for 100 seconds. Although the extra range may be welcome, ''Edinburgh''’s ballistics do not lend herself to long range gunnery.
| | <div style="border: 2px solid rgba(212,175,55,0.8); border-radius: 3px; margin-bottom: 1em; overflow: hidden;"> |
| The more typical choices are the familiar {{Smoke Generator}} or the new {{Surveillance Radar}}. These consumables offer the choice of two different gameplay styles. Taking the Smoke Generator will continue the familiar play style of ''Fiji'' and her predecessors. This creates a series of large smoke clouds which take 99 seconds to disperse. Players will need to remember that ''Edinburgh'' takes longer to slow down from full speed and can easily slide through her smoke before she has come to a stop.
| | {| class="wikitable" style="margin:0; color:inherit; width:100%" |
| Using the Surveillance Radar will allow ''Edinburgh'' to take a more aggressive role. If she is built for stealth, she will have an 800 meter buffer between her detection range and her radar range which allows her to act as a radar trap. Her radar lasts for 30 seconds, allowing her to fire up to four salvos at a detected target.
| | ! style="background-color:#1a3244; color:#ffffff; font-weight:bold;" | SURVIVABILITY !! style="background-color:#1a3244; color:#ffffff; font-weight:bold;" | Edinburgh (A) !! style="background-color:#1a3244; color:#ffffff; font-weight:bold;" | Edinburgh (B) |
| | |- |
| | | style="color:inherit;" | • Hit Points || style="color:inherit;" | 31800 || style="color:inherit;" | 36400 |
| | |- |
| | | style="color:inherit;" | • Torpedo protection damage reduction (%) || colspan="2" style="color:inherit;" | — |
| | |} |
| | </div> |
|
| |
|
| <h4>Armor and Survivability</h4> | | <div style="border: 2px solid rgba(212,175,55,0.8); border-radius: 3px; margin-bottom: 1em; overflow: hidden;"> |
| ''Edinburgh'' is rather lightly armored and vulnerable to enemy fire. Her citadel armor is 114 mm thick, comparable to most light cruisers at her tier, but her citadel extends along the entire hull between front and rear turrets. Additionally, she has a raised section of armor beneath her funnels. This is also 114 mm thick, but it covers the citadel roof which is only 6 mm thick here; any shells that get through the main belt can easily overmatch the citadel roof. Her bow and stern plating is 16 mm thick; this is sufficient to bounce up to 220 mm AP rounds if correctly angled, but is vulnerable to HE penetration from any enemies within her matchmaking spread.
| | {| class="wikitable" style="margin:0; color:inherit; width:100%" |
| ''Edinburgh''’s health pool is below average for a Tier VIII cruiser. Although she has an improved heal, her relatively small HP and thin armor leave her vulnerable to receiving critical damage. If players are able to avoid receiving devastating strikes, ''Edinburgh'' can prove to be surprisingly resilient with her Specialized Repair Party consumable.
| | ! style="background-color:#1a3244; color:#ffffff; font-weight:bold;" | ARMOR DETAIL !! style="background-color:#1a3244; color:#ffffff; font-weight:bold;" | |
| | |- |
| | | style="color:inherit;" | • Belt (mm) || style="color:inherit;" | — |
| | |- |
| | | style="color:inherit;" | • Deck (mm) || style="color:inherit;" | — |
| | |- |
| | | style="color:inherit;" | • Superstructure (mm) || style="color:inherit;" | — |
| | |- |
| | | style="color:inherit;" | • Extremities (mm) || style="color:inherit;" | — |
| | |} |
| | </div> |
|
| |
|
| <h4>Armament</h4> | | <div style="border: 2px solid rgba(212,175,55,0.8); border-radius: 3px; margin-bottom: 1em; overflow: hidden;"> |
| ''Edinburgh'' mounts a main battery of twelve 152 mm guns in four triple turrets. By now these weapons should be familiar to players, as they have been using them since Leander. Her short-fuse AP has improved ricochet angles and reduced arming threshold. When engaging lightly armored targets, players can expect less overpenetration results and fewer ricochets. Armored or angled targets are a trickier proposition, and ''Edinburgh'' can struggle to wear these targets down on her own. Although her potential main battery DPM is good, fully utilizing her main battery requires exposing her citadel to return fire.
| | {| class="wikitable" style="margin:0; color:inherit; width:100%" |
| | ! style="background-color:#1a3244; color:#ffffff; font-weight:bold;" | MANEUVERABILITY !! style="background-color:#1a3244; color:#ffffff; font-weight:bold;" | Edinburgh (A) !! style="background-color:#1a3244; color:#ffffff; font-weight:bold;" | Edinburgh (B) |
| | |- |
| | | style="color:inherit;" | • Maximum speed (kt) || style="color:inherit;" | 32.5 || style="color:inherit;" | 32.5 |
| | |- |
| | | style="color:inherit;" | • Turning circle radius (m) || style="color:inherit;" | 730 || style="color:inherit;" | 730 |
| | |- |
| | | style="color:inherit;" | • Rudder-shift time (sec) || style="color:inherit;" | 17.5 || style="color:inherit;" | 12.5 |
| | |} |
| | </div> |
|
| |
|
| ''Edinburgh'' mounts a triple torpedo launcher on each side, with the ability to individually fire her torpedoes. Her torpedoes have a good range of 10 km; they can be launched from stealth, although the chance of hits at this range is low. Her torpedoes are a useful deterrent to prevent ships pushing into her position, but ''Edinburgh'' does not have enough torpedoes to make them a truly threatening weapon.
| | <div style="border: 2px solid rgba(212,175,55,0.8); border-radius: 3px; margin-bottom: 1em; overflow: hidden;"> |
| | {| class="wikitable" style="margin:0; color:inherit; width:100%" |
| | ! style="background-color:#1a3244; color:#ffffff; font-weight:bold;" | CONCEALMENT !! style="background-color:#1a3244; color:#ffffff; font-weight:bold;" | Edinburgh (A) !! style="background-color:#1a3244; color:#ffffff; font-weight:bold;" | Edinburgh (B) |
| | |- |
| | | style="color:inherit;" | • Detectability by sea (km) || style="color:inherit;" | 11.36 || style="color:inherit;" | 11.36 |
| | |- |
| | | style="color:inherit;" | • Detectability by air (km) || style="color:inherit;" | 7.16 || style="color:inherit;" | 7.16 |
| | |- |
| | | style="color:inherit;" | • Detectability after firing main guns in smoke (km) || colspan="2" style="color:inherit;" | 5.52 |
| | |- |
| | | style="color:inherit;" | • Detectability by depths (km) || style="color:inherit;" | 7.16 || style="color:inherit;" | 7.16 |
| | |} |
| | </div> |
|
| |
|
| <h4>Anti-Air</h4> | | </div></div></div> |
| ''Edinburgh''’s anti-air defenses, while not terrible, are not strong enough to deter a carrier attack. Her long-range guns reach out to 5.8 km and create 5 flak clouds, which can cause serious damage to a distracted enemy CV. However, her short and medium-range weapons are weaker than most of her peers, with 44% of her DPM limited to just 2 km. A lone ''Edinburgh'' presents little serious threat to a carrier.
| | <div class="b-popup"><div class="b-popup_head js-tech-nav_head"><div><h2>Main Battery</h2></div><span class="b-tech-nav_arrow"></span></div><div class="b-popup_content" style="display: none;"><div><div style="border: 2px solid rgba(212,175,55,0.8); border-radius: 3px; margin-bottom: 1em; overflow: hidden;"> |
| | {| class="wikitable" style="margin:0; color:inherit; width:100%" |
| | ! style="background-color:#1a3244; color:#ffffff; font-weight:bold;" | MAIN BATTERY !! style="background-color:#1a3244; color:#ffffff; font-weight:bold;" | Mk VIII mod. 1 !! style="background-color:#1a3244; color:#ffffff; font-weight:bold;" | Mk VIII mod. 2 |
| | |- |
| | | style="color:inherit;" | • Arrangement || colspan="2" style="color:inherit;" | 4×3 152mm |
| | |- |
| | | style="color:inherit;" | • Firing range (km) || style="color:inherit;" | 14.02 || style="color:inherit;" | 15.42 |
| | |- |
| | | style="color:inherit;" | • Reload time (sec) || colspan="2" style="color:inherit;" | 7.7 |
| | |- |
| | | style="color:inherit;" | • Rate of fire (shots/min) || colspan="2" style="color:inherit;" | 7.8 |
| | |- |
| | | style="color:inherit;" | • 180° turn time (sec) || colspan="2" style="color:inherit;" | 25.7 |
| | |} |
| | </div> |
|
| |
|
| <h4>Anti-Submarine</h4> | | <div style="border: 2px solid rgba(212,175,55,0.8); border-radius: 3px; margin-bottom: 1em; overflow: hidden;"> |
| ''Edinburgh'' uses depth charges for ASW attacks, which means she must be in close proximity in order to attack a submerged submarine. She drops a small pattern of three depth charges with each attack. She can have two attacks ready at a time, with each one taking 40 seconds to reload. Although she drops a small pattern, each individual charge is powerful, causing 5000 damage on a direct hit with a good chance of causing floods or fires.
| | {| class="wikitable" style="margin:0; color:inherit; width:100%" |
| | ! style="background-color:#1a3244; color:#ffffff; font-weight:bold;" | DISPERSION !! style="background-color:#1a3244; color:#ffffff; font-weight:bold;" | |
| | |- |
| | | style="color:inherit;" | • Dispersion type || style="color:inherit;" | Standard CA/CL dispersion |
| | |- |
| | | style="color:inherit;" | • Dispersion formula || style="color:inherit;" | Dispersion (m) = 6.9 × range(km) + 33 |
| | |- |
| | | style="color:inherit;" | • Sigma || style="color:inherit;" | 2.0 |
| | |- |
| | | style="color:inherit;" | • Maximum dispersion (m) || style="color:inherit;" | 129 |
| | |- |
| | | style="color:inherit;" | • Dispersion at 5 km || style="color:inherit;" | 68 |
| | |- |
| | | style="color:inherit;" | • Dispersion at 10 km || style="color:inherit;" | 102 |
| | |- |
| | | style="color:inherit;" | • Dispersion at 14.02 km || style="color:inherit;" | 130 |
| | |} |
| | </div> |
|
| |
|
| <h4>Battle Performance</h4>
| |
| ''Edinburgh'' is best suited to supporting friendly ships from short to medium range. Her stealth and agility mean she can operate close to friendly destroyers to help them deal with lighter enemy ships. But, like ''Fiji'', players must take care not to overextend and end up in a position they cannot escape from.
| |
|
| |
|
| The addition of Surveillance Radar gives players a gameplay choice compared to previous ships in the line. The traditional, and safer, approach is to use the Smoke Generator to create cover for sustained firing. Players must remember that she takes a long time to slow down, which can leave her vulnerable if not already in a smoke screen. Slowing down to create a smokescreen in full view of the enemy is not advised; this is often a fast way to end her participation in the battle. The combination of Hydroacoustic Search and improved acceleration means that players should be able to safely avoid any torpedoes fired at her smoke clouds.
| |
|
| |
|
| The alternative option is to utilize Surveillance Radar to turn ''Edinburgh'' into a more aggressive destroyer hunter. However, this will leave her without her smokescreen, so players will either need to carefully manage their engagements or rely on friendly ships to provide cover. A radar-equipped ''Edinburgh'' can come as a nasty surprise for enemy destroyers who will not be aware of her presence until they are already inside the radar range.
| | <div style="border: 2px solid rgba(212,175,55,0.8); border-radius: 3px; margin-bottom: 1em; overflow: hidden;"> |
| | {| class="wikitable" style="margin:0; color:inherit; width:100%" |
| | ! style="background-color:#1a3244; color:#ffffff; font-weight:bold;" | AP SHELL !! style="background-color:#1a3244; color:#ffffff; font-weight:bold;" | |
| | |- |
| | | style="color:inherit;" | • Name || style="color:inherit;" | 152 mm AP 6crh Mk IV |
| | |- |
| | | style="color:inherit;" | • Maximum damage || style="color:inherit;" | 3100 |
| | |- |
| | | style="color:inherit;" | • Shell velocity (m/s) || style="color:inherit;" | 841 |
| | |- |
| | | style="color:inherit;" | • Shell weight (kg) || style="color:inherit;" | 50.8 |
| | |- |
| | | style="color:inherit;" | • Fuse time (sec) || style="color:inherit;" | 0.005 |
| | |- |
| | | style="color:inherit;" | • Ricochet start (°) || style="color:inherit;" | 60 |
| | |- |
| | | style="color:inherit;" | • Always ricochet (°) || style="color:inherit;" | 75 |
| | |- |
| | | style="color:inherit;" | • Normalisation (°) || style="color:inherit;" | 8.5 |
| | |- |
| | | style="color:inherit;" | • Arming threshold (mm) || style="color:inherit;" | 12 |
| | |} |
| | </div> |
| | </div></div></div> |
| | <div class="b-popup"><div class="b-popup_head js-tech-nav_head"><div><h2>Torpedoes</h2></div><span class="b-tech-nav_arrow"></span></div><div class="b-popup_content" style="display: none;"><div> |
| | <div style="border: 2px solid rgba(212,175,55,0.8); border-radius: 3px; margin-bottom: 1em; overflow: hidden;"> |
| | {| class="wikitable" style="margin:0; color:inherit; width:100%" |
| | ! style="background-color:#1a3244; color:#ffffff; font-weight:bold;" | TORPEDO LAUNCHERS !! style="background-color:#1a3244; color:#ffffff; font-weight:bold;" | PBPT008 !! style="background-color:#1a3244; color:#ffffff; font-weight:bold;" | PBPT009 |
| | |- |
| | | style="color:inherit;" | • Number of launchers || style="color:inherit;" | 2 || style="color:inherit;" | 2 |
| | |- |
| | | style="color:inherit;" | • Torpedo name || style="color:inherit;" | PBPT008 || style="color:inherit;" | PBPT009 |
| | |- |
| | | style="color:inherit;" | • Reload time (sec) || style="color:inherit;" | 72.0 || style="color:inherit;" | 72.0 |
| | |- |
| | | style="color:inherit;" | • 180° turn time (sec) || style="color:inherit;" | 7.2 || style="color:inherit;" | 7.2 |
| | |- |
| | | style="color:inherit;" | • Damage || style="color:inherit;" | 44300 || style="color:inherit;" | 43300 |
| | |- |
| | | style="color:inherit;" | • Range (km) || style="color:inherit;" | 0.3 || style="color:inherit;" | 0.3 |
| | |- |
| | | style="color:inherit;" | • Speed (kt) || style="color:inherit;" | 61 || style="color:inherit;" | 62 |
| | |- |
| | | style="color:inherit;" | • Detectability (km) || style="color:inherit;" | 1.3 || style="color:inherit;" | 1.3 |
| | |- |
| | | style="color:inherit;" | • Flooding chance (%) || style="color:inherit;" | 2.65% || style="color:inherit;" | 2.59% |
| | |} |
| | </div> |
|
| |
|
| Once enemy destroyers are cleared out, ''Edinburgh'' will need to rely on flanking enemies and supporting friendly ships. She lacks any serious tools to bring down armored targets without the ability to set fires. Fighting from open water can be difficult due to her thin armor and relatively small health pool. Her guns also lack the range and ballistics to make open water fighting a serious option.
| | </div></div></div> |
| | <div class="b-popup"><div class="b-popup_head js-tech-nav_head"><div><h2>Secondary Battery</h2></div><span class="b-tech-nav_arrow"></span></div><div class="b-popup_content" style="display: none;"><div> |
| | <div style="border: 2px solid rgba(212,175,55,0.8); border-radius: 3px; margin-bottom: 1em; overflow: hidden;"> |
| | {| class="wikitable" style="margin:0; color:inherit; width:100%" |
| | ! style="background-color:#1a3244; color:#ffffff; font-weight:bold;" | SECONDARY BATTERY !! style="background-color:#1a3244; color:#ffffff; font-weight:bold;" | |
| | |- |
| | | style="color:inherit;" | • Secondary battery range (km) || style="color:inherit;" | 6.6 |
| | |} |
| | </div> |
|
| |
|
| |Pros=<!-- write list of positive points below. use * as in ordinary wiki-list. --> | | <div style="border: 2px solid rgba(212,175,55,0.8); border-radius: 3px; margin-bottom: 1em; overflow: hidden;"> |
| * Has access to {{Specialized Repair Teams}} that allow her to regenerate large amounts health.
| | {| class="wikitable" style="margin:0; color:inherit; width:100%" |
| * Highly flexible ship; mounts {{Hydroacoustic Search}} by default, then can choose between {{Spotting Aircraft}}, {{Catapult Fighter}}, {{Smoke Generator}}, and {{Surveillance Radar}}.
| | ! style="background-color:#1a3244; color:#ffffff; font-weight:bold;" | SECONDARY ARMAMENT 1 !! style="background-color:#1a3244; color:#ffffff; font-weight:bold;" | |
| * Good maneuverability; above average turning circle radius and rudder shift times.
| | |- |
| | | style="color:inherit;" | • Shell type || style="color:inherit;" | HE |
| | |- |
| | | style="color:inherit;" | • Name || style="color:inherit;" | 102 mm HE 35 lb |
| | |- |
| | | style="color:inherit;" | • Arrangement || style="color:inherit;" | 2x102mm |
| | |- |
| | | style="color:inherit;" | • Rate of fire (shots/min) || style="color:inherit;" | 20.0 |
| | |- |
| | | style="color:inherit;" | • Maximum damage || style="color:inherit;" | 1500 |
| | |- |
| | | style="color:inherit;" | • Shell velocity (m/s) || style="color:inherit;" | 811 |
| | |- |
| | | style="color:inherit;" | • Penetration (mm) || style="color:inherit;" | 17 |
| | |- |
| | | style="color:inherit;" | • Fire chance (%) || style="color:inherit;" | 6.0% |
| | |} |
| | </div> |
|
| |
|
| |Cons=<!-- write list of negative points below. use * as in ordinary wiki-list. -->
| |
| * Thin armor.
| |
| * Really only effective against lighter enemy units, such as destroyers and other cruisers.
| |
| * Lightly-armored turrets.
| |
| * Short main battery range.
| |
|
| |
|
| |Research=<!-- write text about priority sequence of research below -->
| |
| Hull (B) should be researched first, as it improves survivability with some sorely-needed hit points and improved rudder shift, as well as reinforcing the AA suite. Next should be the torpedoes; in contrast to ''Fiji'''s anemic torpedo upgrade, the extra range greatly increases opportunities for their use. The fire control should be upgraded last, as the ballistics are quite poor near maximum range.
| |
|
| |
|
| |OptimalConfiguration=<!-- write some general text about selection of optimal configuration below (optional)-->
| | </div></div></div> |
| There are a three key choices that dictate how ''{{#var:ship_name}}'' will play: the upgrades in Slots 1 and 3, and which consumable she chooses to go along with {{Hydroacoustic Search}}.
| | <div class="b-popup"><div class="b-popup_head js-tech-nav_head"><div><h2>AA Defense</h2></div><span class="b-tech-nav_arrow"></span></div><div class="b-popup_content" style="display: none;"><div> |
| | <div style="border: 2px solid rgba(212,175,55,0.8); border-radius: 3px; margin-bottom: 1em; overflow: hidden;"> |
| | '''Edinburgh (A)''' |
|
| |
|
| |Upgrades=<!-- write text about best upgrades below --> | | {| class="wikitable" style="margin:0 0 0.8em 0; width:100%; color:inherit;" |
| The recommended upgrades for ''{{#var:ship_name}}'' are as follows:
| | ! style="background-color:#1a3244; color:#ffffff; font-weight:bold;" | AA ARMAMENT !! style="background-color:#1a3244; color:#ffffff; font-weight:bold;" | MOUNTS × BARRELS |
| * '''Slot 1''': {{Main Armaments Modification 1}}
| | |- |
| * '''Slot 2''': {{Engine Room Protection}}
| | | style="color:inherit;" | 102 mm || style="color:inherit;" | 6 × 2 |
| * '''Slot 3''': {{Main Battery Modification 2}}
| | |- |
| * '''Slot 4''': {{Steering Gears Modification 1}}
| | | style="color:inherit;" | 40 mm || style="color:inherit;" | 3 × 8 |
| * '''Slot 5''': {{Concealment System Modification 1}}
| | |- |
| | | style="color:inherit;" | 20 mm || style="color:inherit;" | 5 × 2 + 8 × 1 |
| | |} |
|
| |
|
| For players using {{Surveillance Radar}}, the {{Surveillance Radar Modification 1}} available from the armory for 17,000 {{coal}} will provide a 6 second boost to her radar active time.
| | '''Continuous damage''' — average DPS within each action zone |
| | {| class="wikitable" style="margin:0 0 0.8em 0; width:100%; color:inherit;" |
| | ! style="background-color:#1a3244; color:#ffffff; font-weight:bold;" | RANGE !! style="background-color:#1a3244; color:#ffffff; font-weight:bold;" | DPS !! style="background-color:#1a3244; color:#ffffff; font-weight:bold;" | HIT CHANCE !! style="background-color:#1a3244; color:#ffffff; font-weight:bold;" | ACTION ZONE (km) |
| | |- |
| | | style="color:inherit;" | Short-range || style="color:inherit;" | 143.5 || style="color:inherit;" | 85% || style="color:inherit;" | 2.0 |
| | |- |
| | | style="color:inherit;" | Mid-range || style="color:inherit;" | 119 || style="color:inherit;" | 90% || style="color:inherit;" | 2.5 |
| | |- |
| | | style="color:inherit;" | Long-range || style="color:inherit;" | 80.5 || style="color:inherit;" | 90% || style="color:inherit;" | 5.8 |
| | |} |
|
| |
|
| |CommanderSkills=<!-- write text about best set of Commander Skills below --> | | '''Damage by shell explosions''' |
| Edinburgh does not require many captain skills in order to create a viable build. With only 152 mm AP rounds to worry about, many ammunition-related skills are not needed. A starting 10 point build would be Last Stand, Priority Target, Survivability Expert, and Concealment Expert. Following this, almost any combination of skills can be used as players prefer. As she does not need many ammunition skills and her torpedoes are not worth building into, Edinburgh captains may have the option to use multiple 4 point skills without sacrificing other areas. Additionally, confident captains may wish to forgo Priority Target and take Consumable Enhancement instead.
| | {| class="wikitable" style="margin:0 0 0.8em 0; width:100%; color:inherit;" |
| | ! style="background-color:#1a3244; color:#ffffff; font-weight:bold;" | EXPLOSIONS / SALVO !! style="background-color:#1a3244; color:#ffffff; font-weight:bold;" | DAMAGE !! style="background-color:#1a3244; color:#ffffff; font-weight:bold;" | HIT CHANCE !! style="background-color:#1a3244; color:#ffffff; font-weight:bold;" | ACTION ZONE (km) |
| | |- |
| | | style="color:inherit;" | 4 || style="color:inherit;" | 900 || style="color:inherit;" | 90% || style="color:inherit;" | 3.5–5.8 |
| | |} |
|
| |
|
| For players using radar, the Consumables Enhancement and Top Grade Gunner skills are more useful as Edinburgh will be operating inside her detection radius more frequently and using her radar.
| | '''Edinburgh (B)''' |
|
| |
|
| {{Commander Skills 3 CR | | {| class="wikitable" style="margin:0 0 0.8em 0; width:100%; color:inherit;" |
| <!-- Ratings 1,2,3 are legit. Others are ignored.-->
| | ! style="background-color:#1a3244; color:#ffffff; font-weight:bold;" | AA ARMAMENT !! style="background-color:#1a3244; color:#ffffff; font-weight:bold;" | MOUNTS × BARRELS |
| | rating11 = <!-- Grease the Gears --> | | |- |
| | rating12 = <!-- Swift Fish --> | | | style="color:inherit;" | 102 mm || style="color:inherit;" | 6 × 2 |
| | rating13 = 1 <!-- Consumables Specialist --> | | |- |
| | rating14 = 0 <!-- Gun Feeder --> | | | style="color:inherit;" | 40 mm || style="color:inherit;" | 3 × 6 |
| | rating15 = <!-- Incoming Fire Alert --> | | |- |
| | rating16 = 3 <!-- Last Stand --> | | | style="color:inherit;" | 20 mm || style="color:inherit;" | 14 × 2 |
| | |} |
|
| |
|
| | rating21 = 0 <!-- Pyrotechnician --> | | '''Continuous damage''' — average DPS within each action zone |
| | rating22 = <!-- Fill the Tubes --> | | {| class="wikitable" style="margin:0 0 0.8em 0; width:100%; color:inherit;" |
| | rating23 = 2 <!-- Consumables Enhancements --> | | ! style="background-color:#1a3244; color:#ffffff; font-weight:bold;" | RANGE !! style="background-color:#1a3244; color:#ffffff; font-weight:bold;" | DPS !! style="background-color:#1a3244; color:#ffffff; font-weight:bold;" | HIT CHANCE !! style="background-color:#1a3244; color:#ffffff; font-weight:bold;" | ACTION ZONE (km) |
| | rating24 = <!-- Eye in the Sky --> | | |- |
| | rating25 = 3 <!-- Priority Target --> | | | style="color:inherit;" | Short-range || style="color:inherit;" | 189 || style="color:inherit;" | 85% || style="color:inherit;" | 2.0 |
| | rating26 = <!-- Expert AA Marksman --> | | |- |
| | | style="color:inherit;" | Mid-range || style="color:inherit;" | 112 || style="color:inherit;" | 90% || style="color:inherit;" | 3.5 |
| | |- |
| | | style="color:inherit;" | Long-range || style="color:inherit;" | 115.5 || style="color:inherit;" | 90% || style="color:inherit;" | 5.8 |
| | |} |
|
| |
|
| | rating31 = 0 <!-- Heavy HE and SAP Shells --> | | '''Damage by shell explosions''' |
| | rating32 = <!-- Enhanced Torpedo Explosive Charge --> | | {| class="wikitable" style="margin:0 0 0.8em 0; width:100%; color:inherit;" |
| | rating33 = 1 <!-- Adrenaline Rush -->
| | ! style="background-color:#1a3244; color:#ffffff; font-weight:bold;" | EXPLOSIONS / SALVO !! style="background-color:#1a3244; color:#ffffff; font-weight:bold;" | DAMAGE !! style="background-color:#1a3244; color:#ffffff; font-weight:bold;" | HIT CHANCE !! style="background-color:#1a3244; color:#ffffff; font-weight:bold;" | ACTION ZONE (km) |
| | rating34 = 0 <!-- Heavy AP Shells -->
| | |- |
| | rating35 = 2 <!-- Superintendent --> | | | style="color:inherit;" | 5 || style="color:inherit;" | 1140 || style="color:inherit;" | 90% || style="color:inherit;" | 3.5–5.8 |
| | rating36 = 3 <!-- Survivability Expert --> | | |} |
| | </div> |
| | </div></div></div> |
| | <div class="b-popup"><div class="b-popup_head js-tech-nav_head"><div><h2>Depth Charges</h2></div><span class="b-tech-nav_arrow"></span></div><div class="b-popup_content" style="display: none;"><div> |
| | <div style="border: 2px solid rgba(212,175,55,0.8); border-radius: 3px; margin-bottom: 1em; overflow: hidden;"> |
| | {| class="wikitable" style="margin:0; color:inherit; width:100%" |
| | ! style="background-color:#1a3244; color:#ffffff; font-weight:bold;" | DEPTH CHARGES !! style="background-color:#1a3244; color:#ffffff; font-weight:bold;" | |
| | |- |
| | | style="color:inherit;" | • Max damage || style="color:inherit;" | 5000 |
| | |- |
| | | style="color:inherit;" | • Number of charges || style="color:inherit;" | 2 |
| | |- |
| | | style="color:inherit;" | • Bombs per charge || style="color:inherit;" | 1 |
| | |- |
| | | style="color:inherit;" | • Reload time (sec) || style="color:inherit;" | 40.0 |
| | |} |
| | </div> |
| | </div></div></div> |
|
| |
|
| | rating41 = 1 <!-- Top Grade Gunner -->
| |
| | rating42 = <!-- Outnumbered -->
| |
| | rating43 = 1 <!-- Radio Location -->
| |
| | rating44 = 0 <!-- Inertial Fuse for HE Shells -->
| |
| | rating45 = 3 <!-- Concealment Expert -->
| |
| | rating46 = <!-- AA Gunner -->
| |
| }}
| |
|
| |
|
| | <!-- Add the ship code here to populate the upgrade table --> |
| | {{Ship Upgrades Section|code=PBSC108_Edinburgh}} |
|
| |
|
| |Consumables=<!-- write text about selection of Consumables below -->
| |
| ''{{#var:ship_name}}'' can equip the following consumables:
| |
| * '''Slot 1:''' {{Damage Control Party}}
| |
| * '''Slot 2:''' {{Specialized Repair Teams}} – 3 charges
| |
| * '''Slot 3:''' {{Hydroacoustic Search}} – 3 charges
| |
| * '''Slot 4:''' {{Smoke Generator}} – 3 charges '''or''' {{Spotting Aircraft}} – 4 charges '''or''' {{Catapult Fighter}} – 3 charges '''or''' {{Surveillance Radar}} – 3 charges
| |
|
| |
|
| |Camouflage=<!-- write text about useful camouflage below -->
| | <!-- Consumables have to be tagged individually on a slot by slot basis --> |
| {{TT Ship Camo Insert|shiptier=8}} | | {{Ship Consumables Section|consumables= |
| | * '''Slot 1:''' {{Damage Control Party}} (5.0s action, 60.0s cooldown) |
| | * '''Slot 2:''' {{Repair Party}} (3 charges, 20.0s action, 80.0s cooldown, 636 hp/s) |
| | * '''Slot 3:''' {{Hydroacoustic Search}} (3 charges, 100.0s action, 120.0s cooldown) |
| | * '''Slot 4:''' {{Smoke Generator}} (3 charges, 15.0s action, 160.0s cooldown) '''or''' {{Spotting Aircraft}} (4 charges, 100.0s action, 240.0s cooldown) '''or''' {{Patrol Fighter}} (3 charges, 60.0s action, 90.0s cooldown) |
| | }} |
|
| |
|
| |Signals=<!-- write text about best set of signals below -->
| |
|
| |
|
| {{Signal Flags
| | ==Gallery== |
| <!-- The usual 1,2,3 rating; others ignored. Zero may be useful to other editors to remind that the signal has no effect on the ship. --> | | <div class="b-popup"><div class="b-popup_head js-tech-nav_head"><div><h2>WoWs Gallery</h2></div><span class="b-tech-nav_arrow"></span></div><div class="b-popup_content" style="display: none;"><div> |
|
| |
|
| | Juliet Charlie = 2 <!-- No Detonate -->
| | <gallery> |
| | India Yankee = 1 <!-- -20% Fire duration -->
| |
| | Hotel Yankee = 1 <!-- ram someone -->
| |
| | Juliet Yankee Bissotwo = 1 <!-- -20% flood duration -->
| |
| | Victor Lima = 0 <!-- +1/0.5% (160mm) fire, +4% flood -->
| |
| | India X-Ray = 0 <!-- +1/0.5% (160mm) fire, +5% you detonate -->
| |
| | |
| | Juliet Whiskey Unaone = <!-- +15% flood, +5% you detonate -->
| |
| | Mike Yankee Soxisix = <!-- Secondaries: +5% range, -5% reload, -5% dispersion-->
| |
| | November Echo Setteseven= <!-- +5% AA damage -->
| |
| | Sierra Mike = 2 <!-- +5% speed -->
| |
| | November Foxtrot = 3 <!-- -5% Consumables reload -->
| |
| | India Delta = 3 <!-- +20% HP from Repair Party -->
| |
| | |
| | X-Ray Papa Unaone = 2 <!-- +15% Smoke Gen action time -->
| |
| | Sierra Bravo = 3 <!-- +10% Hydro action time; -10% DFAA reload time -->
| |
| }}
| |
| | |
| | |
| |Gallery=<!-- write below list of files with description (if necessary) separated with | --><gallery>
| |
| File:EdinburghStart.jpg|Moving into position.
| |
| File:EdinburghDD.jpg|''Edinburgh'' engages an enemy destroyer at close range, landing the killing blow.
| |
| File:EdinburghTorp.jpg|''Edinburgh'' fires torpedoes individually at an enemy ''[[Yamato]]'' class battleship.
| |
| File:EdinburghKillsYamato.jpg|An enemy ''Yamato'' class battleship falls victim to a coordinated assault.
| |
| File:EdinburghCamps.jpg|''Edinburgh'' utilizes island cover to maintain concealment.
| |
| File:ShokAttacksEdinburgh.jpg|Torpedo bombers from an enemy ''[[Shokaku]]'' commit the attack.
| |
| File:EdinburghAA.jpg|A ''[[Shokaku]]'' torpedo attack is partially thwarted by ''Edinburgh's'' anti-air guns.
| |
| File:EdinbourghDances.jpg|''Edinburgh'' desperately dodges incoming fire.
| |
| File:EdinbourghDies.jpg|''Edinburgh'' takes a salvo of armor penetrating shells and dies.
| |
| </gallery> | | </gallery> |
| | </div></div></div> |
|
| |
|
| |History=<!-- write text below -->
| | <div class="b-popup"><div class="b-popup_head js-tech-nav_head"><div><h2>Historical Gallery</h2></div><span class="b-tech-nav_arrow"></span></div><div class="b-popup_content" style="display: none;"><div> |
| <div class="thumb tright"> | |
| {{AnnoWiki|content=
| |
| <h2>HMS ''Edinburgh'', 1939</h2> | |
| <h3>Construction</h3>
| |
| :Builder: Swan Hunter Shipyard; Tyne and Wear,<br> England, United Kingdom
| |
| :Laid down: 30 December 1936
| |
| :Launched: 31 March 1938
| |
| :Commissioned: 6 July 1939
| |
| ----
| |
| ===Specifications=== | |
| :10,550 tons displacement, standard
| |
| :13,175 tons displacement, full load
| |
| :187m length
| |
| :19.30m beam
| |
| :6.5m draft
| |
| ---- | |
| ====Machinery====
| |
| :4 Boilers, 4 turbines
| |
| ----
| |
| ====Performance====
| |
| :32.5 knots at 80,000 shaft horsepower
| |
| :8,000nm at 14 knots
| |
| ----
| |
| ====Armor====
| |
| :Main belt: 114mm
| |
| :Decks: 51-77mm
| |
| :Bulkheads: 63.5mm
| |
| :Turrets: 102mm face, 51mm sides, 51mm roof
| |
| ----
| |
| ====Armament====
| |
| =====Main=====
| |
| :Twelve (4x3) 152mm /50 BL Mk. XXIII guns
| |
| =====Secondary=====
| |
| :Twelve (6x2) 102mm /45 QF Mk. XVI guns
| |
| =====Anti-Aircraft===== | |
| :Sixteen (2x8) 40mm /39 QF Mk.VIII guns | |
| :Eight (2x4) 12.7mm /62 MG Mk.III guns
| |
|
| |
|
| :Six (6x1) 20mm /70 Mk.I (added in 1940)
| | <gallery> |
| =====Torpedoes=====
| |
| :Six (3x2) 533mm torpedo tubes
| |
| =====Aircraft=====
| |
| : One catapult
| |
| : Two or Three Supermarine Walrus
| |
| }}
| |
| </div>
| |
| [[File:HMS Edinburgh(7).jpeg|none|frame|x500px|link=|HMS ''Edinburgh'' at sea, 6 July 1939.]]
| |
| | |
| ===History===
| |
| ====Design====
| |
| ''Edinburgh'' and her sister ''[[Belfast]]'' were designed as modified Town class cruisers, being the third (or ''Edinburgh'') sub-class. This sub-class was significantly larger than the previous ''Southampton'' and ''Gloucester'' sub-classes, coming in approximately 1,200 tons heavier than the preceding ''Gloucester'' sub-class.
| |
| | |
| The ships of the Town class were constructed in response to the Japanese ''[[Mogami]]'' and American ''Brooklyn'' class cruisers, which were both armed with fifteen 6-inch (152mm or 155mm) guns. British ship designers sought to match the other cruisers’ number of guns, but due to length restrictions, were unable to properly fit five turrets onto the ships. Another plan that was developed called for the ''Edinburgh'' class to be mounted with quadruple 6-inch turrets; however, this idea was abandoned due to the difficulties in manufacturing such a turret that performed adequately. Ultimately, the new cruisers were mounted with twelve 6-inch (152mm) guns in four triple turrets, arranged in an A-B-X-Y position. However, a new turret, designated the Mk.XXIII was used, which used more powerful motors and a more efficient 'long trunk' ammunition supply, which could provide between 10 to 12 shells to the gun per minute. The effective maximum rate of fire stayed the same as earlier cruisers however, at 8 rounds per minute. The new Mk.XXIII triple turret is easily distinguishable from the earlier Mk.XXII used on the previous Town class cruisers by the flattened edge between the turret roof and face, as opposed to a curved edge.
| |
| | |
| ''Edinburgh'', like preceding cruisers, was designed to have armor capable of protecting the ship against 152mm caliber gunfire. The ship featured a smaller magazine and citadel space compared to previous cruisers. This shortened length allowed for more armor to be mounted around the machinery and weaponry spaces. Additionally, the ''Edinburgh'' class carried more powerful machinery than previous ''Southampton'' sub-class, which allowed her to maintain the designed speed of 32 knots, despite her increased displacement. Her increased fuel capacity, granted the ship an extended range over the older Town class ships. Both ''Edinburgh'' and ''[[Belfast]]'' would receive upgraded radar systems and increased anti-aircraft capabilities at the beginning of World War II.
| |
| | |
| Other differences from the other Town class cruisers included the aircraft catapult being in front of the forward funnel instead of behind it, and the addition of 2 more twin 4-inch (102mm) dual-purpose mounts bringing the total to 3 dual mounts per broadside. The larger size of the ship also allowed the octuple 40mm 'pompom' mounts to be fitted, as opposed to the earlier Town class receiving quadruple 40mm 'pompom' mounts.
| |
| | |
| ====Service====
| |
| ''Edinburgh'' was laid down at the Swan Hunter Shipyard in Tyne and Wear, England on 30 December 1936, twenty days after her only sister ship ''Belfast'' was laid down. She was launched on 31 March 1938 and spent the following year fitting out and beginning her sea trials.
| |
| | |
| ''Edinburgh'' was commissioned on 6 July 1939 and was assigned at Scapa Flow with the Home Fleet at the outbreak of World War II. Her early war service consisted of standard anti-shipping patrol in the North Atlantic. In October 1939, ''Edinburgh'' was attacked by air and sustained light damage, although not directly hit. She was then assigned to escort convoys to Norway, but was ordered to join the hunt for the German Battleships ''[[Scharnhorst]]'' and ''[[Gneisenau]]'' on the 23rd October. She returned to port for refit in March 1940, which strengthened her anti-aircraft loadout and corrected design weaknesses. ''Edinburgh'' returned to convoy duty in October 1940, this time in the South Atlantic, but returned north to patrol for German raiders around Iceland with HMS ''[[Hood]]'', HMS ''[[Cossack]]'' and the E-class destroyers HMS ''Electra'', HMS ''Escapade'' and HMS ''Echo''.
| |
| | |
| In early 1941, ''Edinburgh'' escorted North Atlantic Convoys such as TC9 and WS7, as well as covering the successful commando raid on the Lofoten Islands. In May 1941, ''Edinburgh'' intercepted a German weather ship off Norway, and was briefly detached from convoy duty and ordered to attempt an intercept of ''[[Bismarck]]'', but ''Bismarck'' was sunk before ''Edinburgh'' could find her. She did however, find the German supply ship ''Lech'', taking it as a prize.
| |
| | |
| ''Edinburgh'' returned again to convoy duty, this time alternating between Malta and the South Atlantic, including the successful Malta relief Operations Substance and Halberd. In December 1941, she was assigned to escort duty in the Arctic. She made two successful voyages to Murmansk, with a short period under refit in between in January and February 1942. However, on the return trip with convoy QP-11 in April 1942, ''Edinburgh'' was torpedoed twice by the German submarine ''U-456''. The first hit her amidships on the starboard side, which caused a heavy list, which, but the crew stabilized the ship. The second torpedo destroyed her stern, including her steering gear, leaving the ship crippled. She was taken under tow back to Murmansk, escorted by 2 destroyers and 4 minesweepers and a Russian tug that arrived later, but ''Edinburgh'' was attacked two days later by three German destroyers, ''Z-7 Hermann Schoemann'', ''Z-24'' and ''Z-25''. In the ensuing close range battle (minimum ranges of 2.8 km), ''Edinburgh'' managed to severely cripple ''Schoemann'' which later had to be scuttled, but a torpedo aimed at one of ''Edinburgh''’s escorts hit ''Edinburgh'' on her port side, directly opposite the first torpedo hit from ''U-456''. Salvage was impractical in the cold Arctic waters, she was declared a loss. Her crew was evacuated and she was scuttled by the escorting destroyer HMS ''Foresight'' on 2 May 1942, after numerous failed attempts to sink her using gunfire and depth charges. Of her given compliment of 847, 790 were rescued before she was scuttled, although other values are given.
| |
| | |
| ''Edinburgh'' was carrying 4.5 tons of gold bullion to the UK as a partial payment from USSR for the lend-lease equipment. Between 1981 and 1986, all but 5 of the 465 gold bars were recovered by divers from her wreck on behalf of the British Government, approximately 245m (800ft) below the surface of the sea. The fifth Royal Navy ship to carry the name, ''Edinburgh'' earned 4 battle honors during her service in World War II (Norway 1940, Bismarck 1941, Atlantic 1941, Arctic 1941-2).
| |
| | |
| Sister ship HMS ''[[Belfast]]'', although laid down and launched before ''Edinburgh'', was commissioned into the Royal Navy later. ''Belfast'' struck a mine in late 1939, keeping her under repair until November 1942, after her sister had been sunk. She would not share the same fate though, as ''Belfast'' went on to escort Arctic convoys, play a critical role in the sinking of the German Battleship ''Scharnhorst'', provide fire support on D-Day, and serve in the British Pacific Fleet in 1945. Her career extended beyond the Second World War and into the Korean War before she was finally retired from active service in 1963. Since 1971, ''Belfast'' has served as a museum ship, moored on the River Thames in London as an iconic landmark, the last surviving major Royal Navy surface combatant from the World War II era.
| |
| | |
| ===Historical Inaccuracies===
| |
| * Both anti-aircraft configurations are fictitious for ''Edinburgh''. ''Edinburgh'''s original AA complement consisted of six twin 102mm (4-inch) dual-purpose guns, two octuple 40mm pom-poms and two quadruple 12.7mm machine guns. When she was sunk in May 1942, the only changes to her AA armament was the addition of six single 20mm Oerlikons. ''Edinburgh'' never received any 40mm Bofors or dual 20mm Oerlikons.
| |
| * The anti-aircraft configuration on Hull (A) however, is almost accurate for ''[[Belfast]]'' in her mid-1943 to mid-1944 condition, the exception being that neither ''Belfast'' or ''Edinburgh'' had an octuple 40mm 'pompom' mounted on the stern quarterdeck.
| |
| * Hull (B) has a fictitious AA load-out for both ''Belfast'' and ''Edinburgh'', as neither ship ever received quadruple 40mm 'bofors' mounts, and ''Belfast'' at most had only 5 twin 20mm 'Oerlikon' mounts, in early 1943, nowhere near the 14 that the (B)-hull has in game.
| |
| * Although ''Edinburgh'' uses the same 152mm Mk.XXVIII guns as ''Belfast'', ''[[Leander]]'', ''[[Fiji]]'' and ''[[Perth]]'', ''Edinburgh'' — like other regular Royal Navy light cruisers in game — only gets access to AP shells. Historically, ships using the Mk.XXVIII gun were outfitted with both AP/CPBC (Common Pointed Ballistic Cap) and HE shells.
| |
| * Both hulls for ''Edinburgh'' have the torpedo bulges fitted to ''Belfast'' from 1939-1942.
| |
| * The premium camouflage for ''Edinburgh'' is roughly accurate for her 1942 camouflage, although there are some discrepancies.
| |
| | |
| |HistoricalGallery=<!-- write below list of files with description (if necessary) separated with | --><gallery>
| |
| File:HMS Edinburgh(6).jpeg|HMS ''Edinburgh'' soon after her commissioning, 1938.
| |
| File:HMS Edinburgh(5).jpeg|''Edinburgh'' in 1938.
| |
| File:HMS Edinburgh(4).png|Design scheme for HMS ''Edinburgh''.
| |
| File:HMS Edinburgh(1).jpeg|HMS ''Edinburgh'' setting sail.
| |
| File:HMS Edinburgh(7).jpeg|''Edinburgh'' at sea, 6 July 1939.
| |
| File:HMS Edinburgh.jpg|''Edinburgh'' at Scapa Flow, October 1941.
| |
| File:HMS Birmingham convoy.jpg|''Edinburgh'' with the cruisers ''Hermione'' and ''Euryalus'' on convoy duty during Operation Halberd in September 1941.
| |
| File:HMS Edinburgh(2).jpeg|''Edinburgh'' on duty, April 1942.
| |
| File:Эдинбург3.jpg|''Edinburgh''’s wrecked stern after being struck by a torpedo on 30 April 1942.
| |
| File:HMS Edinburgh(3).jpeg
| |
| File:Photo06clBelfast2NP.jpg|Sister ship, HMS ''Belfast'' at anchor during world war 2.
| |
| </gallery> | | </gallery> |
| | </div></div></div> |
|
| |
|
| |Video=<!-- put below video clips with using template VideoYT. You can use html-tags for formatting. -->
| | [[Category:Ships of U.K.]] |
| {{VideoYT|a-mUALcKCck}}
| | [[Category:Cruisers]] |
| | | [[Category:Tier VIII ships]] |
| |Ref= <!-- write below -->
| | <!-- DO NOT DELETE THIS LINE. DO NOT INSERT ANYTHING BELOW THIS LINE --> |
| # [https://en.wikipedia.org/wiki/HMS_Edinburgh_(16) HMS ''Edinburgh'' (16) - Wikipedia]
| |
| # [https://en.wikipedia.org/wiki/Town-class_cruiser_(1936) Town-class cruiser (1936) - Wikipedia]
| |
| # [https://worldofwarships.com/en/news/game-guides/ed-edin-eddy/ Armada 2.0: Edinburgh - News - World of Warships]
| |
| # [https://www.youtube.com/watch?v=a-mUALcKCck Armada - Edinburgh - World of Warships Official Channel - YouTube]
| |
| | |
| {{WoWS Ship Changelog Insert|1=
| |
| *Available to supertesters in the game starting from Update 0.5.11.
| |
| *Introduced into the game as a researchable ship in Update 0.5.13.
| |
| *Update 0.5.14:
| |
| **The AA mount locations were changed on the stock hull. The effectiveness of the auras were not changed.
| |
| *Update 0.5.16:
| |
| **Fixed a bug with different operating times for the base and premium Spotting Aircraft consumables.
| |
| *Update 0.6.6:
| |
| **Improved appearance of the ship using a special technology for high-quality rendering of thin elements (mainly rigging).
| |
| *Update 0.6.12:
| |
| **Detectability when firing main guns in smoke changed to 5.52 km.
| |
| *Update 0.6.13:
| |
| **Fire extinguishing time now 30 s instead of 60 s.
| |
| **The Smoke Generator active time was increased from 7 to 15 s.
| |
| *Update 0.7.10:
| |
| **The range of the Hydroacoustic Search consumable was unified - 5 km for detecting ships, 3.5 km for detecting torpedoes.
| |
| *Update 0.7.12:
| |
| **Minor fixes to geometry and textures.
| |
| *Update 0.9.2:
| |
| **Updated hull geometry.
| |
| *Update 0.9.6:
| |
| **The value of the in-game turning circle radius was changed to 730 m to correct prior discrepancy.
| |
| *Update 0.10.0:
| |
| **The firing range of the secondary battery was increased to 6.6 km.
| |
| *Update 0.10.4:
| |
| **The dissipation time for the Smoke Generator consumable was reduced from 106 to 99 s.
| |
| *Update 0.10.6:
| |
| **Main battery reload time increased from 7.5 to 7.7 s.
| |
| ***Note: This change was only made for the stock hull; The upgraded hull retained the 7.5 s reload.
| |
| *Update 0.11.6:
| |
| **Minor fixes to the model and textures of the ship.
| |
| *Update 12.0:
| |
| **Improved the geometry and textures of the ship.
| |
| }}
| |
| | |
| }}<!-- DO NOT DELETE THIS LINE. DO NOT INSERT ANYTHING BELOW THIS LINE -->
| |



 (5.0s action, 60.0s cooldown)
 (3 charges, 20.0s action, 80.0s cooldown, 636 hp/s)
 (3 charges, 100.0s action, 120.0s cooldown)
 (3 charges, 15.0s action, 160.0s cooldown) or Spotting Aircraft
  (4 charges, 100.0s action, 240.0s cooldown) or Patrol Fighter
  (3 charges, 60.0s action, 90.0s cooldown)