Ship:Seattle
Automated stats update via wiki pipeline |
Pockington (talk | contribs) added missing information on launch day |
||
| Line 5: | Line 5: | ||
===Pros=== | ===Pros=== | ||
* | * High damage per minute | ||
* | * Access to Defensive AA Fire, Hydroacoustic Search and Surveillance Radar consumables in separate slots | ||
* Low detectability | |||
===Cons=== | ===Cons=== | ||
* | * Low main battery range and ballistics | ||
* | * Poor main battery firing angles | ||
* Poor survivability | |||
| Line 21: | Line 23: | ||
| style="color:inherit;" | • Hit Points || style="color:inherit;" | 41800 || style="color:inherit;" | 43600 | | style="color:inherit;" | • Hit Points || style="color:inherit;" | 41800 || style="color:inherit;" | 43600 | ||
|- | |- | ||
| style="color:inherit;" | • Torpedo protection damage reduction (%) || colspan="2" style="color:inherit;" | | | style="color:inherit;" | • Torpedo protection damage reduction (%) || colspan="2" style="color:inherit;" | 4 | ||
|} | |} | ||
</div> | </div> | ||
| Line 29: | Line 31: | ||
! style="background-color:#1a3244; color:#ffffff; font-weight:bold;" | ARMOR DETAIL !! style="background-color:#1a3244; color:#ffffff; font-weight:bold;" | | ! style="background-color:#1a3244; color:#ffffff; font-weight:bold;" | ARMOR DETAIL !! style="background-color:#1a3244; color:#ffffff; font-weight:bold;" | | ||
|- | |- | ||
| style="color:inherit;" | • Belt (mm) || style="color:inherit;" | | | style="color:inherit;" | • Belt (mm) || style="color:inherit;" | 102 | ||
|- | |- | ||
| style="color:inherit;" | • Deck (mm) || style="color:inherit;" | | | style="color:inherit;" | • Deck (mm) || style="color:inherit;" | 27 | ||
|- | |- | ||
| style="color:inherit;" | • Superstructure (mm) || style="color:inherit;" | | | style="color:inherit;" | • Superstructure (mm) || style="color:inherit;" | 13 | ||
|- | |- | ||
| style="color:inherit;" | • Extremities (mm) || style="color:inherit;" | | | style="color:inherit;" | • Extremities (mm) || style="color:inherit;" | 25 | ||
|} | |} | ||
</div> | </div> | ||
| Line 47: | Line 49: | ||
| style="color:inherit;" | • Turning circle radius (m) || style="color:inherit;" | 750 || style="color:inherit;" | 750 | | style="color:inherit;" | • Turning circle radius (m) || style="color:inherit;" | 750 || style="color:inherit;" | 750 | ||
|- | |- | ||
| style="color:inherit;" | • Rudder-shift time (sec) || style="color:inherit;" | | | style="color:inherit;" | • Rudder-shift time (sec) || style="color:inherit;" | 12.1 || style="color:inherit;" | 8.7 | ||
|} | |} | ||
</div> | </div> | ||
| Line 173: | Line 175: | ||
{| class="wikitable" style="margin:0 0 0.8em 0; width:100%; color:inherit;" | {| class="wikitable" style="margin:0 0 0.8em 0; width:100%; color:inherit;" | ||
! style="background-color:#1a3244; color:#ffffff; font-weight:bold;" | AA ARMAMENT !! style="background-color:#1a3244; color:#ffffff; font-weight:bold;" | MOUNTS × BARRELS | ! style="background-color:#1a3244; color:#ffffff; font-weight:bold;" | AA ARMAMENT !! style="background-color:#1a3244; color:#ffffff; font-weight:bold;" | MOUNTS × BARRELS | ||
|- | |||
| style="color:inherit;" | 152 mm || style="color:inherit;" | 4 × 3 | |||
|- | |- | ||
| style="color:inherit;" | 40 mm || style="color:inherit;" | 12 × 2 | | style="color:inherit;" | 40 mm || style="color:inherit;" | 12 × 2 | ||
| Line 186: | Line 190: | ||
|- | |- | ||
| style="color:inherit;" | Mid-range || style="color:inherit;" | 234.5 || style="color:inherit;" | 90% || style="color:inherit;" | 3.5 | | style="color:inherit;" | Mid-range || style="color:inherit;" | 234.5 || style="color:inherit;" | 90% || style="color:inherit;" | 3.5 | ||
|- | |||
| style="color:inherit;" | Long-range || style="color:inherit;" | 108.5 || style="color:inherit;" | 90% || style="color:inherit;" | 6.9 | |||
|} | |||
'''Damage by shell explosions''' | |||
{| class="wikitable" style="margin:0 0 0.8em 0; width:100%; color:inherit;" | |||
! style="background-color:#1a3244; color:#ffffff; font-weight:bold;" | EXPLOSIONS / SALVO !! style="background-color:#1a3244; color:#ffffff; font-weight:bold;" | DAMAGE !! style="background-color:#1a3244; color:#ffffff; font-weight:bold;" | HIT CHANCE !! style="background-color:#1a3244; color:#ffffff; font-weight:bold;" | ACTION ZONE (km) | |||
|- | |||
| style="color:inherit;" | 5 || style="color:inherit;" | 1820 || style="color:inherit;" | 90% || style="color:inherit;" | 3.5–6.9 | |||
|} | |} | ||
| Line 192: | Line 205: | ||
{| class="wikitable" style="margin:0 0 0.8em 0; width:100%; color:inherit;" | {| class="wikitable" style="margin:0 0 0.8em 0; width:100%; color:inherit;" | ||
! style="background-color:#1a3244; color:#ffffff; font-weight:bold;" | AA ARMAMENT !! style="background-color:#1a3244; color:#ffffff; font-weight:bold;" | MOUNTS × BARRELS | ! style="background-color:#1a3244; color:#ffffff; font-weight:bold;" | AA ARMAMENT !! style="background-color:#1a3244; color:#ffffff; font-weight:bold;" | MOUNTS × BARRELS | ||
|- | |||
| style="color:inherit;" | 152 mm || style="color:inherit;" | 4 × 3 | |||
|- | |- | ||
| style="color:inherit;" | 40 mm || style="color:inherit;" | 12 × 4 | | style="color:inherit;" | 40 mm || style="color:inherit;" | 12 × 4 | ||
| Line 205: | Line 220: | ||
|- | |- | ||
| style="color:inherit;" | Mid-range || style="color:inherit;" | 322 || style="color:inherit;" | 90% || style="color:inherit;" | 3.5 | | style="color:inherit;" | Mid-range || style="color:inherit;" | 322 || style="color:inherit;" | 90% || style="color:inherit;" | 3.5 | ||
|- | |||
| style="color:inherit;" | Long-range || style="color:inherit;" | 105 || style="color:inherit;" | 90% || style="color:inherit;" | 6.9 | |||
|} | |||
'''Damage by shell explosions''' | |||
{| class="wikitable" style="margin:0 0 0.8em 0; width:100%; color:inherit;" | |||
! style="background-color:#1a3244; color:#ffffff; font-weight:bold;" | EXPLOSIONS / SALVO !! style="background-color:#1a3244; color:#ffffff; font-weight:bold;" | DAMAGE !! style="background-color:#1a3244; color:#ffffff; font-weight:bold;" | HIT CHANCE !! style="background-color:#1a3244; color:#ffffff; font-weight:bold;" | ACTION ZONE (km) | |||
|- | |||
| style="color:inherit;" | 5 || style="color:inherit;" | 1820 || style="color:inherit;" | 90% || style="color:inherit;" | 3.5–6.9 | |||
|} | |} | ||
</div> | </div> | ||
| Line 218: | Line 242: | ||
* '''Slot 1:''' {{Damage Control Party}} (5.0s action, 60.0s cooldown) | * '''Slot 1:''' {{Damage Control Party}} (5.0s action, 60.0s cooldown) | ||
* '''Slot 2:''' {{Defensive AA Fire}} (4 charges, 40.0s action, 80.0s cooldown) | * '''Slot 2:''' {{Defensive AA Fire}} (4 charges, 40.0s action, 80.0s cooldown) | ||
* '''Slot 3:''' {{Patrol Fighter}} (3 charges, 60.0s action, 90.0s cooldown) '''or''' {{Spotting Aircraft}} (4 charges, 100.0s action, 240.0s cooldown) | * '''Slot 3:''' {{Surveillance Radar}} (9km, 3 charges, 35.0s action, 120.0s cooldown) '''or''' {{Patrol Fighter}} (3 charges, 60.0s action, 90.0s cooldown) '''or''' {{Spotting Aircraft}} (4 charges, 100.0s action, 240.0s cooldown) | ||
* '''Slot 4:''' {{Hydroacoustic Search}} (3 charges, 100.0s action, 120.0s cooldown) | * '''Slot 4:''' {{Hydroacoustic Search}} (3 charges, 100.0s action, 120.0s cooldown) | ||
* '''Slot 5:''' {{Repair Party}} (3 charges, 28.0s action, 80.0s cooldown, 209 hp/s) | * '''Slot 5:''' {{Repair Party}} (3 charges, 28.0s action, 80.0s cooldown, 209 hp/s) | ||
| Line 228: | Line 252: | ||
<gallery> | <gallery> | ||
</gallery> | </gallery>[[File:Seattleinport.png|thumb]]</div></div></div> | ||
</div></div></div> | |||
<div class="b-popup"><div class="b-popup_head js-tech-nav_head"><div><h2>Historical Gallery</h2></div><span class="b-tech-nav_arrow"></span></div><div class="b-popup_content" style="display: none;"><div> | <div class="b-popup"><div class="b-popup_head js-tech-nav_head"><div><h2>Historical Gallery</h2></div><span class="b-tech-nav_arrow"></span></div><div class="b-popup_content" style="display: none;"><div> | ||
Latest revision as of 00:58, 10 July 2026

IX
14,100,000
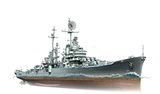
Seattle — U.S.A. Tech Tree Tier IX Cruiser.
During the early 1940s, the United States was actively involved in the development of new cruisers specifically designed to fulfill air-defense missions. They were to have 12 dual-purpose 152 mm guns, a speed of 33 knots, and a thick armor deck to protect against aerial bombs. After the outbreak of World War II, engineers were no longer bound by treaty constraints, although the ship's size was to remain within the limits of a light cruiser. The project never came to life, but its underlying concepts served as the basis for the subsequent design of the Worcester-class cruisers.
Pros
- High damage per minute
- Access to Defensive AA Fire, Hydroacoustic Search and Surveillance Radar consumables in separate slots
- Low detectability
Cons
- Low main battery range and ballistics
- Poor main battery firing angles
- Poor survivability
Ship Stats
Hull Information
Main Battery
Airstrike
AA Defense
Compatible Upgrades
| Slot 1 |
 |
 |
 |

| |
|---|---|---|---|---|---|
| Slot 2 |
 |
 |
 |
 |

|
| Slot 3 |
 |
 |

| ||
| Slot 4 |
 |
 |
 |

| |
| Slot 5 |
 |
 |
 |

| |
| Slot 6 |
 |
 |

|
Consumables
- Slot 1: Damage Control Party
 (5.0s action, 60.0s cooldown)
 - Slot 2: Defensive AA Fire
 (4 charges, 40.0s action, 80.0s cooldown)
 - Slot 3: Surveillance Radar
 (9km, 3 charges, 35.0s action, 120.0s cooldown) or Patrol Fighter
  (3 charges, 60.0s action, 90.0s cooldown) or Spotting Aircraft
  (4 charges, 100.0s action, 240.0s cooldown)
 - Slot 4: Hydroacoustic Search
 (3 charges, 100.0s action, 120.0s cooldown)
 - Slot 5: Repair Party
 (3 charges, 28.0s action, 80.0s cooldown, 209 hp/s)
Gallery
WoWs Gallery

Historical Gallery
Categories:
