Ship:Hughes
Automated stats update via wiki pipeline |
No edit summary |
||
| Line 5: | Line 5: | ||
===Pros=== | ===Pros=== | ||
* | * Access to SAP shells | ||
* | * High SAP damage per minute | ||
* Smoke Screen consumable with pooled usage time available | |||
===Cons=== | ===Cons=== | ||
* | * Relatively low alpha per salvo | ||
* | * Total usage time of Smoke Screen consumable is shorter than an ordinary destroyer | ||
| Line 21: | Line 23: | ||
| style="color:inherit;" | • Hit Points || style="color:inherit;" | 12600 || style="color:inherit;" | 13800 | | style="color:inherit;" | • Hit Points || style="color:inherit;" | 12600 || style="color:inherit;" | 13800 | ||
|- | |- | ||
| style="color:inherit;" | • Torpedo protection damage reduction (%) || colspan="2" style="color:inherit;" | | | style="color:inherit;" | • Torpedo protection damage reduction (%) || colspan="2" style="color:inherit;" | 0% | ||
|} | |} | ||
</div> | </div> | ||
| Line 29: | Line 31: | ||
! style="background-color:#1a3244; color:#ffffff; font-weight:bold;" | ARMOR DETAIL !! style="background-color:#1a3244; color:#ffffff; font-weight:bold;" | | ! style="background-color:#1a3244; color:#ffffff; font-weight:bold;" | ARMOR DETAIL !! style="background-color:#1a3244; color:#ffffff; font-weight:bold;" | | ||
|- | |- | ||
| style="color:inherit;" | • Belt (mm) || style="color:inherit;" | | | style="color:inherit;" | • Belt (mm) || style="color:inherit;" | 16 | ||
|- | |- | ||
| style="color:inherit;" | • Deck (mm) || style="color:inherit;" | | | style="color:inherit;" | • Deck (mm) || style="color:inherit;" | 16 | ||
|- | |- | ||
| style="color:inherit;" | • Superstructure (mm) || style="color:inherit;" | | | style="color:inherit;" | • Superstructure (mm) || style="color:inherit;" | 10 | ||
|- | |- | ||
| style="color:inherit;" | • Extremities (mm) || style="color:inherit;" | | | style="color:inherit;" | • Extremities (mm) || style="color:inherit;" | 10 | ||
|} | |} | ||
</div> | </div> | ||
| Line 47: | Line 49: | ||
| style="color:inherit;" | • Turning circle radius (m) || style="color:inherit;" | 500 || style="color:inherit;" | 500 | | style="color:inherit;" | • Turning circle radius (m) || style="color:inherit;" | 500 || style="color:inherit;" | 500 | ||
|- | |- | ||
| style="color:inherit;" | • Rudder-shift time (sec) || style="color:inherit;" | | | style="color:inherit;" | • Rudder-shift time (sec) || style="color:inherit;" | 3.1 || style="color:inherit;" | 2.7 | ||
|} | |} | ||
</div> | </div> | ||
| Line 124: | Line 126: | ||
! style="background-color:#1a3244; color:#ffffff; font-weight:bold;" | SAP SHELL !! style="background-color:#1a3244; color:#ffffff; font-weight:bold;" | | ! style="background-color:#1a3244; color:#ffffff; font-weight:bold;" | SAP SHELL !! style="background-color:#1a3244; color:#ffffff; font-weight:bold;" | | ||
|- | |- | ||
| style="color:inherit;" | • Name || style="color:inherit;" | | | style="color:inherit;" | • Name || style="color:inherit;" | 127mm CS Mk38 | ||
|- | |- | ||
| style="color:inherit;" | • Maximum damage || style="color:inherit;" | 2700 | | style="color:inherit;" | • Maximum damage || style="color:inherit;" | 2700 | ||
| Line 154: | Line 156: | ||
| style="color:inherit;" | • Number of launchers || style="color:inherit;" | 1 | | style="color:inherit;" | • Number of launchers || style="color:inherit;" | 1 | ||
|- | |- | ||
| style="color:inherit;" | • Torpedo name || style="color:inherit;" | | | style="color:inherit;" | • Torpedo name || style="color:inherit;" | Mk15 mod. 0 | ||
|- | |- | ||
| style="color:inherit;" | • Reload time (sec) || style="color:inherit;" | 95.0 | | style="color:inherit;" | • Reload time (sec) || style="color:inherit;" | 95.0 | ||
| Line 160: | Line 162: | ||
| style="color:inherit;" | • 180° turn time (sec) || style="color:inherit;" | 7.2 | | style="color:inherit;" | • 180° turn time (sec) || style="color:inherit;" | 7.2 | ||
|- | |- | ||
| style="color:inherit;" | • Damage || style="color:inherit;" | | | style="color:inherit;" | • Damage || style="color:inherit;" | 11600 | ||
|- | |- | ||
| style="color:inherit;" | • Range (km) || style="color:inherit;" | | | style="color:inherit;" | • Range (km) || style="color:inherit;" | 9.2 | ||
|- | |- | ||
| style="color:inherit;" | • Speed (kt) || style="color:inherit;" | 55 | | style="color:inherit;" | • Speed (kt) || style="color:inherit;" | 55 | ||
| Line 168: | Line 170: | ||
| style="color:inherit;" | • Detectability (km) || style="color:inherit;" | 1.1 | | style="color:inherit;" | • Detectability (km) || style="color:inherit;" | 1.1 | ||
|- | |- | ||
| style="color:inherit;" | • Flooding chance (%) || style="color:inherit;" | | | style="color:inherit;" | • Flooding chance (%) || style="color:inherit;" | 190% | ||
|} | |} | ||
</div> | </div> | ||
| Line 181: | Line 183: | ||
|- | |- | ||
| style="color:inherit;" | 20 mm || style="color:inherit;" | 4 × 1 | | style="color:inherit;" | 20 mm || style="color:inherit;" | 4 × 1 | ||
|- | |||
| style="color:inherit;" | 127 mm || style="color:inherit;" | 4 × 1 | |||
|} | |} | ||
| Line 188: | Line 192: | ||
|- | |- | ||
| style="color:inherit;" | Short-range || style="color:inherit;" | 42 || style="color:inherit;" | 95% || style="color:inherit;" | 2.0 | | style="color:inherit;" | Short-range || style="color:inherit;" | 42 || style="color:inherit;" | 95% || style="color:inherit;" | 2.0 | ||
|- | |||
| style="color:inherit;" | Long-range || style="color:inherit;" | 70 || style="color:inherit;" | 100% || style="color:inherit;" | 5.8 | |||
|} | |} | ||
| Line 196: | Line 202: | ||
|- | |- | ||
| style="color:inherit;" | 20 mm || style="color:inherit;" | 4 × 2 | | style="color:inherit;" | 20 mm || style="color:inherit;" | 4 × 2 | ||
|- | |||
| style="color:inherit;" | 127 mm || style="color:inherit;" | 4 × 1 | |||
|} | |} | ||
| Line 203: | Line 211: | ||
|- | |- | ||
| style="color:inherit;" | Short-range || style="color:inherit;" | 66.5 || style="color:inherit;" | 95% || style="color:inherit;" | 2.0 | | style="color:inherit;" | Short-range || style="color:inherit;" | 66.5 || style="color:inherit;" | 95% || style="color:inherit;" | 2.0 | ||
|- | |||
| style="color:inherit;" | Long-range || style="color:inherit;" | 70 || style="color:inherit;" | 100% || style="color:inherit;" | 5.8 | |||
|} | |||
'''Damage by shell explosions''' | |||
{| class="wikitable" style="margin:0 0 0.8em 0; width:100%; color:inherit;" | |||
! style="background-color:#1a3244; color:#ffffff; font-weight:bold;" | EXPLOSIONS / SALVO !! style="background-color:#1a3244; color:#ffffff; font-weight:bold;" | DAMAGE !! style="background-color:#1a3244; color:#ffffff; font-weight:bold;" | HIT CHANCE !! style="background-color:#1a3244; color:#ffffff; font-weight:bold;" | ACTION ZONE (km) | |||
|- | |||
| style="color:inherit;" | 1 || style="color:inherit;" | 1400 || style="color:inherit;" | 100% || style="color:inherit;" | 3.5–5.8 | |||
|} | |} | ||
</div> | </div> | ||
| Line 215: | Line 231: | ||
| style="color:inherit;" | • Number of charges || style="color:inherit;" | 2 | | style="color:inherit;" | • Number of charges || style="color:inherit;" | 2 | ||
|- | |- | ||
| style="color:inherit;" | • Bombs per charge || style="color:inherit;" | | | style="color:inherit;" | • Bombs per charge || style="color:inherit;" | 10 | ||
|- | |- | ||
| style="color:inherit;" | • Reload time (sec) || style="color:inherit;" | 40.0 | | style="color:inherit;" | • Reload time (sec) || style="color:inherit;" | 40.0 | ||
|} | |} | ||
</div> | </div> | ||
</div></div></div> | </div></div></div> | ||
| Line 230: | Line 247: | ||
{{Ship Consumables Section|consumables= | {{Ship Consumables Section|consumables= | ||
* '''Slot 1:''' {{Damage Control Party}} (5.0s action, 40.0s cooldown) | * '''Slot 1:''' {{Damage Control Party}} (5.0s action, 40.0s cooldown) | ||
* '''Slot 2:''' {{Smoke Generator}} (25.0s cooldown) | * '''Slot 2:''' {{Smoke Generator}} (140.0s total usage, 20.0s minimum action, 25.0s cooldown) | ||
* '''Slot 3:''' {{Engine Boost}} (3 charges, 120.0s action, 120.0s cooldown) | * '''Slot 3:''' {{Engine Boost}} (3 charges, 120.0s action, 120.0s cooldown) | ||
}} | }} | ||
| Line 237: | Line 254: | ||
==Gallery== | ==Gallery== | ||
<div class="b-popup"><div class="b-popup_head js-tech-nav_head"><div><h2>WoWs Gallery</h2></div><span class="b-tech-nav_arrow"></span></div><div class="b-popup_content" style="display: none;"><div> | <div class="b-popup"><div class="b-popup_head js-tech-nav_head"><div><h2>WoWs Gallery</h2></div><span class="b-tech-nav_arrow"></span></div><div class="b-popup_content" style="display: none;"><div> | ||
[[File:Hughes.png|400px]] | |||
<gallery> | <gallery> | ||
</gallery> | </gallery> | ||
Revision as of 13:00, 5 July 2026

VII
5,350,000
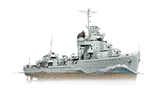
Hughes — U.S.A. Tech Tree Tier VII Destroyer.
A destroyer of the Sims class—the final series of the so-called "1,500-ton" destroyers. USS Hughes entered service in September 1939 and spent the entirety of World War II in the Pacific Theater. The ship took part in the Battle of Midway and the Battle of the Santa Cruz Islands. She also provided support during landings on the Gilbert, Marshall, and Palau Islands. During the Philippines Campaign, USS Hughes was struck by a kamikaze attack but returned to service. The ship was decommissioned in 1946.
Pros
- Access to SAP shells
- High SAP damage per minute
- Smoke Screen consumable with pooled usage time available
Cons
- Relatively low alpha per salvo
- Total usage time of Smoke Screen consumable is shorter than an ordinary destroyer
Ship Stats
Hull Information
Main Battery
Torpedoes
AA Defense
Depth Charges
Compatible Upgrades
| Slot 1 |
 |
 |

| ||
|---|---|---|---|---|---|
| Slot 2 |
 |
 |

| ||
| Slot 3 |
 |
 |
 |
 |

|
| Slot 4 |
 |
 |
 |

|
Consumables
- Slot 1: Damage Control Party
 (5.0s action, 40.0s cooldown)
 - Slot 2: Smoke Generator
 (140.0s total usage, 20.0s minimum action, 25.0s cooldown)
 - Slot 3: Engine Boost
 (3 charges, 120.0s action, 120.0s cooldown)
Gallery
WoWs Gallery

Historical Gallery
Categories:
