Ship:Hatsuharu
Automated stats update via wiki pipeline |
Pockington (talk | contribs) added missing information on launch day |
||
| Line 5: | Line 5: | ||
===Pros=== | ===Pros=== | ||
* | * Heavy HE shell damage per salvo. | ||
* | * Heavy torpedo damage. | ||
* Low detectability. | |||
===Cons=== | ===Cons=== | ||
* | * Low rate of fire. | ||
* | * High torpedo detectability. | ||
| Line 21: | Line 23: | ||
| style="color:inherit;" | • Hit Points || style="color:inherit;" | 10500 || style="color:inherit;" | 11700 | | style="color:inherit;" | • Hit Points || style="color:inherit;" | 10500 || style="color:inherit;" | 11700 | ||
|- | |- | ||
| style="color:inherit;" | • Torpedo protection damage reduction (%) || colspan="2" style="color:inherit;" | | | style="color:inherit;" | • Torpedo protection damage reduction (%) || colspan="2" style="color:inherit;" | 0 | ||
|} | |} | ||
</div> | </div> | ||
| Line 29: | Line 31: | ||
! style="background-color:#1a3244; color:#ffffff; font-weight:bold;" | ARMOR DETAIL !! style="background-color:#1a3244; color:#ffffff; font-weight:bold;" | | ! style="background-color:#1a3244; color:#ffffff; font-weight:bold;" | ARMOR DETAIL !! style="background-color:#1a3244; color:#ffffff; font-weight:bold;" | | ||
|- | |- | ||
| style="color:inherit;" | • Belt (mm) || style="color:inherit;" | | | style="color:inherit;" | • Belt (mm) || style="color:inherit;" | 16 | ||
|- | |- | ||
| style="color:inherit;" | • Deck (mm) || style="color:inherit;" | | | style="color:inherit;" | • Deck (mm) || style="color:inherit;" | 16 | ||
|- | |- | ||
| style="color:inherit;" | • Superstructure (mm) || style="color:inherit;" | | | style="color:inherit;" | • Superstructure (mm) || style="color:inherit;" | 10 | ||
|- | |- | ||
| style="color:inherit;" | • Extremities (mm) || style="color:inherit;" | | | style="color:inherit;" | • Extremities (mm) || style="color:inherit;" | 16 | ||
|} | |} | ||
</div> | </div> | ||
| Line 47: | Line 49: | ||
| style="color:inherit;" | • Turning circle radius (m) || style="color:inherit;" | 580 || style="color:inherit;" | 580 | | style="color:inherit;" | • Turning circle radius (m) || style="color:inherit;" | 580 || style="color:inherit;" | 580 | ||
|- | |- | ||
| style="color:inherit;" | • Rudder-shift time (sec) || style="color:inherit;" | 4 | | style="color:inherit;" | • Rudder-shift time (sec) || style="color:inherit;" | 3.4 || style="color:inherit;" | 2.3 | ||
|} | |} | ||
</div> | </div> | ||
| Line 148: | Line 150: | ||
! style="background-color:#1a3244; color:#ffffff; font-weight:bold;" | TORPEDO LAUNCHERS !! style="background-color:#1a3244; color:#ffffff; font-weight:bold;" | PJPT010 !! style="background-color:#1a3244; color:#ffffff; font-weight:bold;" | PJPT017 | ! style="background-color:#1a3244; color:#ffffff; font-weight:bold;" | TORPEDO LAUNCHERS !! style="background-color:#1a3244; color:#ffffff; font-weight:bold;" | PJPT010 !! style="background-color:#1a3244; color:#ffffff; font-weight:bold;" | PJPT017 | ||
|- | |- | ||
| style="color:inherit;" | • | | style="color:inherit;" | • Torpedo tubes (launchers × tubes) || style="color:inherit;" | 2 × 3 || style="color:inherit;" | 2 × 3 | ||
|- | |- | ||
| style="color:inherit;" | • Torpedo name || style="color:inherit;" | | | style="color:inherit;" | • Torpedo name || style="color:inherit;" | Type8 || style="color:inherit;" | Type8 mod. 2 | ||
|- | |- | ||
| style="color:inherit;" | • Reload time (sec) || style="color:inherit;" | 73 | | style="color:inherit;" | • Reload time (sec) || style="color:inherit;" | 73 || style="color:inherit;" | 76 | ||
|- | |- | ||
| style="color:inherit;" | • 180° turn time (sec) || style="color:inherit;" | 7.2 || style="color:inherit;" | 7.2 | | style="color:inherit;" | • 180° turn time (sec) || style="color:inherit;" | 7.2 || style="color:inherit;" | 7.2 | ||
|- | |- | ||
| style="color:inherit;" | • Damage || style="color:inherit;" | | | style="color:inherit;" | • Damage || style="color:inherit;" | 14,600 || style="color:inherit;" | 16,267 | ||
|- | |- | ||
| style="color:inherit;" | • Range (km) || style="color:inherit;" | 0 | | style="color:inherit;" | • Range (km) || style="color:inherit;" | 6.0 || style="color:inherit;" | 10.0 | ||
|- | |- | ||
| style="color:inherit;" | • Speed (kt) || style="color:inherit;" | 63 || style="color:inherit;" | 59 | | style="color:inherit;" | • Speed (kt) || style="color:inherit;" | 63 || style="color:inherit;" | 59 | ||
| Line 164: | Line 166: | ||
| style="color:inherit;" | • Detectability (km) || style="color:inherit;" | 1.6 || style="color:inherit;" | 1.5 | | style="color:inherit;" | • Detectability (km) || style="color:inherit;" | 1.6 || style="color:inherit;" | 1.5 | ||
|- | |- | ||
| style="color:inherit;" | • Flooding chance (%) || style="color:inherit;" | | | style="color:inherit;" | • Flooding chance (%) || style="color:inherit;" | 240 || style="color:inherit;" | 269 | ||
|} | |} | ||
</div> | </div> | ||
| Line 175: | Line 177: | ||
{| class="wikitable" style="margin:0 0 0.8em 0; width:100%; color:inherit;" | {| class="wikitable" style="margin:0 0 0.8em 0; width:100%; color:inherit;" | ||
! style="background-color:#1a3244; color:#ffffff; font-weight:bold;" | AA ARMAMENT !! style="background-color:#1a3244; color:#ffffff; font-weight:bold;" | MOUNTS × BARRELS | ! style="background-color:#1a3244; color:#ffffff; font-weight:bold;" | AA ARMAMENT !! style="background-color:#1a3244; color:#ffffff; font-weight:bold;" | MOUNTS × BARRELS | ||
|- | |||
| style="color:inherit;" | 127 mm || style="color:inherit;" | 2 × 2 | |||
|- | |- | ||
| style="color:inherit;" | 25 mm || style="color:inherit;" | 4 × 2 | | style="color:inherit;" | 25 mm || style="color:inherit;" | 4 × 2 | ||
| Line 184: | Line 188: | ||
|- | |- | ||
| style="color:inherit;" | Mid-range || style="color:inherit;" | 35 || style="color:inherit;" | 95% || style="color:inherit;" | 2.5 | | style="color:inherit;" | Mid-range || style="color:inherit;" | 35 || style="color:inherit;" | 95% || style="color:inherit;" | 2.5 | ||
|- | |||
| style="color:inherit;" | Long-range || style="color:inherit;" | 35 || style="color:inherit;" | 100% || style="color:inherit;" | 5.8 | |||
|} | |||
'''Damage by shell explosions''' | |||
{| class="wikitable" style="margin:0 0 0.8em 0; width:100%; color:inherit;" | |||
! style="background-color:#1a3244; color:#ffffff; font-weight:bold;" | EXPLOSIONS / SALVO !! style="background-color:#1a3244; color:#ffffff; font-weight:bold;" | DAMAGE !! style="background-color:#1a3244; color:#ffffff; font-weight:bold;" | HIT CHANCE !! style="background-color:#1a3244; color:#ffffff; font-weight:bold;" | ACTION ZONE (km) | |||
|- | |||
| style="color:inherit;" | 1 || style="color:inherit;" | 180 || style="color:inherit;" | 100% || style="color:inherit;" | 3.5–5.8 | |||
|} | |} | ||
| Line 190: | Line 203: | ||
{| class="wikitable" style="margin:0 0 0.8em 0; width:100%; color:inherit;" | {| class="wikitable" style="margin:0 0 0.8em 0; width:100%; color:inherit;" | ||
! style="background-color:#1a3244; color:#ffffff; font-weight:bold;" | AA ARMAMENT !! style="background-color:#1a3244; color:#ffffff; font-weight:bold;" | MOUNTS × BARRELS | ! style="background-color:#1a3244; color:#ffffff; font-weight:bold;" | AA ARMAMENT !! style="background-color:#1a3244; color:#ffffff; font-weight:bold;" | MOUNTS × BARRELS | ||
|- | |||
| style="color:inherit;" | 127 mm || style="color:inherit;" | 2 × 2 | |||
|- | |- | ||
| style="color:inherit;" | 25 mm || style="color:inherit;" | 3 × 3 + 1 × 2 + 14 × 1 | | style="color:inherit;" | 25 mm || style="color:inherit;" | 3 × 3 + 1 × 2 + 14 × 1 | ||
| Line 199: | Line 214: | ||
|- | |- | ||
| style="color:inherit;" | Mid-range || style="color:inherit;" | 112 || style="color:inherit;" | 95% || style="color:inherit;" | 2.5 | | style="color:inherit;" | Mid-range || style="color:inherit;" | 112 || style="color:inherit;" | 95% || style="color:inherit;" | 2.5 | ||
|- | |||
| style="color:inherit;" | Long-range || style="color:inherit;" | 35 || style="color:inherit;" | 100% || style="color:inherit;" | 5.8 | |||
|} | |||
'''Damage by shell explosions''' | |||
{| class="wikitable" style="margin:0 0 0.8em 0; width:100%; color:inherit;" | |||
! style="background-color:#1a3244; color:#ffffff; font-weight:bold;" | EXPLOSIONS / SALVO !! style="background-color:#1a3244; color:#ffffff; font-weight:bold;" | DAMAGE !! style="background-color:#1a3244; color:#ffffff; font-weight:bold;" | HIT CHANCE !! style="background-color:#1a3244; color:#ffffff; font-weight:bold;" | ACTION ZONE (km) | |||
|- | |||
| style="color:inherit;" | 1 || style="color:inherit;" | 180 || style="color:inherit;" | 100% || style="color:inherit;" | 3.5–5.8 | |||
|} | |} | ||
</div> | </div> | ||
| Line 211: | Line 235: | ||
| style="color:inherit;" | • Number of charges || style="color:inherit;" | 2 | | style="color:inherit;" | • Number of charges || style="color:inherit;" | 2 | ||
|- | |- | ||
| style="color:inherit;" | • Bombs per charge || style="color:inherit;" | | | style="color:inherit;" | • Bombs per charge || style="color:inherit;" | 6 | ||
|- | |- | ||
| style="color:inherit;" | • Reload time (sec) || style="color:inherit;" | 40.0 | | style="color:inherit;" | • Reload time (sec) || style="color:inherit;" | 40.0 | ||
| Line 235: | Line 259: | ||
<gallery> | <gallery> | ||
</gallery> | </gallery>[[File:Hatsuharuinport.png|thumb]]</div></div></div> | ||
</div></div></div> | |||
<div class="b-popup"><div class="b-popup_head js-tech-nav_head"><div><h2>Historical Gallery</h2></div><span class="b-tech-nav_arrow"></span></div><div class="b-popup_content" style="display: none;"><div> | <div class="b-popup"><div class="b-popup_head js-tech-nav_head"><div><h2>Historical Gallery</h2></div><span class="b-tech-nav_arrow"></span></div><div class="b-popup_content" style="display: none;"><div> | ||
Revision as of 14:22, 9 July 2026

VI
2,950,000
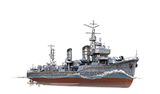
Hatsuharu — Japan Tech Tree Tier VI Destroyer.
A streamlined version of the Fubuki-class destroyer that maintains combat effectiveness comparable to her predecessors while adhering to the constraints of the London Naval Treaty. The ship initially featured a standard turret configuration, but she later underwent an upgrade—one of the forward twin-gun turrets was removed to enhance the ship's stability. Hatsuharu was laid down in May 1931 and entered service in February 1933 as part of Destroyer Division 21. The destroyer was deployed with the invasion force for the Dutch East Indies, engaged in the Aleutians campaign, and fought in the Battle of Leyte Gulf.
Pros
- Heavy HE shell damage per salvo.
- Heavy torpedo damage.
- Low detectability.
Cons
- Low rate of fire.
- High torpedo detectability.
Ship Stats
Hull Information
Main Battery
Torpedoes
AA Defense
Depth Charges
Compatible Upgrades
| Slot 1 |
 |
 |

| ||
|---|---|---|---|---|---|
| Slot 2 |
 |
 |

| ||
| Slot 3 |
 |
 |
 |
 |

|
| Slot 4 |
 |
 |
 |

|
Consumables
- Slot 1: Damage Control Party
 (5.0s action, 40.0s cooldown)
 - Slot 2: Smoke Generator
 (3 charges, 20.0s action, 160.0s cooldown)
 - Slot 3: Engine Boost
 (3 charges, 120.0s action, 120.0s cooldown)
Gallery
WoWs Gallery

Historical Gallery
Categories:
