Ship:Haida
Automated stats update via wiki pipeline |
No edit summary |
||
| Line 148: | Line 148: | ||
<div style="border: 2px solid rgba(212,175,55,0.8); border-radius: 3px; margin-bottom: 1em; overflow: hidden;"> | <div style="border: 2px solid rgba(212,175,55,0.8); border-radius: 3px; margin-bottom: 1em; overflow: hidden;"> | ||
{| class="wikitable" style="margin:0; color:inherit; width:100%" | {| class="wikitable" style="margin:0; color:inherit; width:100%" | ||
! style="background-color:#1a3244; color:#ffffff; font-weight:bold;" | TORPEDO LAUNCHERS !! style="background-color:#1a3244; color:#ffffff; font-weight:bold;" | | ! style="background-color:#1a3244; color:#ffffff; font-weight:bold;" | TORPEDO LAUNCHERS !! style="background-color:#1a3244; color:#ffffff; font-weight:bold;" | 533 mm Mk IXM | ||
|- | |- | ||
| style="color:inherit;" | • | | style="color:inherit;" | • Torpedo tubes (launchers × tubes) || style="color:inherit;" | 1 × 4 | ||
|- | |- | ||
| style="color:inherit;" | • Torpedo name || style="color:inherit;" | | | style="color:inherit;" | • Torpedo name || style="color:inherit;" | 533 mm Mk IXM | ||
|- | |- | ||
| style="color:inherit;" | • Reload time (sec) || style="color:inherit;" | 96 | | style="color:inherit;" | • Reload time (sec) || style="color:inherit;" | 96 | ||
|- | |- | ||
| style="color:inherit;" | • 180° turn time (sec) || style="color:inherit;" | 7.2 | | style="color:inherit;" | • 180° turn time (sec) || style="color:inherit;" | 7.2 | ||
|- | |- | ||
| style="color:inherit;" | • Damage || style="color:inherit;" | | | style="color:inherit;" | • Damage || style="color:inherit;" | 16,767 | ||
|- | |- | ||
| style="color:inherit;" | • Range (km) || style="color:inherit;" | 0 | | style="color:inherit;" | • Range (km) || style="color:inherit;" | 8.0 | ||
|- | |- | ||
| style="color:inherit;" | • Speed (kt) || style="color:inherit;" | 62 | | style="color:inherit;" | • Speed (kt) || style="color:inherit;" | 62 | ||
| Line 166: | Line 166: | ||
| style="color:inherit;" | • Detectability (km) || style="color:inherit;" | 1.4 | | style="color:inherit;" | • Detectability (km) || style="color:inherit;" | 1.4 | ||
|- | |- | ||
| style="color:inherit;" | • Flooding chance (%) || style="color:inherit;" | | | style="color:inherit;" | • Flooding chance (%) || style="color:inherit;" | 282 | ||
|} | |} | ||
</div> | </div> | ||
Revision as of 16:24, 9 July 2026

VII
9,000 doubloons
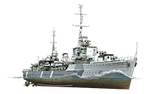
Haida — Commonwealth Premium Tier VII Destroyer.
With the outbreak of World War II, Canada started planning to enhance its fleet. The decision was taken to build several destroyers under the British Tribal-class project. One of them, HMCS Haida, was laid down at the Halifax shipyard in 1941. During the war, she was engaged in escorting polar convoys, SAS operations off the French coast, and the Normandy landings. For her excellent service, HMCS Haida earned the nickname "Fightingest Ship in the Royal Canadian Navy." In 1963, the destroyer was put into reserve but then returned again to participate in patrolling operations and escorting aircraft carriers. In 1964–1965, HMCS Haida was transformed into a museum ship in Hamilton.
Pros
- Pro 1
- Pro 2
Cons
- Con 1
- Con 2
Ship Stats
Hull Information
Main Battery
Torpedoes
Secondary Battery
AA Defense
Depth Charges
Compatible Upgrades
| Slot 1 |
 |
 |

| ||
|---|---|---|---|---|---|
| Slot 2 |
 |
 |
 |

| |
| Slot 3 |
 |
 |
 |
 |

|
| Slot 4 |
 |
 |
 |

|
Consumables
- Slot 1: Damage Control Party
 (5.0s action, 40.0s cooldown)
 - Slot 2: Smoke Generator
 (3 charges, 102.0s action, 80.0s cooldown)
 - Slot 3: Engine Boost
 (3 charges, 120.0s action, 120.0s cooldown)
 - Slot 4: Hydroacoustic Search
 (3 charges, 180.0s action, 120.0s cooldown)
