Ship:Visby
Automated stats update via wiki pipeline |
XDMeloniXD (talk | contribs) No edit summary |
||
| Line 5: | Line 5: | ||
===Pros=== | ===Pros=== | ||
* | * Access to Repair Party | ||
* | * Excellent maneuverability and speed | ||
* Solid torpedo range and reload | |||
===Cons=== | ===Cons=== | ||
* | * Very low HP pool | ||
* | * Poor main battery handling and performance | ||
* Low torpedo damage | |||
==Ship Stats== | ==Ship Stats== | ||
| Line 21: | Line 22: | ||
| style="color:inherit;" | • Hit Points || style="color:inherit;" | 8900 || style="color:inherit;" | 9600 | | style="color:inherit;" | • Hit Points || style="color:inherit;" | 8900 || style="color:inherit;" | 9600 | ||
|- | |- | ||
| style="color:inherit;" | • Torpedo protection damage reduction (%) || colspan="2" style="color:inherit;" | | | style="color:inherit;" | • Torpedo protection damage reduction (%) || colspan="2" style="color:inherit;" | 0 | ||
|} | |} | ||
</div> | </div> | ||
| Line 29: | Line 30: | ||
! style="background-color:#1a3244; color:#ffffff; font-weight:bold;" | ARMOR DETAIL !! style="background-color:#1a3244; color:#ffffff; font-weight:bold;" | | ! style="background-color:#1a3244; color:#ffffff; font-weight:bold;" | ARMOR DETAIL !! style="background-color:#1a3244; color:#ffffff; font-weight:bold;" | | ||
|- | |- | ||
| style="color:inherit;" | • Belt (mm) || style="color:inherit;" | | | style="color:inherit;" | • Belt (mm) || style="color:inherit;" | 10 | ||
|- | |- | ||
| style="color:inherit;" | • Deck (mm) || style="color:inherit;" | | | style="color:inherit;" | • Deck (mm) || style="color:inherit;" | 10 | ||
|- | |- | ||
| style="color:inherit;" | • Superstructure (mm) || style="color:inherit;" | | | style="color:inherit;" | • Superstructure (mm) || style="color:inherit;" | 10 | ||
|- | |- | ||
| style="color:inherit;" | • Extremities (mm) || style="color:inherit;" | | | style="color:inherit;" | • Extremities (mm) || style="color:inherit;" | 10 | ||
|} | |} | ||
</div> | </div> | ||
| Line 47: | Line 48: | ||
| style="color:inherit;" | • Turning circle radius (m) || style="color:inherit;" | 540 || style="color:inherit;" | 540 | | style="color:inherit;" | • Turning circle radius (m) || style="color:inherit;" | 540 || style="color:inherit;" | 540 | ||
|- | |- | ||
| style="color:inherit;" | • Rudder-shift time (sec) || style="color:inherit;" | | | style="color:inherit;" | • Rudder-shift time (sec) || style="color:inherit;" | 3.5 || style="color:inherit;" | 2.5 | ||
|} | |} | ||
</div> | </div> | ||
| Line 146: | Line 147: | ||
<div style="border: 2px solid rgba(212,175,55,0.8); border-radius: 3px; margin-bottom: 1em; overflow: hidden;"> | <div style="border: 2px solid rgba(212,175,55,0.8); border-radius: 3px; margin-bottom: 1em; overflow: hidden;"> | ||
{| class="wikitable" style="margin:0; color:inherit; width:100%" | {| class="wikitable" style="margin:0; color:inherit; width:100%" | ||
! style="background-color:#1a3244; color:#ffffff; font-weight:bold;" | TORPEDO LAUNCHERS !! style="background-color:#1a3244; color:#ffffff; font-weight:bold;" | | ! style="background-color:#1a3244; color:#ffffff; font-weight:bold;" | TORPEDO LAUNCHERS !! style="background-color:#1a3244; color:#ffffff; font-weight:bold;" | Torped M1913 mod 1 !! style="background-color:#1a3244; color:#ffffff; font-weight:bold;" | Torped M1929 | ||
|- | |- | ||
| style="color:inherit;" | • Number of launchers || style="color:inherit;" | | | style="color:inherit;" | • Number of launchers || style="color:inherit;" | 2x3 533mm || style="color:inherit;" | 2x3 533mm | ||
|- | |- | ||
| style="color:inherit;" | • Torpedo name || style="color:inherit;" | | | style="color:inherit;" | • Torpedo name || style="color:inherit;" | Torped M1913 mod 1 || style="color:inherit;" | Torped M1929 | ||
|- | |- | ||
| style="color:inherit;" | • Reload time (sec) || style="color:inherit;" | 59.0 || style="color:inherit;" | | | style="color:inherit;" | • Reload time (sec) || style="color:inherit;" | 59.0 || style="color:inherit;" | 55.0 | ||
|- | |- | ||
| style="color:inherit;" | • 180° turn time (sec) || style="color:inherit;" | 7.2 || style="color:inherit;" | 7.2 | | style="color:inherit;" | • 180° turn time (sec) || style="color:inherit;" | 7.2 || style="color:inherit;" | 7.2 | ||
|- | |- | ||
| style="color:inherit;" | • Damage || style="color:inherit;" | | | style="color:inherit;" | • Damage || style="color:inherit;" | 6200 || style="color:inherit;" | 6200 | ||
|- | |- | ||
| style="color:inherit;" | • Range (km) || style="color:inherit;" | 0 | | style="color:inherit;" | • Range (km) || style="color:inherit;" | 8.0 || style="color:inherit;" | 8.0 | ||
|- | |- | ||
| style="color:inherit;" | • Speed (kt) || style="color:inherit;" | 60 || style="color:inherit;" | 65 | | style="color:inherit;" | • Speed (kt) || style="color:inherit;" | 60 || style="color:inherit;" | 65 | ||
| Line 185: | Line 186: | ||
! style="background-color:#1a3244; color:#ffffff; font-weight:bold;" | RANGE !! style="background-color:#1a3244; color:#ffffff; font-weight:bold;" | DPS !! style="background-color:#1a3244; color:#ffffff; font-weight:bold;" | HIT CHANCE !! style="background-color:#1a3244; color:#ffffff; font-weight:bold;" | ACTION ZONE (km) | ! style="background-color:#1a3244; color:#ffffff; font-weight:bold;" | RANGE !! style="background-color:#1a3244; color:#ffffff; font-weight:bold;" | DPS !! style="background-color:#1a3244; color:#ffffff; font-weight:bold;" | HIT CHANCE !! style="background-color:#1a3244; color:#ffffff; font-weight:bold;" | ACTION ZONE (km) | ||
|- | |- | ||
| style="color:inherit;" | Short-range || style="color:inherit;" | | | style="color:inherit;" | Short-range || style="color:inherit;" | 86 || style="color:inherit;" | 95% || style="color:inherit;" | 2.0 | ||
|- | |- | ||
| style="color:inherit;" | Mid-range || style="color:inherit;" | | | style="color:inherit;" | Mid-range || style="color:inherit;" | 67 || style="color:inherit;" | 100% || style="color:inherit;" | 3.5 | ||
|} | |} | ||
| Line 206: | Line 207: | ||
| style="color:inherit;" | Short-range || style="color:inherit;" | 91 || style="color:inherit;" | 95% || style="color:inherit;" | 2.0 | | style="color:inherit;" | Short-range || style="color:inherit;" | 91 || style="color:inherit;" | 95% || style="color:inherit;" | 2.0 | ||
|- | |- | ||
| style="color:inherit;" | Mid-range || style="color:inherit;" | | | style="color:inherit;" | Mid-range || style="color:inherit;" | 67 || style="color:inherit;" | 100% || style="color:inherit;" | 3.5 | ||
|} | |} | ||
</div> | </div> | ||
| Line 219: | Line 220: | ||
| style="color:inherit;" | • Number of charges || style="color:inherit;" | 2 | | style="color:inherit;" | • Number of charges || style="color:inherit;" | 2 | ||
|- | |- | ||
| style="color:inherit;" | • Bombs per charge || style="color:inherit;" | | | style="color:inherit;" | • Bombs per charge || style="color:inherit;" | 9 | ||
|- | |- | ||
| style="color:inherit;" | • Reload time (sec) || style="color:inherit;" | 40.0 | | style="color:inherit;" | • Reload time (sec) || style="color:inherit;" | 40.0 | ||
| Line 243: | Line 244: | ||
<gallery> | <gallery> | ||
File:Visby_Alpha.png | |||
File:Visby_Bravo.png | |||
</gallery> | </gallery> | ||
</div></div></div> | </div></div></div> | ||
Revision as of 08:48, 3 July 2026

V
1,350,000
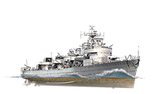
Visby — Europe Tech Tree Tier V Destroyer.
As part of efforts to strengthen the Navy, in 1941, four ships of the Visby class—an improved version of the Göteborg class—were ordered. The lead ship of the series, Visby, was built at the Götaverken shipyard in Gothenburg, launched in October 1942, and entered service in August 1943. After a long and "quiet" service, in the early 1960s, destroyers of this class were converted into anti-submarine frigates. The ships received helipads and rocket-assisted bomb throwers.
Pros
- Access to Repair Party
- Excellent maneuverability and speed
- Solid torpedo range and reload
Cons
- Very low HP pool
- Poor main battery handling and performance
- Low torpedo damage
Ship Stats
Hull Information
Main Battery
Torpedoes
AA Defense
Depth Charges
Compatible Upgrades
| Slot 1 |
 |
 |

| |
|---|---|---|---|---|
| Slot 2 |
 |
 |

| |
| Slot 3 |
 |
 |
 |

|
Consumables
- Slot 1: Damage Control Party
 (5.0s action, 40.0s cooldown)
 - Slot 2: Engine Boost
 (3 charges, 120.0s action, 120.0s cooldown)
 - Slot 3: Repair Party
 (3 charges, 10.0s action, 80.0s cooldown, 89 hp/s)
Gallery
WoWs Gallery


Historical Gallery
Categories:
