Ship:Västerås
Automated stats update via wiki pipeline |
XDMeloniXD (talk | contribs) No edit summary |
||
| Line 5: | Line 5: | ||
===Pros=== | ===Pros=== | ||
* | * Great speed and solid maneuverability | ||
* | * Relatively long torpedo range and good torpedo speed | ||
* Access to Repair Party | |||
===Cons=== | ===Cons=== | ||
* | * Poor main battery performance | ||
* | * No Smoke Generator consumable | ||
* Low torpedo damage | |||
| Line 21: | Line 23: | ||
| style="color:inherit;" | • Hit Points || style="color:inherit;" | 11000 || style="color:inherit;" | 12100 | | style="color:inherit;" | • Hit Points || style="color:inherit;" | 11000 || style="color:inherit;" | 12100 | ||
|- | |- | ||
| style="color:inherit;" | • Torpedo protection damage reduction (%) || colspan="2" style="color:inherit;" | | | style="color:inherit;" | • Torpedo protection damage reduction (%) || colspan="2" style="color:inherit;" | 0 | ||
|} | |} | ||
</div> | </div> | ||
| Line 29: | Line 31: | ||
! style="background-color:#1a3244; color:#ffffff; font-weight:bold;" | ARMOR DETAIL !! style="background-color:#1a3244; color:#ffffff; font-weight:bold;" | | ! style="background-color:#1a3244; color:#ffffff; font-weight:bold;" | ARMOR DETAIL !! style="background-color:#1a3244; color:#ffffff; font-weight:bold;" | | ||
|- | |- | ||
| style="color:inherit;" | • Belt (mm) || style="color:inherit;" | | | style="color:inherit;" | • Belt (mm) || style="color:inherit;" | 16 | ||
|- | |- | ||
| style="color:inherit;" | • Deck (mm) || style="color:inherit;" | | | style="color:inherit;" | • Deck (mm) || style="color:inherit;" | 10 | ||
|- | |- | ||
| style="color:inherit;" | • Superstructure (mm) || style="color:inherit;" | | | style="color:inherit;" | • Superstructure (mm) || style="color:inherit;" | 16 | ||
|- | |- | ||
| style="color:inherit;" | • Extremities (mm) || style="color:inherit;" | | | style="color:inherit;" | • Extremities (mm) || style="color:inherit;" | 16 | ||
|} | |} | ||
</div> | </div> | ||
| Line 47: | Line 49: | ||
| style="color:inherit;" | • Turning circle radius (m) || style="color:inherit;" | 590 || style="color:inherit;" | 590 | | style="color:inherit;" | • Turning circle radius (m) || style="color:inherit;" | 590 || style="color:inherit;" | 590 | ||
|- | |- | ||
| style="color:inherit;" | • Rudder-shift time (sec) || style="color:inherit;" | | | style="color:inherit;" | • Rudder-shift time (sec) || style="color:inherit;" | 4.2 || style="color:inherit;" | 3.0 | ||
|} | |} | ||
</div> | </div> | ||
| Line 146: | Line 148: | ||
<div style="border: 2px solid rgba(212,175,55,0.8); border-radius: 3px; margin-bottom: 1em; overflow: hidden;"> | <div style="border: 2px solid rgba(212,175,55,0.8); border-radius: 3px; margin-bottom: 1em; overflow: hidden;"> | ||
{| class="wikitable" style="margin:0; color:inherit; width:100%" | {| class="wikitable" style="margin:0; color:inherit; width:100%" | ||
! style="background-color:#1a3244; color:#ffffff; font-weight:bold;" | TORPEDO LAUNCHERS !! style="background-color:#1a3244; color:#ffffff; font-weight:bold;" | | ! style="background-color:#1a3244; color:#ffffff; font-weight:bold;" | TORPEDO LAUNCHERS !! style="background-color:#1a3244; color:#ffffff; font-weight:bold;" | Torped M1929 !! style="background-color:#1a3244; color:#ffffff; font-weight:bold;" | Torped M1924 mod 1 | ||
|- | |- | ||
| style="color:inherit;" | • Number of launchers || style="color:inherit;" | | | style="color:inherit;" | • Number of launchers || style="color:inherit;" | 2x3 533mm || style="color:inherit;" | 2x3 533mm | ||
|- | |- | ||
| style="color:inherit;" | • Torpedo name || style="color:inherit;" | | | style="color:inherit;" | • Torpedo name || style="color:inherit;" | Torped M1929 || style="color:inherit;" | Torped M1924 mod 1 | ||
|- | |- | ||
| style="color:inherit;" | • Reload time (sec) || style="color:inherit;" | 59.0 || style="color:inherit;" | 59.0 | | style="color:inherit;" | • Reload time (sec) || style="color:inherit;" | 59.0 || style="color:inherit;" | 59.0 | ||
| Line 156: | Line 158: | ||
| style="color:inherit;" | • 180° turn time (sec) || style="color:inherit;" | 7.2 || style="color:inherit;" | 7.2 | | style="color:inherit;" | • 180° turn time (sec) || style="color:inherit;" | 7.2 || style="color:inherit;" | 7.2 | ||
|- | |- | ||
| style="color:inherit;" | • Damage || style="color:inherit;" | | | style="color:inherit;" | • Damage || style="color:inherit;" | 6200 || style="color:inherit;" | 7533 | ||
|- | |- | ||
| style="color:inherit;" | • Range (km) || style="color:inherit;" | | | style="color:inherit;" | • Range (km) || style="color:inherit;" | 8.00 || style="color:inherit;" | 10.00 | ||
|- | |- | ||
| style="color:inherit;" | • Speed (kt) || style="color:inherit;" | 65 || style="color:inherit;" | 65 | | style="color:inherit;" | • Speed (kt) || style="color:inherit;" | 65 || style="color:inherit;" | 65 | ||
| Line 164: | Line 166: | ||
| style="color:inherit;" | • Detectability (km) || style="color:inherit;" | 1.4 || style="color:inherit;" | 1.4 | | style="color:inherit;" | • Detectability (km) || style="color:inherit;" | 1.4 || style="color:inherit;" | 1.4 | ||
|- | |- | ||
| style="color:inherit;" | • Flooding chance (%) || style="color:inherit;" | 95.0% || style="color:inherit;" | | | style="color:inherit;" | • Flooding chance (%) || style="color:inherit;" | 95.0% || style="color:inherit;" | 119% | ||
|} | |} | ||
</div> | </div> | ||
| Line 185: | Line 187: | ||
! style="background-color:#1a3244; color:#ffffff; font-weight:bold;" | RANGE !! style="background-color:#1a3244; color:#ffffff; font-weight:bold;" | DPS !! style="background-color:#1a3244; color:#ffffff; font-weight:bold;" | HIT CHANCE !! style="background-color:#1a3244; color:#ffffff; font-weight:bold;" | ACTION ZONE (km) | ! style="background-color:#1a3244; color:#ffffff; font-weight:bold;" | RANGE !! style="background-color:#1a3244; color:#ffffff; font-weight:bold;" | DPS !! style="background-color:#1a3244; color:#ffffff; font-weight:bold;" | HIT CHANCE !! style="background-color:#1a3244; color:#ffffff; font-weight:bold;" | ACTION ZONE (km) | ||
|- | |- | ||
| style="color:inherit;" | Short-range || style="color:inherit;" | | | style="color:inherit;" | Short-range || style="color:inherit;" | 23 || style="color:inherit;" | 95% || style="color:inherit;" | 2.0 | ||
|- | |- | ||
| style="color:inherit;" | Mid-range || style="color:inherit;" | 63 || style="color:inherit;" | 100% || style="color:inherit;" | 3.5 | | style="color:inherit;" | Mid-range || style="color:inherit;" | 63 || style="color:inherit;" | 100% || style="color:inherit;" | 3.5 | ||
| Line 204: | Line 206: | ||
! style="background-color:#1a3244; color:#ffffff; font-weight:bold;" | RANGE !! style="background-color:#1a3244; color:#ffffff; font-weight:bold;" | DPS !! style="background-color:#1a3244; color:#ffffff; font-weight:bold;" | HIT CHANCE !! style="background-color:#1a3244; color:#ffffff; font-weight:bold;" | ACTION ZONE (km) | ! style="background-color:#1a3244; color:#ffffff; font-weight:bold;" | RANGE !! style="background-color:#1a3244; color:#ffffff; font-weight:bold;" | DPS !! style="background-color:#1a3244; color:#ffffff; font-weight:bold;" | HIT CHANCE !! style="background-color:#1a3244; color:#ffffff; font-weight:bold;" | ACTION ZONE (km) | ||
|- | |- | ||
| style="color:inherit;" | Short-range || style="color:inherit;" | 17 | | style="color:inherit;" | Short-range || style="color:inherit;" | 17 || style="color:inherit;" | 95% || style="color:inherit;" | 2.5 | ||
|- | |- | ||
| style="color:inherit;" | Mid-range || style="color:inherit;" | | | style="color:inherit;" | Mid-range || style="color:inherit;" | 88 || style="color:inherit;" | 100% || style="color:inherit;" | 3.5 | ||
|} | |} | ||
</div> | </div> | ||
| Line 219: | Line 221: | ||
| style="color:inherit;" | • Number of charges || style="color:inherit;" | 2 | | style="color:inherit;" | • Number of charges || style="color:inherit;" | 2 | ||
|- | |- | ||
| style="color:inherit;" | • Bombs per charge || style="color:inherit;" | | | style="color:inherit;" | • Bombs per charge || style="color:inherit;" | 12 | ||
|- | |- | ||
| style="color:inherit;" | • Reload time (sec) || style="color:inherit;" | 40.0 | | style="color:inherit;" | • Reload time (sec) || style="color:inherit;" | 40.0 | ||
| Line 243: | Line 245: | ||
<gallery> | <gallery> | ||
File:Västerås_Alpha.png | |||
File:Västerås_Bravo.png | |||
</gallery> | </gallery> | ||
</div></div></div> | </div></div></div> | ||
Latest revision as of 09:38, 3 July 2026

VI
3,000,000
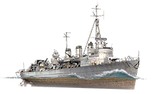
Västerås — Europe Tech Tree Tier VI Destroyer.
In 1933 and 1934, the Polish Navy, planning to build a series of new destroyers, held a competition involving European shipbuilders. Kockums, a Swedish shipyard from Malmö, also participated in the competition with its project. The project was based on the Göteborg-class destroyers that had just been laid down and differed from them with a 50% greater displacement and enhanced armament. The prevailing project came from a British firm, resulting in the appearance of the Grom-class destroyers.
Pros
- Great speed and solid maneuverability
- Relatively long torpedo range and good torpedo speed
- Access to Repair Party
Cons
- Poor main battery performance
- No Smoke Generator consumable
- Low torpedo damage
Ship Stats
Hull Information
Main Battery
Torpedoes
AA Defense
Depth Charges
Compatible Upgrades
| Slot 1 |
 |
 |

| |
|---|---|---|---|---|
| Slot 2 |
 |
 |

| |
| Slot 3 |
 |
 |
 |

|
| Slot 4 |
 |
 |
 |

|
Consumables
- Slot 1: Damage Control Party
 (5.0s action, 40.0s cooldown)
 - Slot 2: Engine Boost
 (3 charges, 120.0s action, 120.0s cooldown)
 - Slot 3: Repair Party
 (3 charges, 10.0s action, 80.0s cooldown, 110 hp/s)
Gallery
WoWs Gallery


Categories:
